What to do if Windows could not update registry data in the installation? Is there any effective way to fix this issue? In this post, MiniTool Partition Wizard introduces how to repair this annoying issue in detail.
Windows Could Not Update Registry Data in the Installation
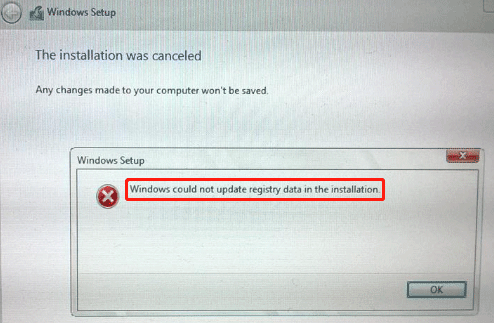
Sometimes, when users install Windows 10 by themselves, they may encounter an error to break off the process. The error will remind them with a notice “the installation was canceled”.
At the same time, a small window will pop up telling you that “Windows could not update registry data in the installation”. Here is a true example from the Microsoft forum:
Windows 10 - Could not update registry data in the installation. I'm attempting to install Build 10130x64 (from an ISO CD created on a Win7 Pro laptop) on a desktop (Asus Sabertooth 990fx R2 MoBo, 160 GB SATA Drive). Have made five attempts, all with the same result: "The Installation was Canceled".https://answers.microsoft.com/en-us/insider/forum/all/windows-10-could-not-update-registry-data-in-the/dc274bf7-80ea-476a-90f1-5998fcc55ffe
This error may occur because the installation media was not created correctly or the disk is faulty. To help fix the “Windows could not update registry data in the installation” error, this post offers you a complete guide.
If you are one of those who encounter this error and don’t know how to fix it, you can pay attention to the following content and find the best ways to sort your problem out.

How to Fix Windows Could Not Update Registry Data in the Installation
If you are faced with this issue, you can refer to our recommended solutions below in order and see if they help resolve the issue.
Solution 1. Create a Fresh Installation Media Properly
Some users encounter the “Windows could not update registry data in the installation” error when they are installing Windows with an installation media. It is possible that the installation media used to install Windows was not properly created or has been damaged.
In this case, you can try creating a fresh installation media properly. You are recommended to use Windows 10 Media Creation Tool to make the installation media if you encounter this problem in Windows 10. Here is the tutorial.
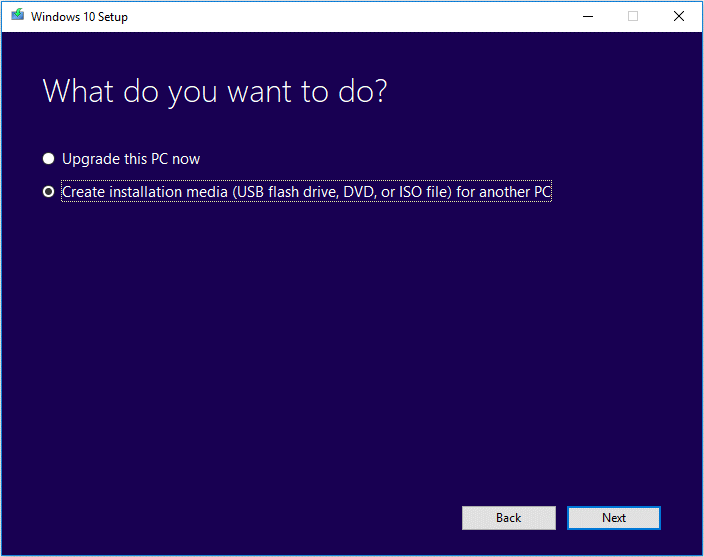
Step 1: Prepare a USB drive and connect it to a working computer. Download and launch the Windows 10 Media Creation Tool on this PC.
Step 2: When you get the following screen, choose Create installation media (USB flash drive, DVD, or ISO file) for another PC and click on the Next button.
Step 3: Set your preferences and click on the Next button. Then, choose the USB flash drive option, select the drive you prepared, and click Next to start creating installation media.
If you are using other versions of Windows, you can download the ISO file from Microsoft’s website and then create corresponding installation media referring to this article: [Complete Guide] How to Make A Bootable USB
If you still receive the error message, you can try the following solutions.
Solution 2. Convert Disk to GPT
You can try converting your disk to GPT to solve the error “Windows could not update registry data in the installation”. To finish this conversion, you can use the DiskPart utility or disk partition software called MiniTool Partition Wizard.
#1. Convert Disk to GPT Using Command Prompt
Here is the tutorial on converting MBR to GPT using Command Prompt.
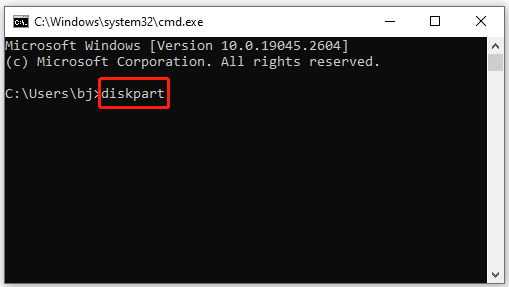
Step 1: During Windows installation, please press the F8 key on the keyboard to access Command Prompt.
Step 2: After getting a cmd.exe window, please input diskpart and press the Enter key on the keyboard.
Step 3: After getting a newly popping-up window, please input the following commands in order, and then press the Enter key on the keyboard after inputting each command. Please make sure your selected disk is an MBR disk. Here I take Disk 1 as an example to complete this conversion.
- list disk
- select disk * (* stands for the MBR disk you want to convert to GPT)
- clean
- convert gpt
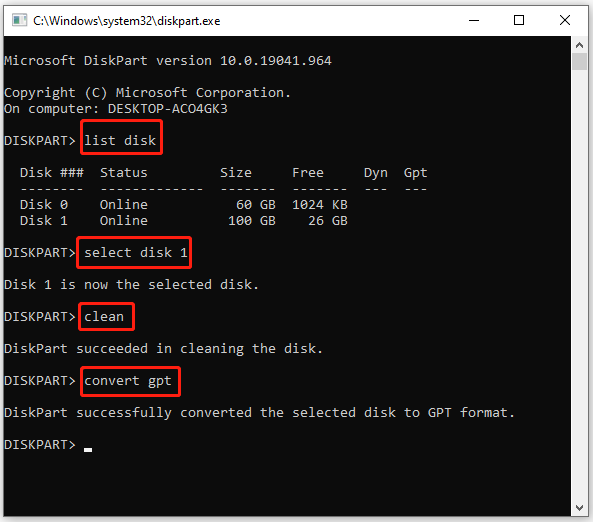
When you see “DiskPart successfully converted the selected disk to GPT format”, the conversion completes.
As you see, this method can help you convert MBR to GPT with few steps. But it can also clean your data stored in the selected disk. If you don’t want to lose any data. After the conversion, you can move to the following method.
#2. Convert Disk to GPT Using MiniTool Partition Wizard
To avoid data loss during the process of converting MBR to GPT, it is strongly recommended that you use a third-party tool – MiniTool Partition Wizard. It helps you convert MBR to GPT without data loss.
Also, it is a very useful disk manager that can help you upgrade to a larger hard drive without reinstalling the OS, back up data to keep your data safe, check disk health, and more.
How to convert MBR to GPT by MiniTool Partition Wizard? To do this, you should complete two steps, making a bootable USB drive and converting MBR to GPT.
Part 1: Create a Bootable USB Drive
Since there is no running operating system installed on your computer, you will need to first create a USB boot disk on another functioning computer. For this purpose, you should use the bootable version of the MiniTool Partition Wizard. How to make a USB boot disk? Please refer to the tutorial below.
Step 1: Connect an empty USB flash drive to another PC that is well-running.
Step 2: Click on the following button to download and install this software on this PC. Then launch it to get its main interface.
MiniTool Partition Wizard DemoClick to Download100%Clean & Safe
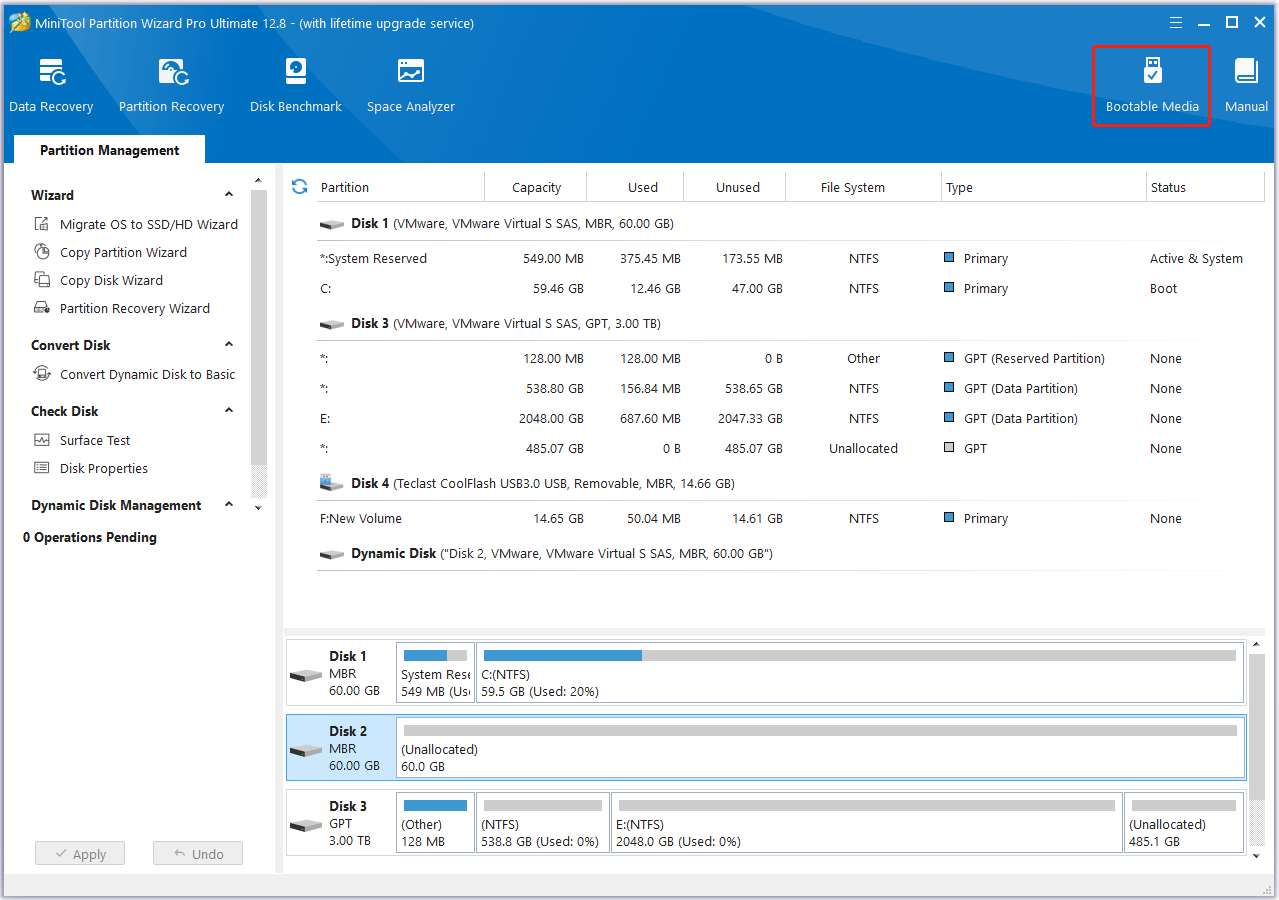
Step 3: Click on Bootable Media at the top-right corner.
Step 4: In the pop-up window, click on WinPE-based media with MiniTool Plug-in to continue.
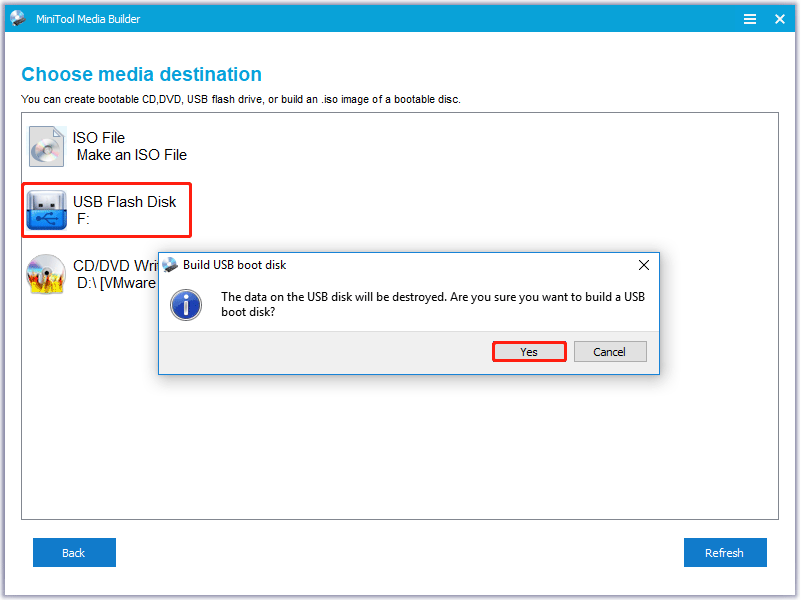
Step 5: In the next window, select the USB flash drive you connect. When prompted, click Yes to confirm to build a USB boot disk.
Step 6: Wait patiently until the process is completed. Once done, click on Finish.
Step 7: Safely eject the USB drive from this PC. Then connect it to your problematic computer.
Step 8: Follow this post to set the created bootable USB drive as the first boot option and save the changes.
Step 9: After that, your Windows 10 will reboot from the bootable USB drive. Wait a while and the system will automatically enter the main interface of MiniTool Partition Wizard.
Part 2: Convert MBR to GPT with MiniTool Partition Wizard
In this part, you can learn detailed instructions about converting MBR to GPT with MiniTool Partition Wizard.
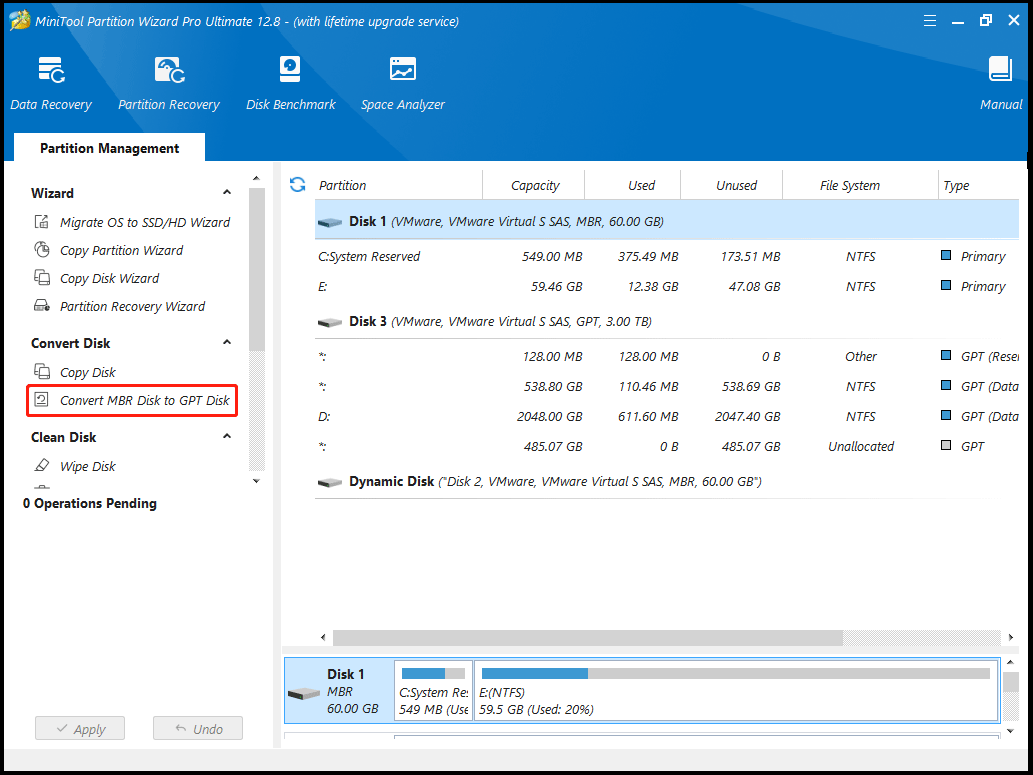
Step 1: In the main interface of this software, choose the target MBR disk, and choose Convert MBR Disk to GPT Disk from the left side panel.
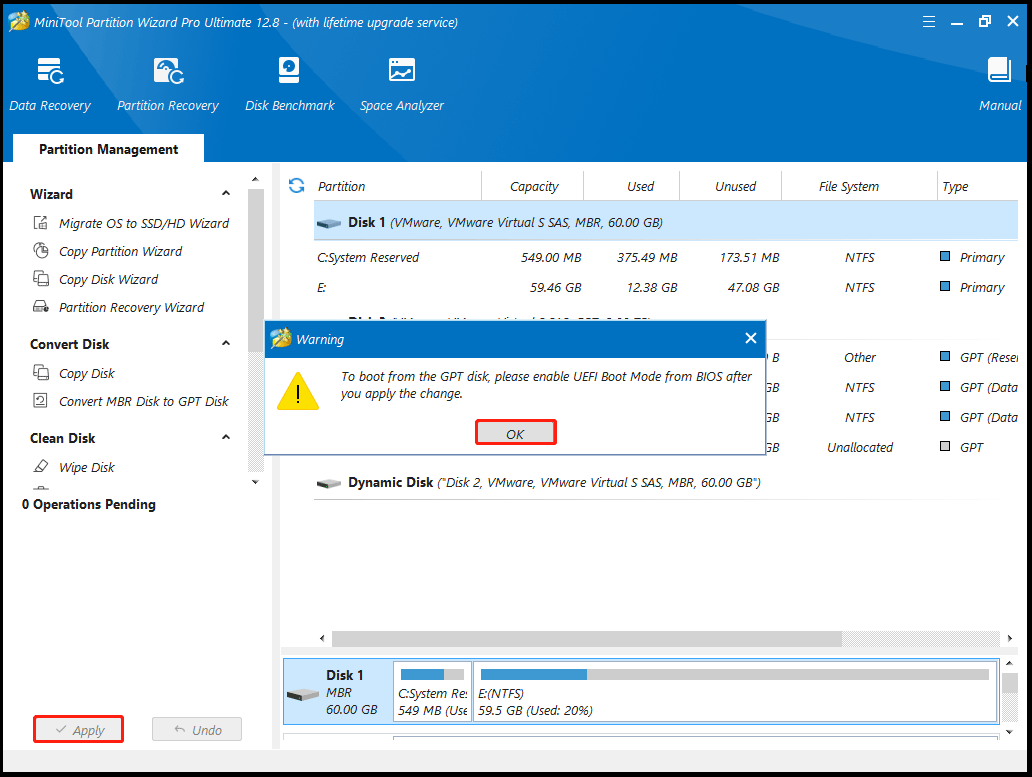
Step 2: Click on the OK button to confirm that you’ve already know you need to change the boot order after converting MBR to GPT. Then this interface becomes the preview of the conversion result and click on Apply to execute the change.
Step 3: Tap the Yes button to confirm the conversion. Wait for the completion of disk conversion. Then click on the OK button finally.
After you convert your disk from MBR to GPT, retry the Windows 10 installation and see if it completes without any errors.
Solution 3. Run CHKDSK
Using CHKDSK is also one solution that has been proved to be effective in fixing the “Windows could not update registry data in the installation” issue. To run CHKDSK in Windows, you can follow the steps below:
Step 1: Access the Command Prompt utility as the steps above.
Step 2: In the Command Prompt window, type the chkdsk G: /f command and press Enter. “G” represents the hard drive partition letter.

Solution 4. Replace the Drive
If none of the above methods help fix the “Windows could not update registry data in the installation” issue, we’d like to recommend you replace the problematic disk with a new one and then reinstall the Windows operating system.
Before replacing the drive, you should back up your important data to a safe location. Here is a tutorial on how to back up data with the help of MiniTool Partition Wizard.
Step 1: Boot the PC from the created bootable USB flash drive as the steps mentioned above.
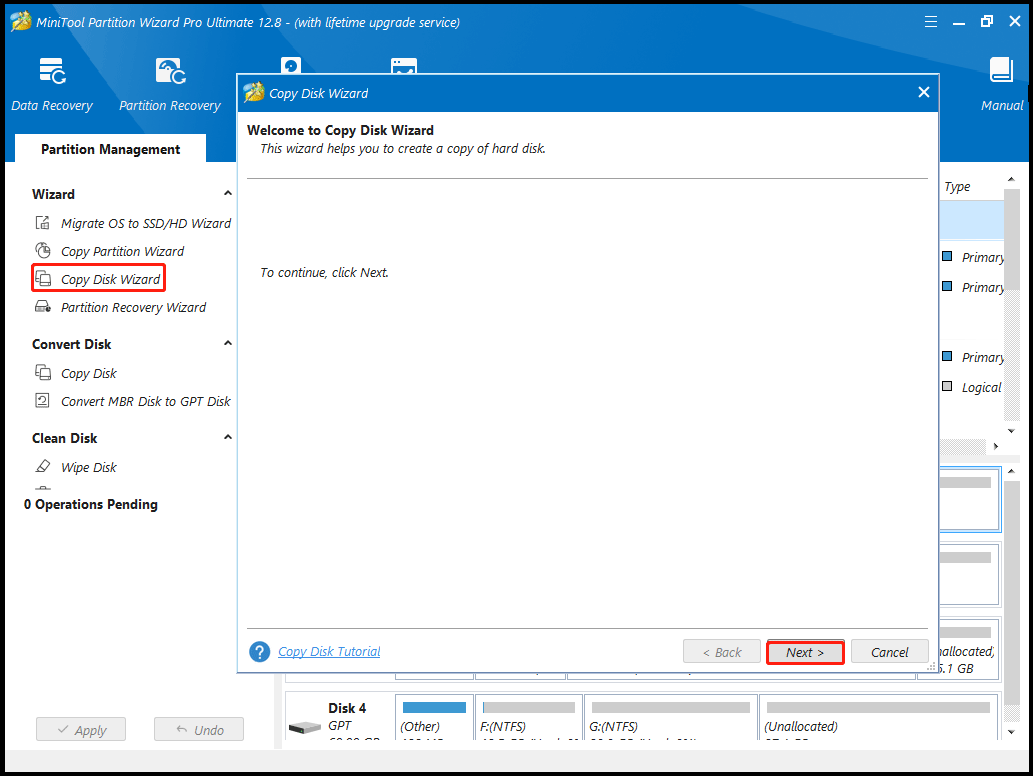
Step 2: In the main interface of MiniTool Partition Wizard, click on Copy Disk Wizard in the action panel. Then click on Next.
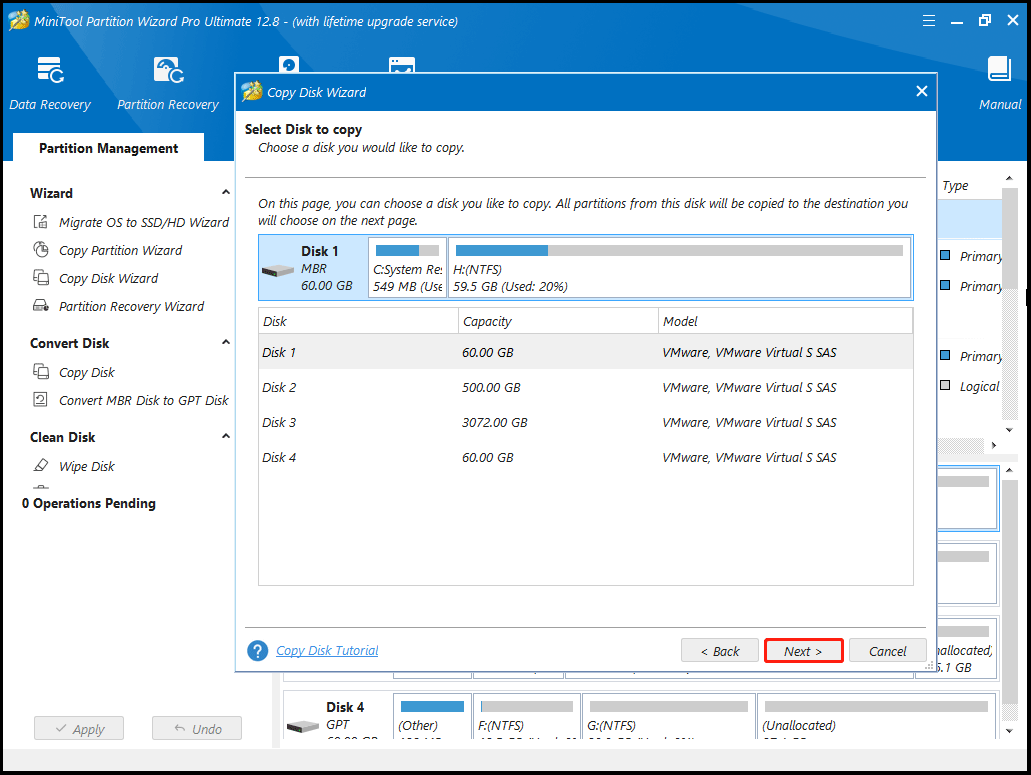
Step 3: In the pop-up window, select the disk to copy and click on Next.
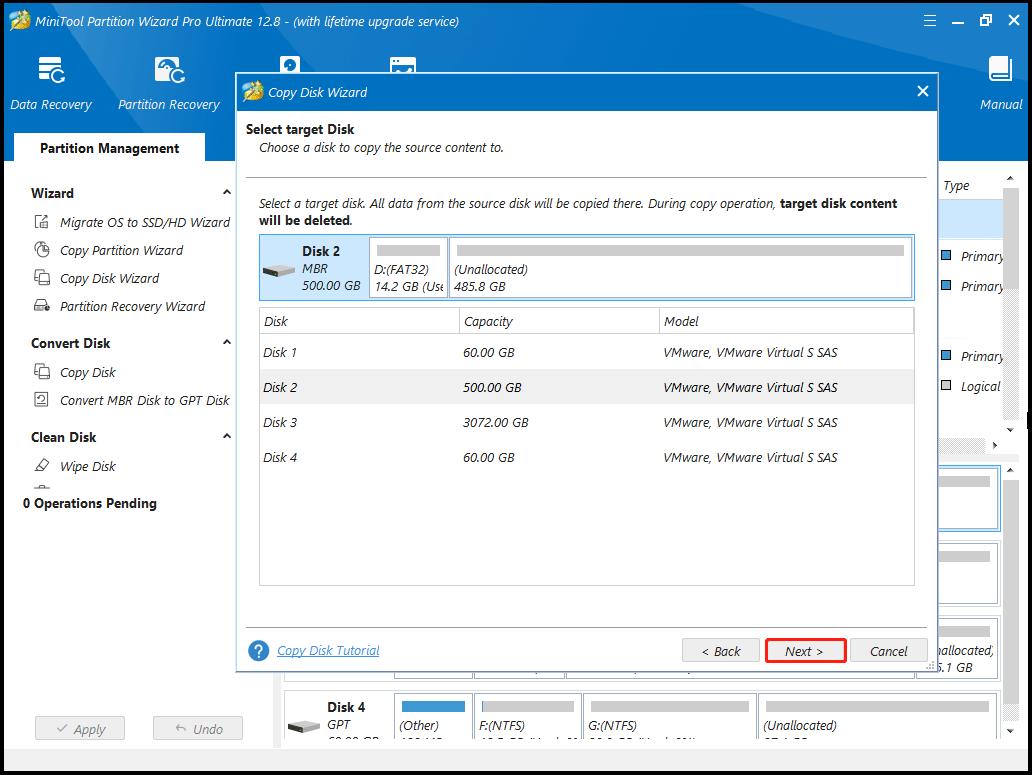
Step 4: Select the destination disk in the next window and click on the Next button.
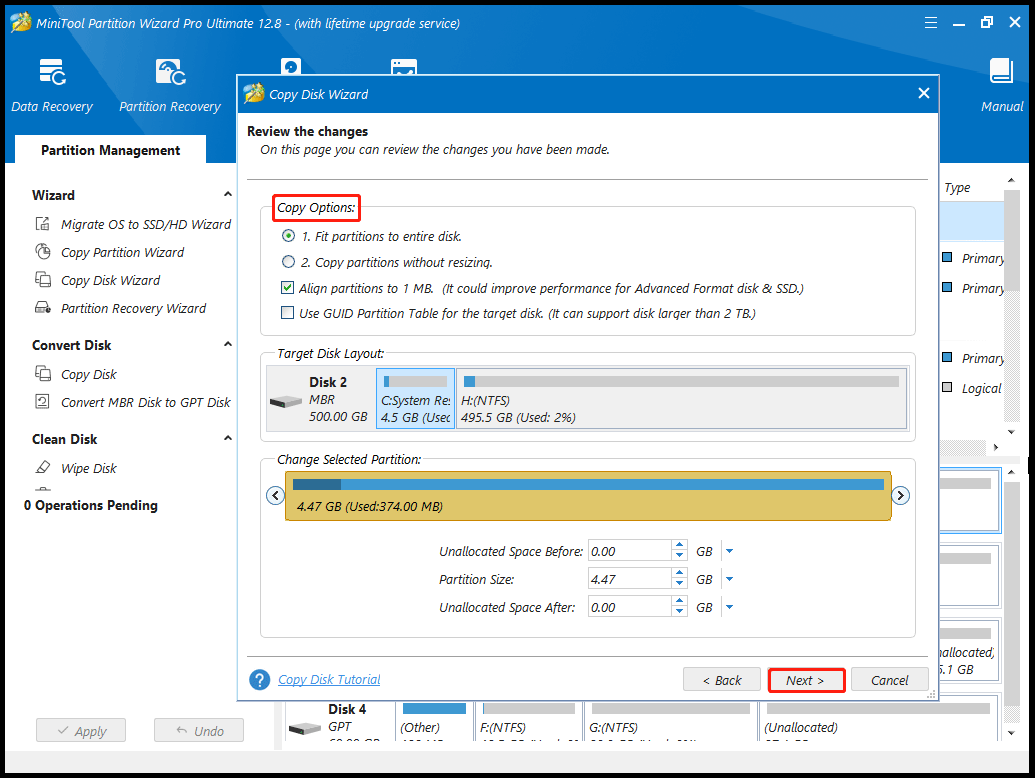
Step 5: Pick Copy Options based on your needs or situation.
Step 6: Click Finish > Apply > Yes to carry out the pending operation.
After finishing the disk cloning, you can replace the hard drive. This post may help you complete this operation: How to Replace Laptop Hard Drive?
Bottom Line
When faced with the “Windows could not update registry data in the installation” issue, you can try to fix it with the above methods. Hope this article can help you solve this issue. If you run into some problems during the fixing process, you can leave them in the following comment zone.
Certainly, if you have any questions about or suggestions for MiniTool Partition Wizard, please do not hesitate to contact us via [email protected].
About The Author

Position: Columnist
Vega enjoys helping people with computer problems, including disk management, data recovery, data backup, and more. She is constantly expanding her knowledge in related fields. And she will continue to bring more easy-to-understand professional articles to help people solve various problems on the PC.
User Comments :