Do you want to remove partitions from SD cards? If you do, you come to the right place. In this post, MiniTool Partition Wizard tells you how to remove partitions from SD cards step by step.
Why Need to Delete Partitions on SD Cards
One possible reason for unpartitioning an SD card is that you want to repartition it for a different purpose, such as installing an operating system or creating a bootable disk. Repartitioning involves deleting all the existing partitions and data on the card, formatting it to a new file system, and creating new partitions.
Another possible reason for unpartitioning an SD card is that you may want to fix some problems with the card, such as formatting issues, capacity errors, or corruption. Sometimes, the SD card may not work properly or show the wrong size. By cleaning the SD card and removing its partitions, you can reset the card and make it usable again.
In addition, you may want to remove partitions from SD cards if there is more than one partition on your SD card but you can only use the space on the first partition. Deleting the extra partitions will allow you to reclaim all the space on the card. What’s more, you can delete partitions to free up space on the SD card.
You may also want to unpartition an SD card when your SD card has a virus or malware infection, which can affect your device’s security. Deleting the partition can help you erase the infection and protect your data.
Further reading:
Unpartitioning an SD card means deleting all the partitions on the card and restoring it to a single volume that can be used by most devices. This can be useful if you want to use the SD card normally again or repartition it for a different purpose. However, deleting partitions on SD cards may cause data loss. Thus, it is recommended that you back up your SD card to avoid losing important data.
How to Remove Partitions from SD Card
There are 3 ways to delete partitions on SD cards in Windows. You can choose one that suits you best.
#1. Use Disk Management
You can unpartition SD cards on Windows PC using Disk Management, which is a Windows built-in tool that can help you manage disks and partitions. It allows you to partition a hard drive, delete partitions, format a hard drive, change a drive letter, etc.
After connecting your SD card to the computer, you can follow the detailed steps below to unpartition an SD card using Disk Management.
Step 1. Press Windows + R keys to open the Run dialog box. Then type diskmgmt.msc and press Enter to open Disk Management.
Step 2. In the pop-up Disk Management window, locate your SD card, right-click the partition on it, and select Delete Volume.
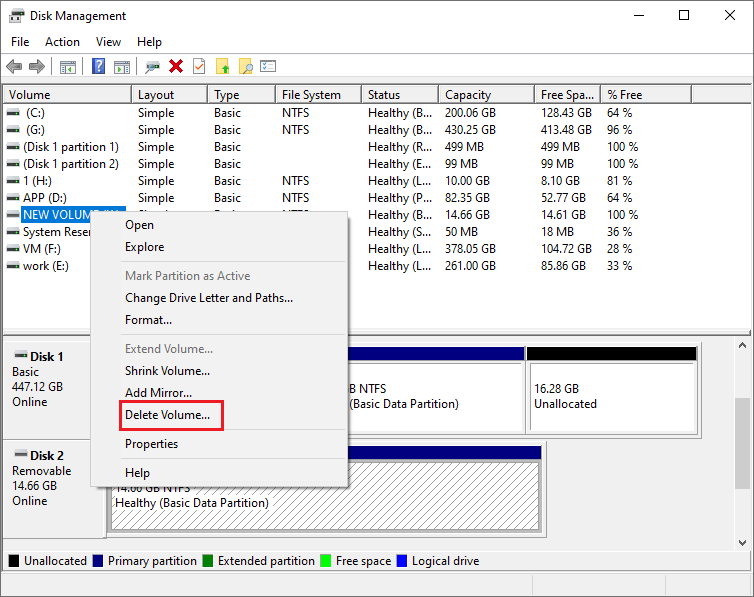
Step 3. Then a warning window saying “Deleting this volume will erase all data on it. Back up any data you want to keep before deleting. Do you want to continue?” will pop up. Click Yes to confirm the operation.
Once done, you can see that the partition is removed and the disk space once occupied by the partition will become unallocated. You can repeat this operation to delete other partitions on the SD card.
#2. Use MiniTool Partition Wizard
Disk Management cannot delete all partitions at once. If you use Disk Management to remove partitions from SD cards, you have to delete each partition individually or may encounter the Disk Management Delete Volume greyed out issue.
In this case, you can use MiniTool Partition Wizard to delete partitions on SD cards. As a powerful and professional partition manager, MiniTool Partition Wizard can help you delete all partitions directly, create/format/copy/resize the partition, recover partitions and data, etc.
Here is how to unpartition an SD card using MiniTool Partition Wizard:
Step 1. Connect your SD card to your computer with a card reader.
Step 2. Download and install MiniTool Partition Wizard on your PC. Then launch it to enter its main interface.
MiniTool Partition Wizard FreeClick to Download100%Clean & Safe
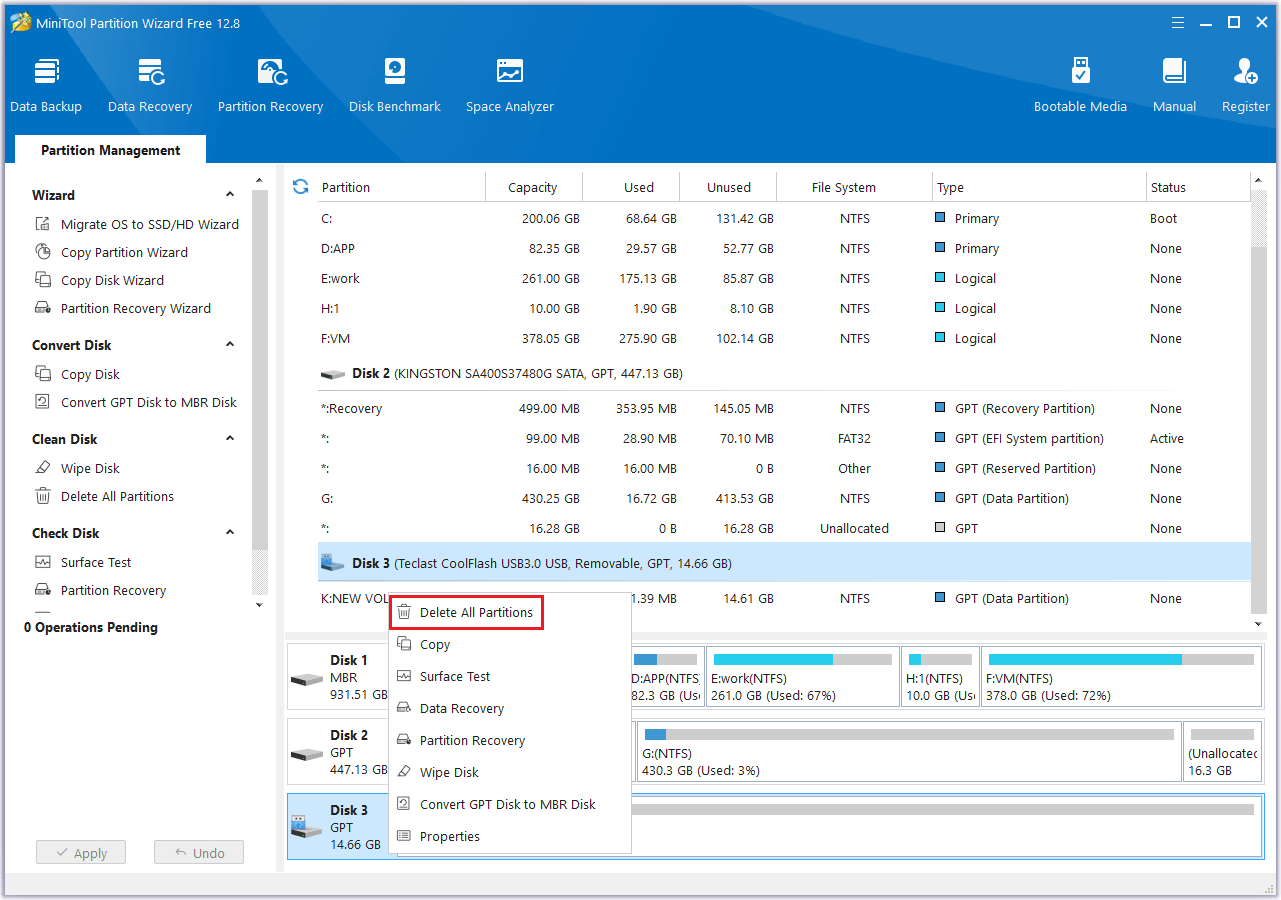
Step 3. Then right-click your SD card and select Delete All Partitions from the context menu to delete all partitions at once. Alternatively, you can highlight the SD card and click Delete All Partitions on the left panel.
Step 4. In the prompted warning window, click Yes to confirm the operation.
Step 5. Once done, you can preview the changes and click the Apply button to carry out the pending operations.
#3. Use Diskpart
Diskpart is another Windows built-in tool that allows you to perform various disk operations using command lines. Here is a tutorial on how to unpartition an SD card using this tool:
Step 1. Insert your SD card into your computer via a card reader.
Step 2. In the Run box, type cmd and press Ctrl + Shift + Enter to run Command Prompt as administrator.
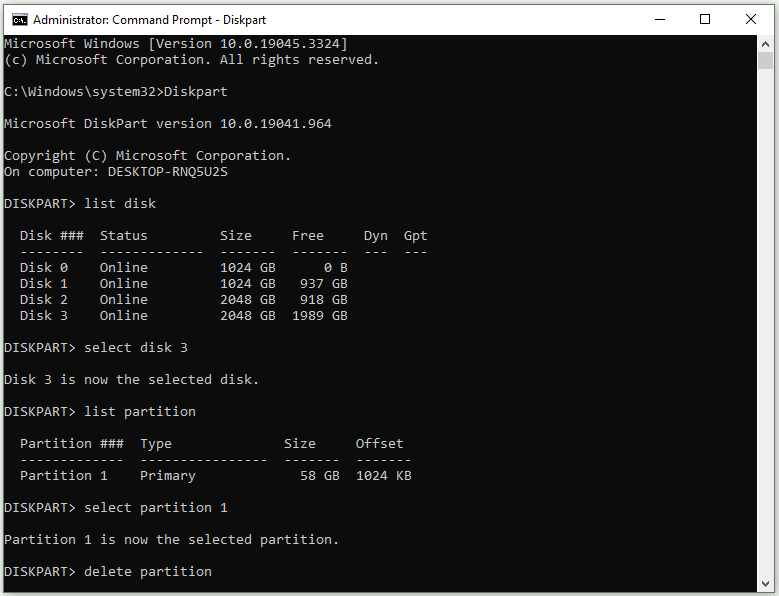
Step 3. In the Command Prompt window, type the following commands one by one and press Enter after each one.
- Diskpart
- list disk
- select disk n (n means the disk number of your SD card)
- list partition
- select partition n (n means the partition number of your SD card)
- delete partition
Step 4. Repeat the steps to remove other partitions on the SD card.
When all partitions are deleted, the whole SD card will become unallocated. Then you can create a new partition on the SD card or format it as you wish.
How to Recover Partitions and Lost Data
What to do if there is some important data missing or you delete partitions mistakenly? Is there an easy way to recover them? The answer is absolutely YES. MiniTool Partition Wizard is a professional data/partition recovery tool that can help you restore files and partitions from various storage devices, including SD cards.
To recover data and partitions using this data recovery software, follow the detailed steps below.
MiniTool Partition Wizard DemoClick to Download100%Clean & Safe
1. Recover Partition
The Partition Recovery feature of MiniTool Partition Wizard can help you recover lost or deleted partitions with all the data on them.
Step 1. Connect your SD card to your Windows PC.
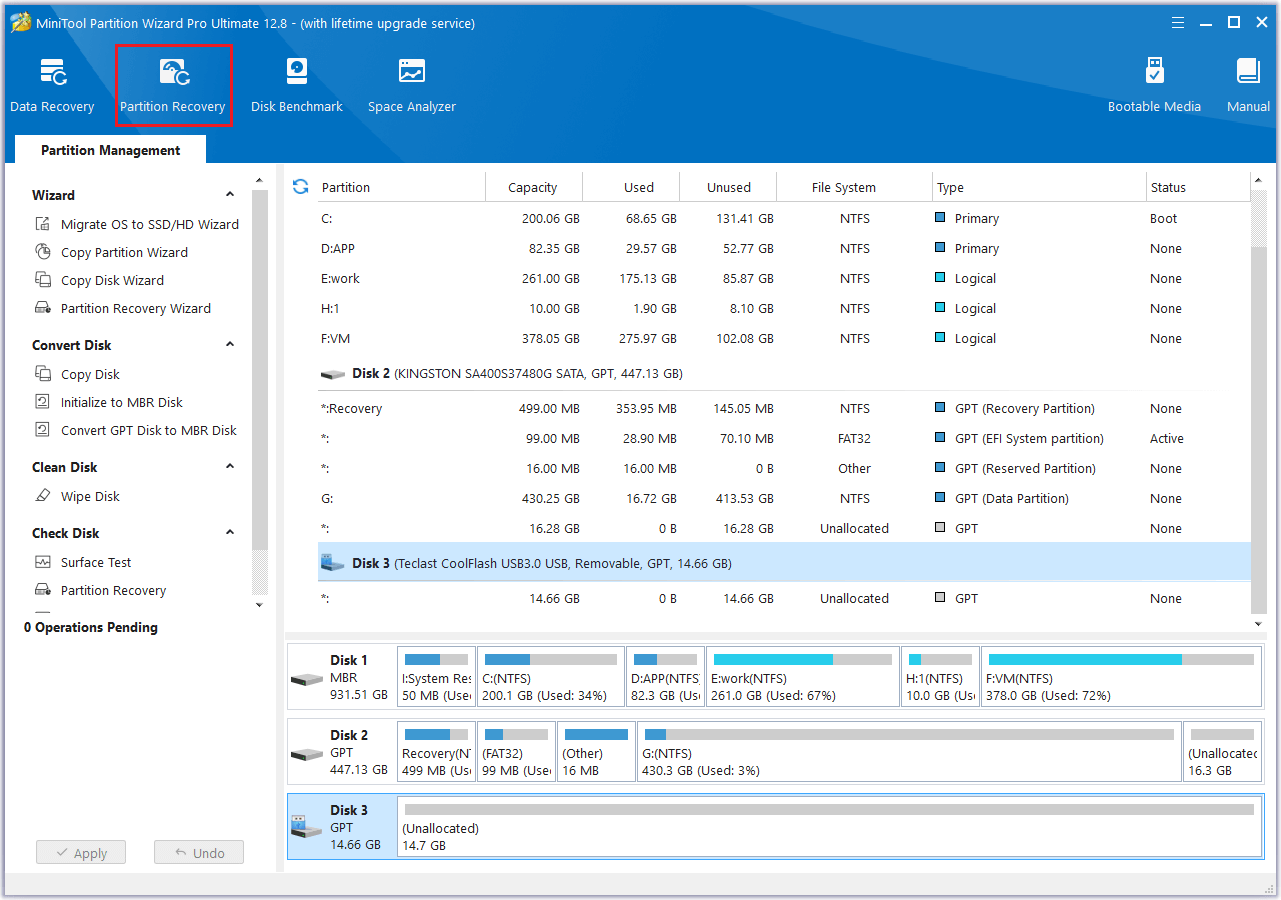
Step 2. Launch MiniTool Partition Wizard to enter its main interface. Then click Partition Recovery on the top toolbar.
Step 3. In the pop-up window, click Next to continue. Then choose your SD card for recovery and click Next.
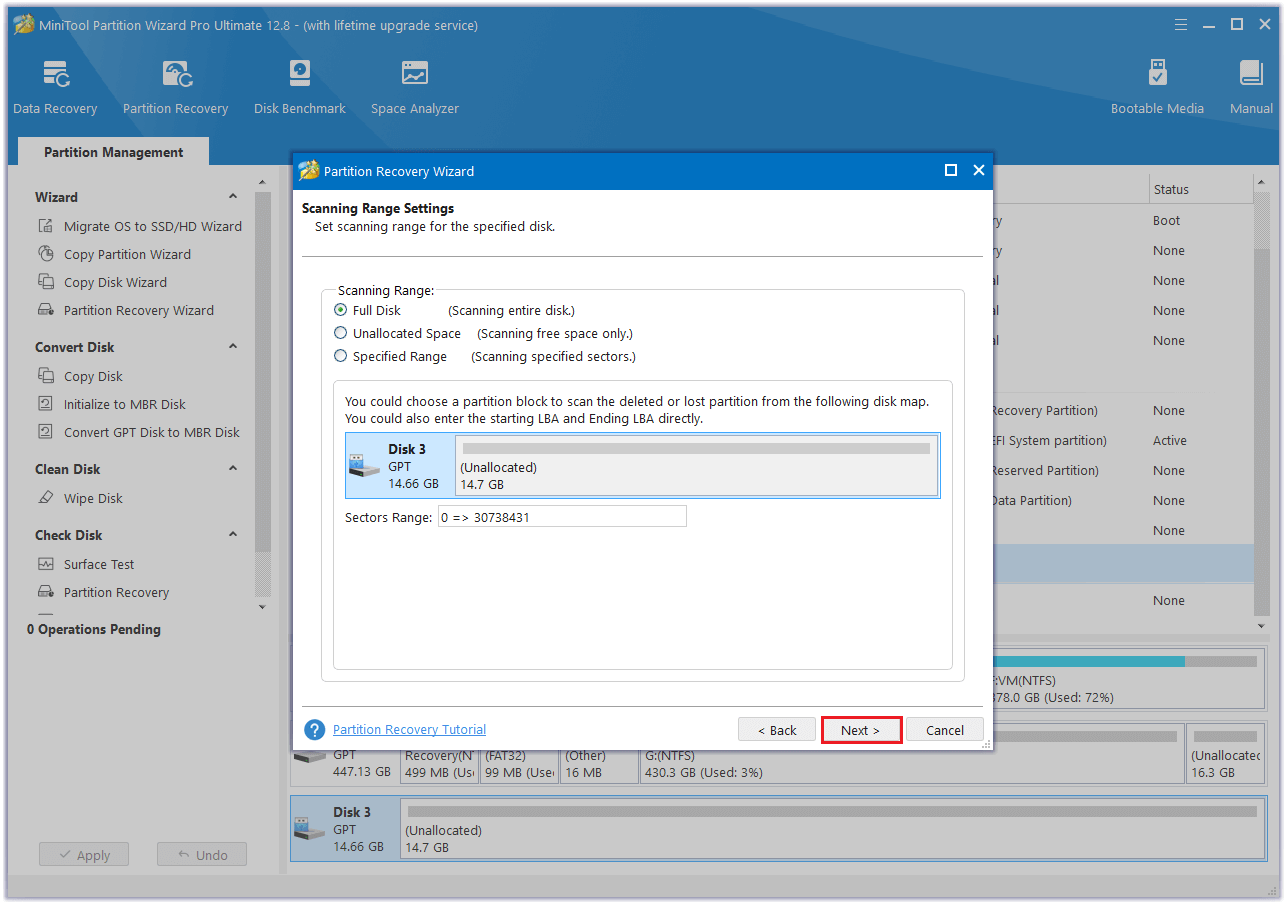
Step 4. In the next window, set the scanning range for the specified disk. There are three options provided: Full Disk (scanning entire disk), Unallocated Space (scanning free space only), and Specified Range (scanning specified sectors). Once done, click Next.
Step 5. Then choose a scanning method and click Next to continue.
Step 6. Wait patiently until the process completes. Once done, select all needed partitions and click the Finish button.
2. Recover Data
If you want to recover the lost data, you can use the Data Recovery feature of MiniTool Partition Wizard.
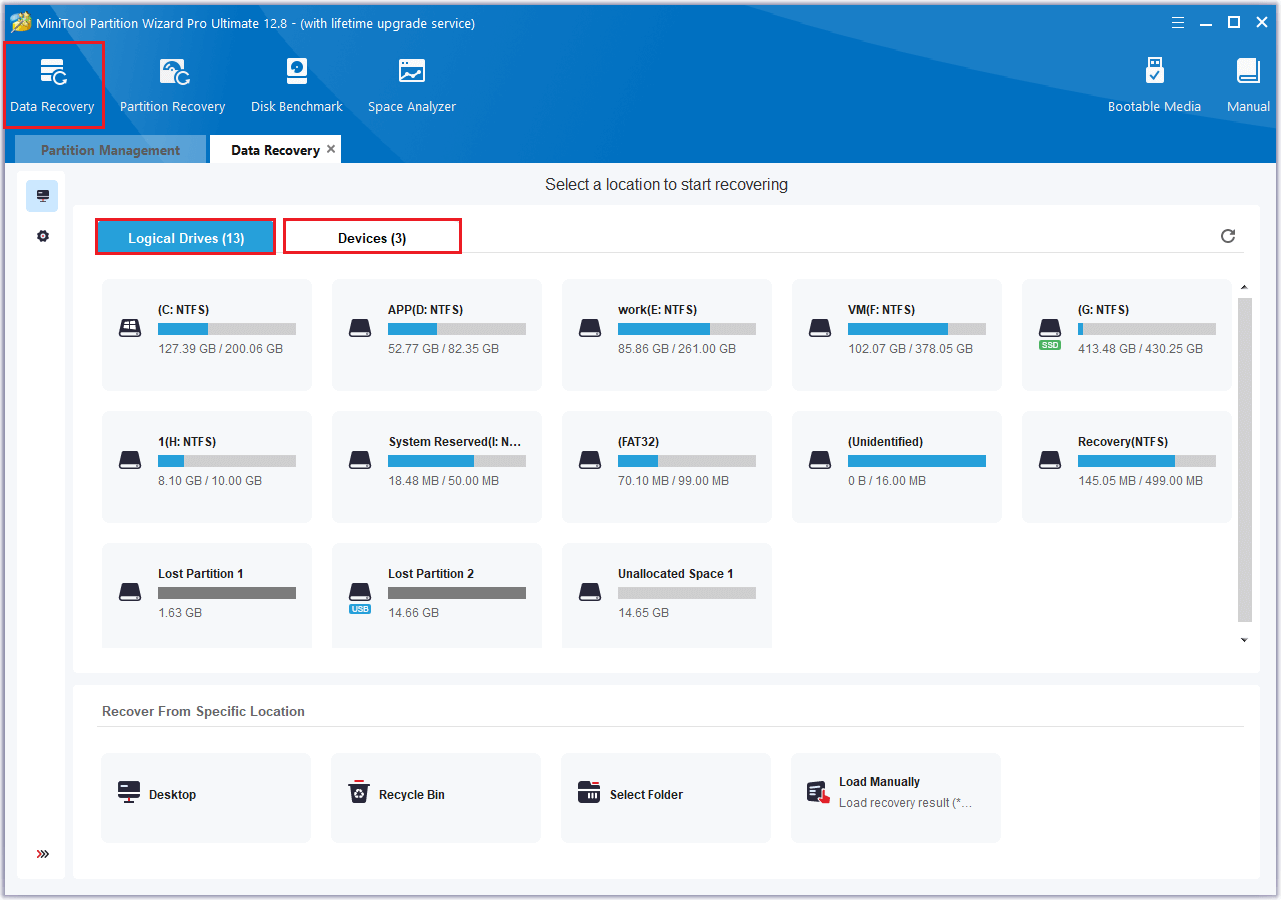
Step 1. After launching MiniTool Partition Wizard, click Data Recovery on the top toolbar.
Step 2. Then choose a location to scan for missing data. There are 2 options you can choose from:
- Logical Drives: all the partitions and unallocated space are listed in this section. You can choose a specific location to scan.
- Devices: all the devices connected to your computer display in this section. You can choose your SD card to scan and recover lost files.
Step 3. Then the software will start to scan the target disk. During the scanning process, you can click the Pause or Stop button if you have found the desired files.
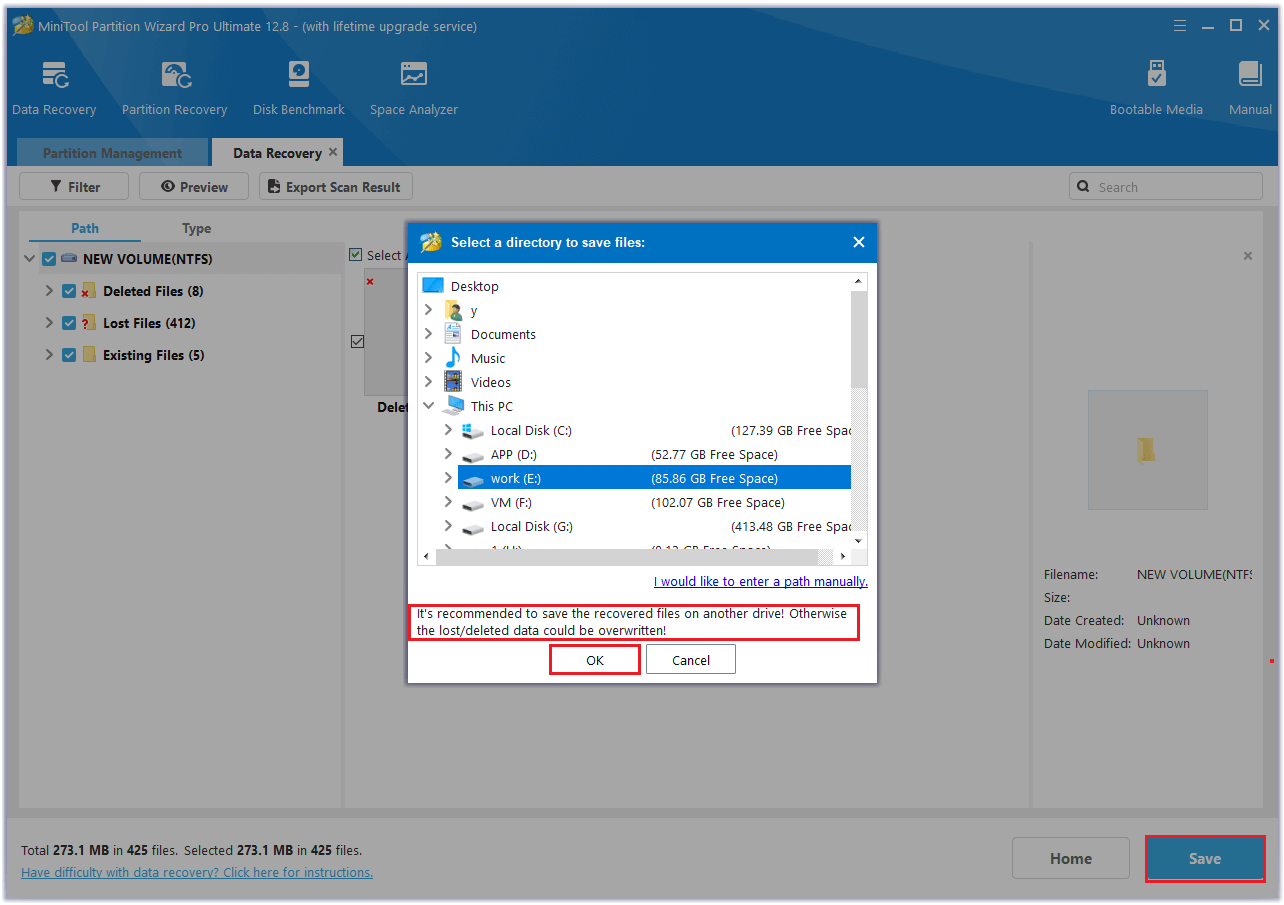
Step 4. After the scan completes, check all the files that you want to recover, and click the Save button.
Step 5. In the next dialog box, select another partition to save the recovered files and click OK to confirm the operation.
Bottom Line
In this post, we have learned something about unpartitioning SD cards and how to remove partitions from SD card step by step. If you have any suggestions or other nice solutions, just feel free to share them with us in the following comment part.
Do you encounter any issues while using MiniTool Partition Wizard? If you do, you can contact us via [email protected]. We will get back to you as soon as possible.
Unpartition SD Card FAQ
Unpartitioning an SD card means deleting all the partitions on the card. You can restore the full capacity of the card and use it for other purposes.
You can use MiniTool Partition Wizard or Windows built-in tools like Disk Management and Diskpart to unpartition your SD card.
User Comments :