The recovery partition plays an important role in repairing OS, so you should always keep it safe. Making it invisible is a great way because this avoids accidental formatting/deleting. You can hide recovery partition through MiniTool Partition Wizard, Disk Management, and Command Prompt.
Why You Need to Hide Recovery Partition
There are two types of recovery partitions on the Windows 10/8/7 PCs. They are the Windows recovery partition and OEM recovery partition. Windows recovery partition enables you to boot into Windows recovery environment to recover OS, while the OEM recovery partition lets you restore the PC to factory status.
As you see, recovery partition is essential and useful. Therefore, you should make efforts to protect it. Hiding the recovery partition is a good idea because this can prevent you from deleting or formatting the partition by accident.
The recovery partition is hidden by default on most PCs and doesn’t appear in the File Explorer. However, it might show up in File Explorer on some computers. How to hide a recovery partition manually? Well, it is very easy to hide recovery partition or any other partitions from File Explorer.
You just need to remove the assigned drive letter. There are 3 ways to do that.
#1: Hide Recovery Partition via MiniTool Partition Wizard
You can directly hide a recovery partition by using MiniTool Partition Wizard – a free partition manager for Windows PCs. Its Hide Partition feature enables you to hide the recovery partition within a few clicks. After the process ends, you won’t see the recovery partition in File Explorer but it is still visible in this software and Disk Management.
If you want to make the recovery partition visible in File Explorer, unhide it via the Unhide Partition feature of MiniTool Partition Wizard. In addition to hiding partitions, MiniTool Partition Wizard also allows you to partition hard drives, convert MBR to GPT, clone hard drives, migrate Windows 10, change cluster size, recover data from hard drives with bad sectors, and so on.
Now, follow the steps below to hide recovery partition via MiniTool Partition Wizard.
Step 1: Get MiniTool Partition Wizard installed and then launch the software.
MiniTool Partition Wizard FreeClick to Download100%Clean & Safe
Step 2: Right-click on the recovery partition and click Hide Partition. Alternatively, click on the target partition and click Hide Partition.
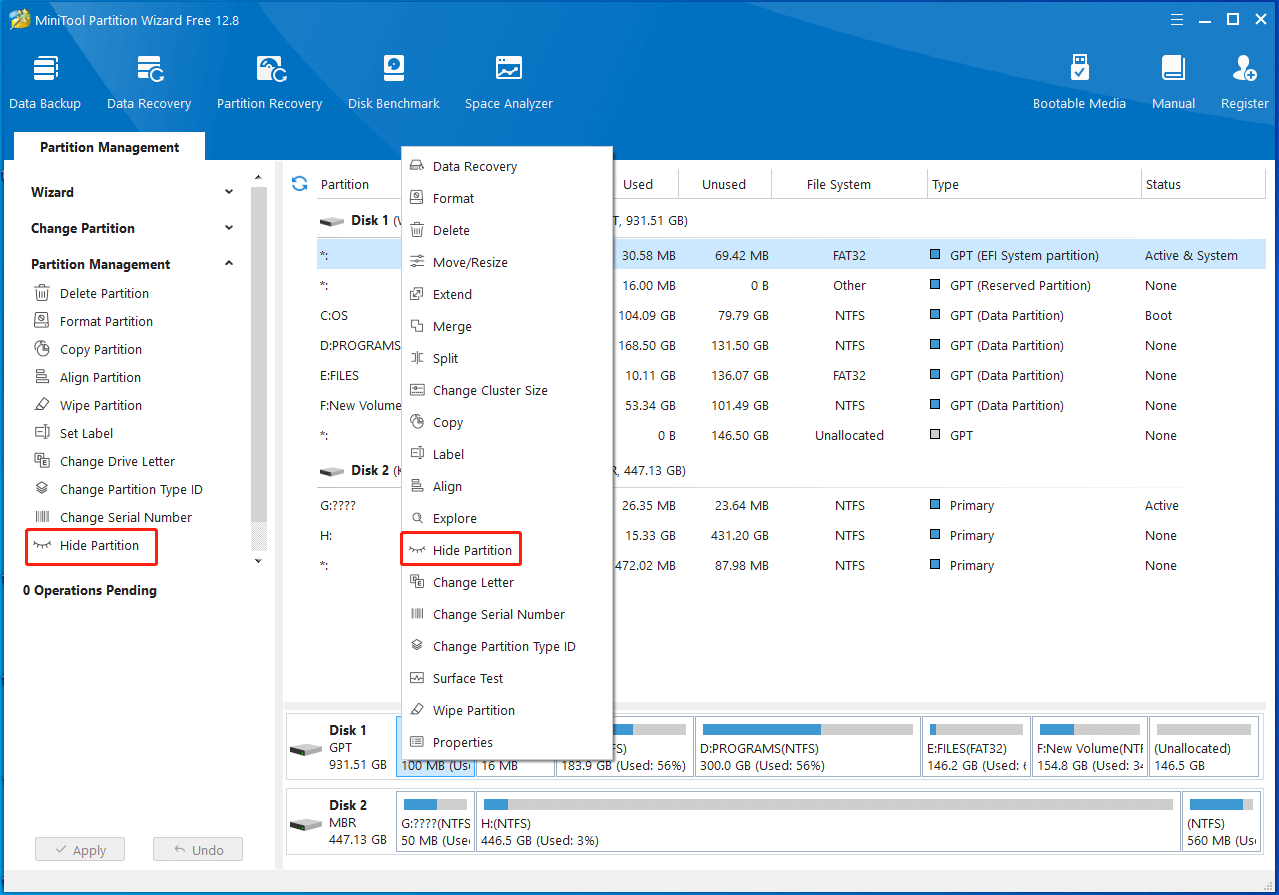
Step 3: Then click Apply to execute the operation.
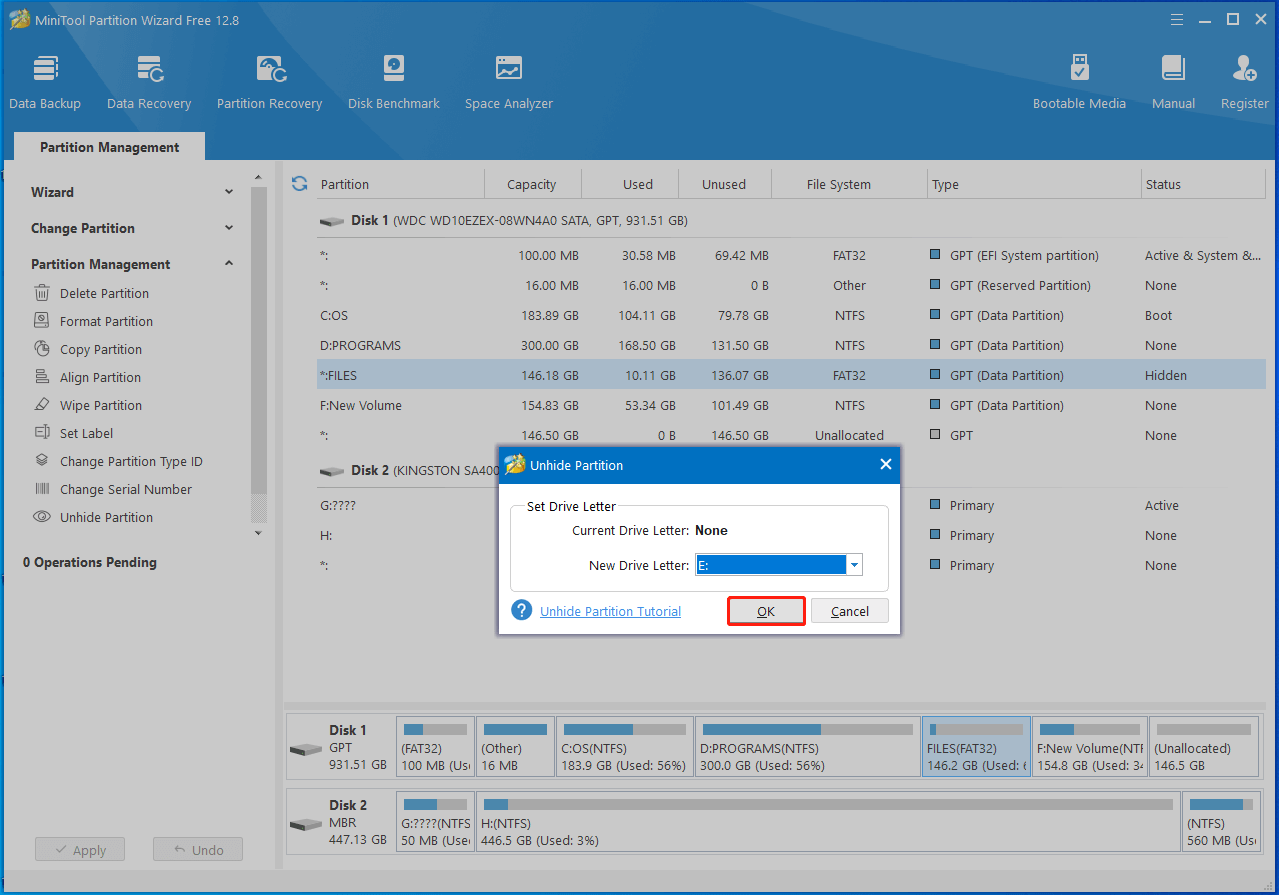
Step 4: To unhide the recovery partition, click on the partition and hit the Unhide Partition feature in the left panel. In the next window, select a drive letter for the partition and click OK.
Step 5: Tap Apply to carry out the operation.
#2: Hide Recovery Partition via Disk Management
Disk Management, a built-in disk managing utility in Windows computers, enables you to hide the recovery partition too. Here’s the guide on how to hide a recovery partition through Disk Management.
Step 1: Open the Run dialog window by pressing the Windows and R keys.
Step 2: Type diskmgmt.msc and hit Enter.

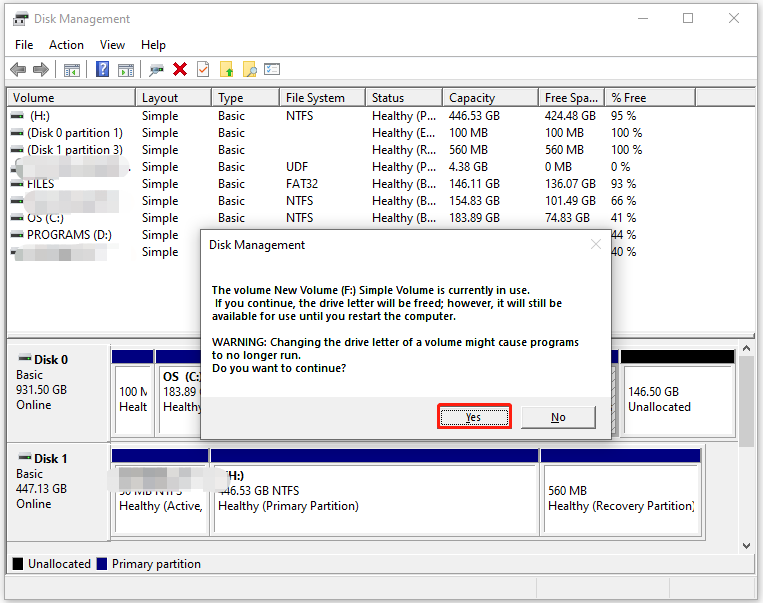
Step 3: Right-click on the recovery partition and click Change Drive Letter and Paths.
Step 4: In the pop-up window, click Remove. If you are prompted with a warning window, click Yes consecutively to confirm the operation.
Further reading:
To unhide the recovery partition, right-click on it in Disk Management and pick Change Drive Letter and Paths. Then assign a drive letter for the partition and click OK to save the changes.
#3: Hide Recovery Partition via Command Prompt
Like Disk Management, Command Prompt is also a utility that comes with Windows computers. It executes various tasks by running corresponding command lines. By using this utility, you can create/format/extend/delete partitions, assign/remove drive letter, perform a SFC scan, etc. Here, you hide recovery partition via Command Prompt with the steps below.
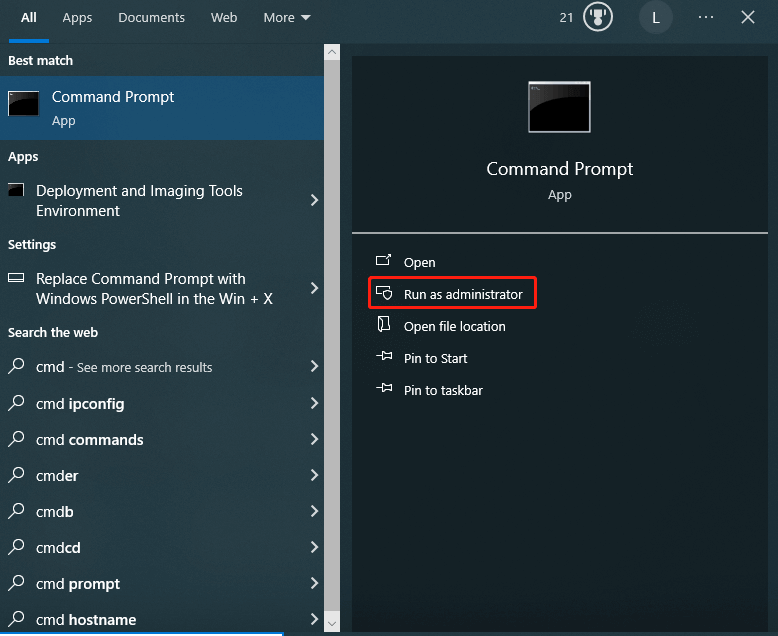
Step 1: Type cmd in the search box and then click Run as administrator under the searched Command Prompt App.
Step 2: In the elevated Command Prompt window, type the commands below and hit Enter after each.
- diskpart
- list volume
- select volume n (replace n with the number that stands for the recovery partition)
Step 3: Remove its drive letter by executing this command: remove letter x (replace x with the actual drive letter of the recovery partition).
If you want to let the hidden recovery partition appear in File Explorer, directly add a drive letter via Command Prompt. Follow the Step 1 and Step 2 to select the recovery partition. Then type assign letter f and hit Enter.
Bottom Line
This post explains why you need to hide recovery partition and illustrates how to do that. If you need to hide recovery partition, follow the methods given in this post. If you have other thoughts about the recovery partition, tell us in the following comment area. For any questions related to MiniTool Partition Wizard, contact us by sending an email to [email protected]. We will get back to you as soon as possible.
User Comments :