What is amifldrv64.sys? What causes the amifldrv64.sys BSOD error? How to fix this troublesome problem? To get the answers to all these questions, you can read this post of MiniTool.
About Amifldrv64. sys BSOD Error
There are multiple blue screen errors such as 0x80070017 error, hal.dll BSOD error, and the amifldrv64.sys error is one of them. Before talking about amifldrv64.sys BSOD error, let’s have a basic understanding of the question – what is amifldrv64.sys.
The amifldrv.sys is a sys file that is created by MSI (American Megatrends, Inc) for strangers. The file usually is located in the ‘c:WindowsTemp’ folder with a size of 13864 bytes (13KB). It is a safe file because there are no bad comments on the file at present.
However, some Windows users suffer from a blue screen of death related to amifldrv64.sys when attempting to update BIOS version (usually in the very beginning of the flash process). What causes the amifldrv64.sys BSOD Windows 10 error?
Here are several possibilities. Firstly, you update your BIOS via your computer operating system and there are some conflicts between them. Secondly, the driver verifier poses threats to computer driver, which leads to the crash of some BIOS flashing utility.
Thirdly, the machine interruption can also give rise to the amifldrv64.sys BSOD error. Finally, the Wi-Fi adapter driver can also cause conflicts leading to the amifldrv64.sys blue screen error. Now, solutions based on these possible causes are provided for you.
7 Best Ways to Fix Amifldrv64.sys BSOD Error
- Disable Driver Verifier
- Create a Bootable USB that contains BIOS update
- Reinstall Wi-Fi Adapter
- Uninstall MSI Live Update program
- Run Windows Memory Diagnostic tool
- Repair install Windows OS
- Restore your computer
Solution 1: Disable Driver Verifier via Its Manager
Driver verifier, a built-in diagnostic tool, appears on Windows 7/8.1/10, which is designed to verify both native Microsoft drivers and third-party drivers. It makes your incompatible or outdated drivers to work improperly.
This feature of driver verifier can be beneficial to the health selection of drivers, while this will trigger the conflict with BIOS flashing utilities. These utilities are more than basic scripts that aren’t updated by motherboard manufacturers.
Due to this reason, plenty of BSODs errors will appear in the process of updating the BIOS. Hence, you need to disable driver verifier. Here are steps for disabling driver verifier through the verifier manager.
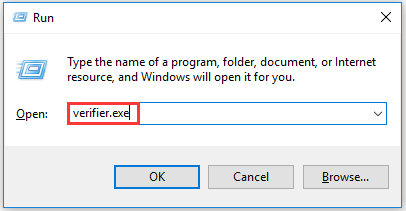
Step 1: Open the Run dialogue window by pressing Win and R keys, and then type verifier.exe in the window and click on the Enter key to open the driver verifier utility.
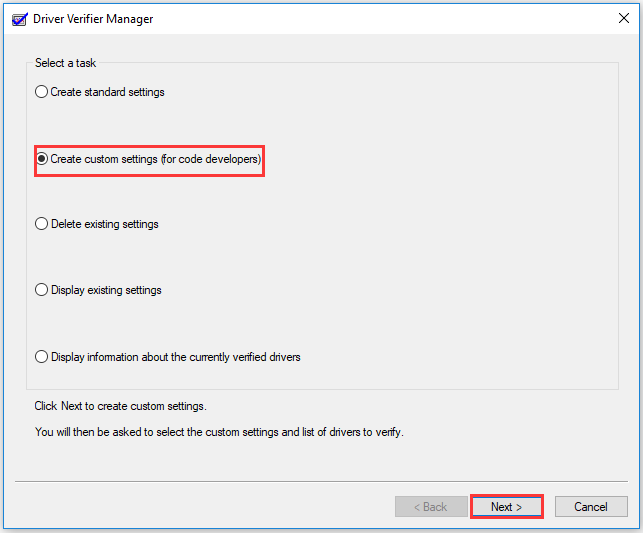
Step 2: In the next window, choose the Create custom settings (for code developers) option under the Select a task tab and click on Next to go on.
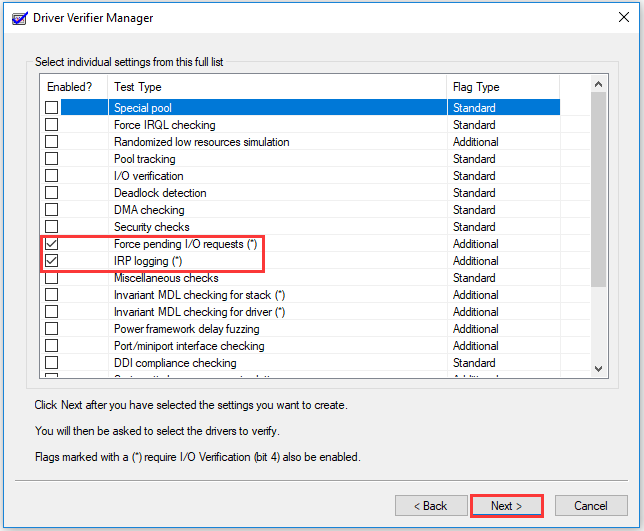
Step 3: In the pop-up window, check the Force pending I/O requests and IRP Logging checkboxes and click on Next.
Step 4: Choose the Select driver names from a list option from the prompted window and click on the Next button.

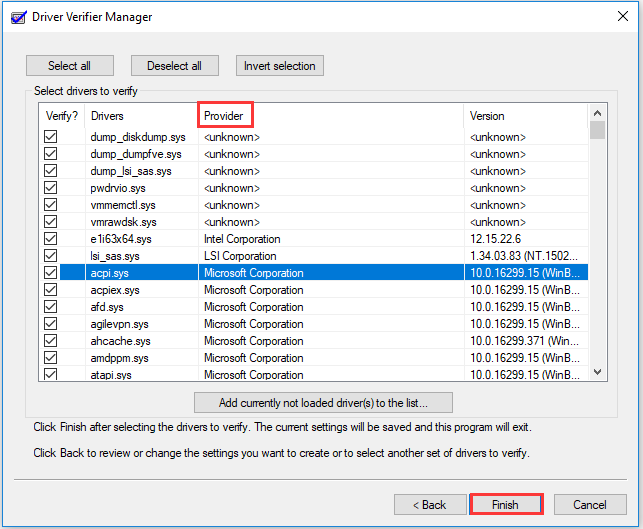
Step 5: All the drivers will be listed in the window, and the list will be sorted out according to the manufacturers after clicking on Provider. After that, check every driver on the list that is not supported by Microsoft Corporation. Finally, click on the Finish and the OK buttons in the next confirmation window to save and the operation.
Solution 2: Create a Bootable USB That Contains BIOS Update
If you get the amifldrv64.sys blue screen error when updating BIOS directly from computer operating system, you can create a bootable USB that contains BIOS update. Before creating a bootable USB with BIOS Update, you need to prepare an empty or a new USB flash drive.
Therefore, this section should be discussed in 2 cases. You have a USB drive that contains data or it is a totally new one. As for the 2 different cases, you should take different actions.
Case 1: You Own a USB Drive That Contains Data
If your USB drive contains important data, please back it up then erase the data. To erase the data on the USB flash drive, you need a professional tool like MiniTool Partition Wizard. The Wipe Disk feature of MiniTool Partition Wizard enables you to erase all the data on the USB flash drive easily.
Different from other data erasing ways, wiping disk is an absolutely safe way because it will fill the every sector on the drive. Hence, you won’t have to worry that the deleted data would be recovered by some data recovery software like MiniTool Power Data Recovery.
In fact, MiniTool Partition Wizard allows you to check SSD health, move/resize partition, clean up your computer, check and fix file system, etc. You can get this fantastic software by clicking the button below.
MiniTool Partition Wizard FreeClick to Download100%Clean & Safe
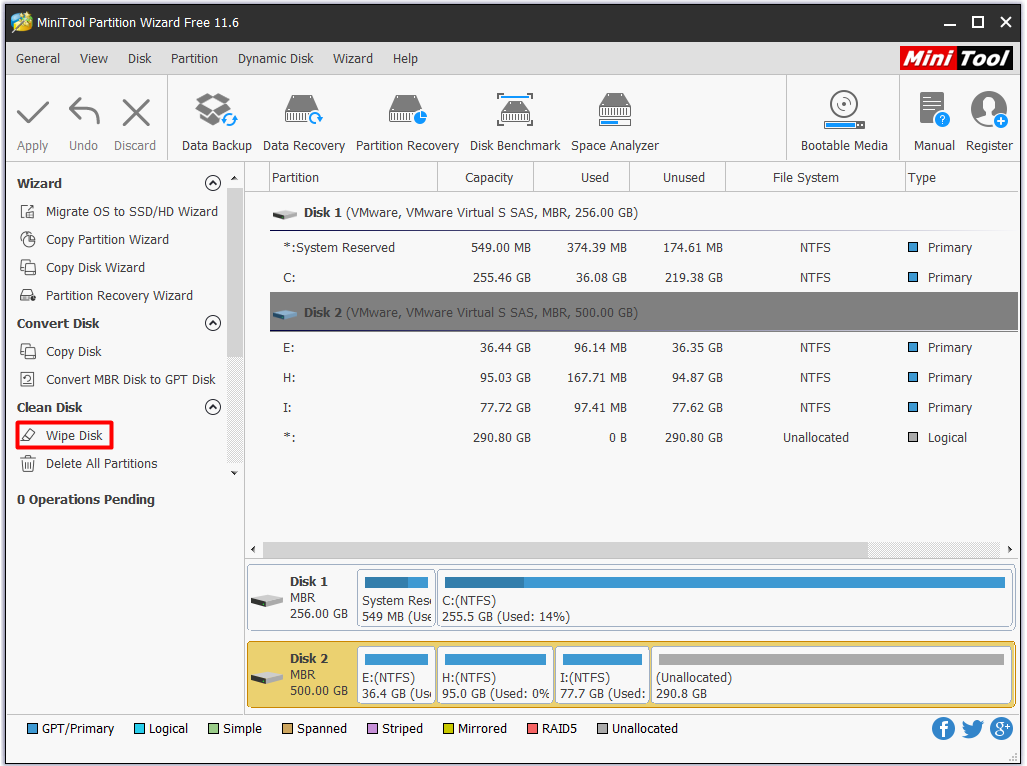
Step 1: Plug your USB drive into computer. Launch MiniTool Partition Wizard Free Edition to enter its main interface and choose your USB drive.
Step 2: Now, click on the Wipe Disk feature in the left action panel.
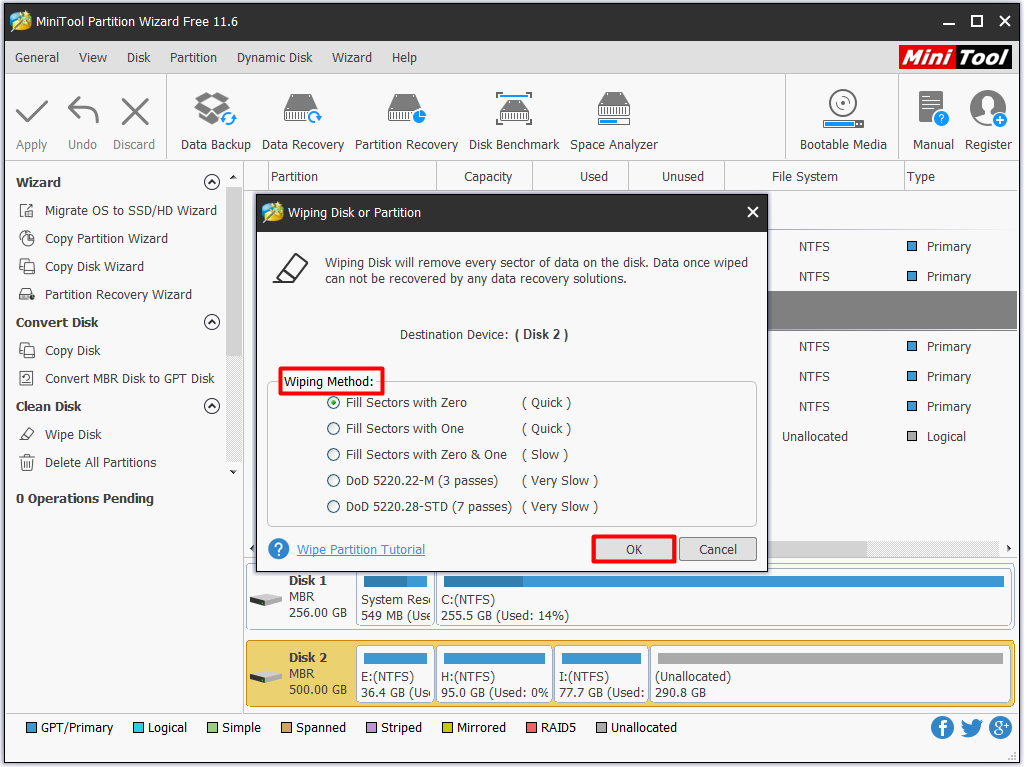
Step 3: In the next window, choose a wiping method from the 5 given options according to your demand and click OK.
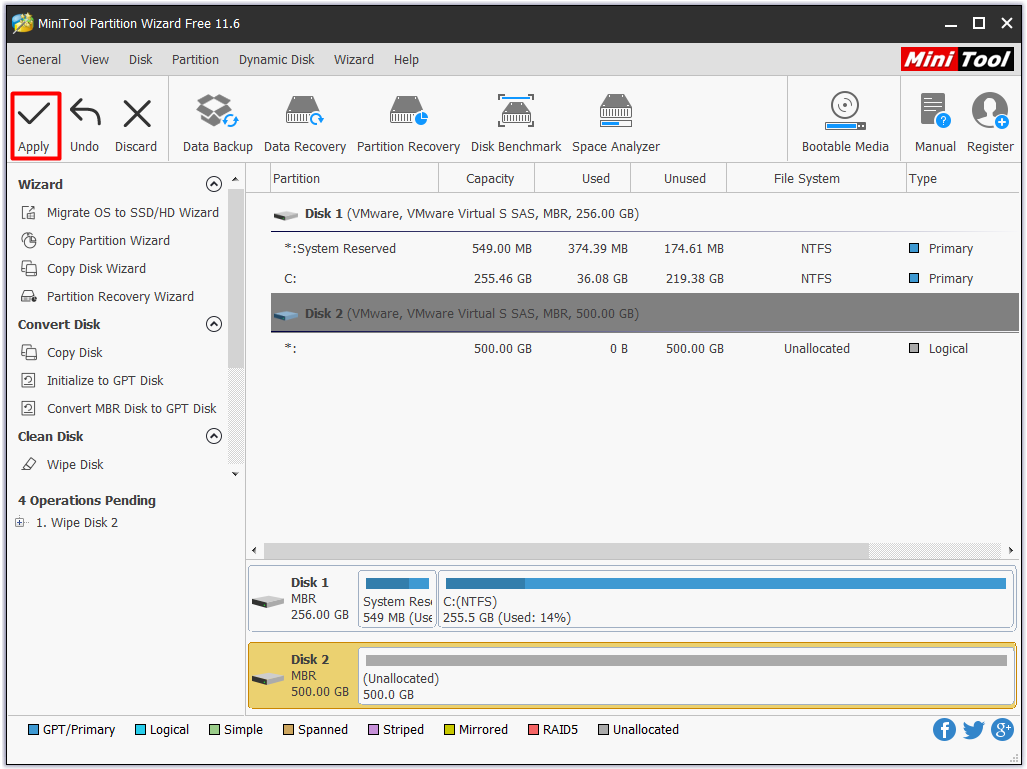
After backing to the main interface, you will see that all the data on the USB drive has gone and the drive status is unallocated, but all these changes will only take effect after clicking on Apply to carry out the operation.
Case 2: You Own a New USB Drive
If you have a completely new USB drive, you need to format it before using it. How to format a hard drive? You have 4 options that means you can format your hard drive via Windows Disk Management, Windows Explorer, Diskpart and MiniTool Partition Wizard.
MiniTool Partition Wizard FreeClick to Download100%Clean & Safe
No matter which method you would like to use, you can complete the formatting job. What effect will the formatting operation bring you? You may refer to this guide: What does formatting a hard drive do? Here Are Answers
After you prepare the USB drive, download the BIOS update that you would like to install from the manufacturer’s official website and save it to your USB drive. If you are required to get some specified files by the manufacturer, just follow it.
Then, plug the USB drive into your computer and reboot the PC. During the startup process, click setup key according to your motherboard model and computer brand to enter the BIOS settings. Within the BIOS page, find out and click the Update System BIOS option or something like this.
Confirm the operation in the prompted window and choose your USB drive that contains BIOS update. Then, the updating BIOS process will begin automatically. Restart your PC until the updating process ends to check if the error is solved or not.
Solution 3: Reinstall the Wi-Fi Adapter
If the amifldrv64.sys error happens to you after the BIOS update operation, you should check your Wi-Fi adapter for errors. According to user report, the amifldrv64.sys BSOD can be fixed by reinstalling the Wi-Fi adapter through device manager.
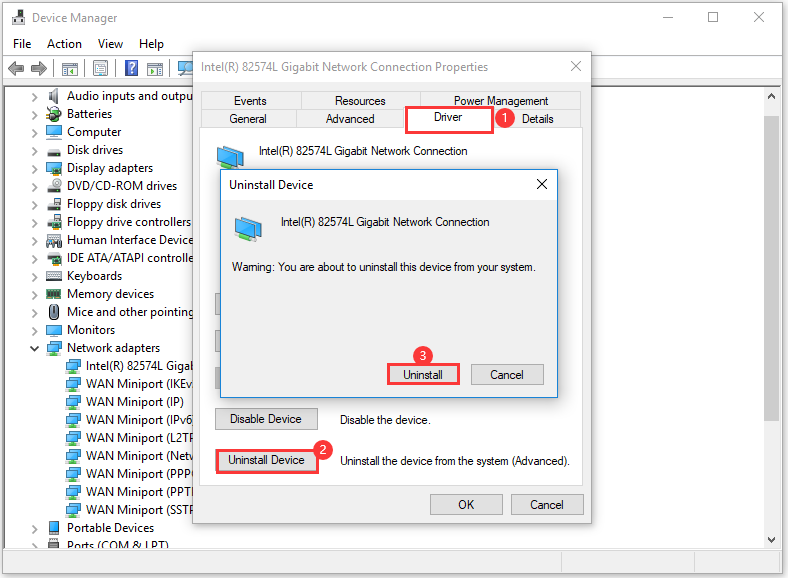
Step 1: After opening the Run dialogue window, type devmgmt.msc and click the Enter key to open the Device Manager.
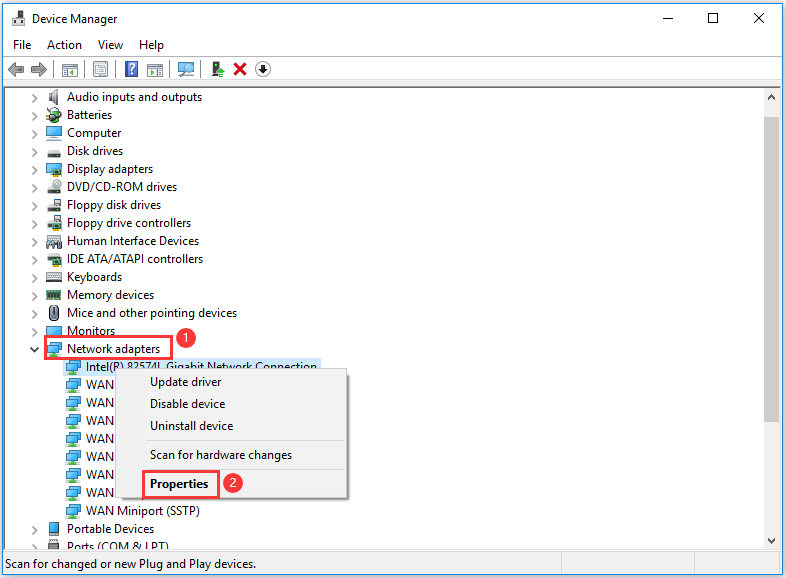
Step 2: In the Device Manager, scroll down the installed devices list to find Network Adapters. Double click to expand it, and then right click on the entry related to your Wi-Fi driver and choose Properties from the context menu.
Step 3: In the next window, go to the Driver tab and click on Uninstall Device option at the bottom left of the window. Then, click on Uninstall in the confirmation window to finish the uninstallation operation.
Solution 4: Remove the MSI Live Update Program
If the blue screen error is related to amifldrv63.sys or NTIOLib_X64.sys file but the error doesn’t appear at the startup moment, it is probably the fault of the MSI Live update program. And that has been proved to be true.
Some users uninstall the MSI Live update program after encountering the amifldrv.sys BSOD error and it works. Here are steps to uninstall the MSI Live update program.
Step 1: Open the Run window, and then type appwiz.cpl and click Enter.
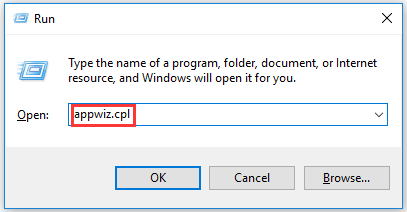
Step 2: Drop down the application list and find the MSI Live update program. Right click on the program and choose Uninstall option from the pop-up menu.
Step 3: Then, follow the on-screen instruction to finish the uninstallation. After that, restart your computer and check if the BSOD error is fixed successfully.
Solution 5: Run Memory Diagnostic Program
Windows Memory Diagnostic is a built-in utility in Windows that can help you fix some issues related RAM like fatal error with your computer. Therefore, you can consider running the program when you receive the amifldrv64.sys error.
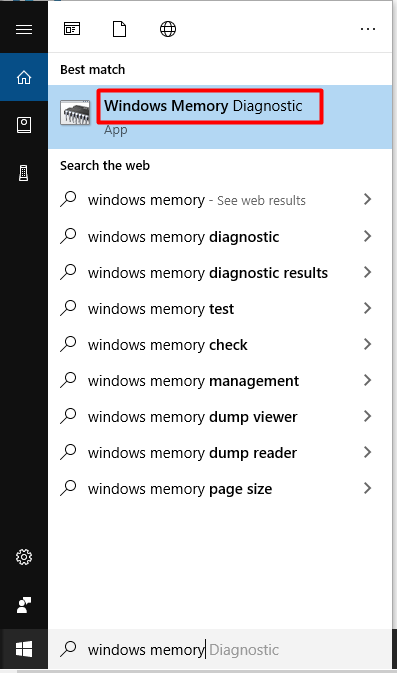
Step 1: Type windows memory diagnostic or a shorter one mdsched in the search box, and then choose Windows Memory Diagnostic from the prompted list.
Step 2: In the next window, click on Restart now and check for problems (recommended) to go on.
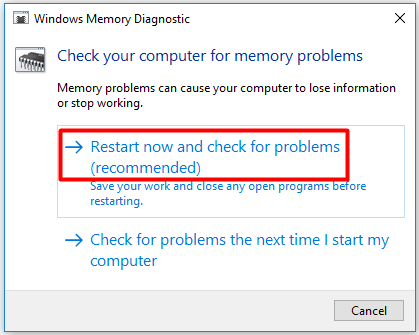
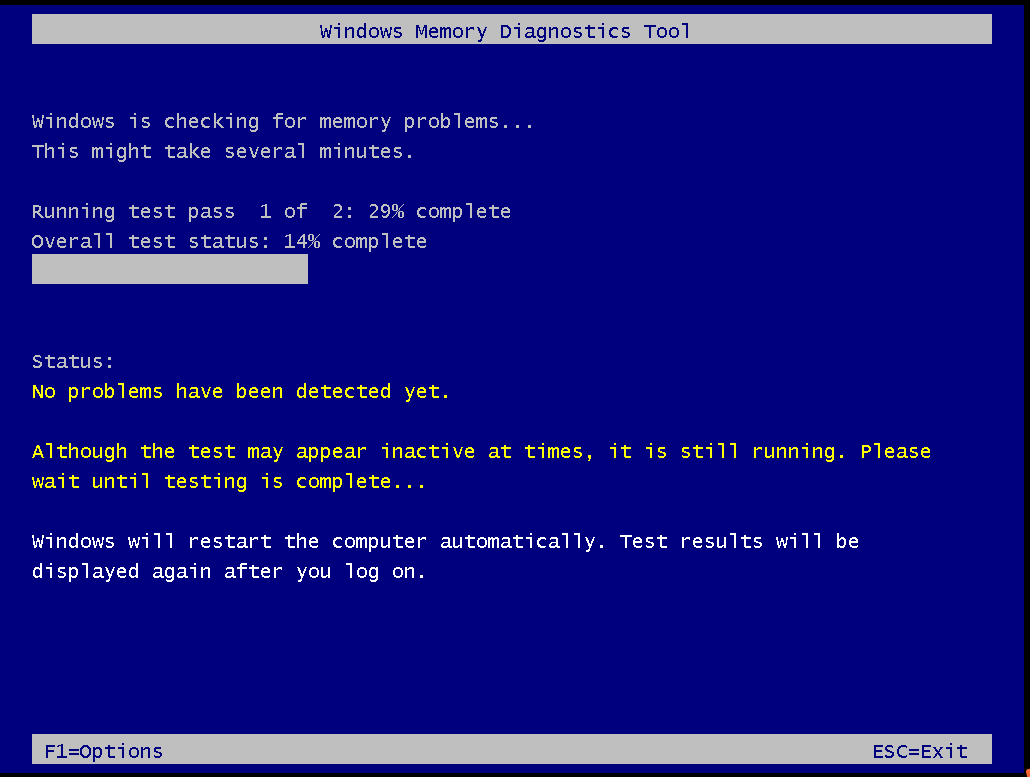
Step 3: The Windows Memory Diagnostic Tool will run automatically, and you just need to wait patiently. After scanning the computer, it will show you all the detected results after logging on it again.
Solution 6: Perform a Repair Install
If all the above methods fail to fix the amifldrv64.sys BSDO error, performing a repair install instead. This operation will refresh every OS component for you to take the place of the corrupted instances.
How to do that? There is a complete guide to perform a repair install, which offers you the detailed steps for that.
Solution 7: Restore Your Computer to Previous State
Alternatively, you can also restore your computer to a previous state in which your computer runs normally. Though this operation can cancel some changes you made on the computer and cause some data missing, this way enables your Windows to run properly again.
This way is very convenient. How to restore computer to earlier date in Windows 10/8/7? There are 2 available methods for you, so you can pick one based on your demand.
Conclusion
All the methods to fix the troublesome error amifldrv.sys BSOD have been offered for you. Now, it’s time to make a choice. Which method to select? All of them are available for you. You can choose one as you like. If you are not sure about it, just try them one by one until the error is fixed successfully.
If you have any new ideas related to the amifldrv.sys BSOD Windows 10, please share them with us in the below comment area. You can send any suggestion or advice in the form of an email via [email protected].
User Comments :