Do you get the message “Virtual Disk Service error: There is not enough usable space for this operation” when you try to create a new partition on a hard disk using the DiskPart utility? How can you fix this error? Read this post from MiniTool Partition Wizard to know the answer.
If you encounter the error ” Virtual Disk Service error: There is not usable enough space for this operation” while creating/extending partitions on your hard drive using the DiskPart utility. Well, you cannot create new partitions because there is not enough free space on your hard disk.
The complete error message displayed by the DiskPart utility could be either of the two:
Virtual Disk Service error: There is not enough usable space for this operation.
There is not enough free space on Specified disk(s) to extend the volume.
To solve the “Virtual Disk Service error: There is not enough usable space for this operation” problem, you can try the following methods.
Way 1: Use an Alternative to DiskPart
If you are eager to create or extend partition on the hard disk, you can consider taking advantage of an alternative to DiskPart. Here we highly recommend you use MiniTool Partition Wizard. It is a professional partition managing program that helps you create/wipe/delete/resize/extend/format partitions and other advanced features such as Copy Disk, Check File System, Data Recovery, and so on.
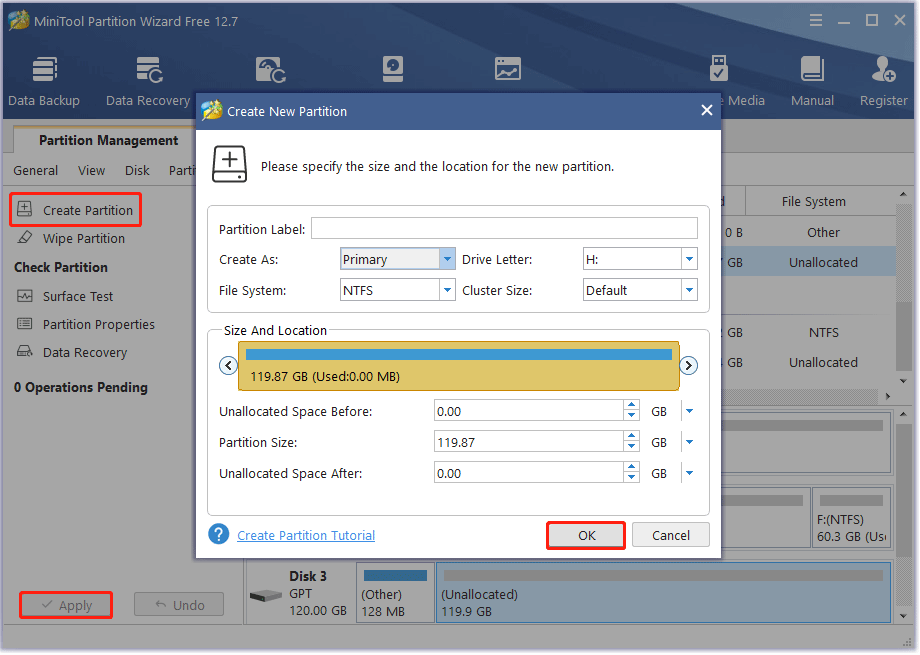
To use MiniTool Partition Wizard to create a partition on your hard disk, you can follow the steps below.
Step 1: Download and install MiniTool Partition Wizard on your PC.
MiniTool Partition Wizard FreeClick to Download100%Clean & Safe
Step 2: Launch this program to enter its main interface.
Step 3: Click on the unallocated space and choose the Create Partition option.
Step 4: In the pop-up window, set parameters and click OK > Apply to execute the operation.
Way 2: Check the Partition Style of Your Disk
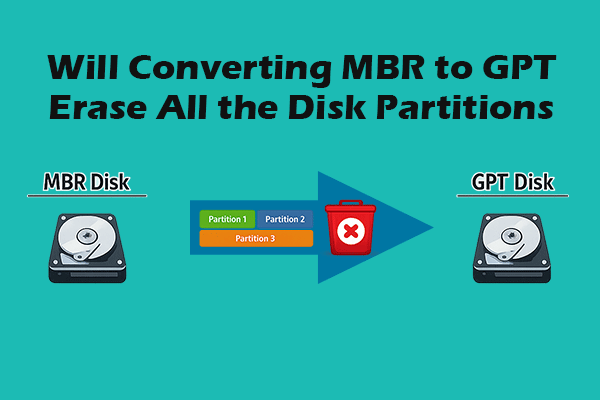
One possible cause of this error is a limitation of MBR disks. If your disk uses Master Boot Record, you cannot create more than 4 partitions on the disk.
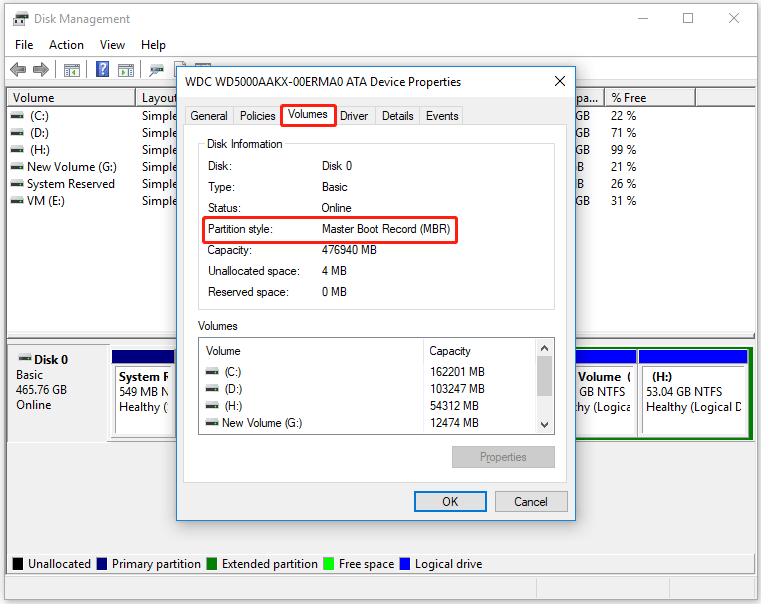
To check the partition type of the hard disk, follow the steps below:
Step 1: Press the Win + R key to open the Run dialog box. Then type diskmgmt.msc and press Enter.
Step 2: In the Disk Management window, right-click on your hard disk and select Properties.
Step 3: Select the Volumes tab. Then you will see the partition style of your hard disk.
If your hard disk partition type is MBR, and you already have 4 partitions, you need to convert it to GPT to create more partitions.
Way 3: Rescan Your Hard Disk
The Rescan command helps you detect new disks added to your computer. When this command is run, it detects configuration changes on the hard drive and updates the information. You can try running this command in Diskpart and see if it helps. Follow the steps below:
Step 1: Open Command Prompt as an administrator.
Step 2: Type diskpart and press Enter.
Step 3: Type Rescan and press Enter.
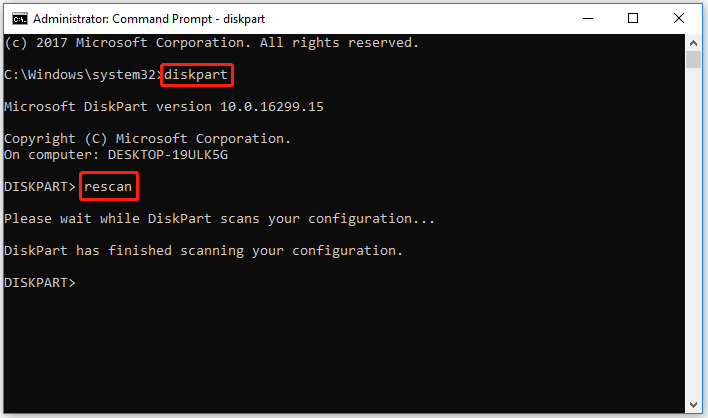
Once done, check if the “Disk Service error there is not enough usable space for this operation” persists.
Way 4: Shrink the Partition on Your Hard Disk
According to the error, your hard disk does not have enough free space. To fix this error, you can shrink the partition to leave unallocated space. After shrinking the partition, you should be able to create a new one.
You can use DiskPart to shrink the partition, but it might fail if you are not familiar with the commands. Therefore, you can also use MiniTool Partition Wizard to shrink a partition. This shrinking tool can shrink any partition that has free space without data loss with the Enhanced Data Protecting Mode enabled.
Let’s see how to shrink a partition in Windows 10/11 using the shrinking tool.
MiniTool Partition Wizard FreeClick to Download100%Clean & Safe
Step 1: Launch MiniTool Partition Wizard to access its main interface. Then select the partition that you want to shrink and choose the Move/Resize Partition feature from the left action panel or choose Move/Resize from the right-click menu.
Step 2: On the Move/Resize Partition window, you should:
- Tick the Using Enhanced Data Protecting Mode
- Move the slide handle to the left and click the OK
In this step, you can adjust the location of the partition and the unallocated space on the hard disk by dragging the entire partition handle.
Step 3: The software returns to the main interface. On the interface, preview the reduced result. If you are satisfied with it, you can click the Apply button to apply the change.

About The Author

Position: Columnist
Vega enjoys helping people with computer problems, including disk management, data recovery, data backup, and more. She is constantly expanding her knowledge in related fields. And she will continue to bring more easy-to-understand professional articles to help people solve various problems on the PC.
User Comments :