In Disk Management, you can see an option labeled by Shrink Volume after clicking an NTFS partition. What does the option do? Simply put, it can decrease the space of a partition to create unallocated space. Now follow the guide from MiniTool Partition Wizard to learn more about “what does Shrink Volume do”.
Windows allows you to perform advanced storage tasks using Disk Management, such as partitioning a hard drive, assigning a drive letter to a partition, extending partition, shrinking partition, and so on. It is easy to perform these tasks, but before performing them, you can spend some time learning about what they do. In this post, we discuss “what does Shrink Volume do in Disk Management”.
Shrink Volume Windows 10
What does Shrink Volume do in Disk Management? When to use Shrink Volume? How to access Shrink Volume in Disk Management? These questions are discussed below.
What Does Shrink Volume Do in Disk Management?
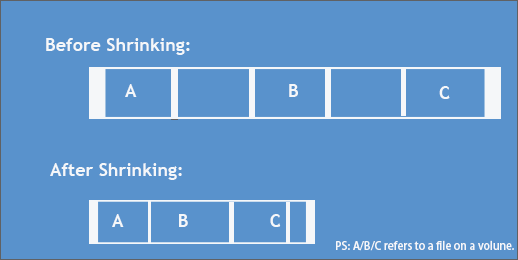
Shrink Volume is one of the functions of Disk Management. When you activate the function, any ordinary files will be automatically relocated on the partition to decrease the space of the partition and create unallocated space.
When to Use Shrink Volume?
Shrinking volume eventually creates unallocated space. So, there are two main intentions or reasons for shrinking a volume.
One is using the unallocated space to create a new volume for storing important files, setting up SSD over-provisioning, and so on. The other is extending the size of the adjacent volume (using Disk Management).
How to Access Shrink Volume in Disk Management?
To access this function, you just need to right-click the Windows icon on the taskbar, choose the Disk Management option, and right-click the partition you want to shrink. You will see the function in Disk Management.
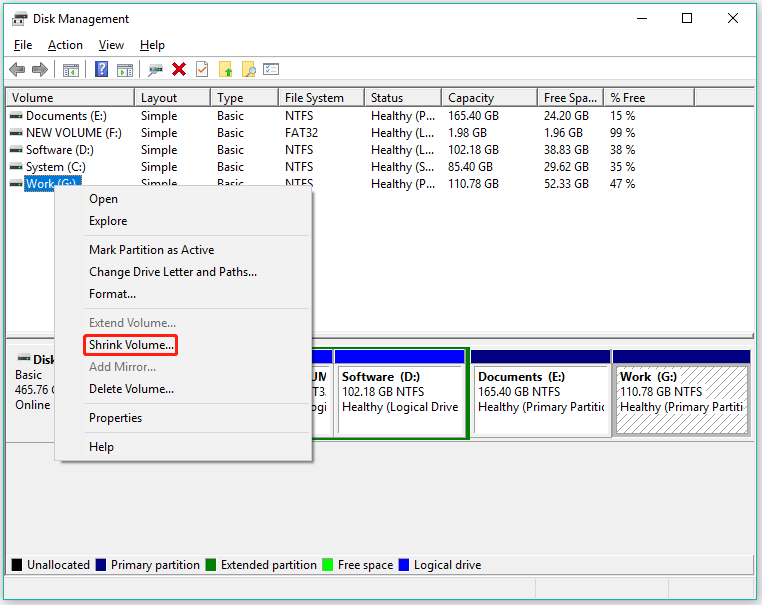
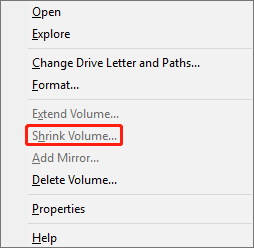
If the function is in the state like the above image, you can directly choose it and follow the on-screen instructions to shrink the volume. But if you find Shrink Volume is greyed out like the following image, you need to make some changes to make it available.
The “Shrink Volume greyed out” issue can lie in the following causes:
The partition is not an NTFS partition or RAW partition. Disk Management allows you to only shrink the RAW and NTFS partition. To break the limitation, you can convert the files system of the partition to NTFS and then shrink it with the Windows tool, or use the shrinking tool like MiniTool Partition Wizard.
There are unmovable files at the end of the partition. Or, there is some virtual memory on the partition. Certain files, like paging files and the shadow copy storage area, cannot be automatically relocated, but the volume that contains such files can be shrunk to the point where these files are located.
In this case, you can try transferring virtual memory from the volume you want to shrink to another volume to make the option available in Disk Management.
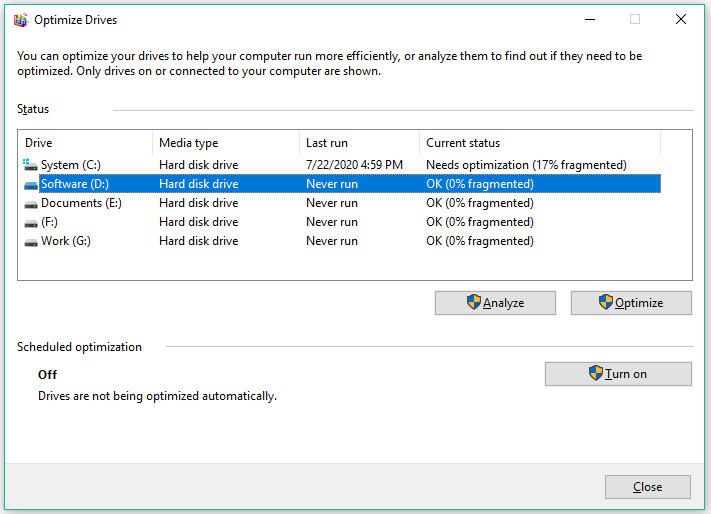
There are some disk fragments on the partition of an HDD. In this case, you can defrag the volume to make Shrink Volume available. The steps to defrag a drive are as follows:
- Press Windows + E to call out File Explorer.
- Right-click the partition you want to shrink and choose the Properties option.
- Switch to the Tools tab and then click the Optimize option.
- Select the partition you want to shrink again and click the Optimize button.
- Wait until the defragging process ends.
How to Shrink Volume in Windows 10?
To safely shrink a volume in Windows 10, you can use Disk Management as well as other shrinking tools like DiskPart and MiniTool Partition Wizard.
Editor’s Choice: Shrink Volume via MiniTool Partition Wizard
This way can safely shrink a partition that uses the file system like NTFS and FAT32 within three steps:
- Choose Move/Resize Partition.
- Determine how much space you want to decrease.
- Click Apply.
MiniTool Partition Wizard FreeClick to Download100%Clean & Safe
Now follow the tutorial below to use one of the three utilities to shrink the volume.
Shrink Volume via Disk Management
Several steps are required to shrink a volume using Disk Management and they are:
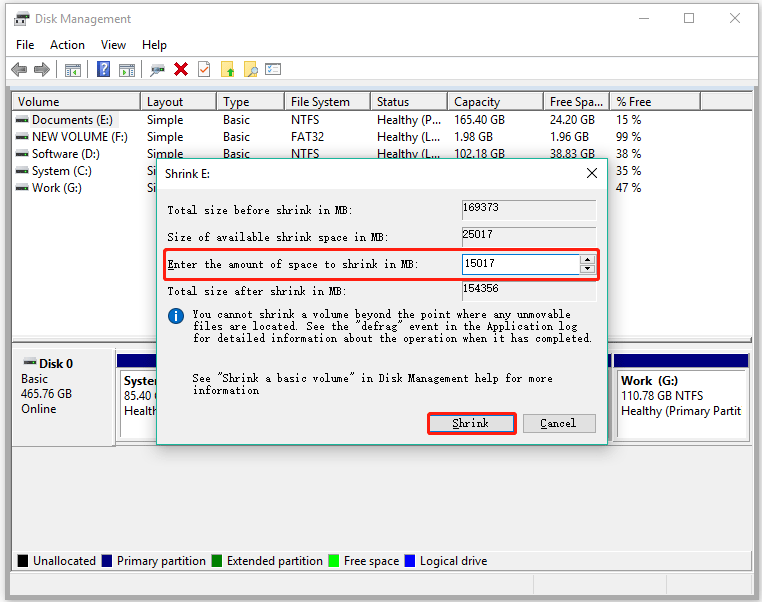
Step 1: Access the Shrink Volume option in Disk Management.
Step 2: Wait for Disk Management to query available space to shrink.
Step 3: When you see a pop-up window, enter the size (in MB) you want to decrease and then click the Shrink button.
Shrink Volume via DiskPart
Alternatively, you can use DiskPart, another Windows built-in tool, to shrink a volume. But note that this tool has the same limitations as Disk Management.
Here is how to shrink volume in Windows 10 using DiskPart:
Step 1: Run the DiskPart utility.
- Press Windows + R to call out the Run window.
- Enter diskpart into the Run window and then hit the Enter key.
Step 2: Once the utility runs, input the following commands and hit the Enter key after inputting.
list volume
select volume # (replace # with the volume number, e.g., select volume 3)
shrink desired = * (replace * with the amount of space you want to shrink, e.g., shrink desired = 1024)
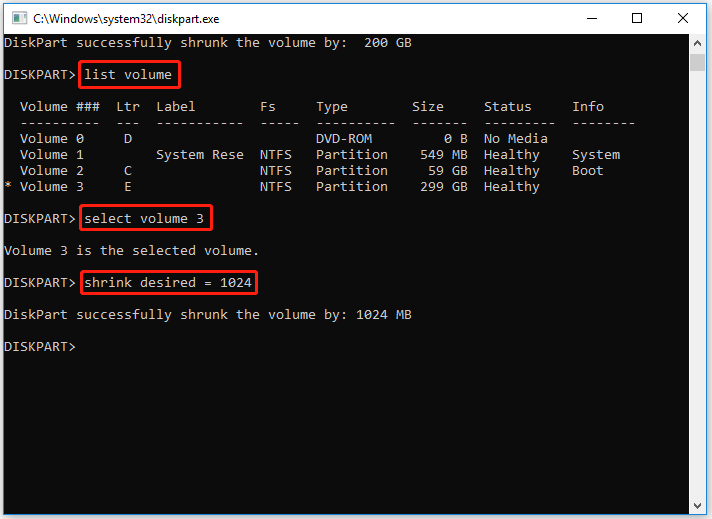
Step 3: When you receive the message saying “DiskPart successfully shrunk the volume by: …”, you can input Exit and hit the Enter key to close DiskPart.
Shrink Volume via MiniTool Partition Wizard
In addition, you can use MiniTool Partition Wizard to shrink a volume in Windows 10. This shrinking tool can shrink any partition that has free space without data loss with the Enhanced Data Protecting Mode enabled.
Plus, it is a comprehensive tool that can check and fix file system errors, migrate Windows operating system, recovery data and partitions, rebuild MBR, and so on.
Let’s see how to shrink a volume in Windows 10 using the shrinking tool.
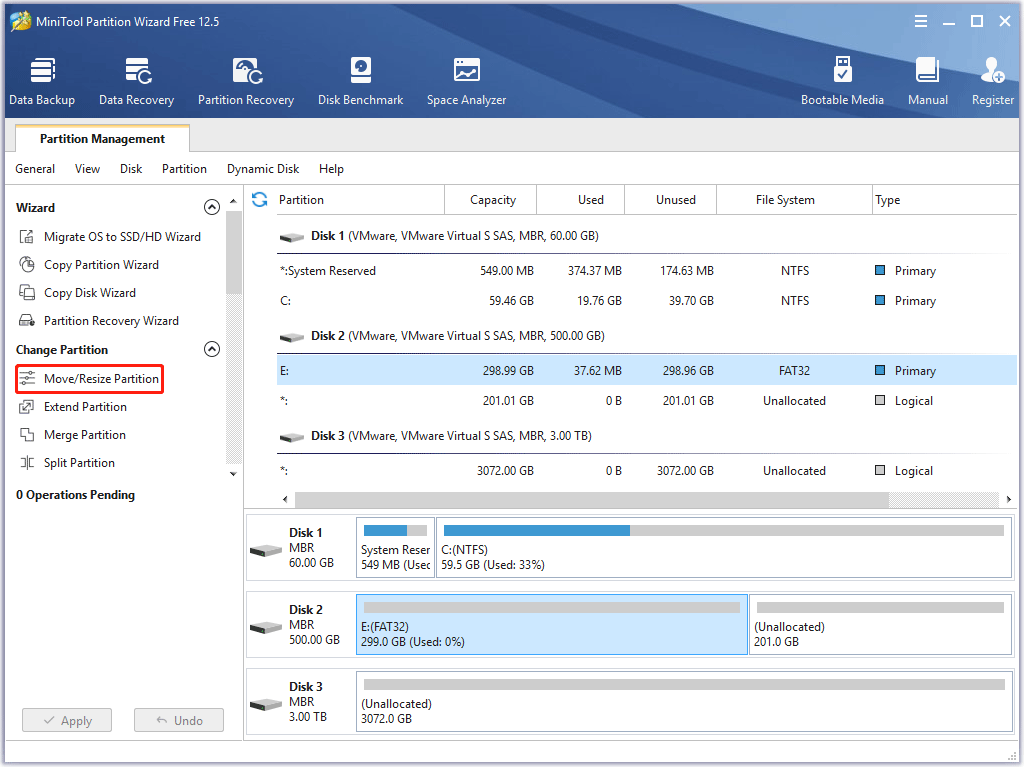
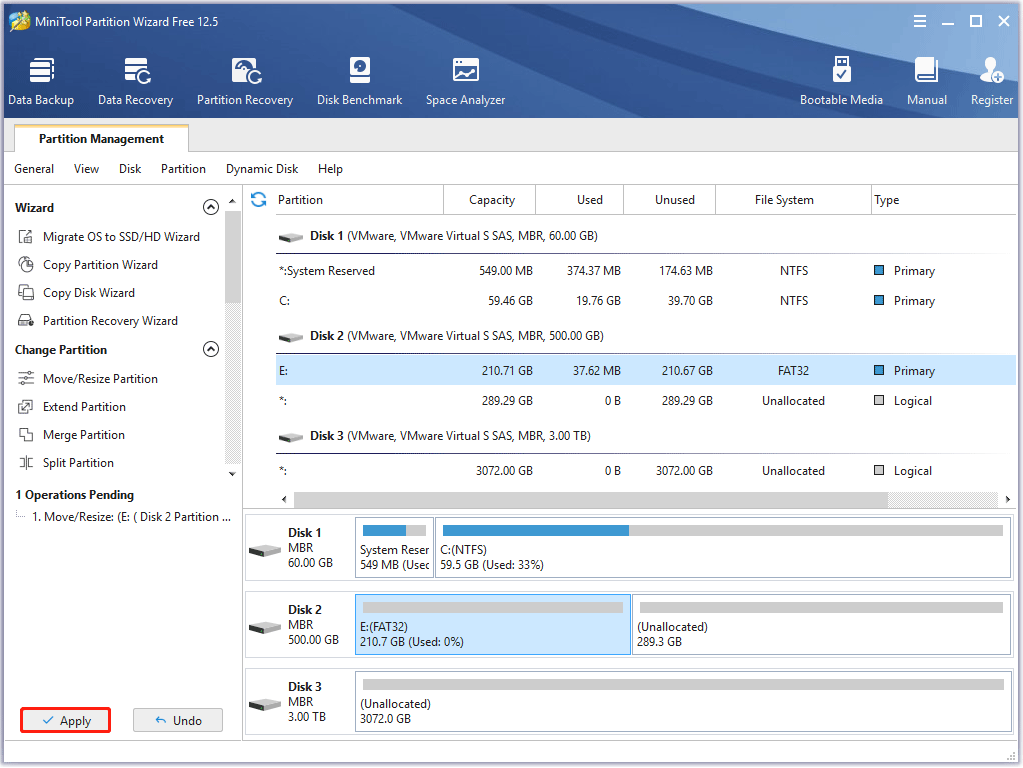
Step 1: Launch MiniTool Partition Wizard to access its main interface. Then select the partition that you want to shrink and choose the Move/Resize Partition feature.
MiniTool Partition Wizard FreeClick to Download100%Clean & Safe
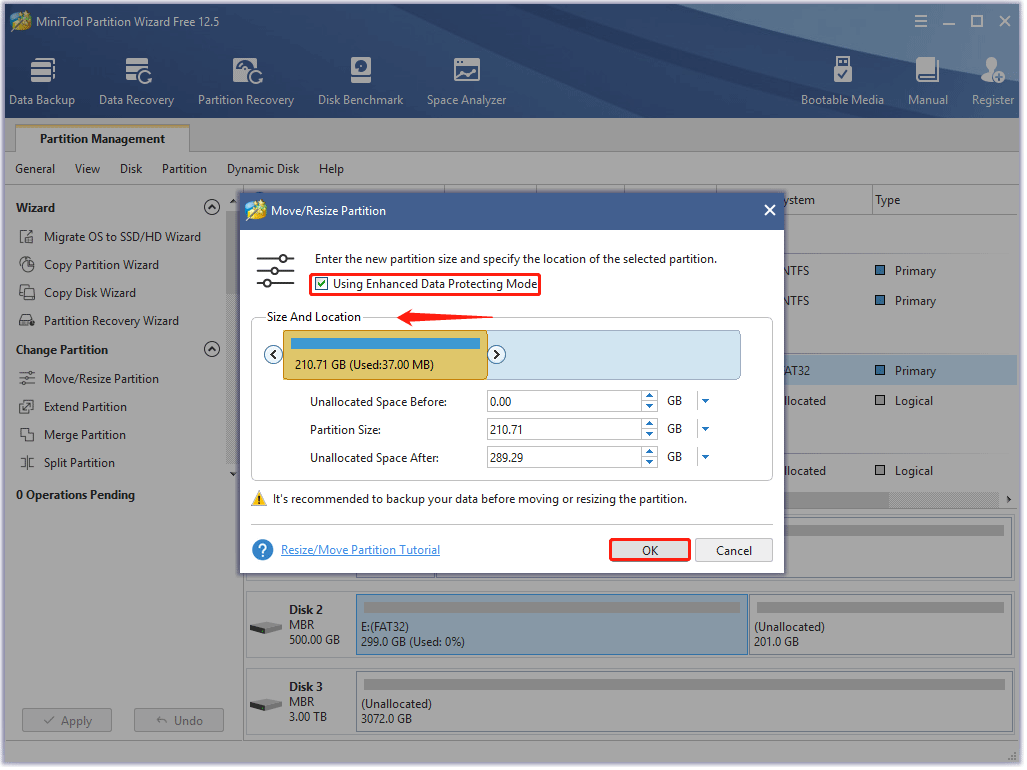
Step 3: On the Move/Resize Partition window, you should:
- Keep the Using Enhanced Data Protecting Mode option ticked.
- Move the slide handle leftward and then click the OK button.
Step 3: The software returns to its main interface. On the interface, preview the shrinking result. If you are satisfied with it, you can click the Apply button to let the software perform the task.
What to Do After Shrinking a Volume?
After shrinking a volume, you get new unallocated space and you can use it to create a new partition or extend a partition. So, here we continue to show how to easily complete the two things with the help of MiniTool Partition Wizard.
MiniTool Partition Wizard FreeClick to Download100%Clean & Safe
Create a New Volume
It is easy to create a volume in Windows 10 whether you use Disk Management, DiskPart, or MiniTool Partition. However, some rules must be learned about. Otherwise, you might fail to create a volume and receive error messages, like “No Free MBR Slot”.
Here are the rules:
- On an MBR disk, you can create up to four primary partitions or three partitions and one extended partition (containing numerous logical partitions).
- On a GPT disk, you can create up to 128 partitions.
So, check your disk is using MBR partition style or GPT partition style. You can launch MiniTool Partition Wizard and then see if your disk is labeled by MBR or GPT.
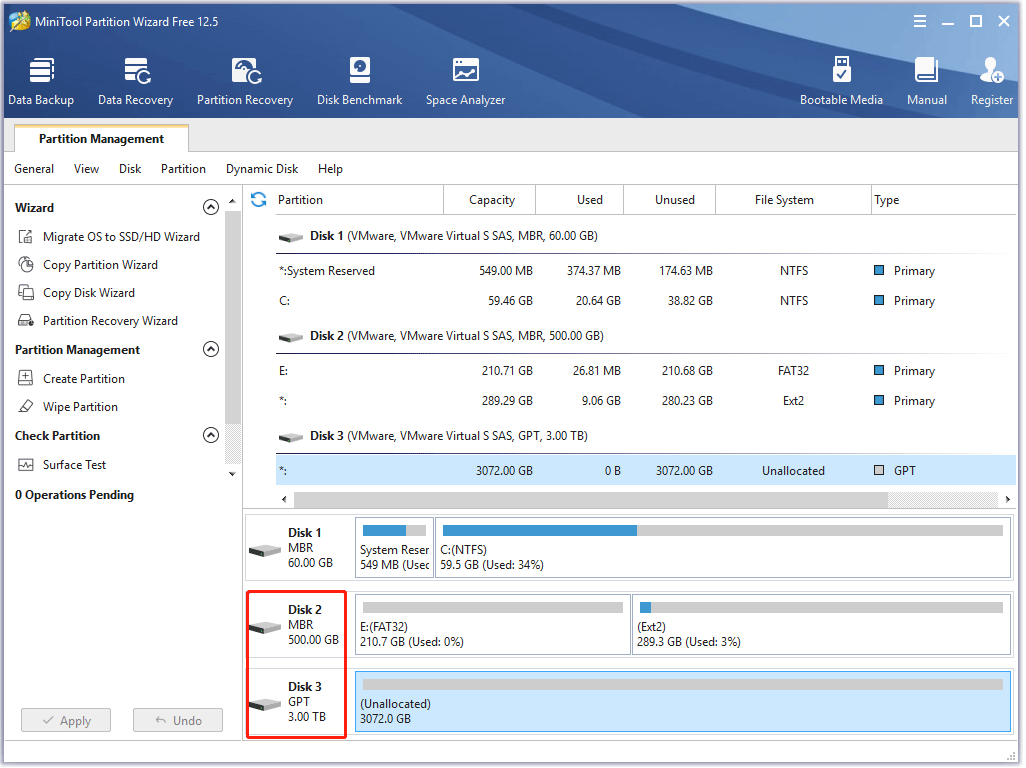
After learning about the partition style of your disk, you can create a volume based on the aforementioned rules.
Here is how to create a new partition on unallocated space with MiniTool Partition Wizard.
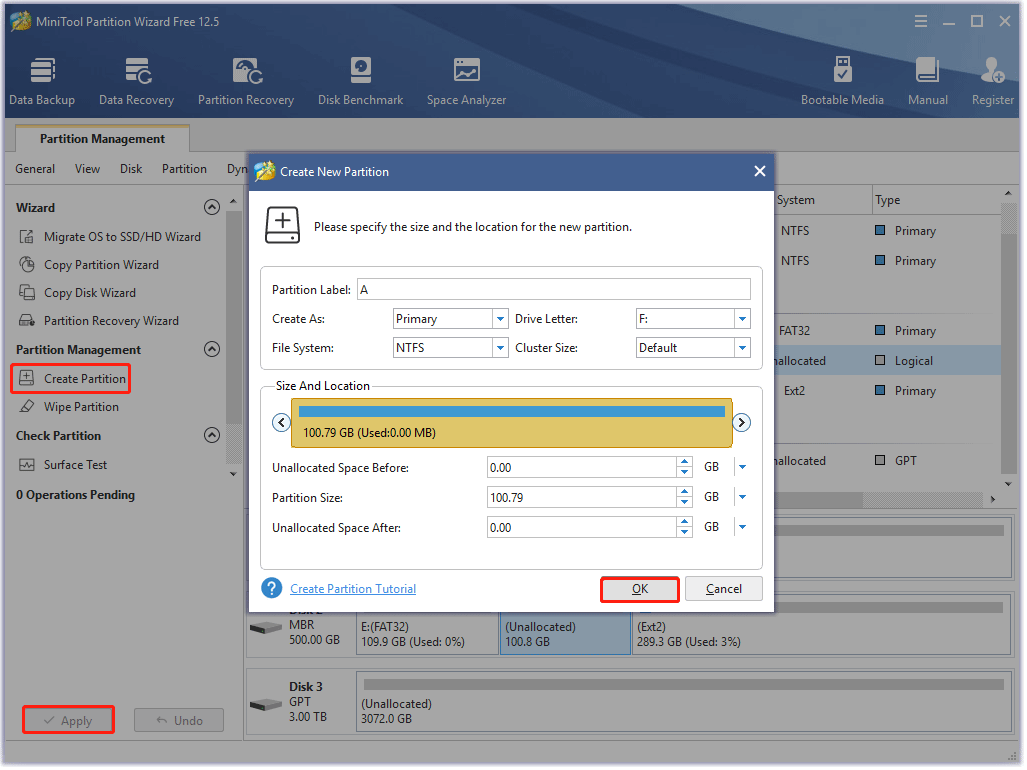
- On the MiniTool software’s interface, select the unallocated space and then choose the Create Partition option from the left side.
- On the Create New Partition window, confirm the parameters including partition type, drive letter, file system, cluster size (optional), and partition size. After that, click the OK button.
- Preview the creation result and click the Apply button.
The MiniTool software begins to execute the task and can complete it in a few seconds. Once the partition is created, you can use it for storing files.
Extend a Volume
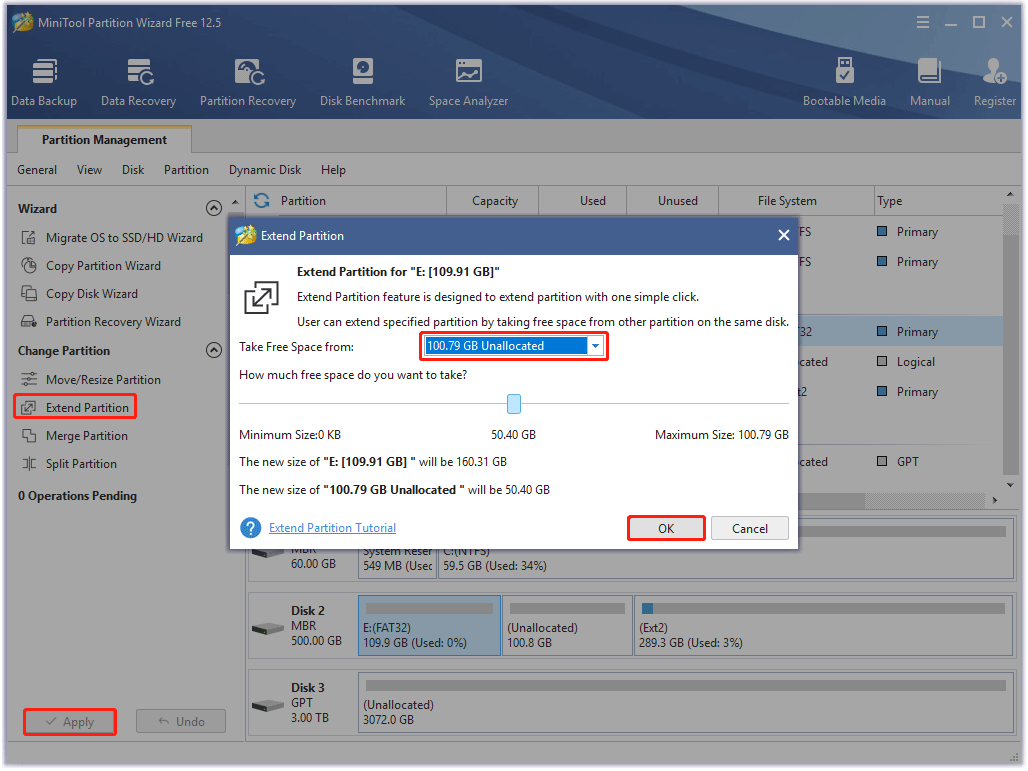
Disk Management only allows you to extend a volume when there is unallocated space after the volume. Well, how to extend a volume which is not in that case? You can try MiniTool Partition Wizard. Its Extend Partition feature can be used when there is unused space on your hard drive. The operations are as follows:
- Launch the MiniTool software and get access to its main interface.
- Select the partition you want to extend and then choose the Extend Partition feature from the left side.
- On the Extend Partition window, choose the unallocated space from the drop-down menu of Take Free Space from. Then, determine how much free space you want to take. Finally, click the OK button.
- Preview the result and then click the Apply button.
Final Thoughts on Shrinking Volume
What does Shrink Volume do in Disk Management? Shrinking volume can decrease the space of a partition by relocating the files on it. So, shrinking a volume might lead to data loss if the process is interrupted.
To protect data integrity, especially it in C drive, please back up it before shrinking it using the Windows built-in tools. Or you can try MiniTool Partition Wizard, its Enhanced Data Protecting Mode function can secure data on the partition that you want to shrink. But if you want to resize the C drive, please try its bootable version.
That’s all about “Shrink Volume Windows 10”. If you have any questions about the subject, please leave them in the comment zone; if you run into some issues when using MiniTool software, please do not hesitate to contact us via [email protected]. Regardless of your comment or email, we will reply to you as soon as possible.
User Comments :