Don’t panic when you run into the “system repair disc could not be created” issue in Windows 10/11. In this post, MiniTool Partition Wizard introduces a detailed guide on how to fix the issue. You can take it as a reference and work out your problem effectively.
System Repair Disc Could Not be Created
The “system repair disc could not be created Windows 10/11” issue is a common issue that occurs when you are trying to create a system repair disc for your PC. When the issue happens, you may receive one of the following error messages:
- The parameter is incorrect. (0x80070057)
- The request could not be performed because of an I/O device error. (0x8007045D)
- The system cannot find the path specified. (0x80070003)
- There is no media in the device. (0xC0AA0202)
- …
To help you with the annoying issue, this post summarizes several feasible troubleshooting fixes below. You can have a try.
Fix 1: Temporarily Disable the Antivirus
The antivirus programs on your computer may sometimes recognize the system repair disc creation as a threat and interfere with the process. As a result, the “system repair disc could not be created the parameter is incorrect” issue may come out. To avoid it, you’d better disable the antivirus temporarily.
You can execute the operation with this guide: How to Disable Antivirus on Windows 10 Temporarily/Permanently.
Fix 2: Run SFC and DISM
Corrupted system files may cause the “system repair disc could not be created the parameter is incorrect” issue as well. In this case, you can try to fix it by running SFC and DISM scans.
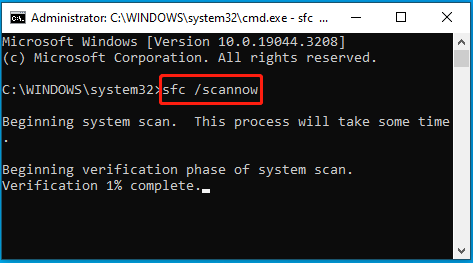
Step 1: Search for Command Prompt in the search bar. Then right-click Command Prompt in Best match and select Run as administrator.
Step 2: In the elevated Command Prompt, type sfc /scannow and press Enter.
Step 3: Wait for the process to complete. Then restart your computer and open Command Prompt as an administrator again.
Step 4: After that, execute the DISM /Online /Cleanup-Image /RestoreHealth command.
Step 5: Once done, restart your PC to see if the issue disappears.
Fix 3: Use CHKDSK
File system errors and bad sectors on your drive may also lead to the “system repair disc could not be created Windows 11/10” issue. To fix it, you may need to check and fix disk errors with the CHKDSK utility. Just open Command Prompt with administrative rights and then run the chkdsk *: /f /r command. * represents your drive letter.
Fix 4: Update Your Windows
When facing the “system repair disc could not be created Windows 10/11” issue, updating your system to the latest version may help solve it. Simply choose a Windows update method from this guide to update your Windows.
Fix 5: Shrink the Hard Drive
In some cases, shrinking the drive used for creating the system repair disc may help you fix the “system repair disc could not be created Windows 11” issue. To do this, follow the steps below.
Step 1: Right-click the Start icon and select Disk Management.
Step 2: Locate and right-click the partition on the target hard drive and select Shrink Volume.
Step 3: In the pop-up window, enter a specified number to determine the amount of disk space to shrink in MB. Then click Shrink to execute the operation.
Further reading:
If you cannot shrink volume via Disk Management, we’d like to recommend you make use of MiniTool Partition Wizard. It’s a free partition manager that enables you to shrink Windows partition with ease. Besides, you can also use it to partition/clone hard drive, convert MBR to GPT, recover data from hard drive, etc.
MiniTool Partition Wizard FreeClick to Download100%Clean & Safe
When suffering the “system repair disc could not be created” issue, you can try to fix it with the above methods. If you have any problems with the issue, you can leave a message in our comment area below.
User Comments :