Here is a true example from the Microsoft forum:
I went to computer management and when I click disk management it empty.https://answers.microsoft.com/en-us/windows/forum/all/disk-management-is-empty/d2e2bdac-56ca-4cab-a447-9e924d663f28
If you also encounter the “Disk Management is blank” issue, you may wonder: why is my Disk Management empty? How to fix this problem? Don’t worry. Keep reading to know the answers.
# 1. Run SFC Scan
Corrupted system files may lead to the “Disk Management is empty” issue. In this case, you’d better use the SFC (System File Checker) tool to repair these system files. To do this, follow the given steps.
Step 1: Click Start, and then type cmd in the Start Search box.
Step 2: Right-click Command Prompt in the Programs list, and then click Run as administrator. If you are prompted for an administrator password or promotion, type your password or click Yes.
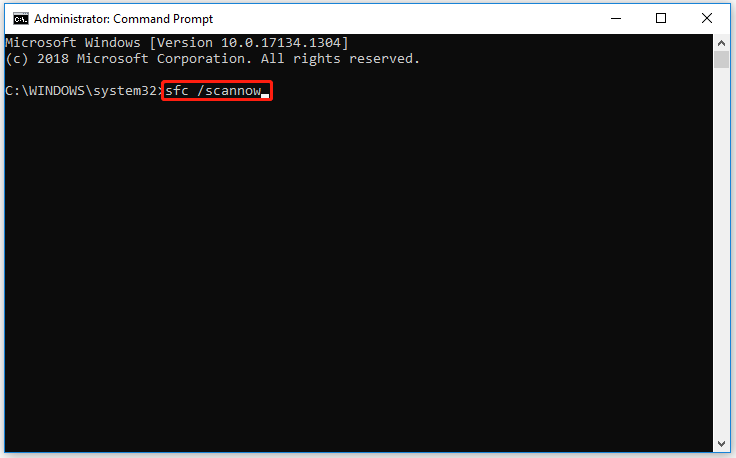
Step 3: At the Command Prompt window, type the following line, and then press Enter:
sfc /scannow
When the scan is complete, test to see whether the issue that you are experiencing is resolved.

# 2. Modify the Related Services
The main cause of “Disk Management is blank” is Logical Disk Manager stops working.
Step 1: Press the Win + R key to open the Run dialog box. Then type services.msc and press Enter.
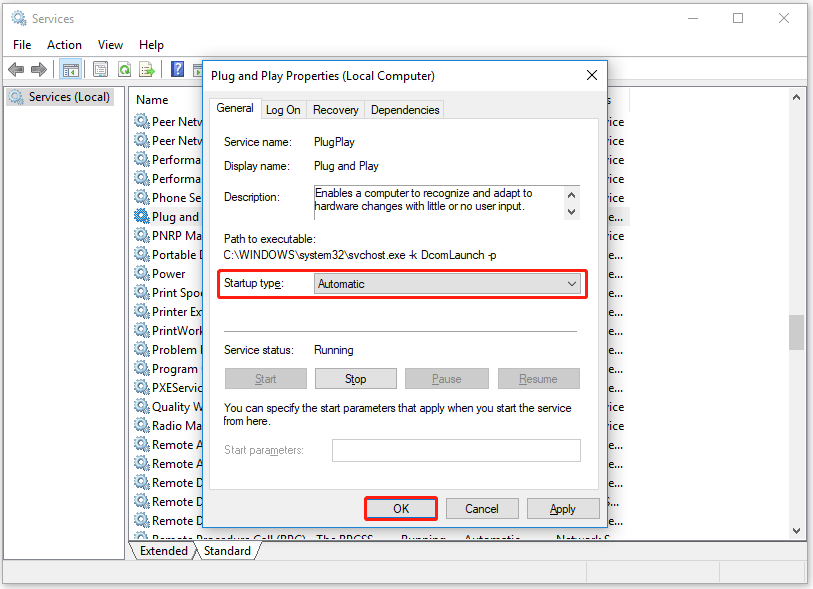
Step 2: In the Services window, scroll down to find the Plug and Play service. Then double-click it.
Step 3: In the next pop-up window, set the Startup type as Automatic.
Step 4: Click OK to save the changes.
Once done, you can open the Disk Management again to check if the Disk Management is blank.
![[Solved] Conversion from FAT32 to NTFS Is Not Available](https://images.minitool.com/partitionwizard.com/images/uploads/2023/06/conversion-from-fat32-to-ntfs-is-not-available-thumbnail.png)
# 3. Use an Alternative to Disk Management
Windows Disk Management has basic functions like formatting volumes, extending volumes, etc., but it still has limitations and some problems like Disk Management is empty, Format option grayed out, convert to MBR disk greyed out, etc.
So, we highly recommend you use a third-party partition manager as the alternative. MiniTool Partition Wizard is a great choice. It is a reliable partition manager that can help you do many works such as convert FAT32 to NTFS without data loss, format hard drives, perform disk benchmarks, migrate OS to SSD/HD, recover the lost partition, and so on.
To use MiniTool Partition Wizard to execute the desired task on your disk or partition, you can follow the steps below.
Step 1: Download and install MiniTool Partition Wizard on your PC.
MiniTool Partition Wizard FreeClick to Download100%Clean & Safe
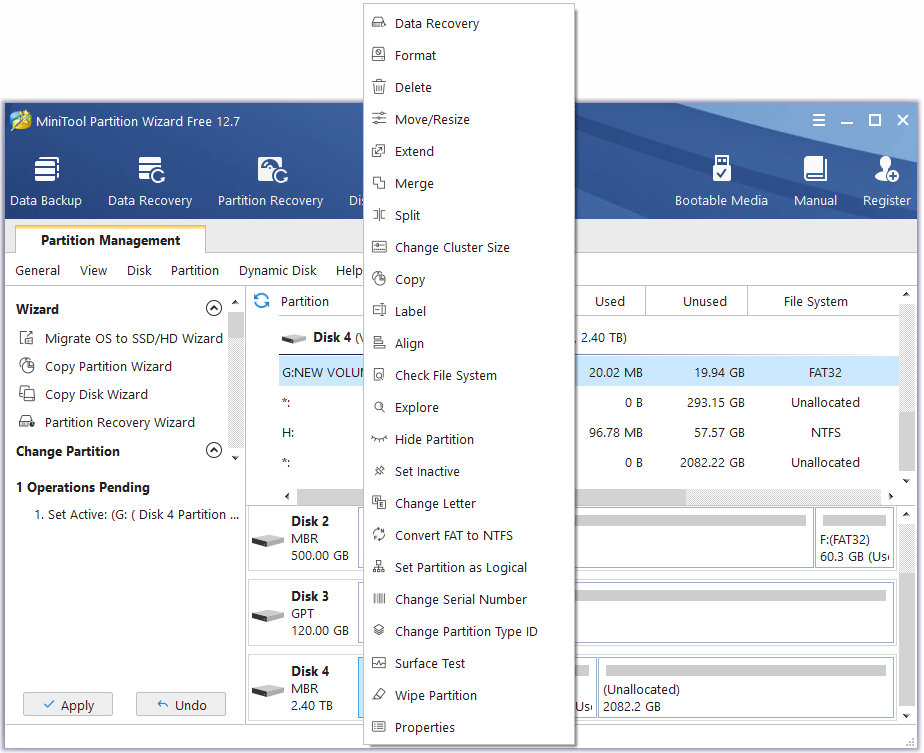
Step 2: Launch this partition manager to enter its interface.
Step 3: Right-click the target disk or partition, and then select the operation you want to perform. Alternatively, you can highlight the target disk/partition and then select the desired feature from the left action panel.
Step 4: Then follow the instructions to finish the operation. And for most operations, you need to click Apply to save the pending changes.
The steps to perform some operations using this software are very simple, just a few clicks. If you are interested in it, you can have a try.
About The Author

Position: Columnist
Vega enjoys helping people with computer problems, including disk management, data recovery, data backup, and more. She is constantly expanding her knowledge in related fields. And she will continue to bring more easy-to-understand professional articles to help people solve various problems on the PC.
User Comments :