This post of MiniTool Partition Wizard shows several methods to fix the “Maxtor external drive not working” issue. Besides, this post also introduces a way to recover data from the Maxtor external hard drive. Just follow this post to have a try!
Some users reported that their Maxtor external hard drives did not work normally on their computers and they wanted to recover data from the external hard drive. The reasons why Maxtor external drive is not working are various.
For instance, there is a possibility that the connection between the Maxtor external drive and the computer is unstable, or the USB port and data cable have issues. Also, if your external hard drive is a new disk, the disk may need to be initialized to display and use.
Besides, the Maxtor external drive may become a raw drive or its file system cannot be recognized by your PC. In addition, the outdated disk driver can lead to this issue. What’s more, there may be bad sectors on the external hard drive.
After knowing the reasons why Maxtor external hard drive cannot respond, there are several methods introduced below to help you fix this issue.
How to Fix “Maxtor External Drive Not Working” Issue
First, the “Maxtor external hard drive not responding” issue can be caused by a wrong cable or unstable connection. You can reconnect the Maxtor external hard drive through another USB cable to check if the issue still exists. If the issue is not caused by USB cable, you can refer to the following methods to fix this issue.
Method 1. Check the External Hard Drive State
You can use File Explorer and Disk Management to check the Maxtor external hard drive state. Follow the detailed steps below.
Step 1. After connecting the external hard drive to computer, go to File Explorer > This PC. You can view if the external hard drive shows up. If it does not show up in File Explorer, right-click the Windows icon and select Disk Management.
Step 2. In the pop-up window, you can check the state of your external hard drive.
- If the external hard drive shows as RAM or Unallocated, you can refer to the following method 6 to restore the data first, and then you can format the disk or create a new partition.
- If the external hard drive shows as Unknown, you need to initialize the disk and then create a partition.
- If your external hard drive displays as Offline, you can set the disk online in Disk Management. Right-click the disk and select Online.
- If your external hard drive displays as a new volume and does not have a drive letter, you can refer to this article to assign a letter.
Method 2. Disable USB Power-Saving Mode
You can attempt to disable the USB power saving mode to fix “Maxtor external drive not working” issue.
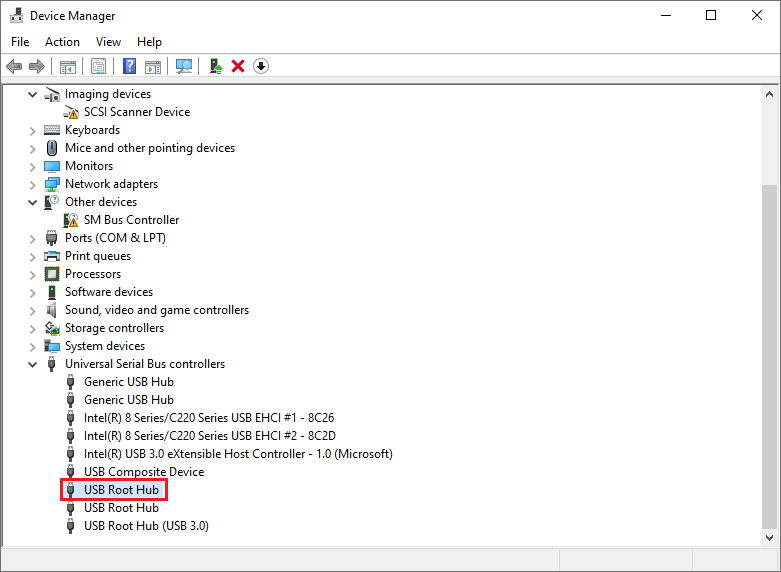
Step 1. Right-click the Windows icon and select Device Manger to open it. Then click Universal Serial Bus controllers to expand it and double-click USB Root Hub.
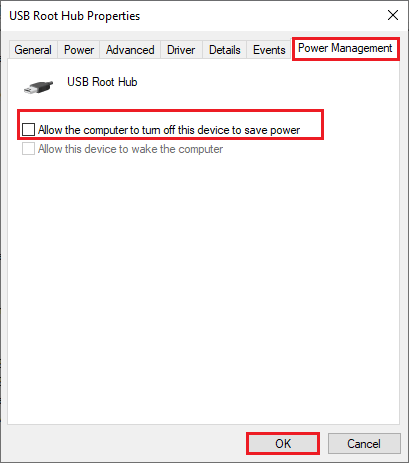
Step 2. In the pop-up window, click Power Management tab. Then uncheck the Allow the computer to turn off this device to save power box to disable it. click OK button to save change.
Method 3. Update the Disk Driver
If the disk driver is outdated, you can refer to the following steps to update the driver.
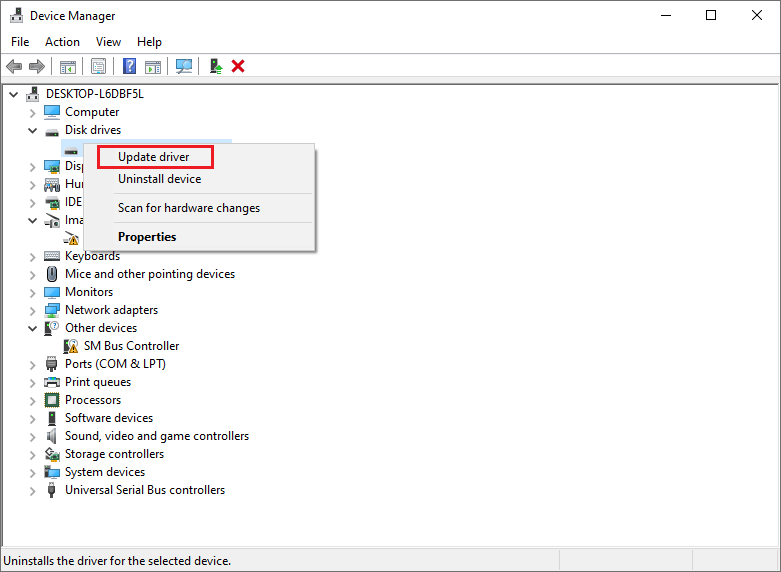
Step 1. Right-click the Windows icon and select Device Manger to open it. Then click Disk drives to expand it.
Step 2. Right-click your Maxtor external driver and select Update driver. Then you can follow the on-screen instructions to operate.
Step 3. After updating, restart your computer to check if the “Maxtor external hard drive not responding” issue is fixed.
Method 4. Check the Maxtor External Drive for Errors
The bad sectors on the hard drive can also lead to the “Maxtor external drive not working” issue. You can run CHKDSK to check the hard drive. Make sure your external hard drive is connected to the computer correctly and then follow the detailed steps below.
1. Check Hard Drive via Command Prompt
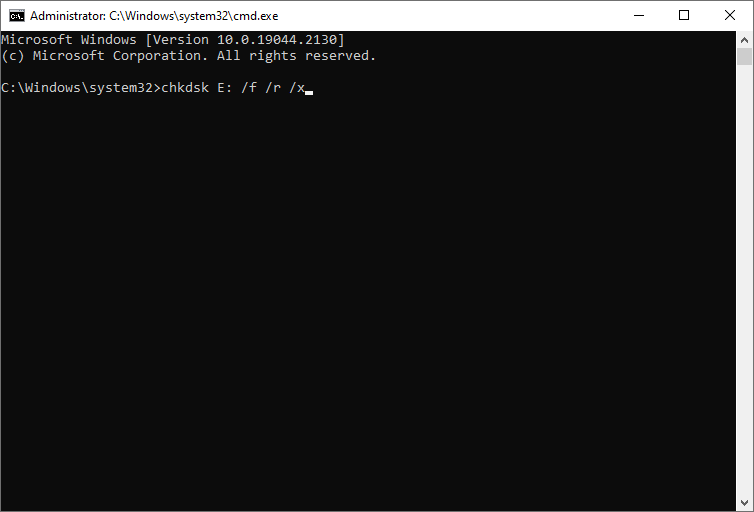
Step 1. Press Win + R keys on the keyboard to open Run box. Then type cmd in the box and press Ctrl + Shift + Enter keys to run it as administrator.
Step 2. When the Command Prompt window pops up, type chkdsk *: /f /r /x (* represents the drive letter of the selected hard drive) command and press Enter key to execute.
If you don’t remember the drive letter, you can view it in the Disk Management.
However, sometimes running CHKDSK in Command Prompt may be time-consuming. If you are not familiar with commands, there is a free CHKDSK repair alternative to repair the hard drive. You can use the Surface Test function of MiniTool Partition Wizard.
2. Check Hard Drive via MiniTool Partition Wizard
In addition to above method, you can use MiniTool Partition Wizard to check the hard drive. As a professional partition manager, MiniTool Partition Wizard can help you manage your disk and partition safely and conveniently. It has a number of useful functions.
For instance, the Surface Test and Check File System functions of MiniTool Partition Wizard can help you check the hard drive. Besides, its Copy Disk function can help you back up the data and disk easily.
In addition, if you want to move your operating system to another disk, you can use Migrate OS to SSD/HD Wizard function of MiniTool Partition Wizard.
Now follow the detailed steps below to check the hard drive by using MiniTool Partition Wizard.
Step 1. Download MiniTool Partition Wizard Free Edition, install and launch it to get its main interface.
MiniTool Partition Wizard FreeClick to Download100%Clean & Safe
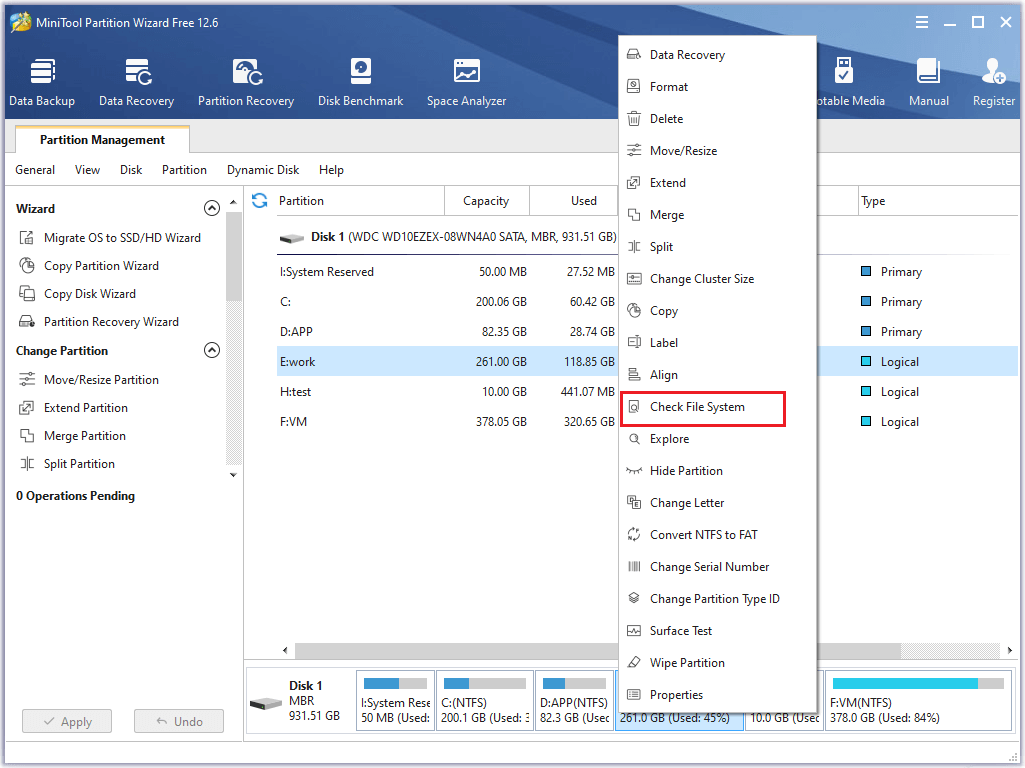
Step 2. Right-click the partition that you want to check and select Check File System to check and fix file system errors.
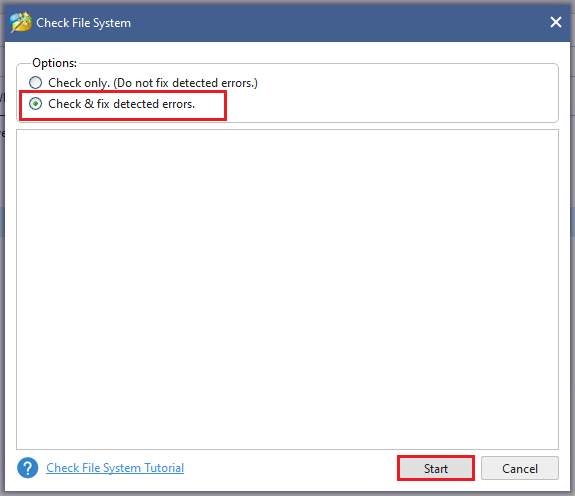
Step 3. In the pop-up window, click the Check & fix detected errors option according to your situation. Then click Start button.
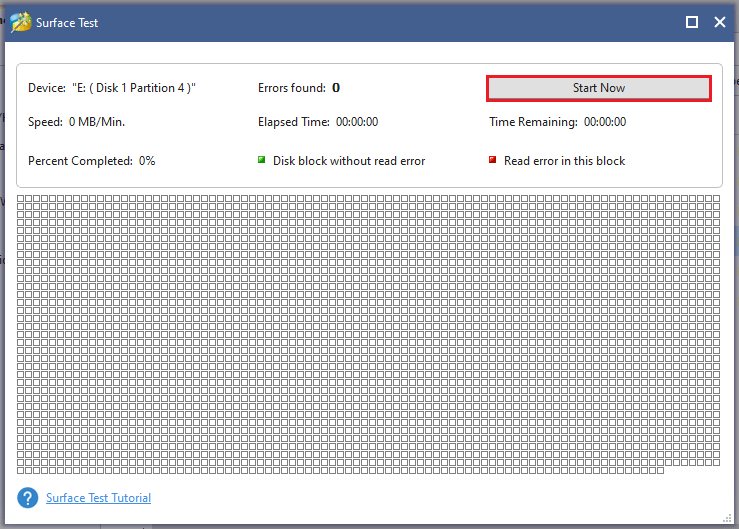
Step 4. Then right-click the partition that you need to further check if there is any bad sector and select Surface Test to check bad sectors on the hard drive.
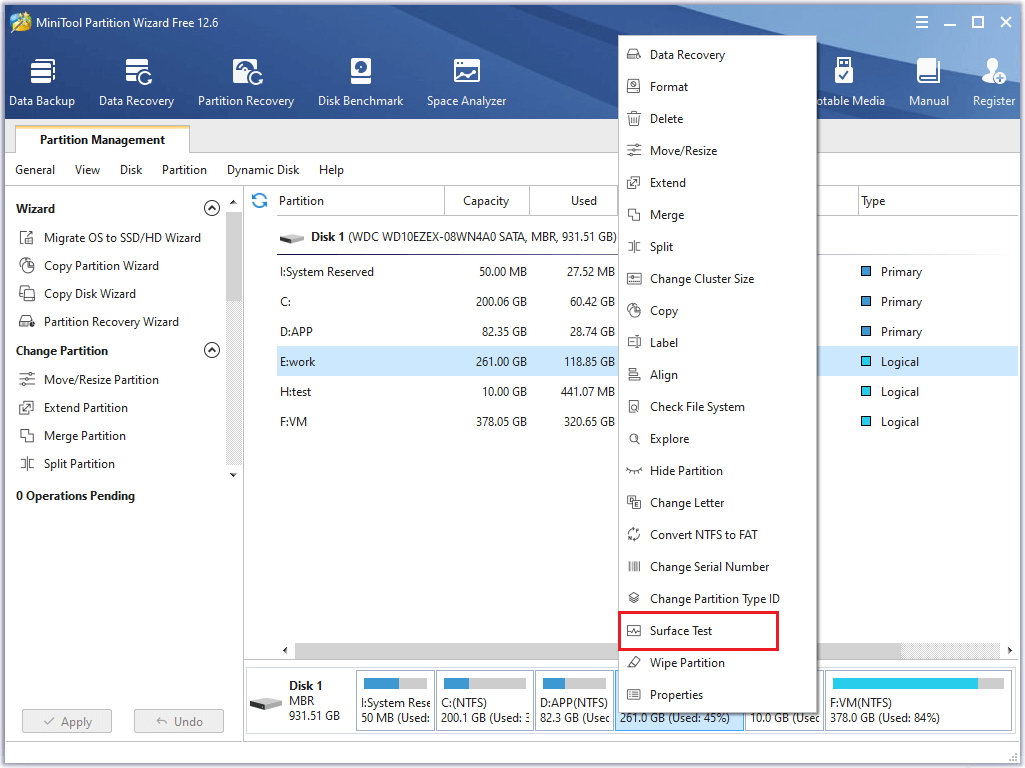
Step 5. In the pop-up window, click Start now button. If there are bad sectors, the blocks will be marked with red color.
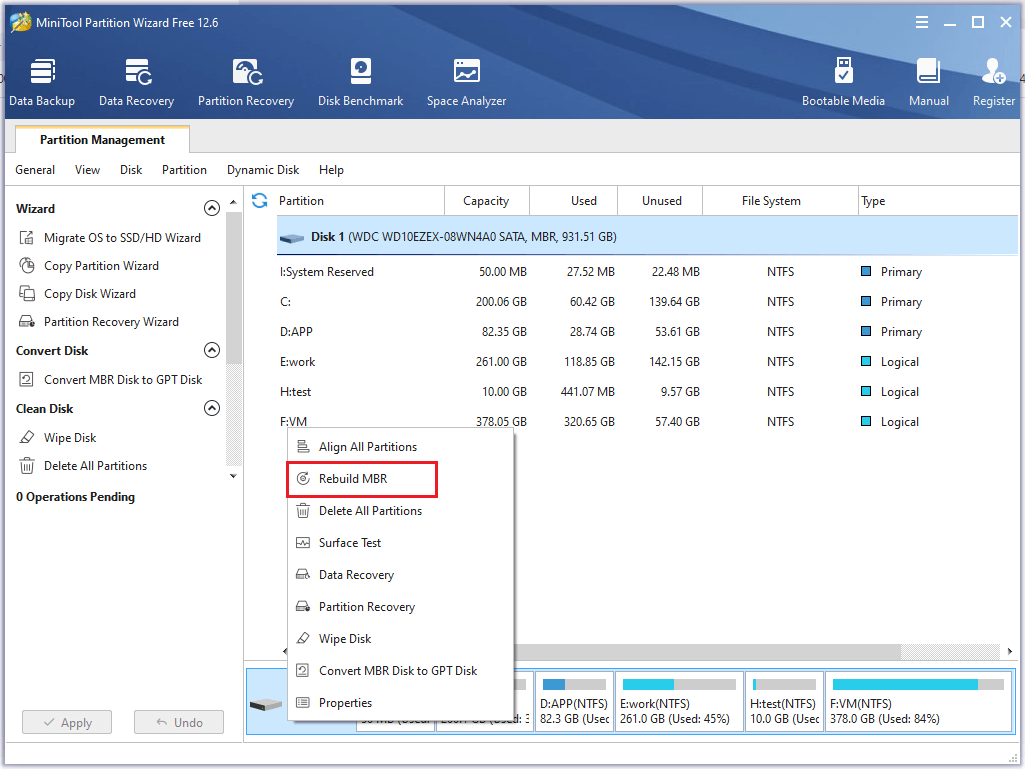
Method 5. Rebuild MBR
If the MBR of the Maxtor external hard drive becomes damaged, the hard drive will be not working. You can use MiniTool Partition Wizard to rebuild MBR. Follow the detailed steps below.
Step 1. Download MiniTool Partition Wizard Free Edition, install and launch it to get its main interface.
MiniTool Partition Wizard FreeClick to Download100%Clean & Safe
Step 2. Right-click the external hard drive and select Rebuild MBR function. Then click Apply button to apply the changes. In the pop-up window, click Yes.
Method 6. Format the Hard Drive
If your Maxtor external hard drive is a new disk or not recognized by the system or has an unrecognized file system, you can format it to a recognized file system such as NTFS. Follow the detailed steps below.
Format will cause the data loss, so you need to back up the data and files on the external hard drive in advance.
1. Use Disk Management
Step 1. Right-click Windows icon and select Disk management to open it.
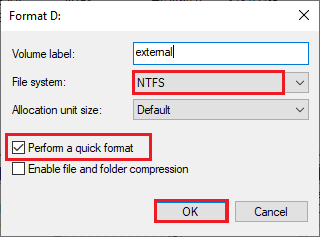
Step 2. In the pop-up window, right-click your Maxtor external hard drive and select Format. Then select NTFS as File system and check Perform a quick format. Click OK button to save changes.
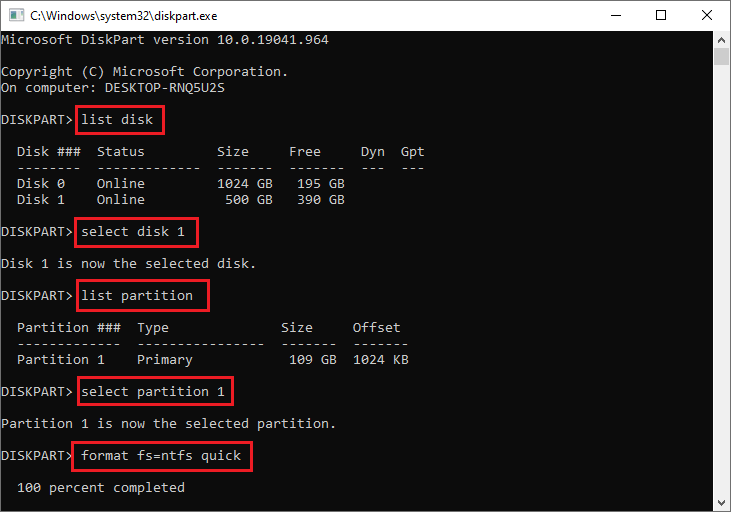
2. Use Diskpart
Step 1. Press Win + R keys on the keyboard to open Run box. Then type diskpart in the box and press Enter keys to open it.
Step 2. In the pop-up window, type the following commands and press Enter key after each command.
list disk
select disk * (* represents the number of the disk you want to format)
list partition
select partition * (* represents the number of the disk you want to format)
format fs=ntfs quick
exit
3. Use Minitool Partition Wizard
MiniTool Partition Wizard FreeClick to Download100%Clean & Safe
Step 1. In the main interface of the MiniTool software, right-click the partition you want to format and select Format. In the pop-up window, choose NTFS as File System. Then click OK button.
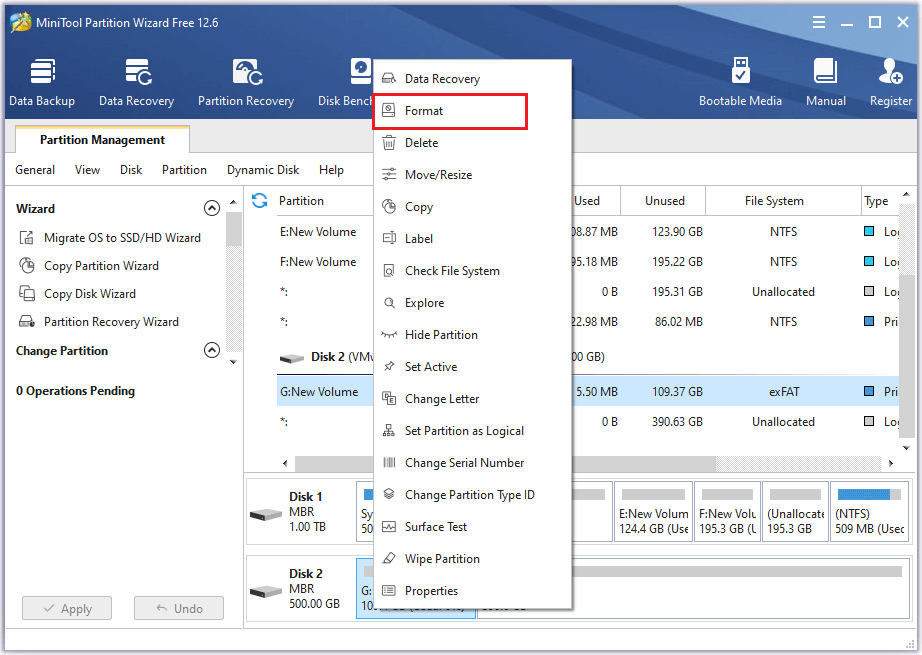
Step 2. Click Apply button to apply the change.
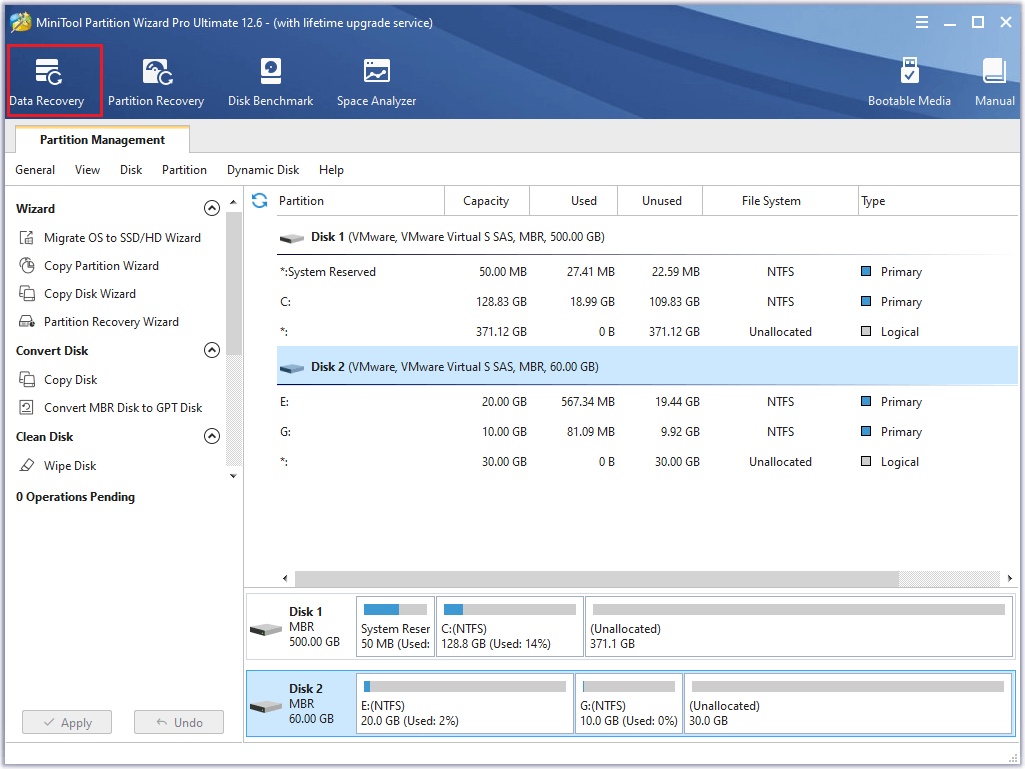
Method 6. Recover the Data from Maxtor External Drive
If your Maxtor external hard drive is inaccessible or the partition on the hard drive shows RAW or Unallocated, you can restore data from the external hard drive directly so as to avoid further data loss. You can use the Data Recovery function of MiniTool Partition Wizard.
It can help you restore the lost data from RAW, unallocated, lost and existing partitions. Now follow the detailed steps below to recover the data.
You should save the recovered data on another drive so as to avoid data overwriting.

Step 1. After launching the main interface of MiniTool Partition Wizard, click Data Recovery.
MiniTool Partition Wizard DemoClick to Download100%Clean & Safe
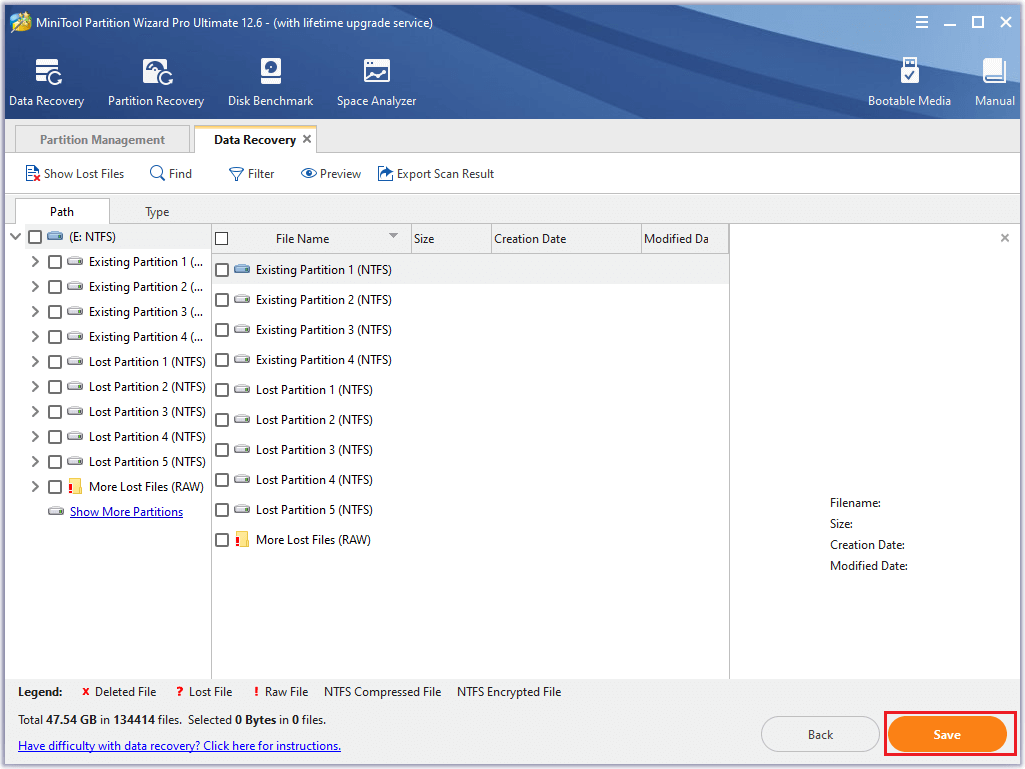
Step 2. In the Data Recovery interface, choose the partition on the external hard drive to scan.
Step 3. Wait patiently until MiniTool Partition Wizard finishes scanning. Once done, the scanning result is shown as follows. Select the needed files to save. Click Save button.
Be careful when choosing the save path, it is recommended to save the recovered data to another drive, or the data will be overwritten.
Step 4. After saving the recovered data on another drive, a notice window will display to show you that the recovery has been completed.
Method 7. Update Windows
It is necessary to update your Windows to the latest version. Follow the detailed steps to update your operating system.
Step 1. Go to Settings > Update & Security > Windows Update.
Step 2. Click Check for updates. And Windows will install updates on your computer automatically. If there are updates for the system, click Install now.
Step 3. After updating, restart your computer.
Wrapping Things Up
Now this guide comes to an end. There are several methods introduced above according to different situations. For instance, you can update the disk driver and check the hard drive. If the hard drive is RAW or unallocated, you can recover data from it. Besides, it’s highly recommended using MiniTool Partition Wizard to solve the “Maxtor external drive not working” issue.
If you have issue about using MiniTool Partition Wizard, you can contact us via [email protected] or leave us a message.
User Comments :