When the C drive is RAW on your PC, the system will fail to start up. How can you fix the issue and boot your Windows 10 normally? Here, this post from MiniTool Partition Wizard introduces several troubleshooting fixes for the issue. It also helps with data recovery from the RAW C drive. You can take a look.
Some users complain that they cannot boot their computers properly because the C drive is RAW. If you are one victim of the frustrating issue, you can focus on the following content to find out why the C drive shows up as RAW and how to fix it.
The Reasons Why the C drive Is RAW
What causes the “Windows 10 C drive changed RAW file system” issue? This post collects multiple possible reasons for the issue as follows:
- Virus or malware infection
- Unexpected power outage or sudden shutdown
- Corrupted or damaged file system of the C drive
- Bad sectors on the C drive
- Too old and worn-out system disk after being used for a very long period
- …
Recover Data from the RAW C Drive
In case of severe data loss, you’d better recover important files from the RAW C drive before repairing it. Here, we highly recommend you use MiniTool Partition Wizard to perform a data recovery. It’s a powerful and reliable data recovery tool enabling you to recover deleted/lost data from internal/external hard drives, USB drives, SD cards, etc.
Besides, you can also use MiniTool Partition Wizard as a comprehensive partition manager. With it, you can partition/clone/wipe hard drives, check hard drive health, format USB to FAT32/NTFS/exFAT, convert MBR to GPT without losing data, and more.
Here’s a full guide on how to recover data from the RAW C drive by using MiniTool Partition Wizard. Simply download and install MiniTool Partition Wizard on another well-running PC. Then follow the given steps.
MiniTool Partition Wizard DemoClick to Download100%Clean & Safe
Part 1: Boot Your Problematic PC with a Bootable USB Drive
Since your computer cannot boot up normally, you need to create a bootable USB drive first and then use it to boot the system for data recovery.
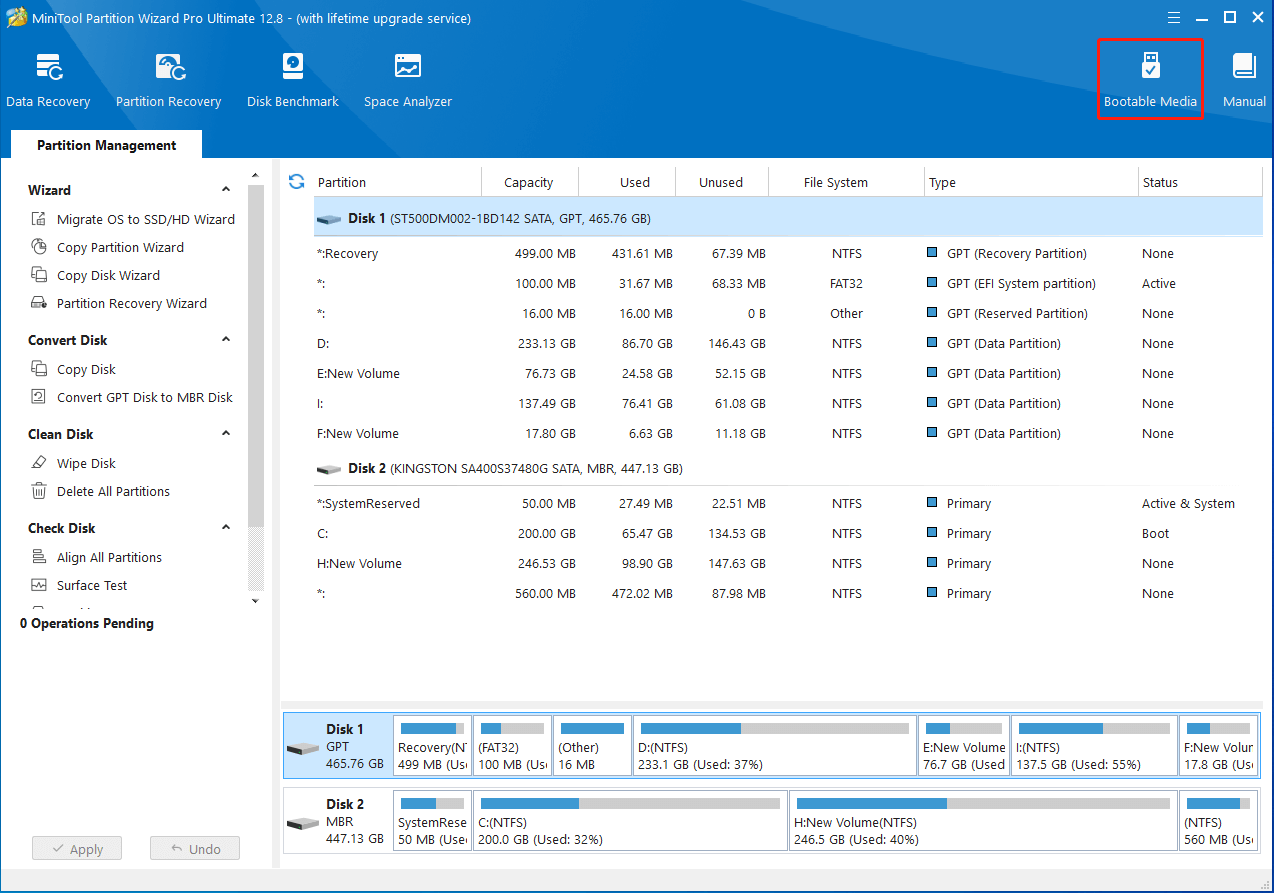
Step 1: Prepare a USB flash drive and connect it to the healthy computer. Then launch MiniTool Partition Wizard to access its main interface.
Step 2: Click Bootable Media at the top-right corner to continue.
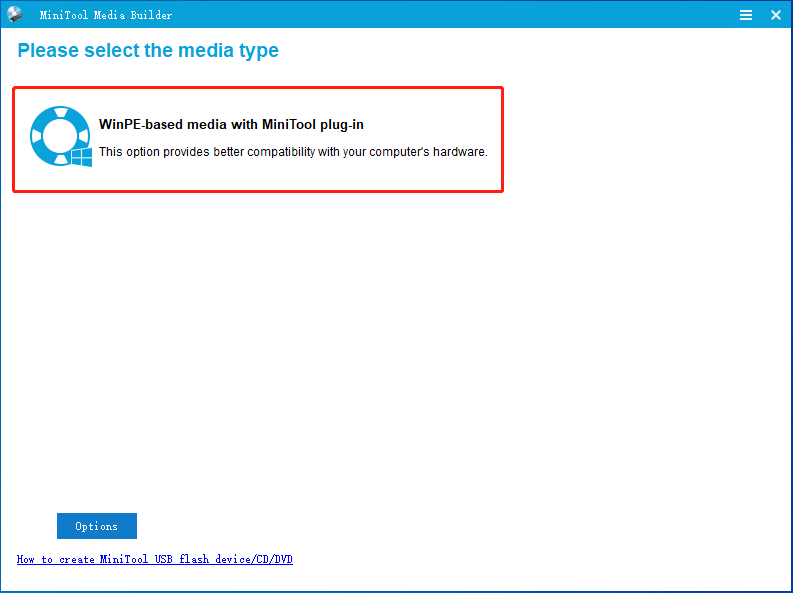
Step 3: In the pop-up window, click WinPE-based media with MiniTool plug-in.
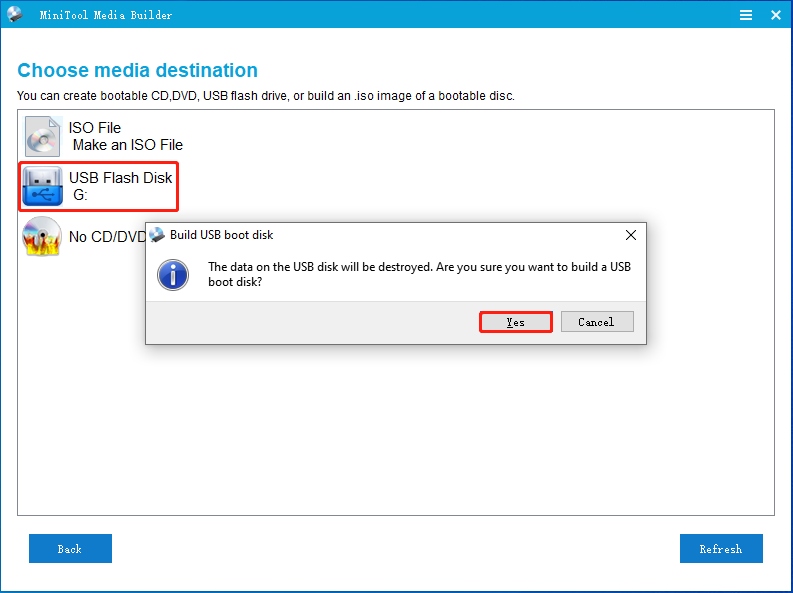
Step 4: After that, select the USB Flash Disk option. Then click Yes for confirmation when prompted.
Step 5: Wait patiently until the process of building a bootable USB disk completes. Then, click Finish.
Step 6: Safely eject the bootable USB drive from the computer and then connect it to the unbootable PC.
Step 7: Finally, make your PC boot from the bootable USB drive.
Part 2: Recover Important Data from the C Drive
Once you boot the PC from the created bootable USB drive and access the main interface of MiniTool Partition Wizard, you can start recovering data from the C drive.
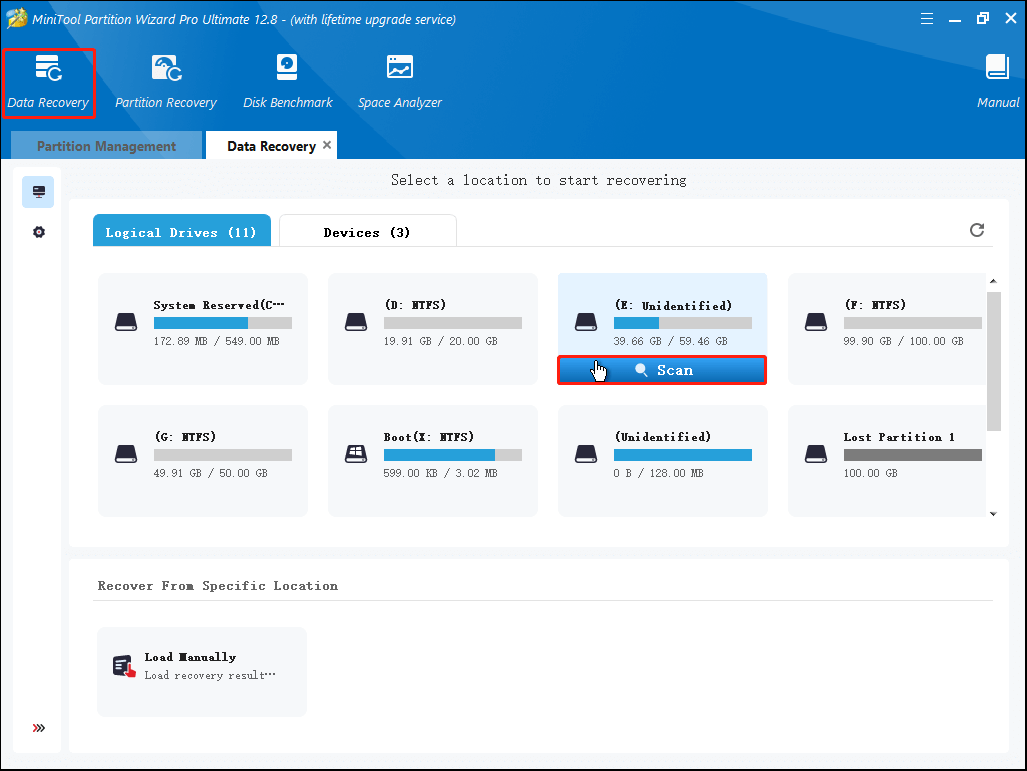
Step 1: Click Data Recovery from the top toolbar.
Step 2: Move your cursor to the target drive and then click Scan.
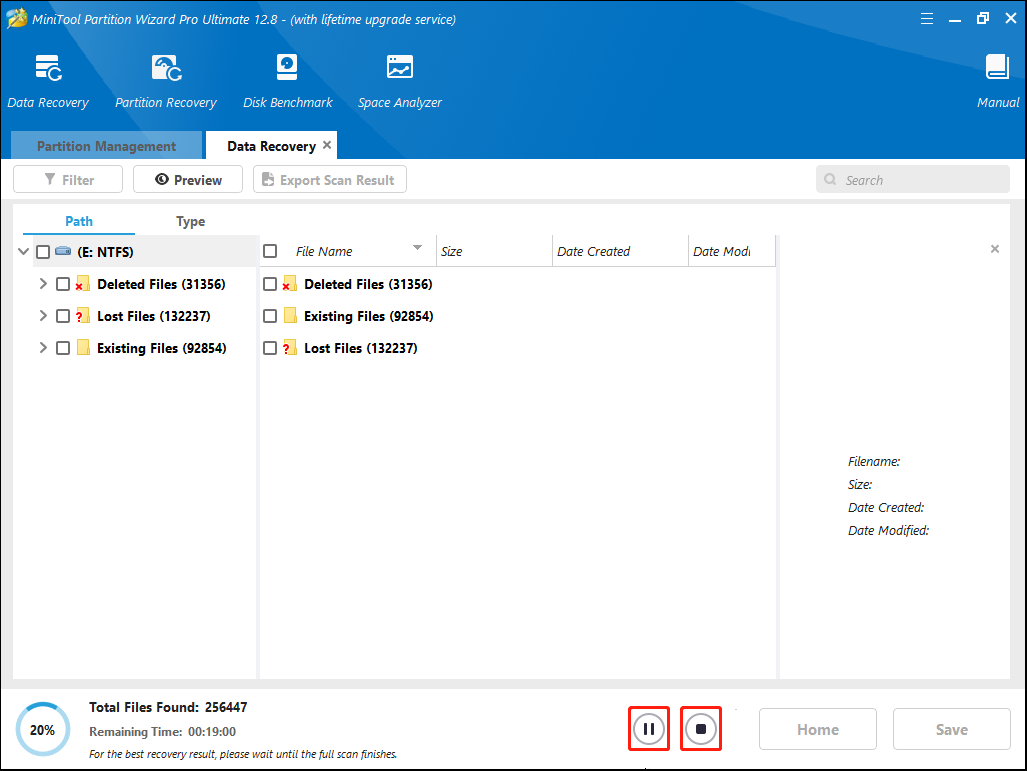
Step 3: If you find the needed files during the scanning process, you can click the Pause or Stop icon to end it. For the best recovery result, it’s recommended that you wait for the full scan to finish.
Step 4: Check all the files you want to recover and then click Save.
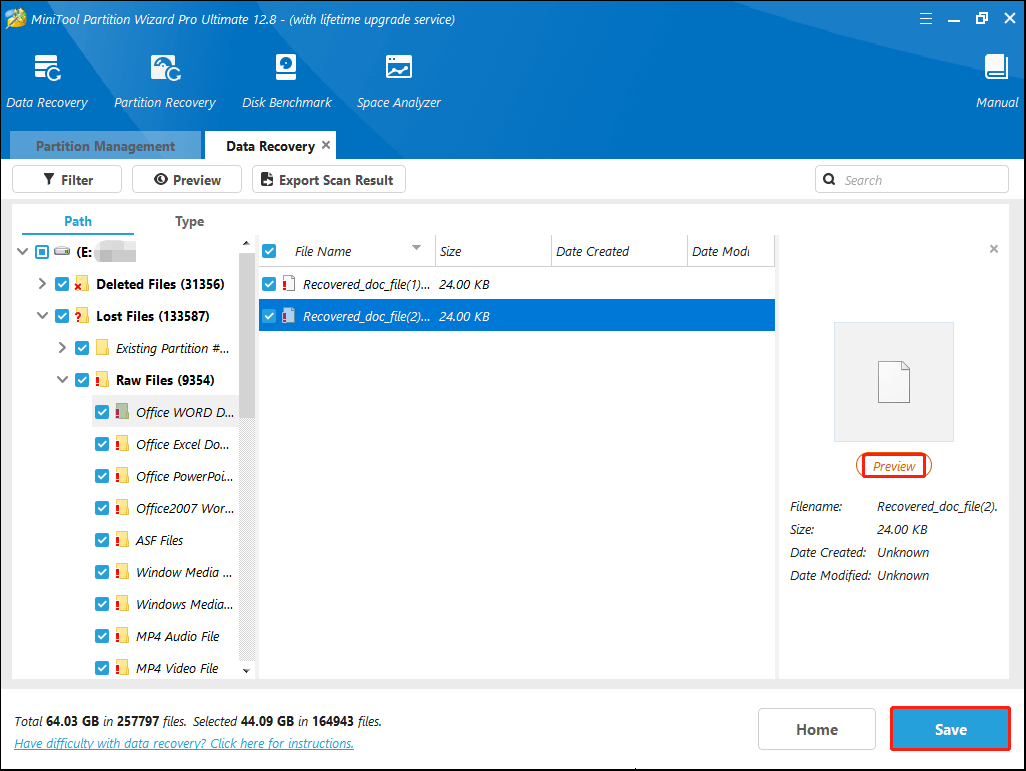
Step 5: In the next window, choose a drive and click OK to store the chosen files. It’s better to save the recovered files on another different drive. Otherwise, the lost/deleted data could be overwritten.
How to Fix RAW C Hard Drive to NTFS
What should you do when the C drive is RAW? This post lists some solutions that may help you fix the issue. You can follow them one by one after recovering data from the RAW C drive.
Solution 1: Boot into Safe Mode
When your C drive shows up as RAW, it may indicate that there is something wrong with the file system. To fix it, you can try booting into Safe Mode to repair the corrupted file system. Here’s how to do this.
Step 1: Boot your computer into Windows Recovery Environment (WinRE) by using Windows installation media.
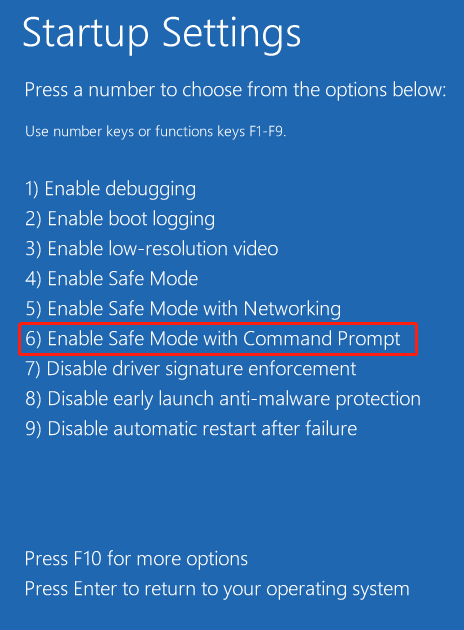
Step 2: After that, go to Troubleshoot > Advanced options > Startup Settings.
Step 3: Click the Restart button. Then select Enable Safe Mode with Command Prompt by pressing F6.
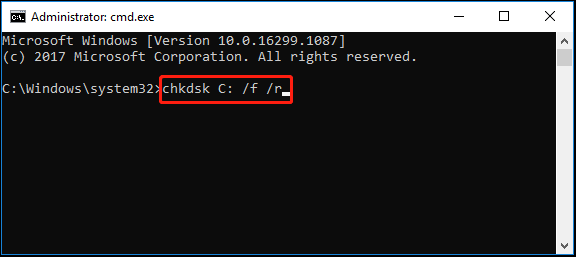
Step 4: Once you get into the Command Prompt window, type chkdsk C: /f /r and press Enter.
Solution 2: Rebuild BCD
BCD or Boot Configuration Data is a file that contains information related to the Windows boot options on your computer. If it gets corrupted, you may suffer from the “Windows 10 C drive changed RAW file system” issue as well. In this case, you can try to fix the issue by rebuilding BCD. To execute the operation, follow the steps below.
Step 1: Boot your computer into WinRE. Then navigate to Troubleshoot > Advanced options > Command Prompt.
Step 2: In the elevated Command Prompt window, type bootrec /rebuildbcd and press Enter.
Step 3: Restart the computer to see if it can boot up normally. If the RAW C drive persists, open Command Prompt in WinRE again and run the bcdboot c:\windows /s c: command to create the boot configuration file manually.
Solution 3: Format C Drive and Reinstall Windows
Formatting the C drive and reinstalling Windows is another possible way how to fix RAW C hard drive to NTFS. The following are detailed steps to effectively complete the operation.
Step 1: Access the Command Prompt in the Windows Recovery Environment.
Step 2: Type the following commands and press Enter after each.
- diskpart
- list disk
- select disk N (Replace N with the number of the disk including the C drive)
- list partition
- select partition X (X represents the number of the C drive)
- format fs=ntfs quick
- exit
If the Diskpart format is stuck at 0 percent, we’d like to recommend you turn to MiniTool Partition Wizard to complete the formatting process. You can learn how to do this with the following guide.
Step 1: Boot your computer from the MiniTool bootable USB drive and enter the main interface of MiniTool Partition Wizard.
MiniTool Partition Wizard DemoClick to Download100%Clean & Safe
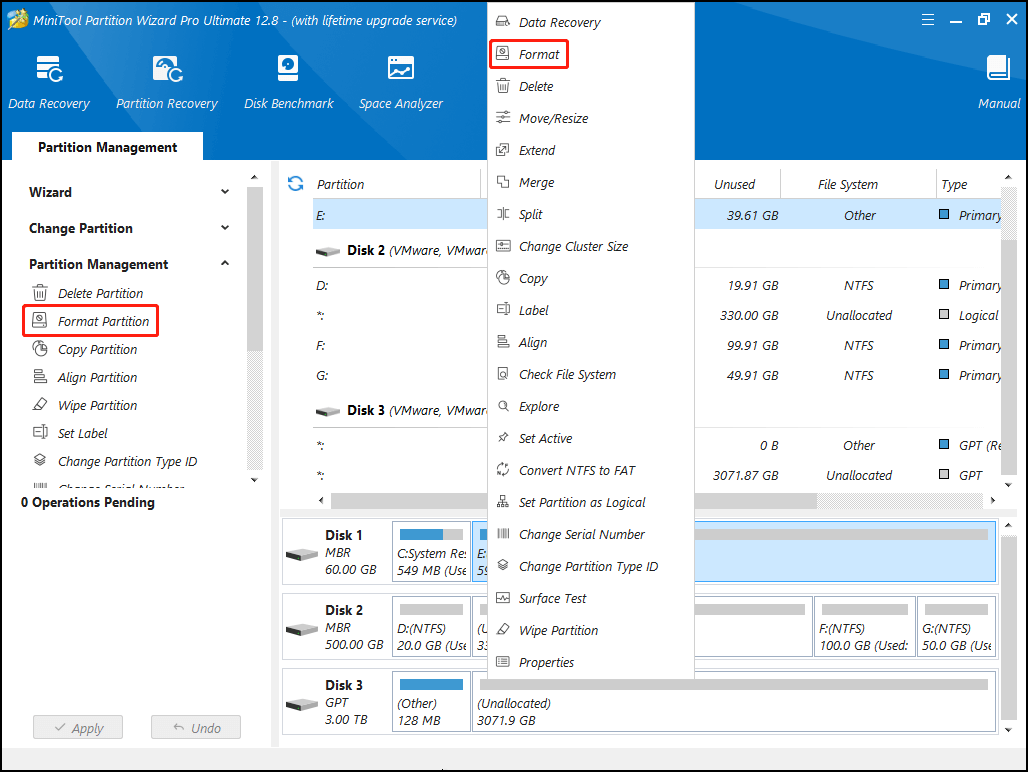
Step 2: Right-click the target partition and then select Format from the context menu. Also, you can highlight the target partition and then select Format Partition from the left action panel. If prompted, click Yes to move on.
Step 3: In the Format Partition window, choose NTFS as the File System and then click OK.
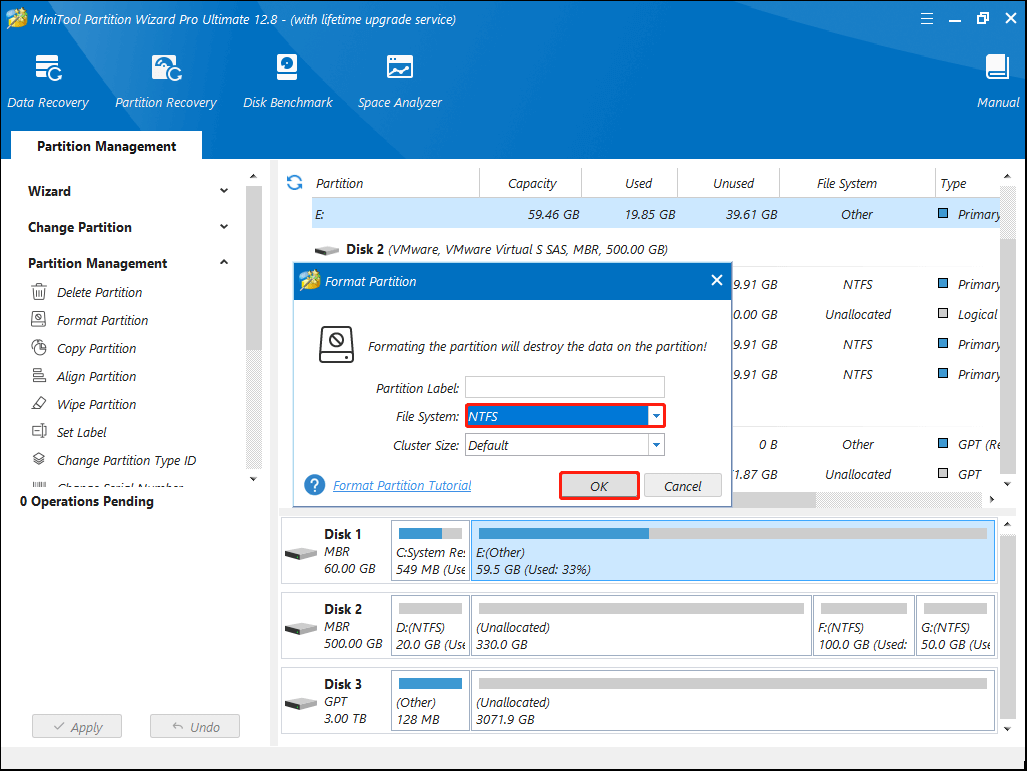
Step 4: Finally, don’t forget to click Apply to execute the operation.
Once the C drive is formatted to NTFS successfully, refer to the tutorial below to reinstall the Windows.
- Create Windows installation media. Then connect it to the problematic computer, and change the boot order to boot your computer from the Windows installation media.
- Modify the language and other preferences in the Windows Setup window. Then click Next.
- Click Install now. Then click I accept the license terms and click Next.
- Select Custom: Install Windows only (advanced).
- Choose the formatted C drive and click Next to proceed with the Windows installation.
Solution 4: Replace Your Disk
If you have used the system disk for a long time, it’s advised that you replace it with a new hard disk. By doing so, you can minimize the probability of the issue that the C drive shows up as RAW. You can follow this guide to install Windows 10 on the new SSD/HDD: Top 2 Methods to Install Windows 10 on New SSD Without USB.
If you have another computer that runs on the same version of Windows 10 as the failing PC, you can try migrating its OS to the new disk. This way allows you to get a healthy Windows 10 system without reinstalling, which can save much time.
Bottom Line
When you find that the C drive is RAW, try to solve it with the above methods. If you have any other great solutions to the issue, please share them with us in our comment area below.
For any problems associated with MiniTool Partition Wizard, feel free to contact us via [email protected]. We’ll make a reply with technological assistance as soon as possible.
User Comments :