The fastest way to transfer files from PC to PC is disk cloning, while USB drives, cloud storage, and network sharing are better for transferring selected files. This from MiniTool Partition Wizard explains the instructions for five common transfer methods, helping you choose the most efficient solution for your needs.
Transferring data from an old PC to a new PC is easier than ever, but the best method depends on what you want to move.
If you only need to copy documents, photos, or other personal files, a USB drive or cloud storage may be enough. If you want to migrate your entire Windows system, installed applications, settings, and files without reinstalling anything, disk cloning is usually the most efficient solution.
This guide compares five proven ways to transfer data between PCs, explains when each method works best, and provides step-by-step instructions to help you complete the migration safely and efficiently.
How to Transfer Data from One Laptop to Another
There are several ways to transfer data from one laptop to another. The best method depends on the amount of data you need to move, whether both devices are connected to the same network, and whether you want to transfer only files or migrate your entire Windows system.
The table below compares the most common transfer methods to help you choose the one that best fits your needs.
| Method | Best For | Advantages | Limitations |
| Cloud storage | Small to medium files | Accessible anywhere, no extra hardware | Requires an internet connection and cloud storage space |
| USB flash drive / External HDD or SSD | Large files | Fast, simple, and it works offline | Manual copying required |
| Local network transfer | Two PCs on the same network | No additional storage device needed | Requires network configuration |
| Data transfer cable | Direct PC-to-PC transfer | Faster than manual copying | Requires a compatible cable and software |
| Disk cloning | Full system migration | Transfers Windows, applications, and files together | Requires cloning software and a target drive |
The following sections explain each method in detail, including when to use it and how to complete the transfer step by step.
Method 1: Use Cloud Storage
Cloud storage is an easy way to transfer files between computers. It lets you upload files from an old PC and download them on a new one using services like Google Drive, OneDrive, or Dropbox.
This method is best for transferring documents, photos, and other small to medium-sized files over the internet.
Step 1: Open Google Drive and sign in with your Google account.
- Go to the Google Drive website.
- Log in with your Google Account. If you don’t have an account, you can sign up for free.
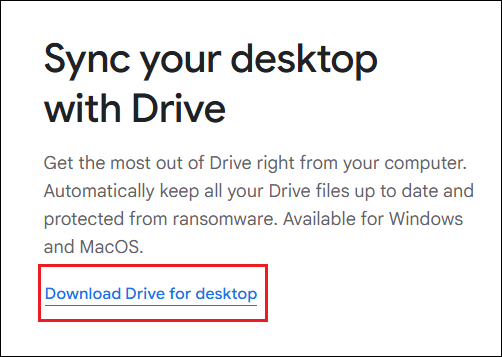
Step 2: Click the link above, then scroll down the page to find Download Drive for desktop and click it to install the Application on both computers.
Step 3: Upload Files.
- Drag and drop the files and folders you want to transfer into the cloud storage folder on your old computer.
- The files will automatically sync to the cloud.
Step 4: Download Files.
- Log in to the same cloud account on your new computer.
- Find the file/folder you just uploaded.
- Right-click and select Download to save it to your local computer.
Method 2: Use External Hard Drive or USB Flash Drive
External hard drives and USB flash drives are a simple way to transfer files between computers without an internet connection.
This method is suitable for documents, photos, videos, and other personal files, but it cannot transfer installed programs or system settings.
Step 1: Prepare an external storage device.
- Make sure your USB flash drive or external hard drive has enough capacity to accommodate the files you want to transfer.
- I recommend using a device with a USB 3.0 interface for faster transfer speeds.
Step 2: Plug the external storage device into your old computer.
- Plug the USB flash drive or external hard drive into a USB port on your old computer.
- Click This PC and ensure the device is correctly recognized and appears as a new disk partition.
Step 3: Copy the files you want to transfer.
- Find the data you want to transfer (such as files, documents, pictures, videos, etc.).
- Select the files or folders you want to transfer, right-click them, and select Copy.
- Open the USB flash drive/external hard drive window, right-click an empty area, and click Paste.
- Wait for the files to copy. If the file is large, this may take several minutes to several dozen minutes.
Step 4: Safely eject the device.
- Click the “Safely Remove Hardware and Eject Media” icon in the lower-right corner of the taskbar, select your device, and click “Eject”.
- Then unplug the device from the old computer.
Step 5: Plug the device into the new computer.
- Plug the USB drive/portable hard drive into a USB port on the new computer.
- Click This PC and locate the device.
Step 6: Copy the file to the new computer.
- Find the file or folder you copied earlier.
- Right-click them and select Copy, then paste them into the appropriate location on the new computer.
Method 3: Local Network Transfer
If both PCs are connected to the same Wi-Fi or local network, you can transfer files directly between them without cloud storage. It is a faster option for large file transfers.
Step 1: Enable network discovery and file sharing.
- Type control panel in the Search box.
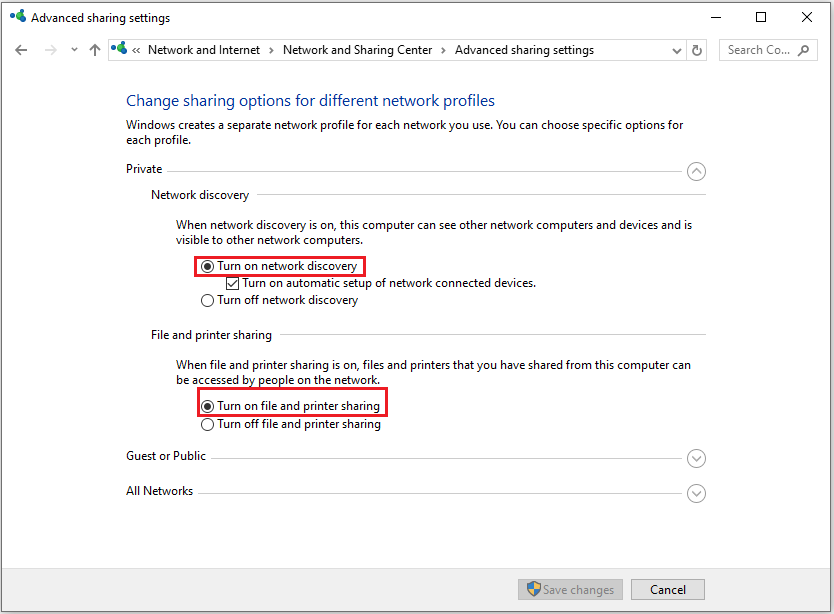
- Click Network and Internet > Network and Sharing Center > Change advanced sharing settings.
- Turn on network discovery and Turn on file and printer sharing under the Private section.
- Turn off password protected sharing if you want others to connect without needing a username/password under the All Networks section. However, this is risky and should only be used to disable password protection on trusted networks.
- Click Save changes.
Step 2: Share a folder on the sending PC.
- Right-click the folder you want to share.
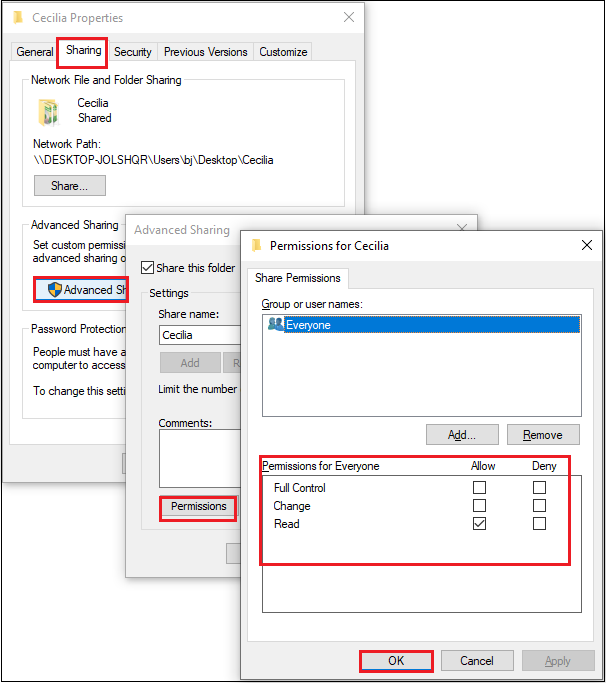
- Click Properties > Sharing > Advanced Sharing.
- Check the box Share this folder.
- Click Permissions.
- To allow full access (copy/delete/edit), check Full Control.
- To allow only reading/downloading, leave it as Read.
- Click OK > Apply.
Step 3: Access the shared folder from the receiving PC.
- Click File Explorer > Network.
- Double-click the name of your previous PC. You can see the shared folder.
- Once you open the shared folder on your new PC, you can copy files and folders.
Also read: What Is LAN (Local Area Network)? Here Is an Introduction!
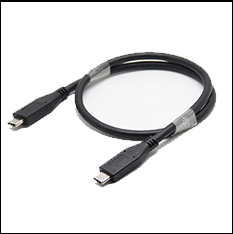
Method 4: Use Data Transfer Cable
Ordinary USB cables cannot directly connect two computers. You need to use a dedicated USB data transfer cable with a chip and corresponding software to achieve data transfer.
Step 1: Connect the two computers.
Plug both ends of the USB cable into the USB ports on each computer.
Step 2: Install and run the transfer software.
- Download and install the transfer software from the manufacturer’s website, then open it on both computers.
- After installation, open the software on each computer.
Step 3: Establish a connection between the two computers.
- After the software starts, it will automatically detect the USB cable connection.
- After successful recognition, two file windows will appear on the screen.
Step 4: Select the data to transfer.
- Find the folder you want to transfer.
- Drag and drop or click the Copy button to paste the file to the destination computer.
- Once completed, you can view the file on the destination computer.
Method 5: Disk Cloning with MiniTool Partition Wizard
If you plan to replace an old computer, upgrade from an HDD to an SSD, or migrate your Windows system, installed programs, and personal files to a new drive, disk cloning is typically the fastest and most efficient solution.
To simplify this process, MiniTool Partition Wizard offers a range of built-in migration features designed for various scenarios.
| Feature | Function | Use Case |
| Copy Disk | Copy the entire disk | Full PC migration |
| Migrate OS to SSD/HD | Move Windows only | SSD upgrade |
| Copy Partition | Copy selected partition | Data backup/only copy a partition data |
Let’s take the migration of the operating system as an example.
MiniTool Partition Wizard DemoClick to Download100%Clean & Safe
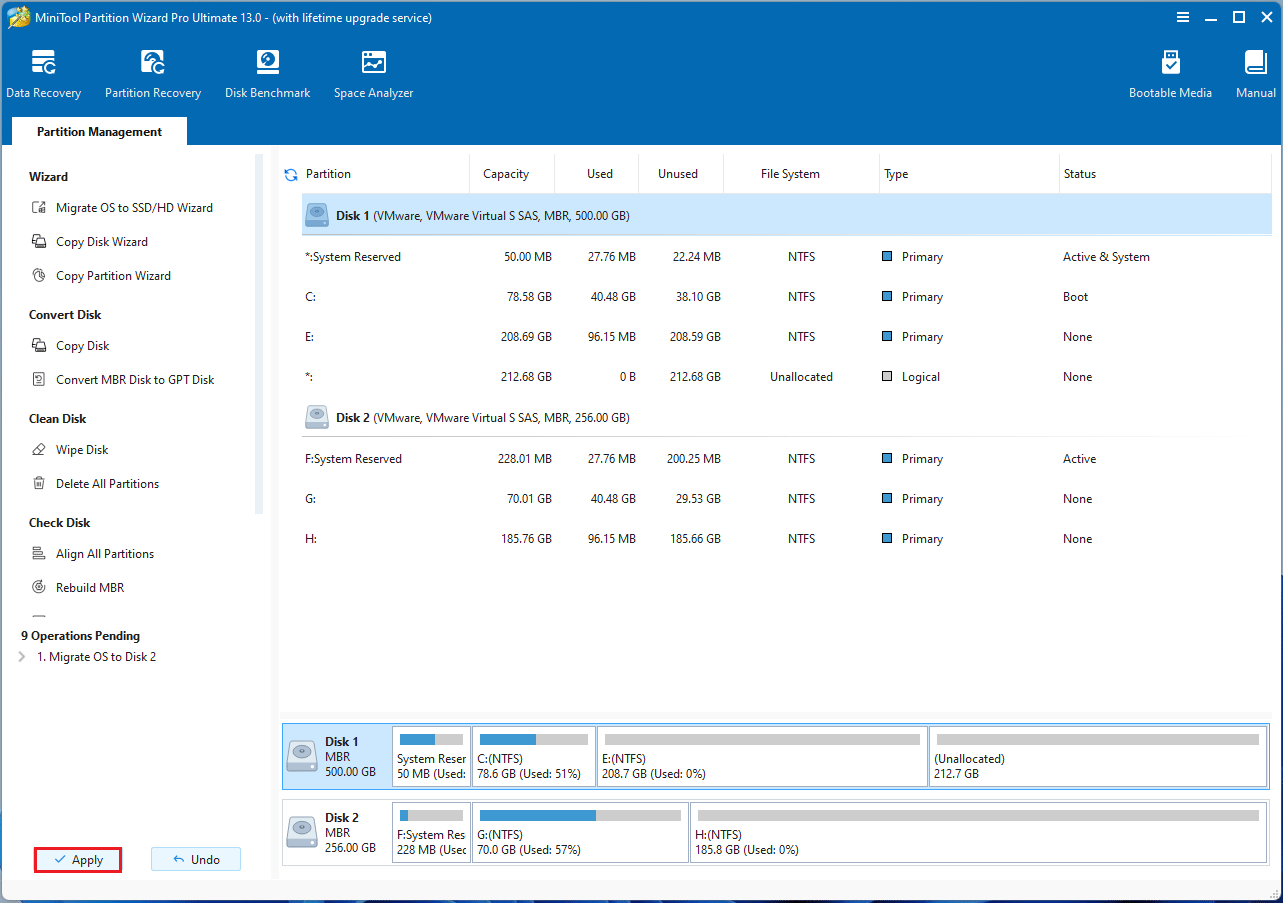
Step 1: Connect the hard drive to your new computer via an NVMe to USB adapter or SATA to USB adapter and launch MiniTool Partition Wizard to its main interface.
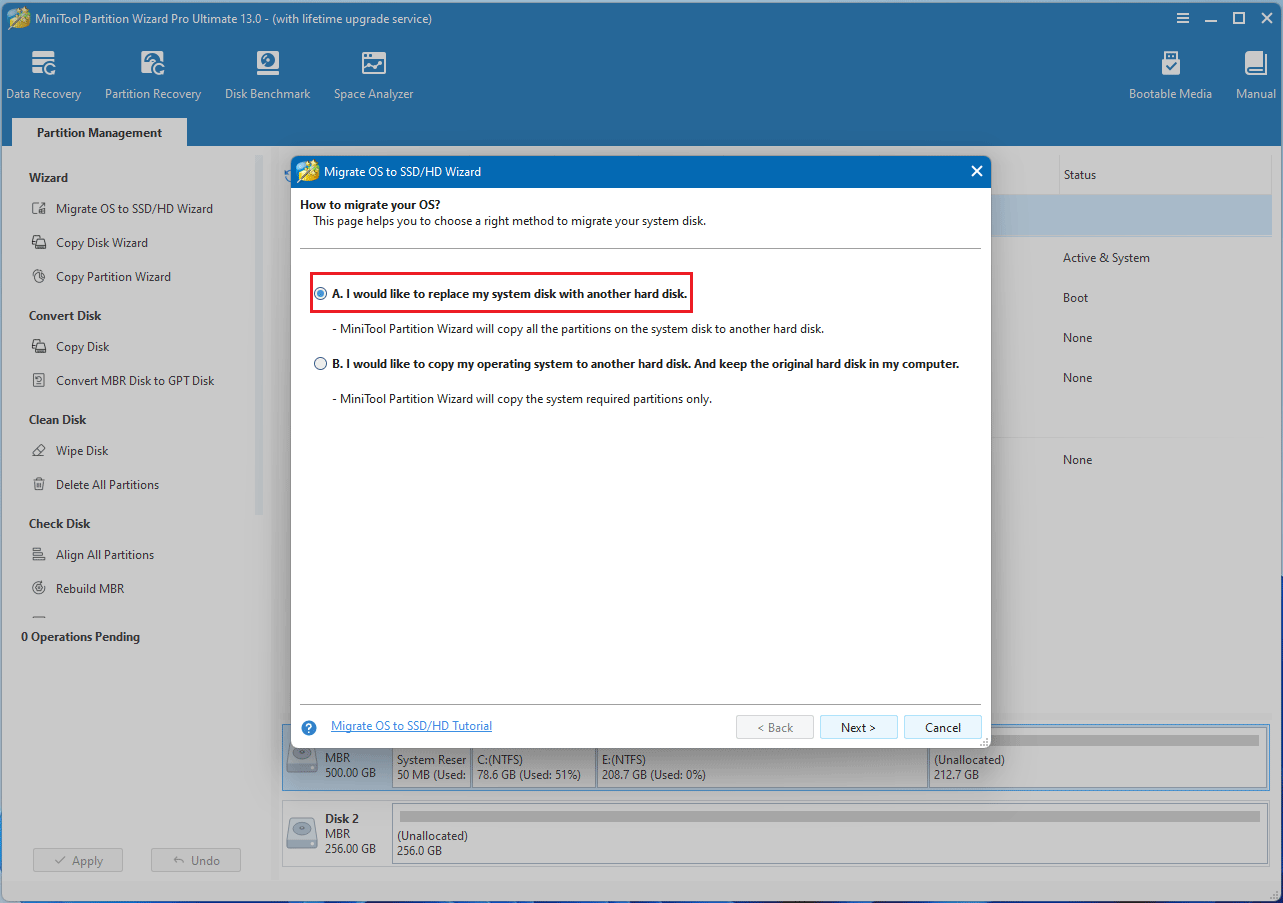
Step 2: Click on the Migrate OS to SSD/HD Wizard feature. Then choose Option A and click Next to proceed.
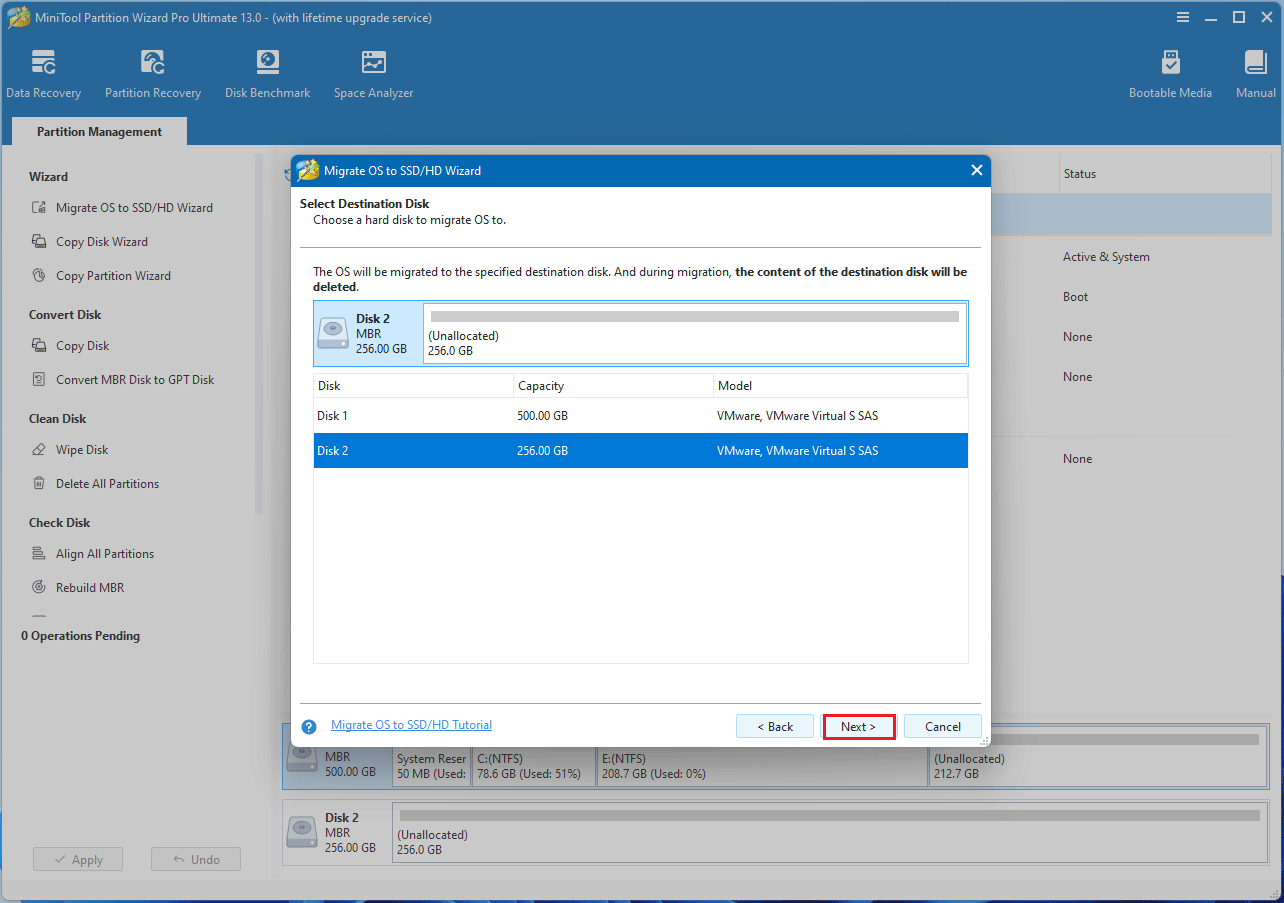
Step 3: In the pop-up window, choose the new SSD as the target disk, then click Next.
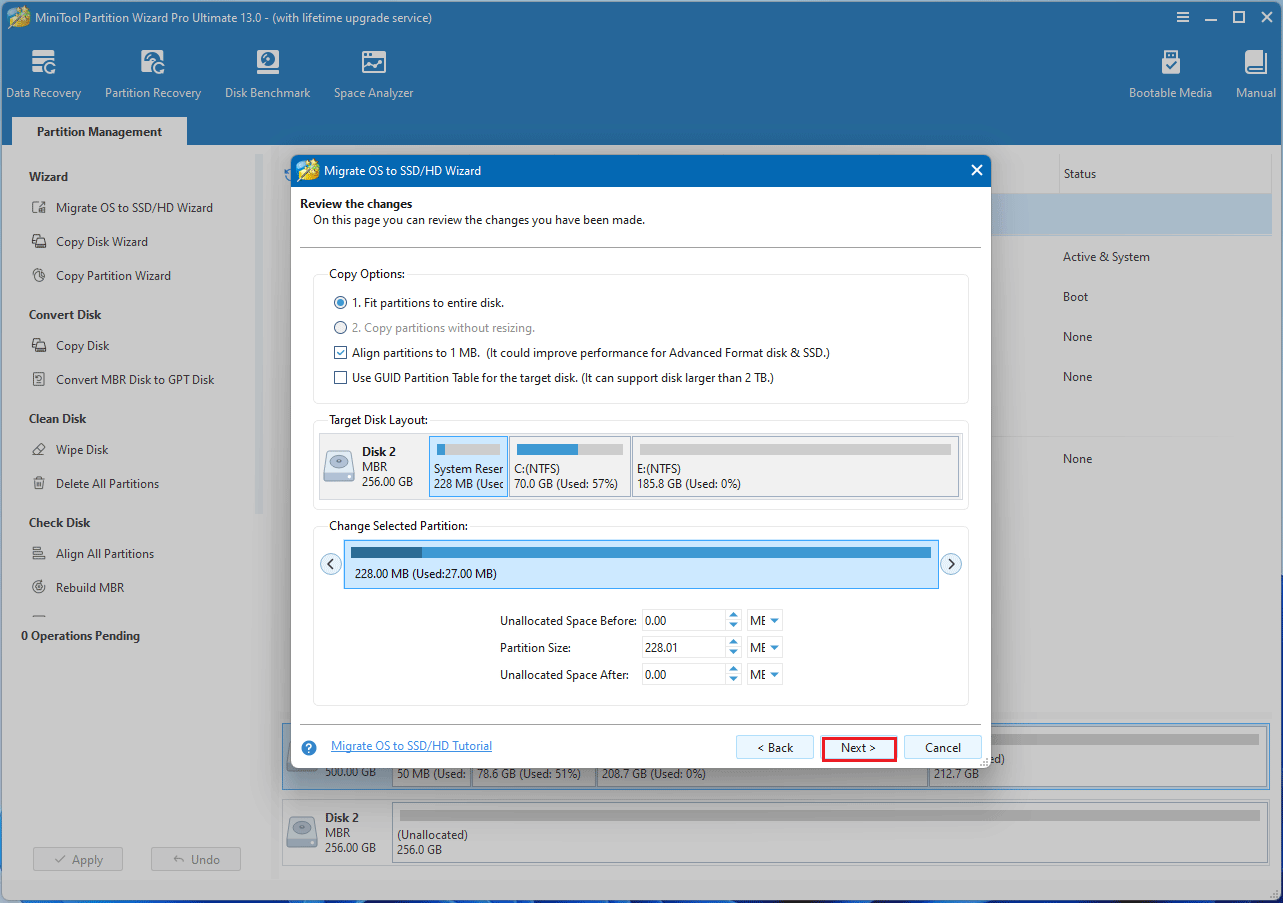
Step 4: Choose a copy option and then click the Next button.
- The options “Fit partitions to entire disk” and “Align partitions to 1 MB” are selected by default. The former adjusts partition sizes proportionally to utilize the full capacity of the new SSD, and the latter option will apply 4K alignment to the SSD.
- If the original hard drive is an MBR disk, but you want the cloned SSD to be a GPT disk, you can choose the Use GUID partition table for the target disk option.
- Under the Change Selected Partition section, you can resize or move the partition according to your needs.
Step 5: A warning message will pop up, and click Finish to continue.
Step 6: Click the Apply button. After the migration is complete, the data will be transferred to another computer.
Further Reading: Common Problems and Fixes after Cloning
These are some common issues you may encounter when cloning a disk and their quick solutions.
#1. Cloning process is stuck or running slowly.
This usually happens due to bad sectors or system interference.
- Check the health of both disks.
- Temporarily disable antivirus software.
#2. New disk won’t boot after cloning.
This is often caused by incorrect boot settings or system mode mismatch.
- Set the new disk as the primary boot device in BIOS.
- Make sure UEFI or Legacy mode matches the original system.
#3. Missing or unallocated partitions after cloning.
This may occur if partitions are not resized properly during the cloning process.
- Use the Rebuild MBR feature.
- Extend or adjust partitions in Disk Management.
How to Deal with Data in an Old Computer
What you should do with the data on your old computer depends on how you plan to use the device.
If you plan to keep using it, you may only need to clean up unnecessary files and free up storage space. However, if you are selling, donating, or disposing of the computer, it is important to properly protect your personal data to prevent data leakage.
Common ways to manage old computer data include backing up important files, deleting unnecessary partitions, or completely erasing the hard drive.
Below, we will explain these methods in detail so you can choose the most suitable option for your situation.
#1. Delete Partition
Deleting a partition removes the existing storage structure on the hard drive. However, this method does not completely erase the data. The deleted files may still be recoverable using data recovery software.
Therefore, this method is not recommended if you wish to permanently protect your personal information.
The following steps demonstrate how to safely delete a partition.
Step 1: Open MiniTool Partition Wizard to its main interface. Then, right-click the partition you no longer need and choose Delete.
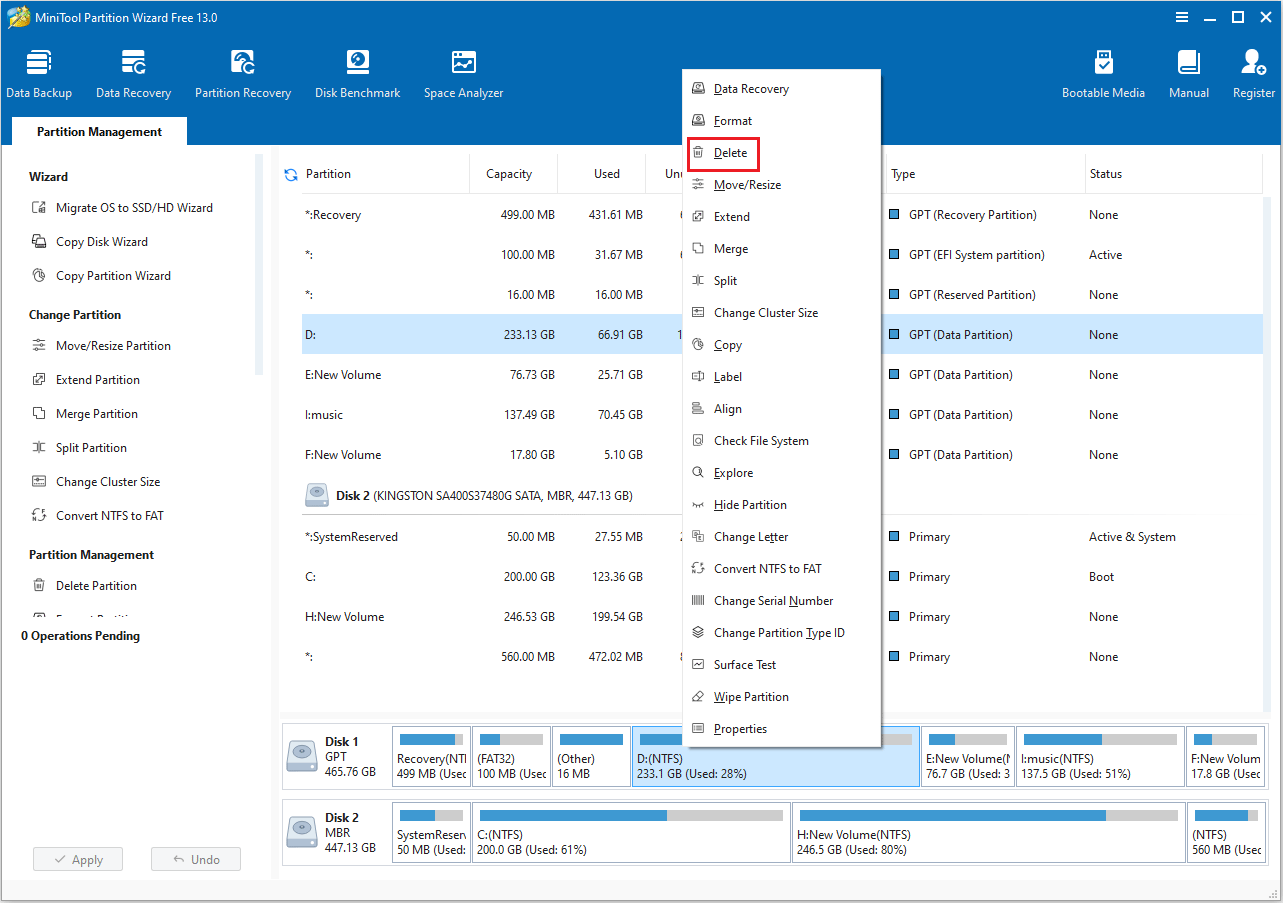
Step 2: The original partition will now appear as unallocated space.
Step 3: Click the Apply button to perform all changes.
#2. Wipe Disk
If you plan to sell, donate, or dispose of your computer, or if the hard drive contains sensitive personal data, you may want to erase the disk to prevent data recovery or privacy breaches.
Erasing the disk permanently deletes all data on it by overwriting the drive with zeros or random data. This makes recovering the original data much more difficult.
The following steps show how to securely erase the disk.
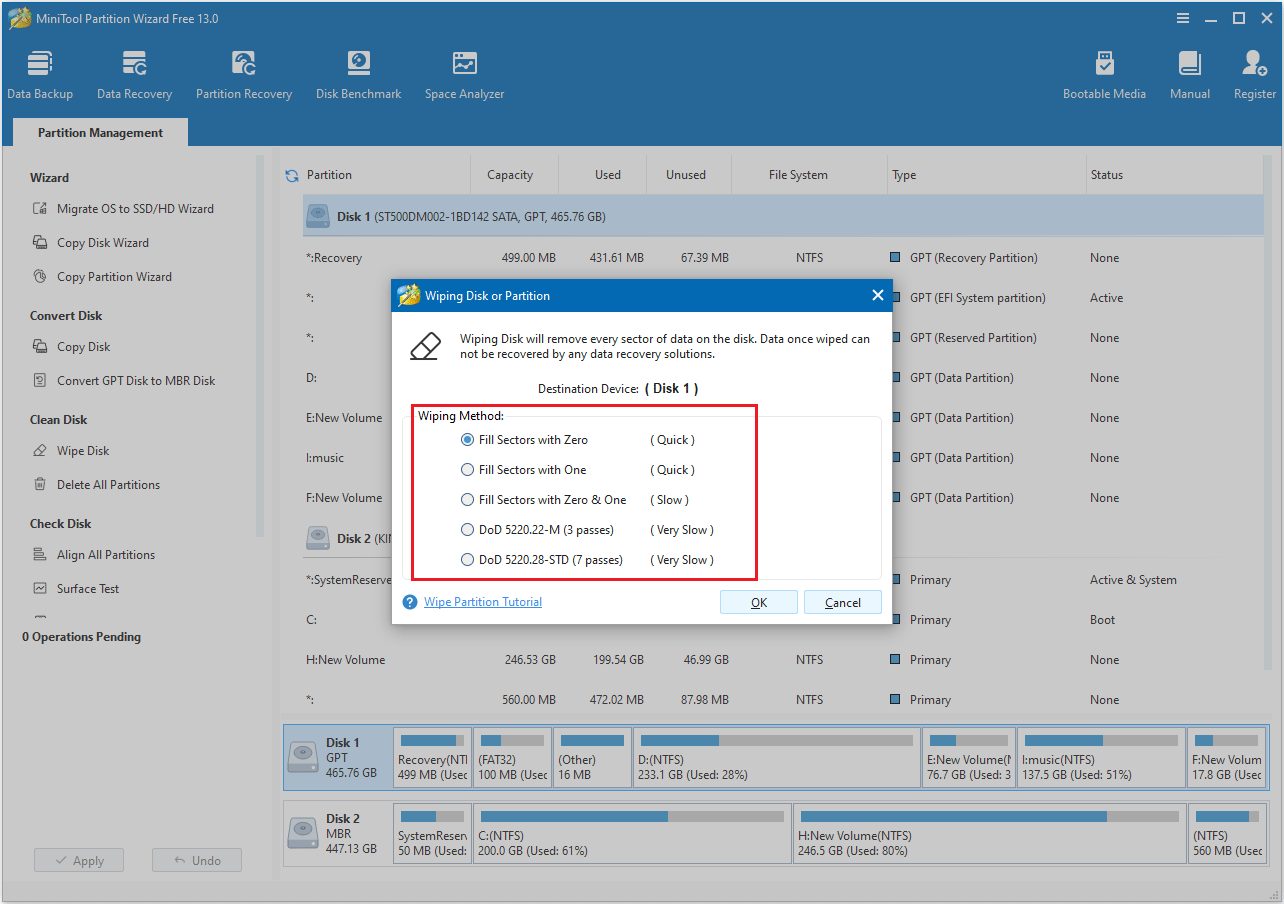
Step 1: Right-click the disk you want to erase and choose Wipe Disk.
Step 2: A window will pop up as illustrated below. Select a wiping method and click OK to proceed.
- Fill sectors with Zero and Fill sectors with One: They just write the same code to the partition, which is similar to a full format in Windows.
- Fill sectors with Zero & One: It will randomly write zeros and ones to partition, which makes data more unrecoverable.
- DoD 5220.22-M (3 passes): It is recommended for users who want to permanently erase their data.
- DoD 5220.28-STD (7 passes): It offers a higher level of data security due to having more overwrite passes than the DoD 5220.22-M (which uses 3 passes).
Step 3: After the process is complete, click the Apply button. Once completed, the data on the disk will be cleared.
Transfer Files from PC to PC FAQ
Disk cloning, on the other hand, copies the entire system, including Windows, applications, and personal data, making it a faster and more reliable solution for full PC migration.
If you are performing a full system migration or disk cloning, the entire process could take several hours.
Disk wiping overwrites the data, making it much more difficult or nearly impossible to recover, which helps prevent privacy leaks.
Bottom Line
There are several reliable ways to transfer data from an old PC to a new one. USB drives, external hard drives, cloud storage, and network sharing are suitable for moving selected files, while disk cloning is the most efficient solution for transferring an entire system, including Windows, applications, and personal files.
If you have any questions or suggestions while using MiniTool Partition Wizard, you can contact us at [email protected] to get a quick reply.
About The Author

Position: Columnist
Cecilia has been an editor at MiniTool for two years. She primarily focuses on disk and partition-related content, with particular expertise in disk cloning, partition recovery, and PDF document conversion. She is dedicated to providing users with clear and accurate solutions to help them efficiently resolve common computer problems.
User Comments :