In some cases, you may need to reimage laptop. Before beginning, you need to understand what reimaging a computer means, what preparations you need to make, and how to do it. Read on for detailed steps and answers.
What Does Reimaging a Computer Mean
Reimage refers to completely erasing all data on a computer and reinstalling the operating system and core software using a pre-set system image or installation media.
This process typically erases the current operating system, drivers, application software, and settings, ultimately restoring the computer to a “clean” state.

When Do I Need to Reimage My Computer?
You may need to consider reimaging your operating system if your computer experiences any of the following problems:
- System crash, slow speed, inability to boot: If your computer’s operating system frequently crashes, runs extremely slowly, and basic troubleshooting methods are ineffective, or if there are serious file/registry problems that prevent it from booting and cannot be repaired, reimaging the system is usually the most direct solution.
- Severe virus or malware infection: When your computer is infected with a virus or malware that cannot be completely removed by antivirus software, reimaging the system is an effective way to ensure complete virus removal.
- Preparing to sell or give away your computer: If you plan to sell or give away your computer, reimaging the operating system is an important step. This not only erases all personal data, ensuring privacy and security, but also gives the new user a clean system.
Further Reading:
Backing up your data is a crucial step before reimaging your computer.
This is because reimaging a laptop typically erases all files and data on your computer, including everything on the disk where the operating system is located (usually the C drive).
Therefore, it’s essential to ensure that all important files are backed up before reimaging. The simplest method is to use copy and paste. Alternatively, you can use free backup software like MiniTool ShadowMaker to help with data backup.
The following will introduce how to reimage in Windows.
How to Reimage a Computer Without a Disc
Microsoft has a built-in feature that can help reset your computer. The steps for running this function differ slightly depending on whether the computer can boot up or not. Here are the detailed steps.
When the Computer Can Start Normally
Once your computer starts up normally, you can perform a reimage directly in Windows settings.
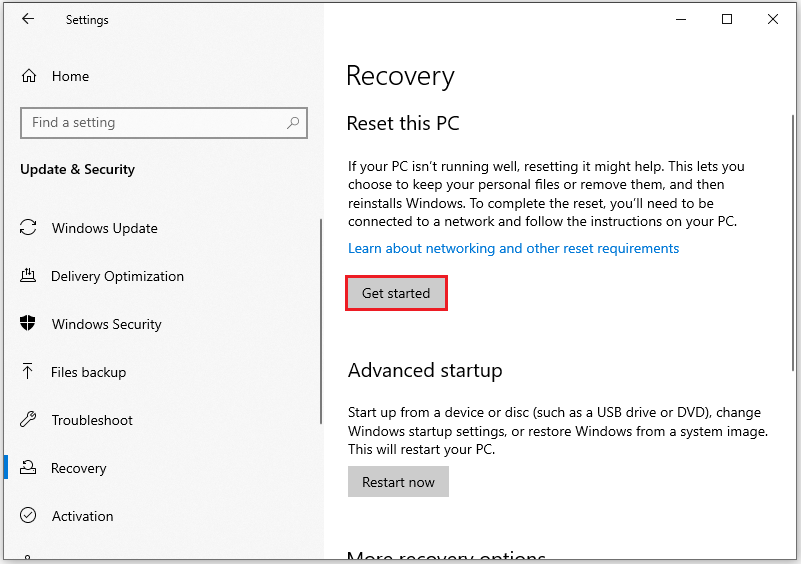
Step 1: Enable the PC reset feature from Settings.
- Click the Start Menu and select the Settings icon.
- Navigate to Update & Security > Recovery.
- Under the Reset this PC section, click Get started.
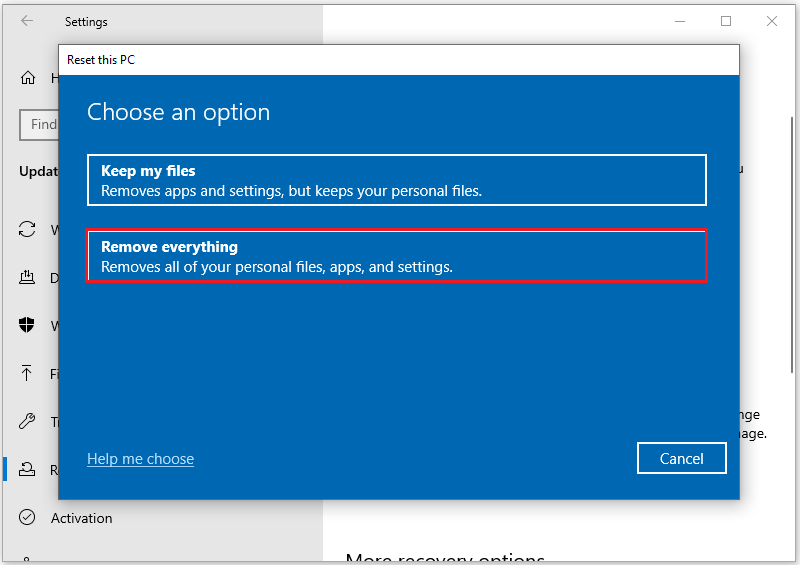
Step 2: Here are two options to Reset this PC: Keep my files and Remove everything. The latter is recommended because it can erase all personal files, apps, and settings, making it impossible to recover data. Therefore, it is perfect for selling or fixing serious problems like malware.
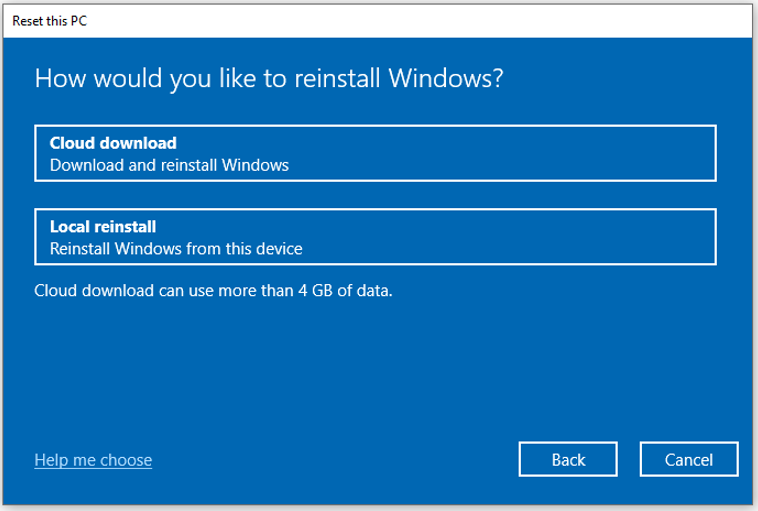
Step 3: Select a reinstallation method.
- Cloud download: Downloads a fresh Windows from Microsoft.
- Local reinstall: Reinstall Windows from this PC. It reinstalls the system by extracting the operating system installation files from a hidden recovery partition on the hard drive, also known as a recovery partition.
Step 4: Follow the prompts, click Reset, and wait a few minutes until the preparation is fully finished.
Reinstalling Windows may take a while. Your computer or laptop will restart multiple times throughout the process.
When the Computer Can Not Start Normally
If your computer fails to boot normally, you’ll need to operate within the Windows Recovery Environment (WinRE).
To enter WinRE, just interrupt the Windows startup process 3 times. Power on the PC and then power it off immediately when you see the PC logo screen. Repeat this process 3 times, and the WinRE will open automatically.
Step 1: Click Troubleshoot > Reset this PC.
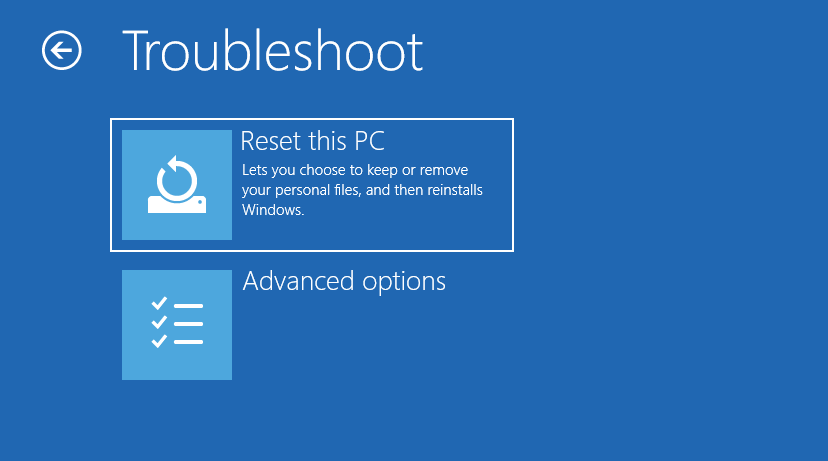
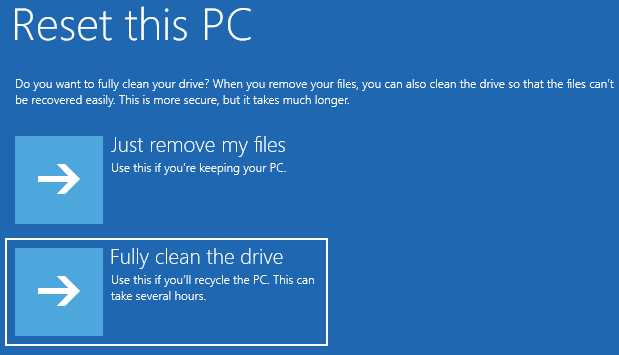
Step 2: Click Remove everything > Local reinstall > All drives > Fully clean the drive.
Then follow the instructions to reset the computer.
How to Reimage Computer via System Image Recovery
Reimaging a computer using System Image Recovery can be done in two different ways: from the hard disk or via the network.
Below, I will walk you through both methods to help you reimage your computer efficiently.
#1. Reimage Computer from Hard Disk
Before reimagining your computer using a system image, you need to create a Windows image via the Backup and Restore (Windows 7) feature.
Here are the steps:
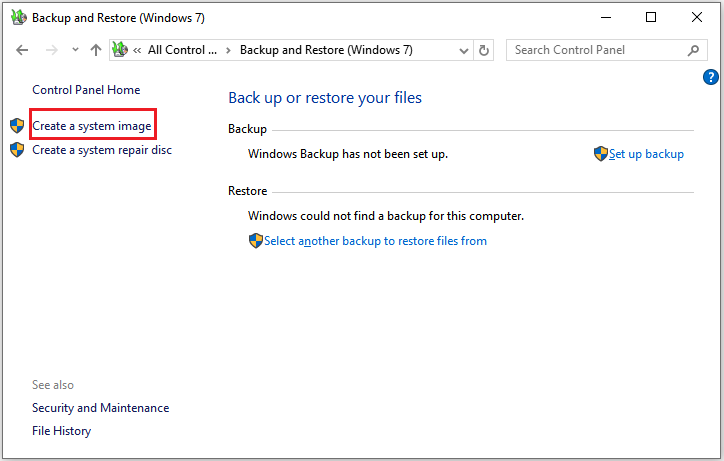
Step 1: Navigate to Create a System image feature from Control Panel.
- Type Control Panel in the search box and click Open from the right side.
- Select Backup and Restore (Windows 7).
- Click Create a system image feature in the left pane.
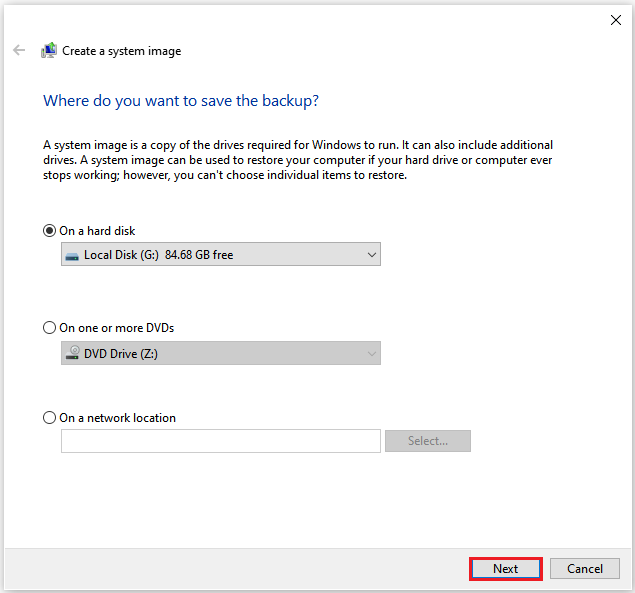
Step 2: Next, select the partition where you wish to store the backup. You can choose a hard drive, a DVD, or a network location. Here, I choose to back up to a hard disk and then click Next.
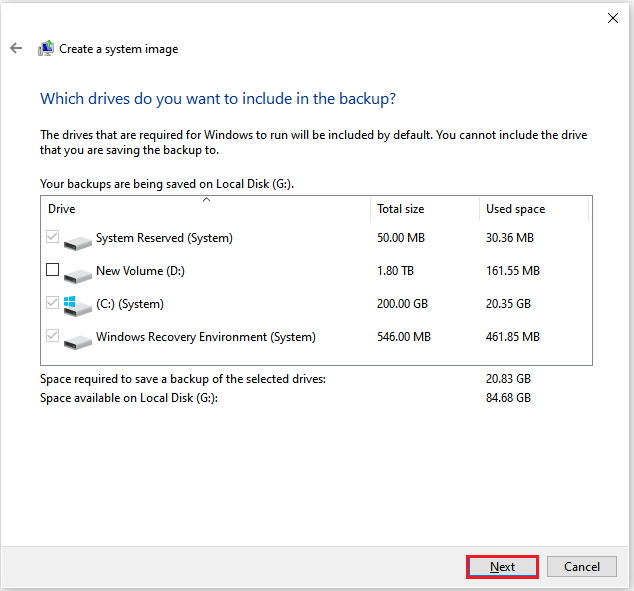
Step 3: By default, the backup includes the system-related partitions. Then, click Next.
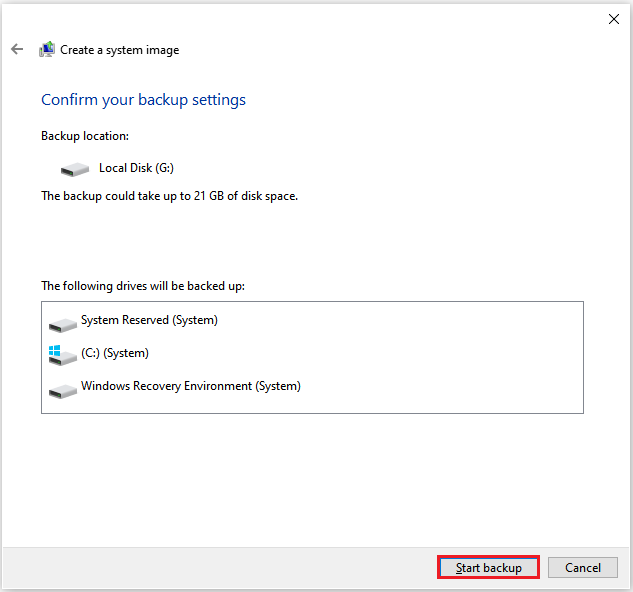
Step 4: In the next window, verify your backup settings, including the backup location, the size of the Windows 10 system image, and the drives to be included in the backup. Click Start backup to begin the process.
The backup will be complete after a few minutes. Next, follow these steps to reimage your computer using a system image recovery.
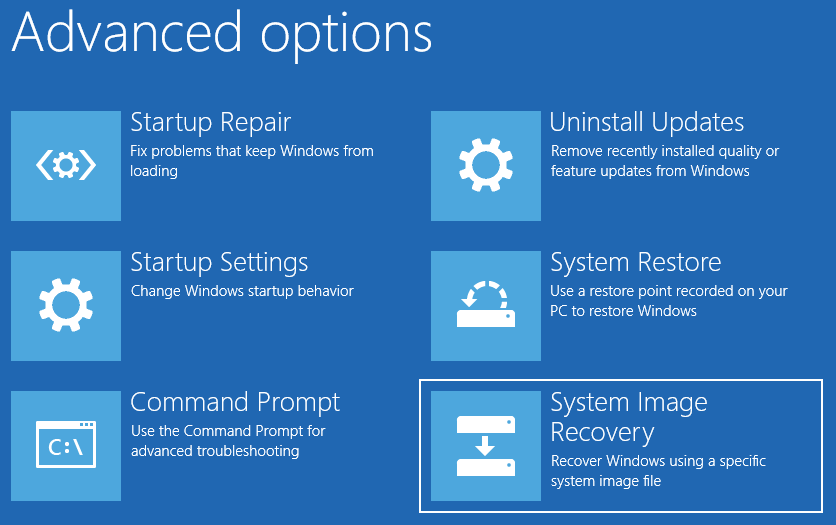
Step 1: Enter the WinRE and click Troubleshoot > Advanced options > System Image Recovery.
Step 2: Select your account and type your password to enter the Re-image your computer interface.
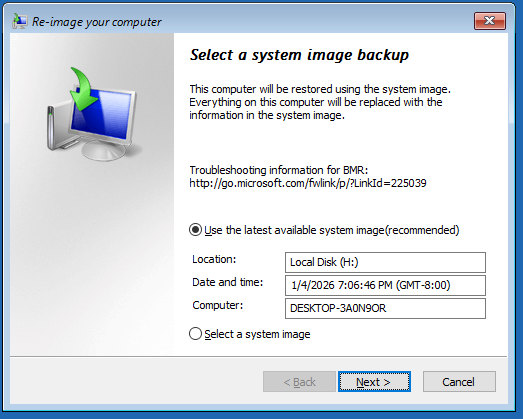
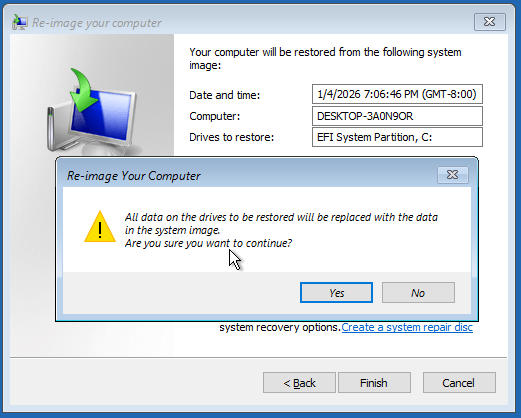
Step 3: Follow the instructions to restore your PC. A warning about formatting might appear, then click Yes to continue.

#2. Reimage Computer from Network
When creating a system image, “Network Location” refers to backing up the entire computer system to a network shared folder or a network-attached storage (NAS) device.
The advantage of doing this is that you can remotely manage the backup over the network from different devices, making system recovery convenient. It also avoids occupying local hard drive space or using external hard drives.
If you selected a network location when creating the image, you will need to set up a NAS shared location yourself. After creation, the subsequent system reimage steps are as follows.
Step 1: Follow the steps above to access the Re-image your computer interface.
Step 2: Click Advanced, and in the new pop-up window, click Search for a system image on the network.
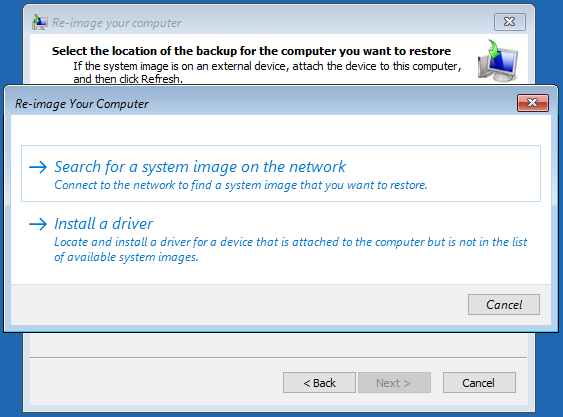
Then, follow the instructions to do a reimage PC repair.
How to Reimage a Computer from USB Drive
Reimaging your computer’s operating system using a USB drive is a useful method, especially when there is no internet connection.
Here are the detailed steps:
Step 1: Go to the Download Windows 10 site on your working computer. If you are using Windows 11, visit the Windows 11 download website.
Step 2: Under Create Windows Installation Media, select Download Now. The MediaCreationTool.exe tool is downloaded.
Step 3: Run MediaCreationTool.exe. The media creation tool walks through creating installation media. Then, use this tool to create a bootable USB drive (usually 8GB or larger).
Step 4: Insert the bootable USB drive into the computer where you want to reimage the system.
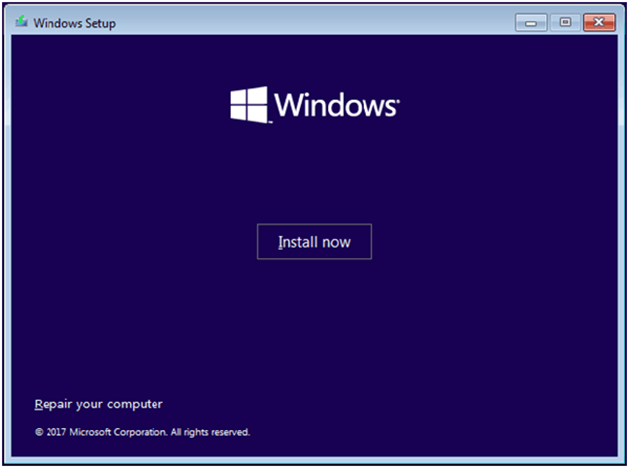
Step 5: Start your computer and repeatedly press the boot menu key (usually F12, F2, or Esc) to enter the boot menu.
Step 6: Select the USB drive as the boot drive and press Enter.
Step 7: Follow the on-screen prompts (language, time), and then click Install Now. Complete the region, account, and privacy settings to access the desktop.
Step 8: Click I don’t have a product key and click Next. Then, tick the checkbox next to the I accept the license terms option and then click Next.
Step 9: Select Custom: Install Windows only (Advanced).
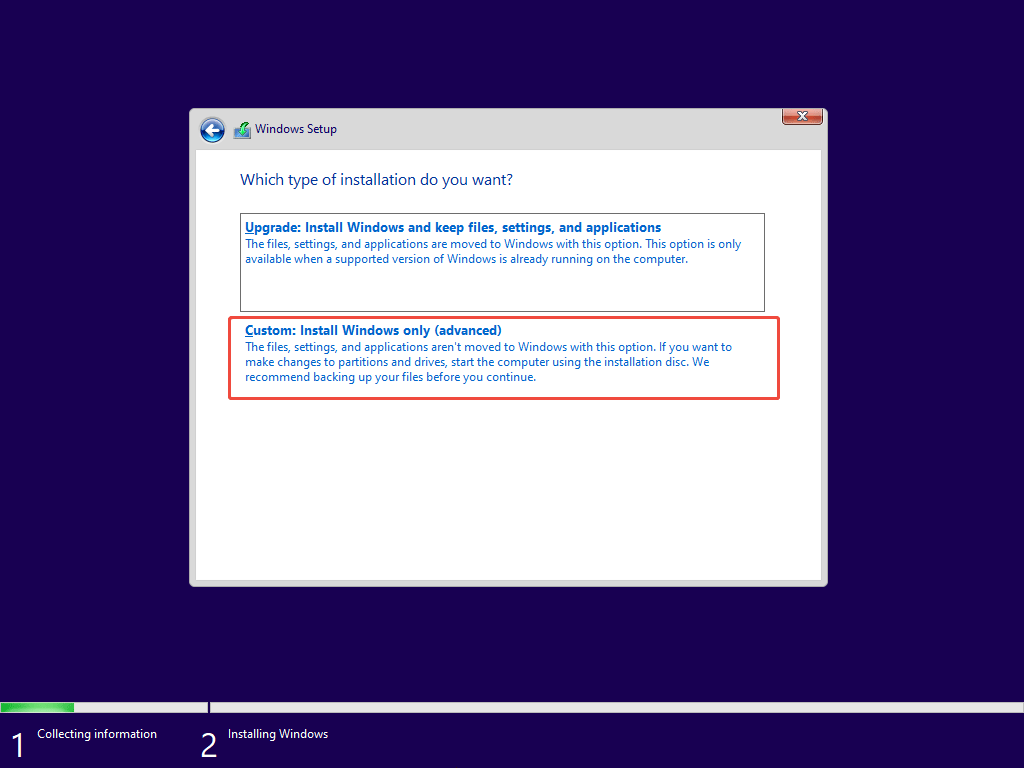
Step 10: Select each partition on your main drive and click Delete, then choose the Unallocated Space and click Next to install.
Step 11: After that, finish Windows setup (region, account, privacy), and it will install a fresh Windows on your computer.
Once it’s done, simply log in with your account.
Also read: How to Create Bootable USB from ISO Win10
Bonus Tip: Back up Computer via MiniTool Partition Wizard
Reimaging your computer is both troublesome and time-consuming, whether due to a system crash or other reasons.
Based on this, you can use the Migrate OS to SSD/HD function of MiniTool Partition Wizard to migrate your system to a new hard drive or solid-state drive.
The following will explain how to use it to complete the data migration.
MiniTool Partition Wizard DemoClick to Download100%Clean & Safe
Step 1: Connect the hard drive to your computer.
Step 2: Open MiniTool Partition Wizard and click on the Migrate OS to SSD/HD Wizard feature.
Step 3: Select option B and click Next.
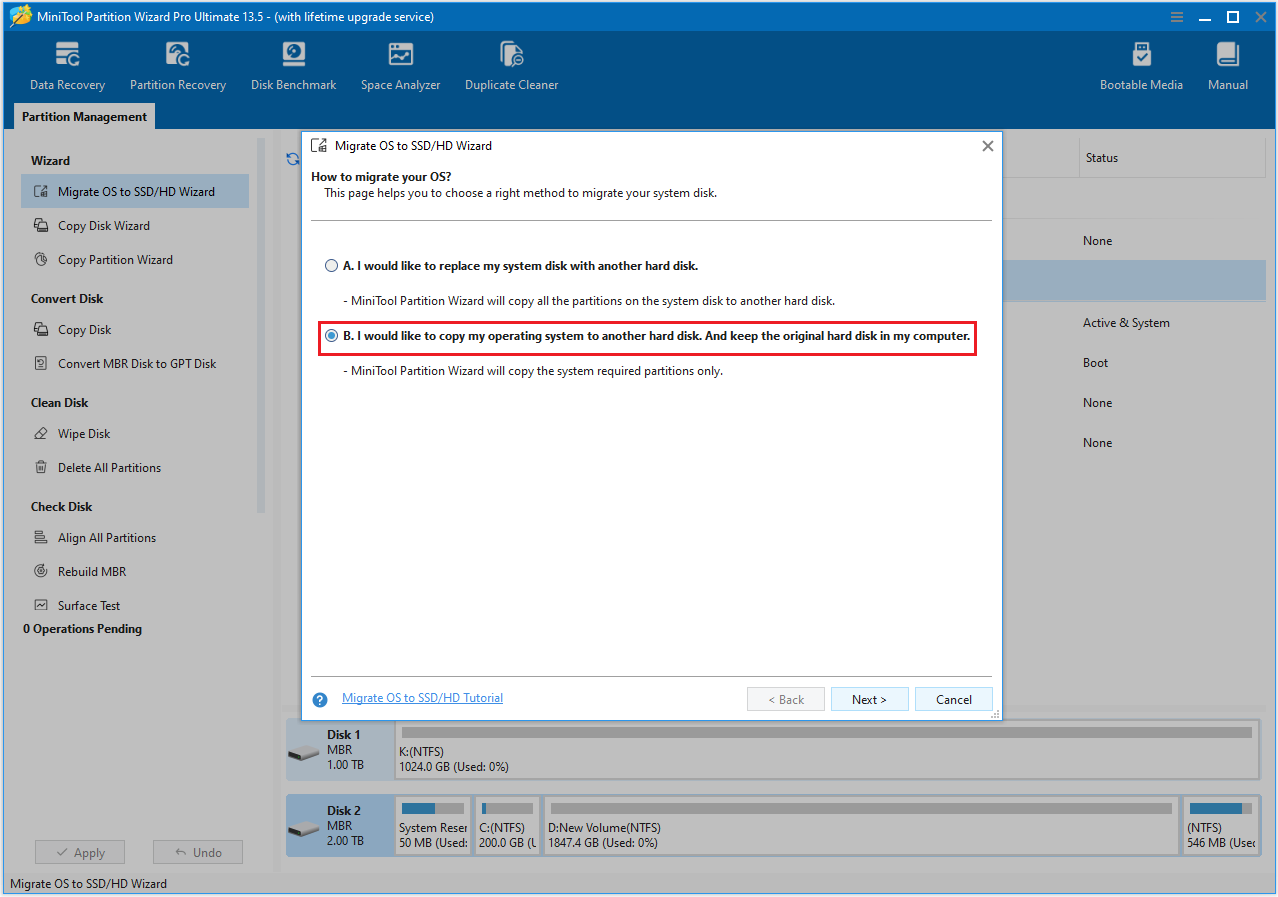
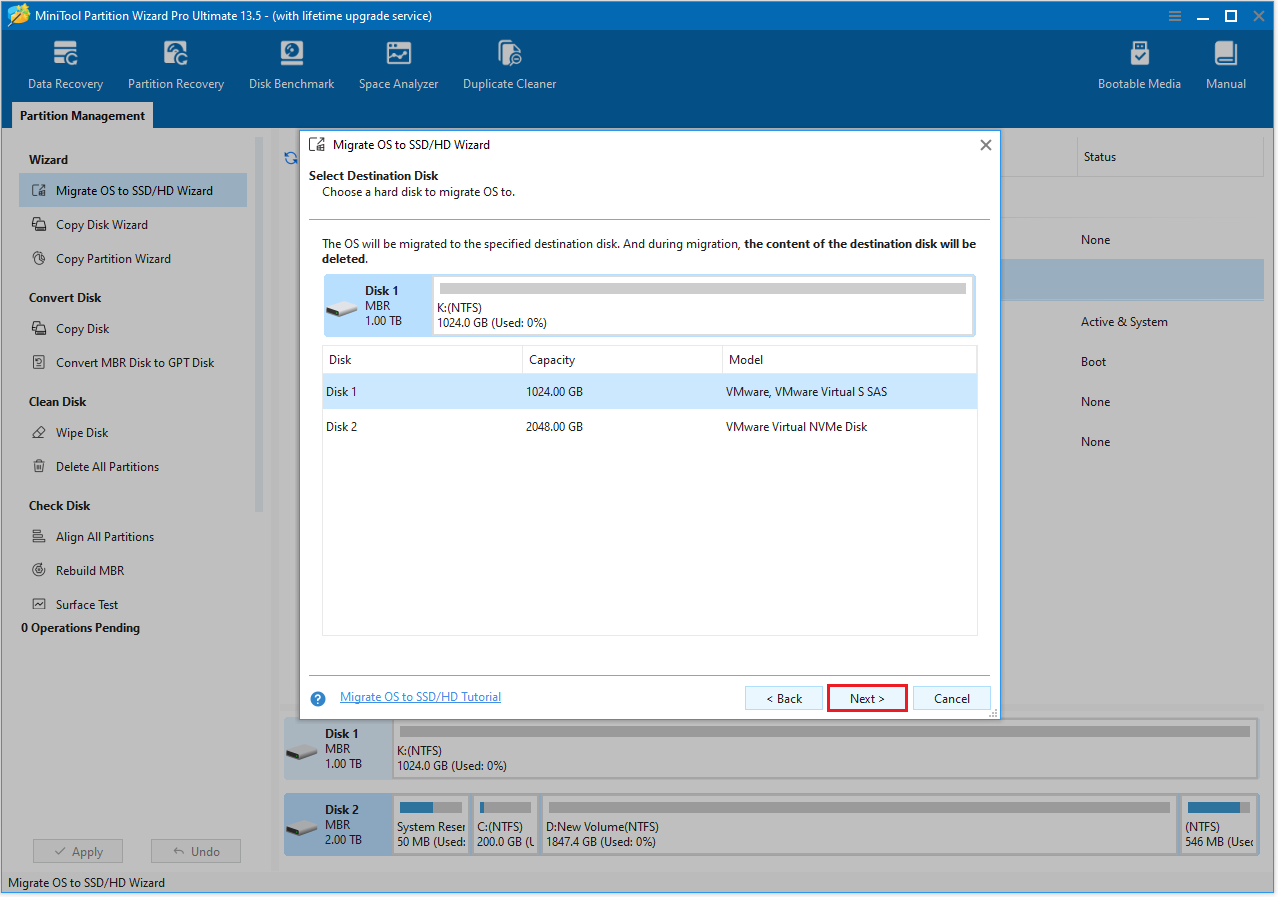
Step 4: Choose the destination disk. Then click Next > Yes.
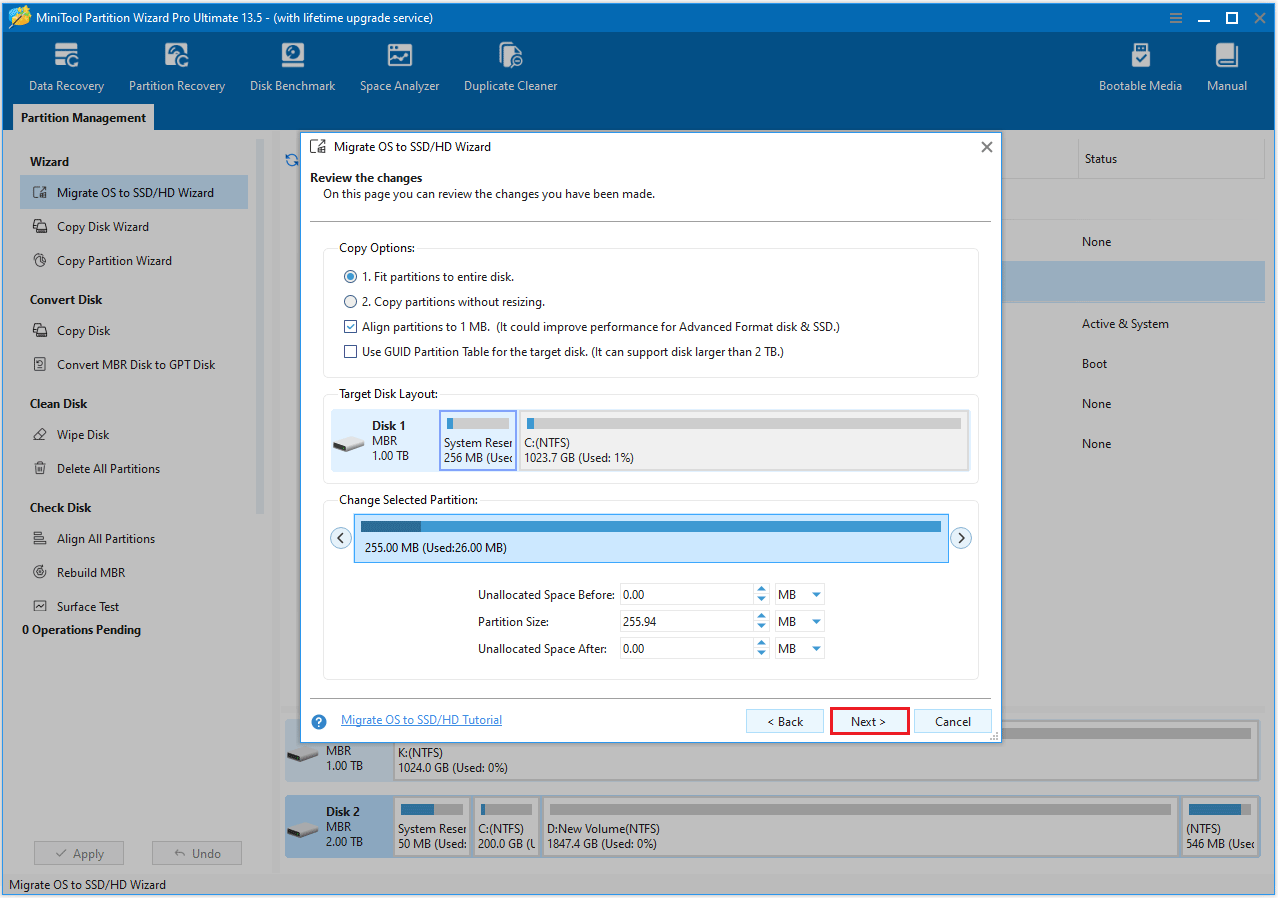
Step 5: Choose your desired copy settings and customize the disk layout as needed. Then, click Next to continue.
- The options “Fit partitions to entire disk” and “Align partitions to 1 MB” are selected by default. The former adjusts partition sizes proportionally to utilize the full capacity of the new hard drive, and the latter option will apply 4K alignment to the disk.
- If the original hard drive is an MBR disk, but you want the cloned disk to be a GPT disk, you can choose the Use GUID partition table for the target disk option.
- Under the Change Selected Partition section, you can resize or move the partition according to your needs.
Step 6: Read the note about how to boot from the new disk and press the Finish > Apply buttons.
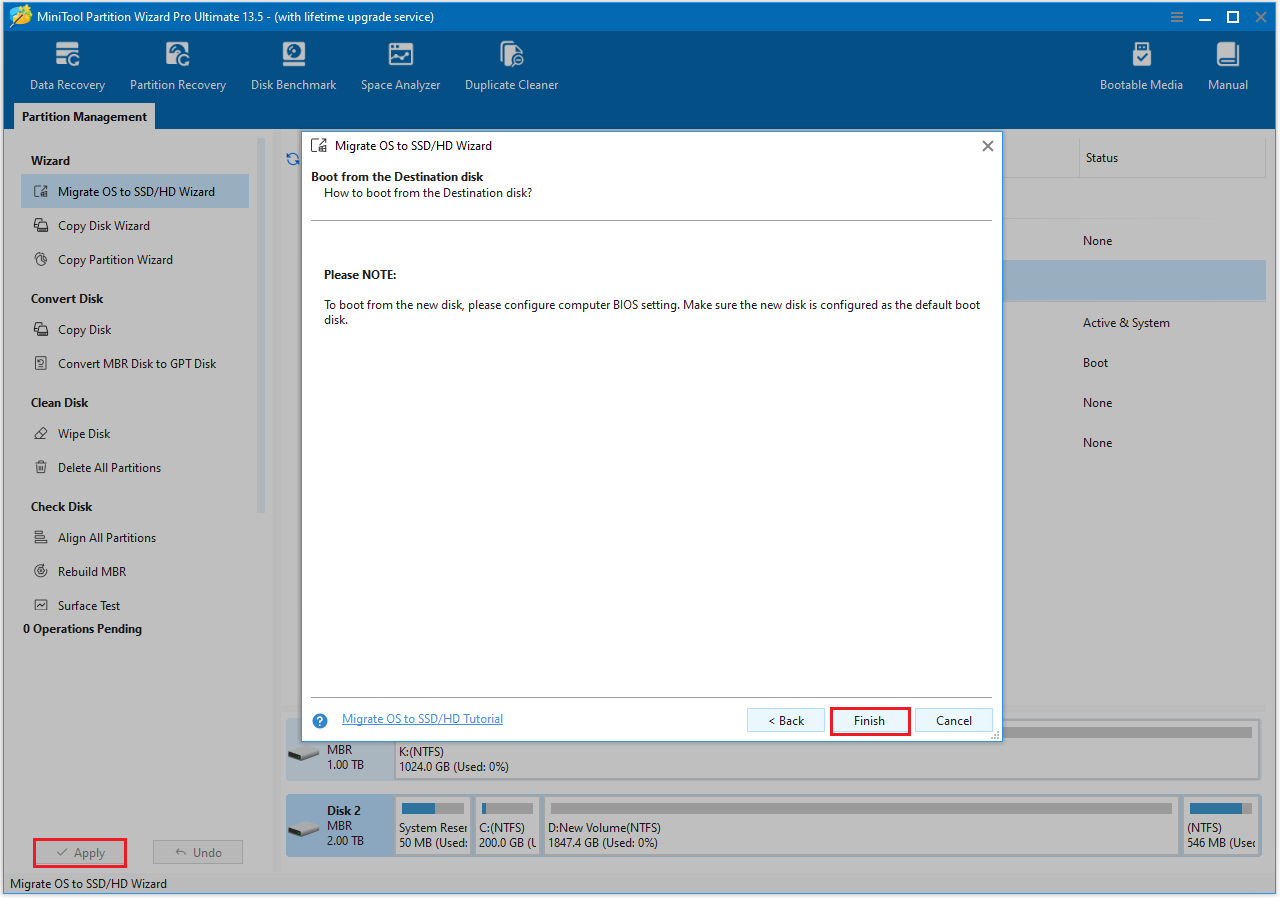
After the migration is complete, your operating system will be copied to another hard drive.
Bottom Line
This article describes three methods that help you reimage a computer: reimage a computer without a Disc, reimage computer via system image recovery, and reimage a computer from USB drive. Furthermore, it shows you how to use the migration function to transfer your data.
If you have any questions or feedback about MiniTool Partition Wizard, feel free to contact our support team at [email protected] for additional help.
About The Author

Position: Columnist
Cecilia has been an editor at MiniTool for two years. She primarily focuses on disk and partition-related content, with particular expertise in disk cloning, partition recovery, and PDF document conversion. She is dedicated to providing users with clear and accurate solutions to help them efficiently resolve common computer problems.
User Comments :