About Nintendo Switch Storage
How much storage does a Switch have? Nintendo Switch is a game console released by Nintendo in March 2017. It adopts the integrated design of home console and handheld, and supports 1920 * 1080 TV output and 1280 * 720 handheld output.
The Nintendo eShop offers you many games to download. The problem is that the Nintendo Switch only comes with 32GB of internal storage, of which only 25GB is actually accessible by the end-user. Apparently, this is minuscule if you plan on having more than just a handful of games and apps downloaded to your handheld console.
How much storage does each Nintendo Switch model have?
Nintendo Switch Model | Internal Storage | Expandable Storage |
Nintendo Switch | 32GB | microSD |
Nintendo Switch Lite | 32GB | microSD |
Nintendo Switch OLED | 64GB | microSD |
Not all internal storage is available to users because part of it is reserved for the operating system.
How to Check Available Storage? Here are the steps:
- Open System Settings.
- Select Data Management.
- View the available space for both System Memory and the installed microSD Card.
When Nintendo Switch storage is full, what should you do to add the Nintendo Switch storage size? There are three methods you can use:
- Free up space on your Switch.
- Add a microSD card.
- Upgrade to a larger SD card if you have a smaller SD card installed already.
How to Free Up Nintendo Switch Storage?
If you want to save money, you can use the first method. This first method is very simple and you just need to follow the steps below:
Step 1: Delete games.
- From the Home Menu, select System Settings.
- Select Data Management and then click Manage Software.
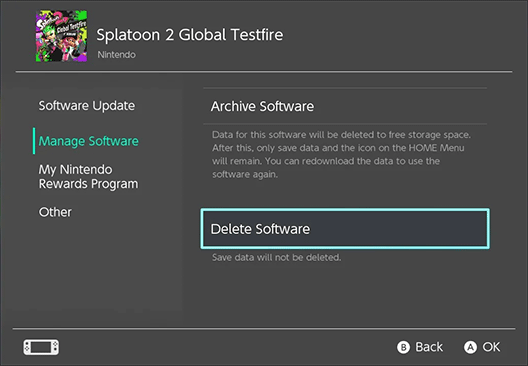
- Select the game you wish to delete.
- Choose Delete Software or Archive Software. Delete Software option removes all data including game saves, while Archive Software option deletes the game but keeps the game saves in case you want to download the game again.
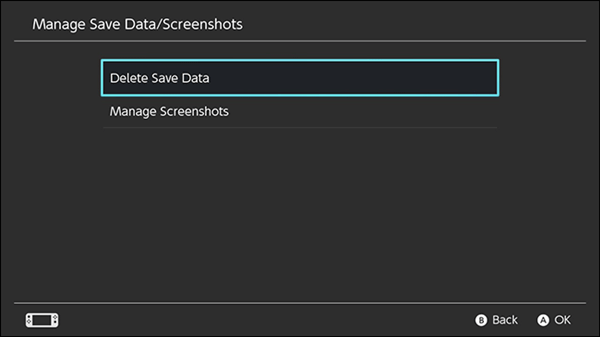
Step 2: Delete Save Data and Screenshots
- Navigate to Data Management
- Select Delete Save Data or Manage Screenshots. The former will bring you to a list of games that have save data on your switch. You need to choose the save data to delete. The latter will bring you to a menu so you can adjust your screenshots.
How to Add a MicroSD Card to Nintendo Switch?
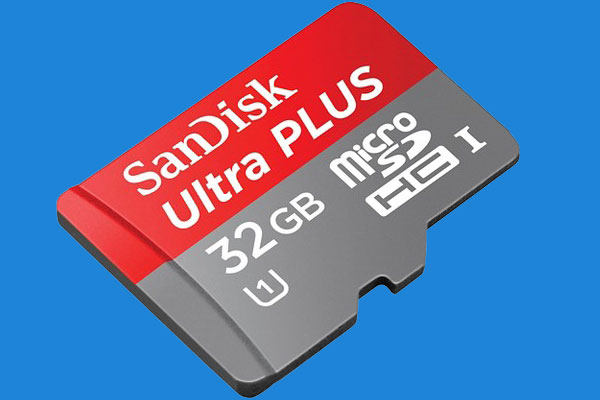
The best way to increase storage space for your Nintendo Switch is to add a microSD card to it. Before you add a microSD card, you should choose a proper one.
Stage 1. Choose a Proper Nintendo Switch SD Card
When you plan to pick a Nintendo Switch memory card, you should keep these tips in mind:
1. The built-in system memory card can’t be replaced.
When we talk about add a microSD card, which means there is an extra location for you to expand Nintendo Switch storage. After you add a Nintendo Switch SD card, there are two cards in this console: the built-in system memory card (MMC) and the SD card.
The built-in system memory has only a capacity of 32GB and can’t be expanded. But don’t worry! Nintendo offers you the following methods to free up its space:
- Copy screenshots to the microSD card to save system memory space: start System Settingsand then go to Data Management > Save Data/Screenshots > Manage Screenshots to copy screenshots between the system memory and the microSD card.
- Transfer software data to the SD card: Nintendo Switch system update Ver. 10.0.0 (Released April 13, 2020) added an option to transfer software data between the system memory and an SD card, which allows you to transfer downloadable software, update data, and DLC from the system memory to the SD card.
2. Nintendo Switch only supports microSD card.
Nintendo Switch official website stated that it supports using microSD card for storage expansion. Other types of memory cards can’t be inserted into the console.
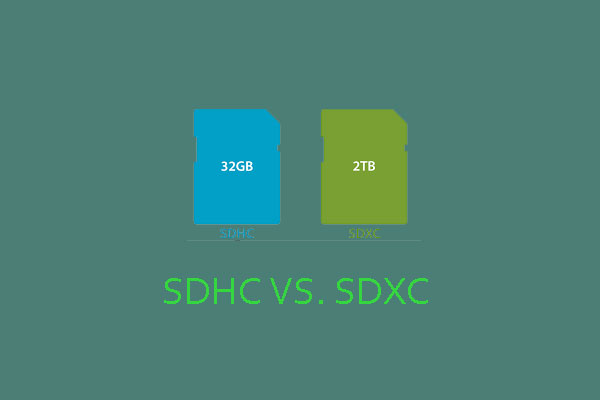
3. Nintendo Switch SD card max size is 2TB.
In the official website, Nintendo states that Nintendo switch console is compatible with microSD, microSDHC, and microSDXC. With these microSD cards, you can easily expand Nintendo Switch storage space up to 2TB.
4. Choose what size SD card for Switch?
Although, Nintendo Switch allows you to expand the storage up to 2TB, it’s not sensible to add a 2TB SD card. Actually a proper Nintendo Switch SD card size depends on how you play the games.
If you are inclined to buy game cards, and only buy eShop titles occasionally, a 64 GB card should be enough. If you download eShop games on a regular basis, a 128GB card should be good for you. But if you want to download a good portion of AAA games, a card with at least 200GB storage space is recommended.
5. What speed SD card should Nintendo Switch use?
As we all know, the faster the read and write speeds of microSD card, the more smoothly the Nintendo Switch runs. However, Nintendo sated in its official website that the Nintendo Switch supports UHS-I and doesn’t support UHS-II.
The speed of UHS-I card can’t exceed 104 MB/s. If you buy a higher-speed UHS-II card, it is just a waste of money and performance.
The Best Micro SD Card For Nintendo Switch (2020)
Stage 2. Add a Micro SD Card to Nintendo Switch
If you don’t have a microSD card already installed and you don’t need to move games from an SD card to another SD card, what you should do is to find the microSD slot and insert the SD card into the console. Please refer to the following steps:
Step 1: Turn off your Switch by holding down the power button, scrolling down to Power Options, and then selecting Turn Off.
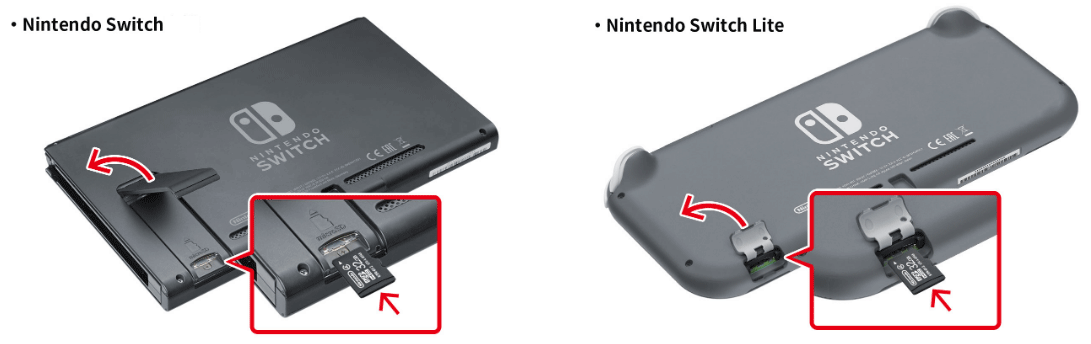
Step 2: Turn the handheld over, then lift the kickstand next to the right Joy-Con controller. Underneath the plastic stand, you’ll find a microSD card slot.
Step 3: Insert your new microSD card into the slot. You should hear a slight click once it’s securely docked.
Step 4: Power on your Nintendo Switch and use the new feature added in Nintendo Switch system update Ver. 10.0.0 to transfer games and data to the microSD card.
How to Upgrade to a Larger Nintendo Switch SD Card
If you already have a microSD card installed and want to swap it for a larger card, you should copy games from an SD card to another SD card. If so, you can use the following two methods to complete this job.
Method 1. Use Copy and Paste Feature
Step 1: Format the microSD card if it has ever been used in other host devices. If it hasn’t ever been used, you can skip this step. You can perform the Nintendo Switch SD card format through the following steps:
- Insert the microSD card into your Nintendo Switch.
- Turn your Nintendo Switch on.
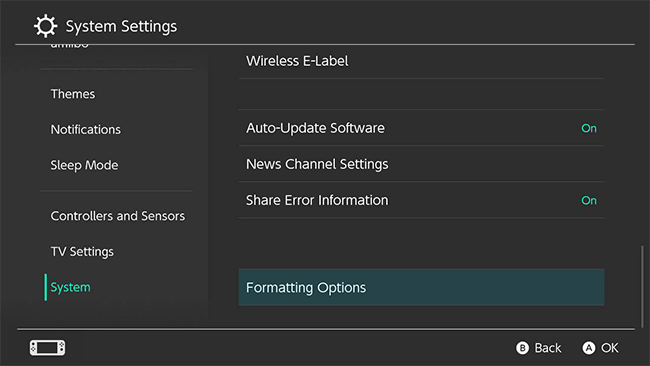
- Select Settings form the home screen.
- Select System from the settings menu. It’s at the bottom of the menu.
- Select Formatting Options. It’s all the way at the bottom of the menu.
- Select Format microSD Card.
- Select Continue.
Step 2: Eject your old microSD card from the Nintendo Switch and then connect it to a Windows computer via an adapter. Your computer will recognize it as a removable drive.
Step 3: Open File Explorer to access the microSD card. Then, highlight the “Nintendo” folder and drag it to the desktop.
Step 4: Eject the first microSD card and then connect the second microSD card to the computer. Access the second microSD card and drag the data from the desktop to this microSD card.
Step 5: Eject the new microSD and then insert it into the Nintendo Switch console. If you find some software that cannot be read on the system via the new microSD card, you can simply redownload it from the Nintendo eShop.
Method 2. Use MiniTool Partition Wizard
MiniTool Partition Wizard can help Nintendo Switch transfer SD card without formatting. Besides, if there are more than one partitions on the original Nintendo Switch microSD card (I mean the Nintendo Switch has been hacked), MiniTool Partition Wizard may help you migrate data to the new SD card without data loss. Please follow the steps below:
Step 1: Connect your two microSD cards to a computer via card readers. Then, click the above button to buy MiniTool Partition Wizard.
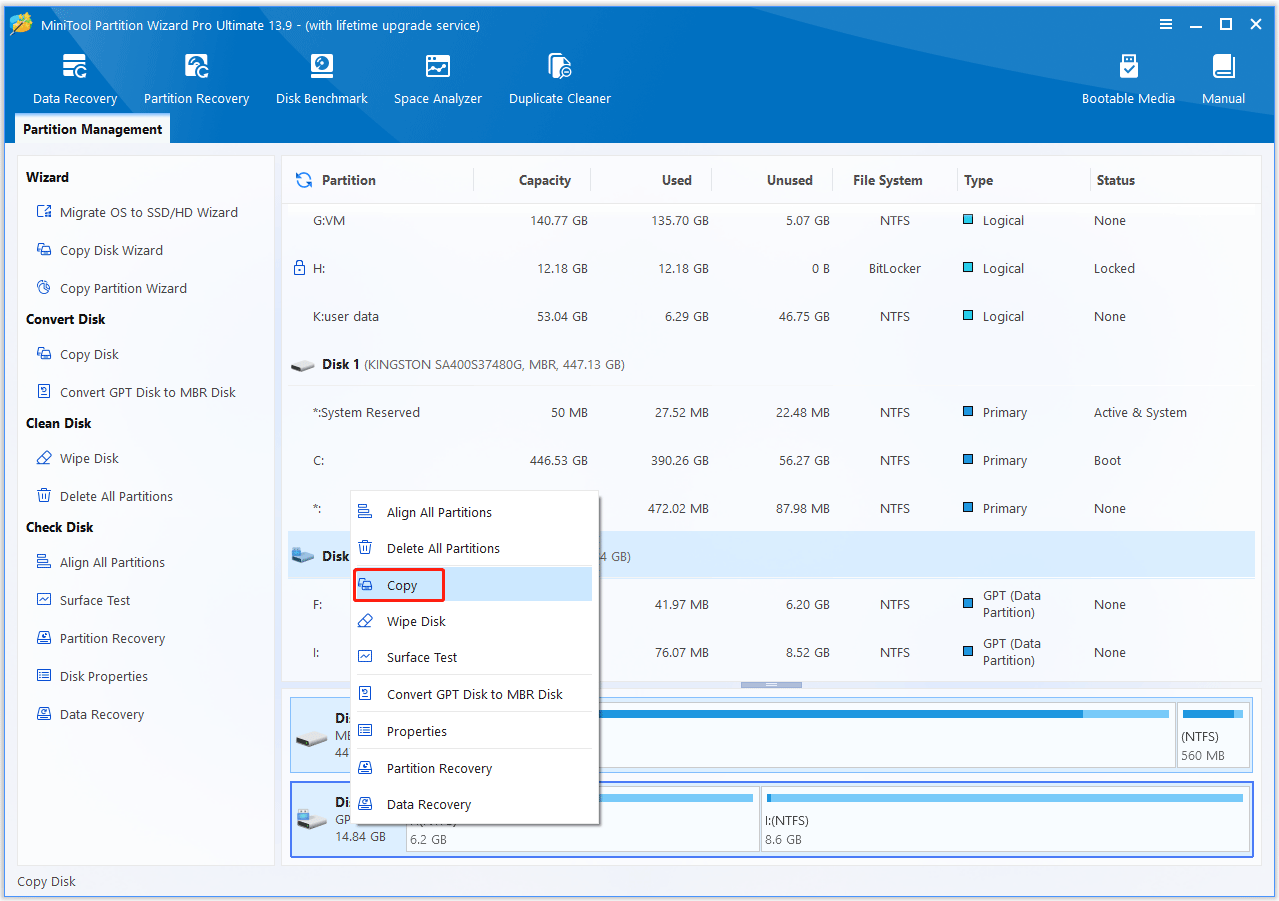
Step 2: Launch MiniTool Partition Wizard and go to its main interface. Right-click the old SD card disk and choose Copy.
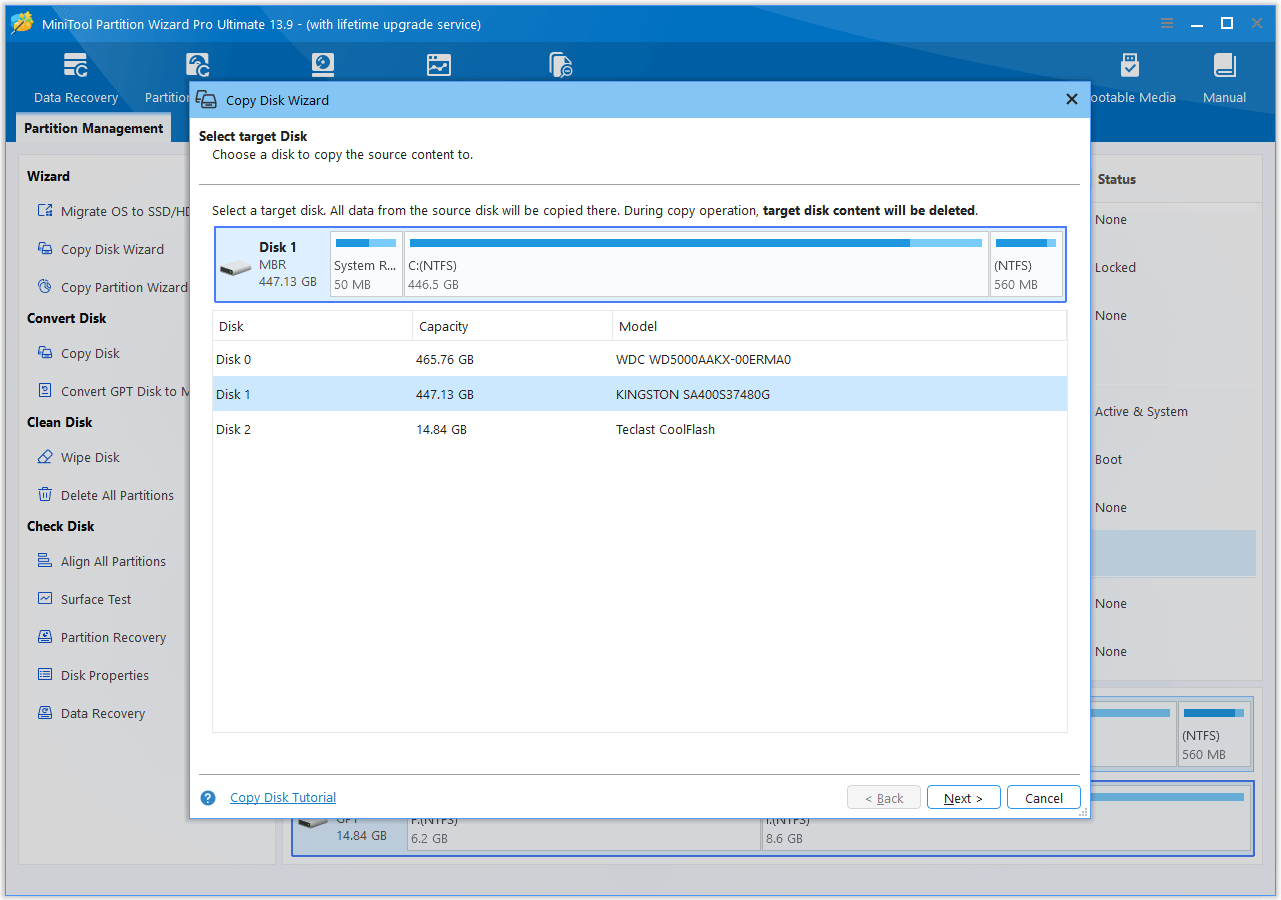
Step 3: Choose the new SD card disk as the destination and then click Next button. Then, a window pops up, warning that all the data on the destination disk will be destroyed. Click Yes button to continue if it’s OK.
Step 4: When you choose copy options, just keep all in default and click Next button.
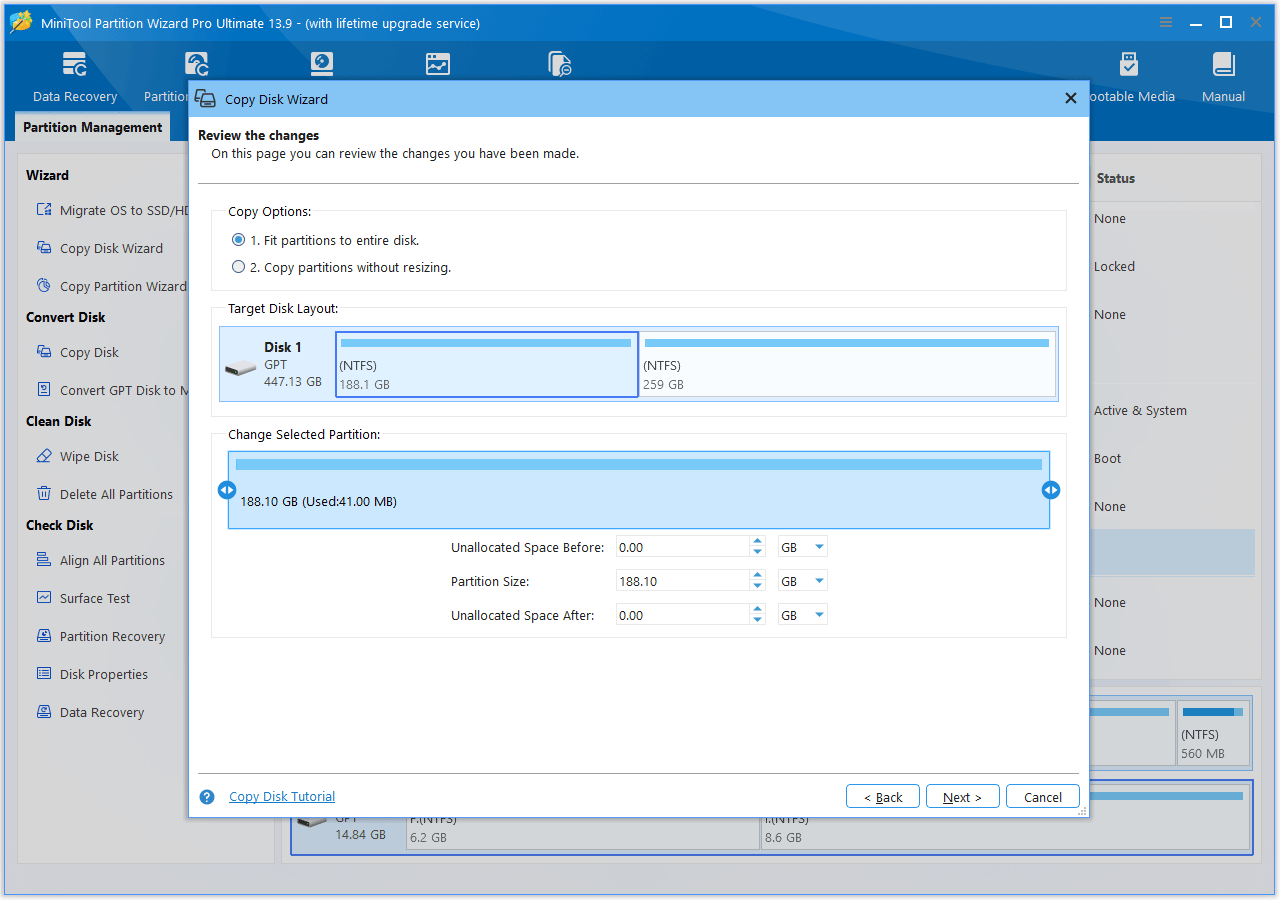
Step 5: Click Finish button and then click Apply button to execute the operation.
Step 6: Insert the new SD card into the Nintendo Switch console and power on it.
Nintendo Switch Storage FAQ
Bottom Line
Can this post solve your problem? Do you have other methods to add Nintendo Switch storage? Please leave your feedback in the following comment zone. If you have difficulty in copying SD card data, you can email at [email protected]. We will get back to you as soon as possible.
About The Author

Position: Columnist
Vega enjoys helping people with computer problems, including disk management, data recovery, data backup, and more. She is constantly expanding her knowledge in related fields. And she will continue to bring more easy-to-understand professional articles to help people solve various problems on the PC.
User Comments :