
What Is a Chipset Driver?
A chipset driver enables communication between the operating system and critical components.
The chipset is the central traffic controller of your computer. It manages how your processor (CPU) communicates with your RAM, storage drives, USB ports, and other connected devices.
So, it’s crucial to update motherboard drivers for better system performance. Prior to installing the chipset drivers, you’d better have a look at your motherboard manual and operate properly.
Should you update chipset drivers? In many cases, yes, but only when necessary.
Update chipset drivers if you:
- Install a new CPU.
- Update your motherboard BIOS.
- Reinstall Windows.
- Experience hardware compatibility problems.
- Notice missing or unknown devices in Device Manager.
If your computer is working normally, updating chipset drivers is optional rather than mandatory.
![How to Update BIOS on MSI Motherboard? [Complete Guide]](https://images.minitool.com/partitionwizard.com/images/uploads/2025/10/msi-bios-update-thumbnail.png)
How to Update Chipset Drivers
There are 2 major ways to update motherboard drivers. You can update chipset drivers automatically in Device Manager or download and install it manually from its official website.
Method 1. Update Chipset Drivers Automatically in Device Manager
The first and simplest method to update chipset drivers is to use the Device Manager. Here’s how to do that:
Step 1. Right-click the Start menu and select Device Manager from the context menu.
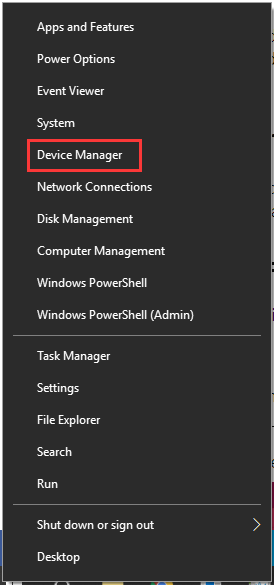
Step 2. In the Device Manager window, expand the System devices categories and right-click the chipset driver that you want to update, then select the Update driver option from the context menu.
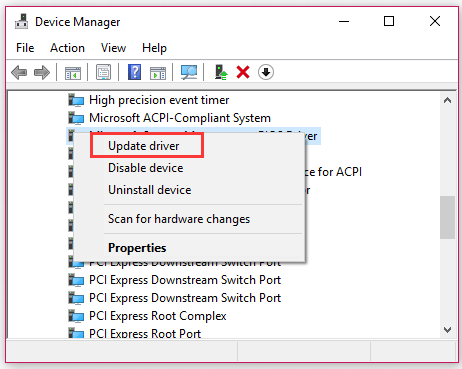
Step 3. Then there are 2 options to update chipset drivers. Here you can select the Search automatically for updated driver software option, which can help you install the updated chipset drivers automatically.
Step 4. Windows will search for the updated chipset drivers automatically, and then you can follow the on-screen prompts to install the drivers on your computer.
Alternatively, you can update chipset drivers on Windows 10 manually. Please keep reading the following content.
Method 2. Update Chipset Drivers Manually
You can download the motherboard drivers from its official website and install it on your computer manually. To do so, you need to check the computer’s system information firstly. It is important to download the right chipset driver that is suitable for your Windows system – whether it’s Windows 10, 32- bit or 46-bit version, etc. For that:
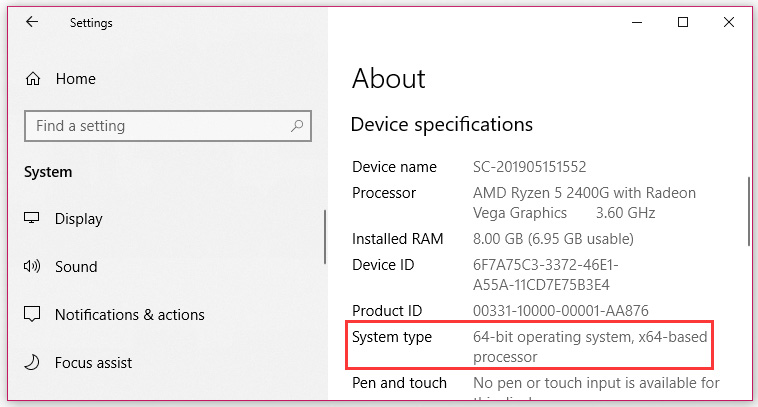
Step 1. Press Win + I keys to open the Settings window, and then click on the System section.
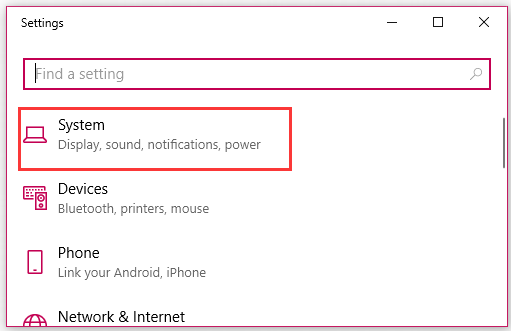
Step 2. Click on the About button from the left pane, and then scroll down the right sidebar to the Device specifications section where you should find the system type is b4-bit or 32-bit.
Step 3. Navigate to the official website of your motherboard manufacturer. Here we take the Intel chipset drivers for example. Click here to visit its official website.
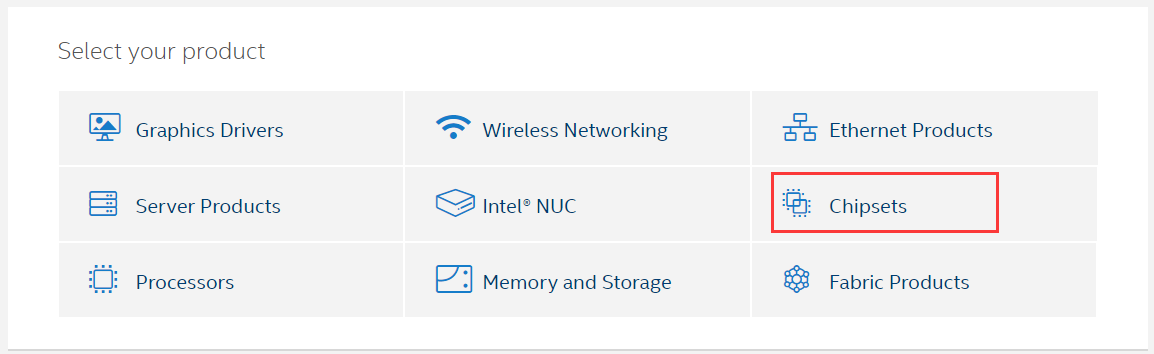
Step 4. Then select the Chipsets section to go on.
Step 5. In the pop-up window, you can select the Product type and Operating system type form the down-down menus to filter the chipset drivers that you want to download. Alternatively, you can type the product name or keywords in the search bar.
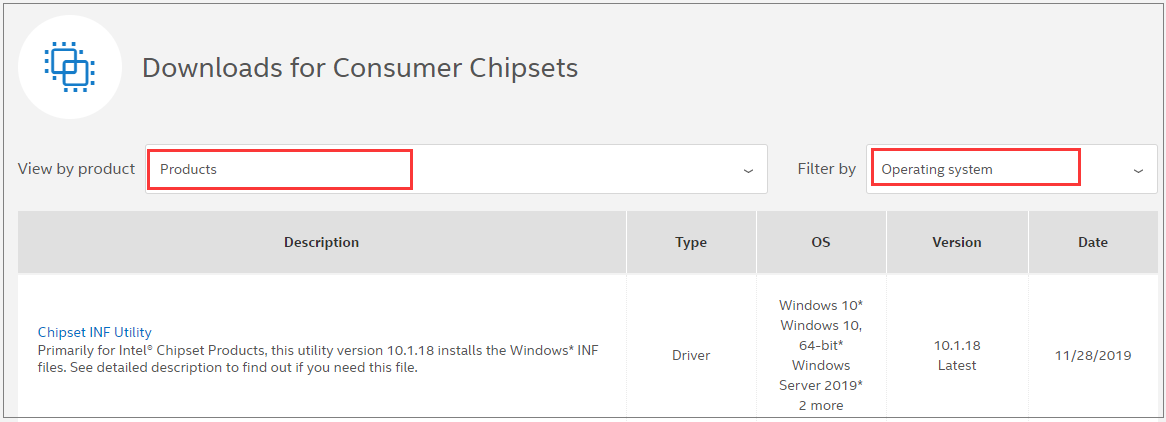
Step 6. Select a suitable chipset driver and click on Download in the next window.
Step 7. After you download the chipset drivers, open the downloaded files and follow the on-screen prompts to install them on your computer
How to Update Chipset Drivers FAQ
Bottom Line
Keeping chipset drivers up to date helps Windows communicate efficiently with motherboard components and can improve hardware compatibility, stability, and overall system performance.
This post offers 2 easy methods to update chipset drivers on Windows 10/11.
User Comments :