Are you planning to upgrade your Gateway laptop hard drive to make your computer work faster or expand your storage space? This post from MiniTool Partition Wizard is worth reading. It gives a step-by-step guide on the Gateway laptop hard drive upgrade.
Why Do You Need to Upgrade Gateway Laptop Hard Drive
Gateway is one of the famous personal computer brands that launches a variety of laptop models. It is a compact, ultra-thin, lightweight laptop designed for everyday tasks. Different models will have different storage configurations.
After using your Gateway for a long time, the hard drive may get corrupted. So, it becomes necessary to upgrade Gateway hard drive with a better one. Here are three common reasons:
- To more storage space.
- To get faster speeds.
- To get rid of hard drive failure.
If you definitely need to perform a Gateway laptop hard drive replacement with a better one, then you need to figure out how to choose the right hard drive for you.
How to Choose a Suitable Hard Drive for Gateway Laptop
As you know, there are two common types of hard drives: HDD and SSD. When you’re looking for a hard drive for your Gateway laptop to upgrade an old drive, you’d better choose SSD rather than HDD because of its higher performance, smaller size, and less noise. But if you just need more space, a hard drive might also be a good choice.
Here are some factors you should consider when choosing a suitable hard drive:
Hard Drive Size and Interface
First, you should check the physical specifications of the hard drive. Make sure that your computer has enough physical space and the interfaces on your laptop and the new hard drive are compatible. You can check your laptop manual to get the information you need.
Built-in hard drives come in various sizes such as 2.5 inches and 3.5 inches. 3.5-inch hard drives are used in desktop computers, while 2.5-inch hard drives are available both in desktop and laptop computers.
Additionally, you need to check the interfaces inside your Gateway laptop. Most modern internal drives (HDD and SSD) use SATA connectors.
Performance
In addition to physical specifications, you should also choose a disk with ideal performance based on your needs, including capacity, rotation speed, read and write speed, cache, vibration, etc. Before you try to buy a drive, you should carefully read the drive’s product description for details about these features.
How to Upgrade Gateway Laptop Hard Drive
Once you have the new disk, you can start upgrading your original Gateway laptop hard drive. It’s not difficult, just three steps: initialize the new disk; upgrade the Gateway hard drive; remove the original hard drive, and install the new disk. Let’s do it step by step to perform a Gateway laptop hard drive replacement.
Stage 1. Initialize New Disk
Since the disk is brand new, it needs to be initialized to MBR or GPT before it can be used. You can do this in Windows Disk Management.
Step 1: Connect the new disk to your laptop with a USB adapter.
Step 2: Press the Win + R key to open the Run dialog box. Then input diskmgmt.msc and click on OK to open Disk Management.
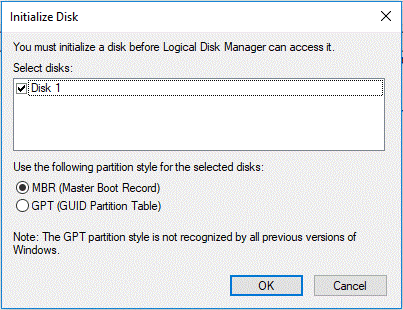
Step 3: In the Disk Management window, right-click on the new disk and select Initialize Disk.
Step 4: In the pop-up window, select MBR or GPT according to your needs and click on OK. Then follow the on-screen instructions to finish the operation.
After initializing the disk, you can keep the new disk connected to your computer and then go to Stage 2 to replace the Gateway hard drive.
Stage 2. Upgrade Gateway Hard Drive
There are two options for Gateway laptop hard drive upgrade:
- Gateway hard drive upgrade without OS reinstallation.
- Gateway hard drive upgrade with OS reinstallation.
No matter which one you choose, there’s a tutorial for it below.
Gateway Laptop Hard Drive Upgrade Without OS Reinstallation
To upgrade your hard drive to a new one without reinstalling Windows, you can clone the original hard drive using reliable third-party hard drive cloning software.
Here I recommend MiniTool Partition Wizard. It is a powerful disk manager that can help you handle various disk or partition needs, including migrate OS to SSD/HD, clone a hard drive, clone Windows 10 to SSD, etc.
What’s more, MiniTool Partition Wizard offers lots of helpful features for partition/disk management such as partition hard drive, convert MBR to GPT, recover data from hard drive, and more.
MiniTool Partition Wizard DemoClick to Download100%Clean & Safe
Step 1: Download and install MiniTool Partition Wizard on your PC. Then launch it to its main interface.
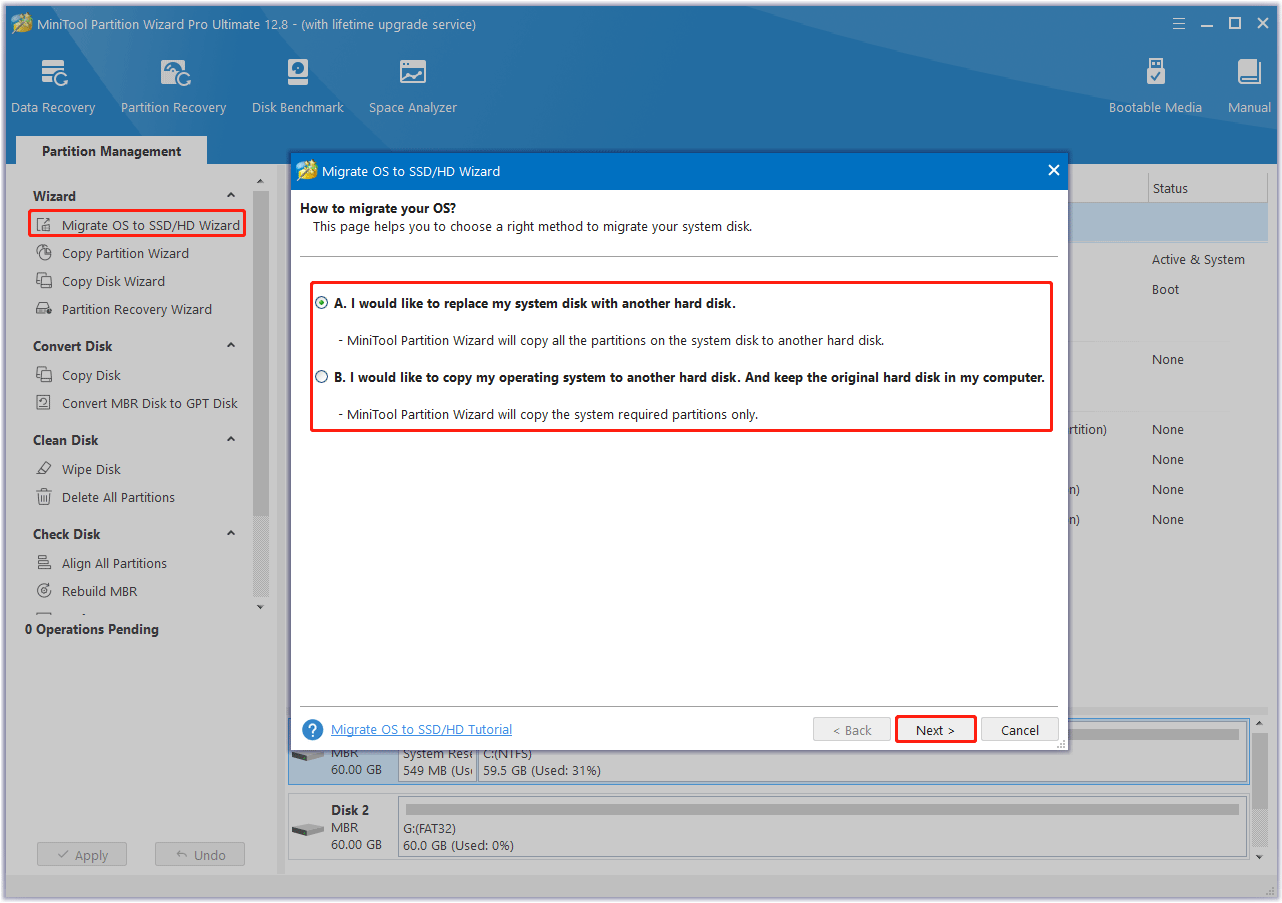
Step 2: Choose Migrate OS to SSD/HD Wizard from the left action panel.
Step 3: Choose the right method to migrate the system disk and click on Next. Option A allows you to clone the whole system disk, while Option B only allows you to migrate the OS-related partitions.
Step 4: Select the new hard drive as the destination disk and click on Next.
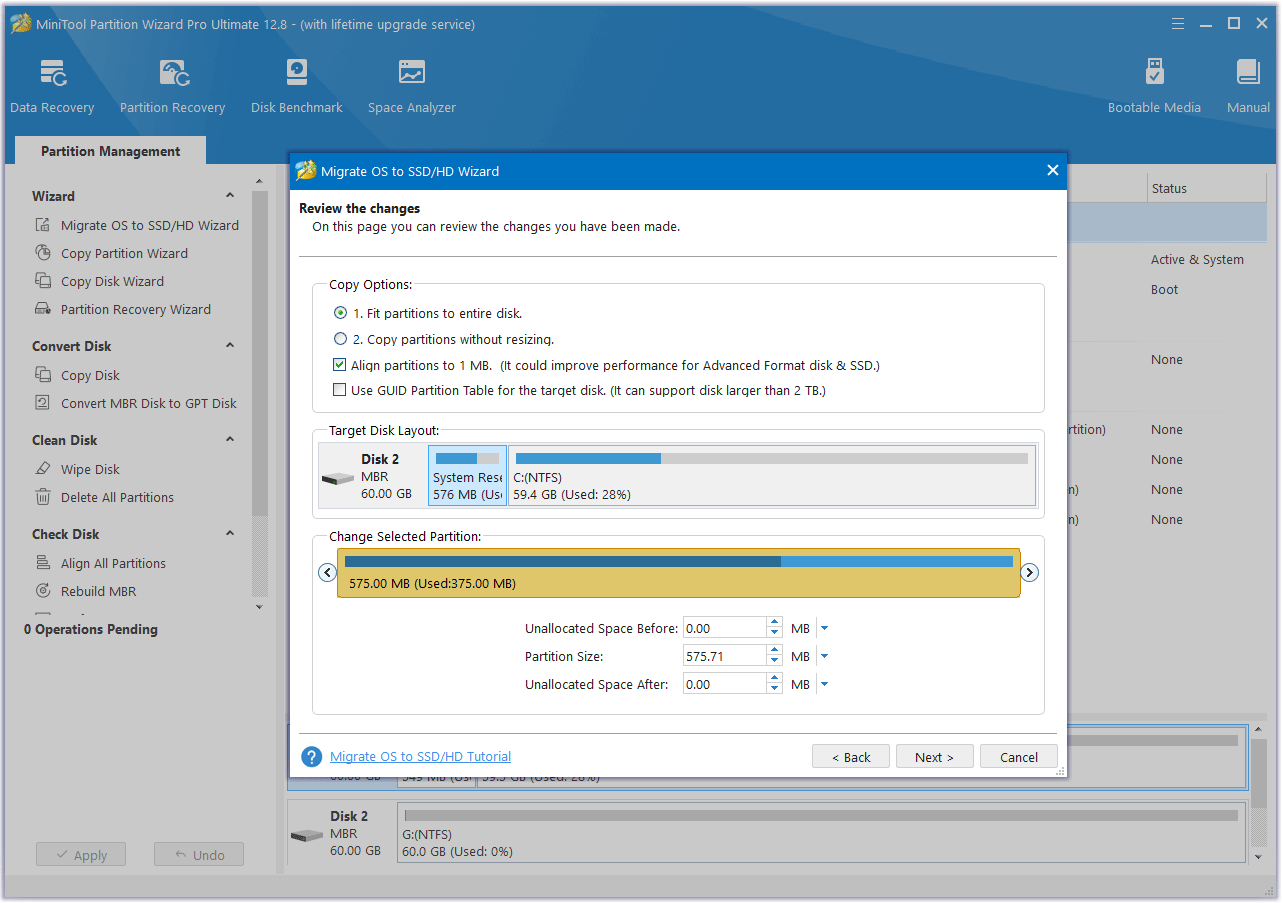
Step 5: In the following window, configure the Copy Options, Target Disk Layout and Change Selected Partition according to your needs. Then click on Next.
Step 6: Read the note about how to boot from the new disk and click on the Finish button. When you go back to the main interface, click on the Apply button to start the cloning process.
The cloning process will take some time and please wait patiently during the cloning process.
Gateway Laptop Hard Drive Upgrade with OS Reinstallation
You can choose to reinstall Windows on a new hard drive. Here are four steps:
- Back up your computer.
- Create a bootable USB.
- Remove the old hard drive and install the new one.
- Install Windows on the new hard drive.
For more details on these four steps, see How to Replace Your Laptop Hard Drive and Reinstall Your Operating System.
Stage 3. Remove Gateway Laptop Hard Drive and Install New Disk
Now all you need to do is remove the original Gateway laptop hard drive and install the new hard drive. Before that, you should prepare a Phillips head screwdriver. Then follow the steps below to remove Gateway laptop hard drive and install the new disk.
- Shut down your Gateway laptop. Disconnect the laptop from the optional port replicator. Disconnect the AC adapter, modem cable, and network cable connected to a laptop. Disconnect all peripheral devices connected to the laptop.
- Turn the laptop over so the bottom is facing up, and remove the battery.
- Loosen the hard drive bay cover screw (the screw cannot be removed), and then remove the hard drive bay cover.
- Slide the hard drive away from the hard drive connector.
- Remove the hard drive assembly from the notebook computer. Be careful not to bend the connector pins on the hard drive kit.
- Remove the four screws that secure the hard drive to the hard drive kit bracket. Remove the bracket from the hard drive.
- Then you can install the new hard drive for the Gateway laptop by doing the reverse of how you removed the old one.
For more detailed steps or information, you can visit the official website of Gateway laptop support or check your laptop manual.
After installing the new hard drive for the Gateway laptop, you can turn on your computer and boot from the new disk. Then check if it works properly with higher performance. Here is How to Measure Disk Performance Easily.
Bonus Tip: How to Deal with the Replaced Gateway Hard Drive
That’s great if your computer boots successfully after the Gateway laptop hard drive upgrade. But it’s not over yet, there is one more thing that needs to be done, and that is to deal with the replaced hard drive.
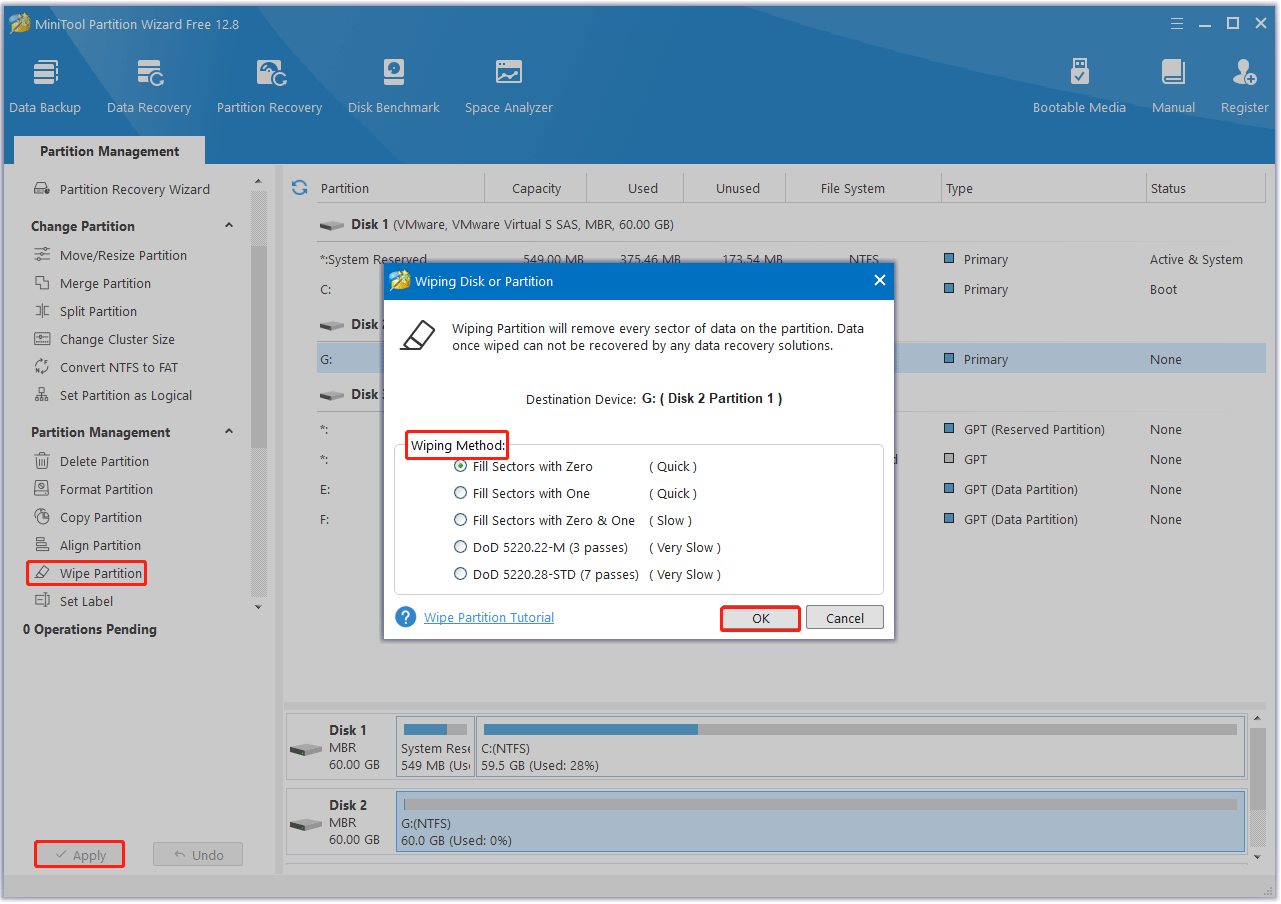
How to safely deal with the replaced hard drive? Before throwing your hard drive into the recycle bin, it is highly recommended that you wipe it to prevent someone from stealing your data. You can do this using the MiniTool Partition Wizard for free. It has five different methods with different speeds and security levels.
MiniTool Partition Wizard FreeClick to Download100%Clean & Safe
Step 1: Connect the hard drive to your PC and launch MiniTool Partition Wizard to get the main interface.
Step 2: Select the drive that you want to wipe and choose Wipe Disk from the left action panel or the right-click menu.
Step 3: Choose one of five wiping methods listed on the pop-up window and click OK. The more time it costs, the higher security you will have.
Step 4: Click on Apply to carry out the operation. Then the wiping process starts automatically and you just need to wait patiently until the process ends.
Bottom Line
The key points of Gateway laptop hard drive upgrade have been displayed above. I believe you can successfully do that with this article. Finally, we recommend that you wipe your old hard drive clean before throwing it away.
For any other opinions about this topic, you can leave a message in our comment area below. If you encounter certain issues while using MiniTool Partition Wizard, you can send us an email via [email protected] to get a quick reply.
About The Author

Position: Columnist
Vega enjoys helping people with computer problems, including disk management, data recovery, data backup, and more. She is constantly expanding her knowledge in related fields. And she will continue to bring more easy-to-understand professional articles to help people solve various problems on the PC.
User Comments :