Do you know what virtual memory is? Do you know why you need to move your virtual memory sometimes? Do you know how to move your Virtual Memory Windows 10? Don’t worry, MiniTool will give you the answers in this post. Just keep reading.
Brief Introduction to Virtual Memory
Virtual Memory, also known as Paging file, is a feature in Windows to store unused, modified pages in random-access memory (RAM) to your hard drive.
Paging file, stored on the system drive on your computer, is a hidden system file with the .sys extension. When you open more programs than the RAM that your computer can accommodate, the programs already present in the RAM will be automatically transferred to Paging file and the process is called paging.
The Paging file works as a secondary RAM, so it is also called Virtual Memory. The Virtual Memory works automatically and can be up to 4 times of the physical memory on your computer. But sometimes, you need to move it from the system partition to another drive manually to improve disk performance and decrease Paging file fragmentation.
Just follow the following steps to move Virtual memory to another drive in Windows 10.
How to Move Virtual Memory to Another Drive
To move your Virtual Memory, you just need to make some changes in Windows Setting. The detailed tutorial is displayed below:
Note: You are recommended to move Paging file to a drive that is equal or better in performance than the original drive. If you are using an SSD besides the system disk, you should migrate your Windows 10 to the SSD and boot from it to improve performance rather than just moving the Paging file to SSD.
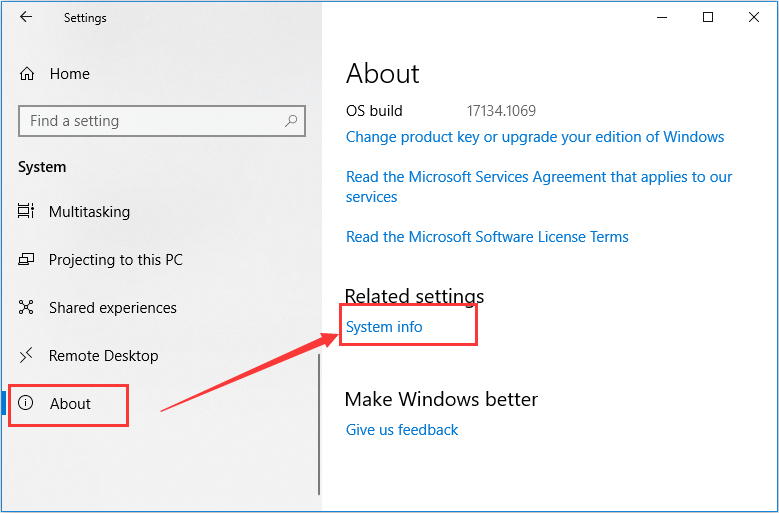
Step 1: Press Windows + I to open Settings.
Step 2: Choose System in the main interface.
Step 3: Switch to About section in the left pane, and click System info in the right pane.
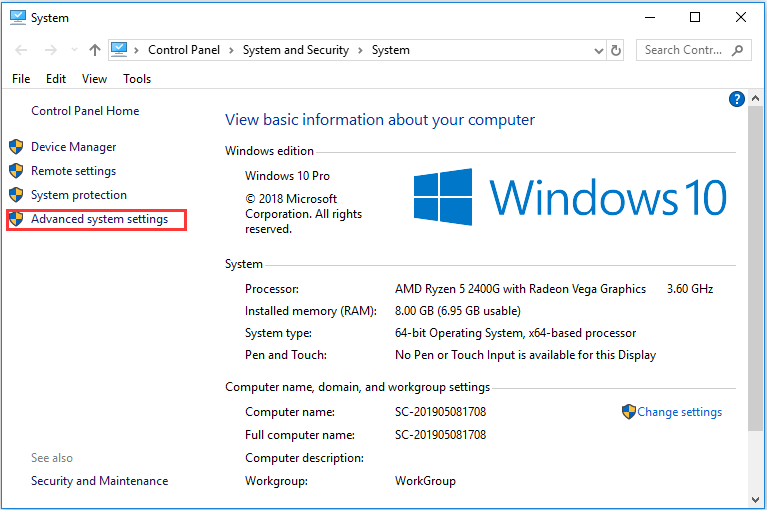
Step 4: Then, you will get the window of Control Panel as follows. Just click Advanced system settings.
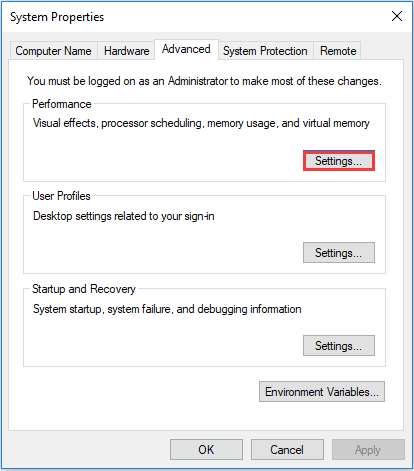
Step 5: Under Advanced tab, click Settings button in Performance section.
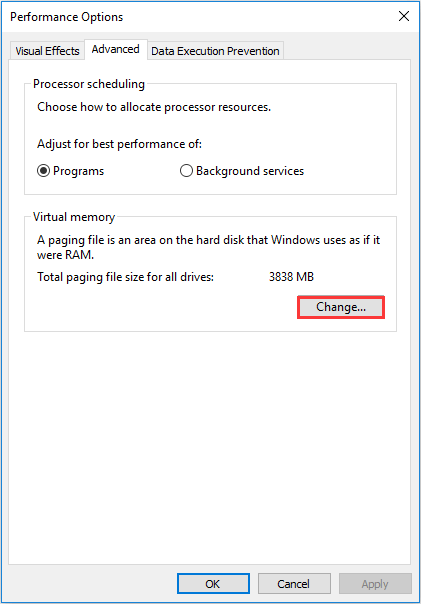
Step 6: In Performance Options window, switch to Advanced tab and click Change button in Virtual memory section.
Step 7: In the following window, uncheck Automatically manage paging file size for all drives option. Then, select your system partition and check No paging file option, and hit Set button.
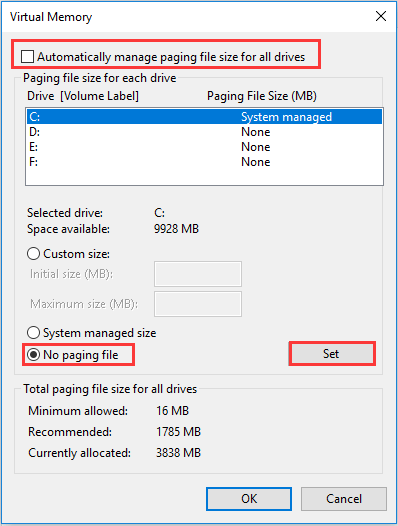
Step 8: Now, choose the drive that you want to use to save the Virtual Memory. Then, check System managed size option and click Set.
Step 9: Click OK button to exit the Virtual Memory window. Click Apply and OK button to save the changes you have made.
Then, you will be required to restart your computer to make the changes take effect. After that, the new Paging file will be created and saved to the new location.
Additional Tip: How to Confirm Virtual Memory Windows 10
After you move Virtual Memory to another drive, you might want to confirm if it is working on the new drive. Here’s a way to help you confirm that.
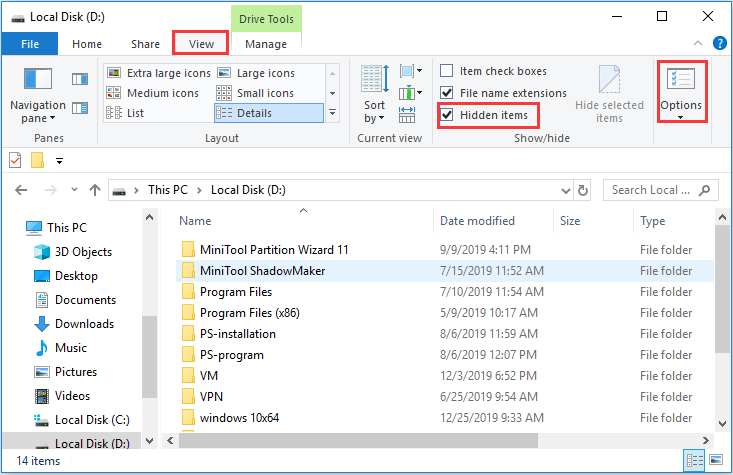
Step 1: Double click This PC icon to open File Explorer.
Step 2: Under the Devices and drives section, double-click the drive that is storing the Paging file to open it.
Step 3: Then, switch to View tab and check Hidden items. Click Options button.
Step 4: In Folder Options window, click View tab and uncheck Hide protected operating system files item and click Apply and OK button.
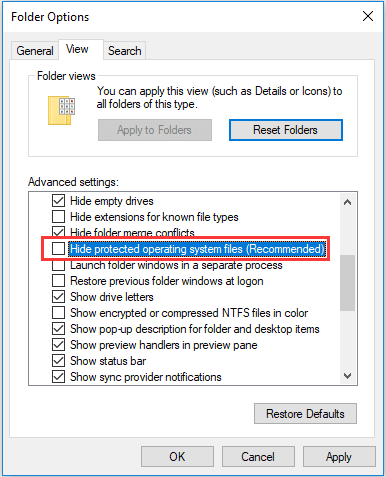
Now, you should see a pagefile.sys file displayed in the folder. If so, your Windows 10 is using the new drive to store the Virtual Memory.

User Comments :