Some users reported that they encountered the problem “Starbound crashes on startup” on Windows PCs. Don’t panic if you are bothered by the same issue. You can try these methods provided by MiniTool Partition Wizard one by one to solve it.
Starbound is an action-adventure video game developed by Chucklefish. It is available on many platforms, including Microsoft Windows, OS X, and Linux. Besides, it is in development for Xbox One and PlayStation 4.
A lot of Windows users complained that their Starbound crashes on Startup frequently. Reasons for this problem are various and some of them are listed below:
- The lack of administrative privileges
- The lack of free storage space
- Issues with antivirus software
- An outdated or corrupted graphics card driver
- Corrupted or missing game files
To solve the problem caused by different factors, you need to troubleshoot it in different ways. If you are not sure why your Starbound keeps crashing on startup, you can try the following methods one by one to fix it.
9 Methods to Fix Starbound Crashing on Startup
- Run Satarbound as an administrator.
- Change the resolution.
- Free up disk space.
- Disable antivirus software.
- Run Starbound in compatibility mode.
- Verify the integrity of game files.
- Update the graphics card driver.
- Update Windows.
- Reinstall Starbound.
Method 1: Run Starbound as an Administrator
Starbound crashing on startup could happen due to the lack of administrative permissions. To solve the problem, you can try running the game as an administrator. Windows users buy and play Starbound on Steam. Therefore, you need to run Steam as an administrator. Here are the detailed steps.
Step 1: Right-click the Steam shortcut on your desktop and select Properties.
Step 2: In the pop-up window, switch to the Compatibility tab and check the option Run this program as an administrator.
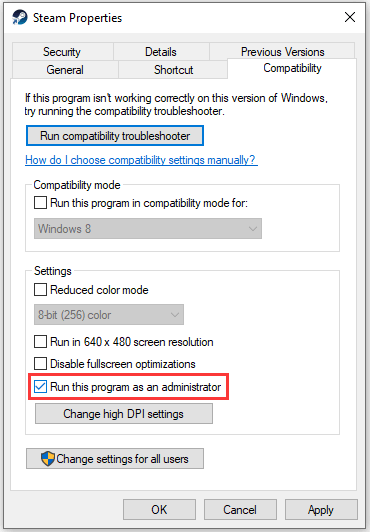
Step 3: Click Apply and OK to save the changes.
Then you can launch Steam and run the game to check if the problem has been solved. If Starbound crashes on startup again, you need to move on to the next method.
Method 2: Change Your Resolution
Improper graphics settings could cause various game issues. Starbound crashing on startup is one of them. To make sure the game runs without problems, you can try setting the graphics quality to low.
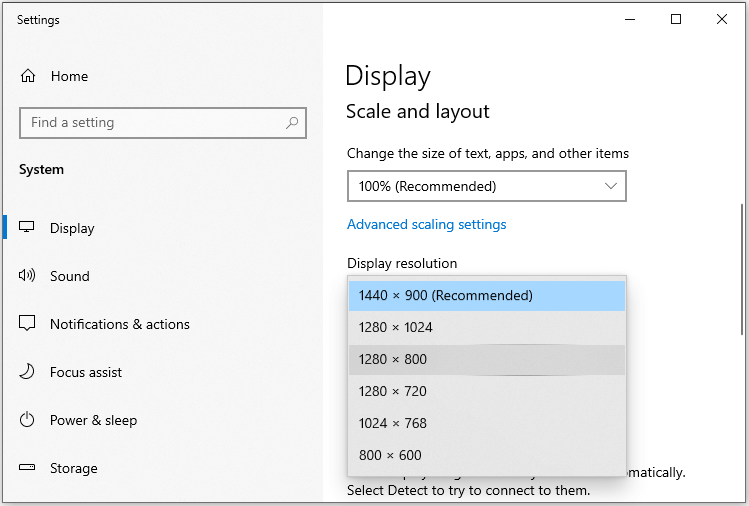
Step 1: Right-click any empty space on your desktop and select Display settings.
Step 2: In the Settings window, scroll down to locate the Scale and layout section. Then select a display resolution that is lower than the current one.
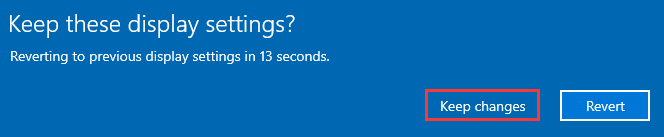
Step 3: In the pop-up window, select Keep changes.
After changing the resolution, you can close Settings and try launching Starbound. If Starbound won’t launch, try the next solution.
Method 3: Free up Disk Space
To make sure the game can be installed and played properly on your Windows PC, your PC needs to meet the following minimum system requirements:
- OS: Windows XP or later
- Processor: Core 2 Duo
- Memory: 2 GB RAM
- Graphics: 256 MB graphics memory and DirectX 9.0c compatible GPU
- DirectX: Version 9.0c
- Network: Broadband Internet connection
- Storage: 3 GB available space
As you can see, it’s not a high-end game and the system requirements are easy to meet on most modern computers. You just need to pay attention to the storage space. As the developers keep releasing updates for bug fixes and gaming experience improvement, you need more than 3 GB of free space to run the game. When your disk is running out of space, you would encounter some issues during the gameplay.
Therefore, if your Starbound crashes on startup, you’d better check whether there is enough free disk space on the partition where the game is installed. To view the disk space, you can press Win + E to open the File Explorer and navigate to This PC.
If the partition is full, you can delete some useless files or uninstall certain programs to free up disk space.
You can also extend the partition to get more free space by taking space from other partitions where there is available free space. As there are some limitations to resize a partition in Disk Management, the build-in disk manager in Windows operating systems, it’s better to use a reliable third-party program to extend the partition. Here I recommend MiniTool Partition Wizard.
MiniTool Partition Wizard is a professional partition manager released in 2009. It could help a lot if you need to create/resize/delete partitions, recover data, or clone disks. Now, let’s see how to extend a partition with MiniTool Partition Wizard.
Step 1: Download MiniTool Partition Wizard by clicking the following button. Then install and launch it.
MiniTool Partition Wizard FreeClick to Download100%Clean & Safe
Step 2: When you get the main interface of MiniTool Partition Wizard, select the target partition that you want to extend and click Extend Partition.
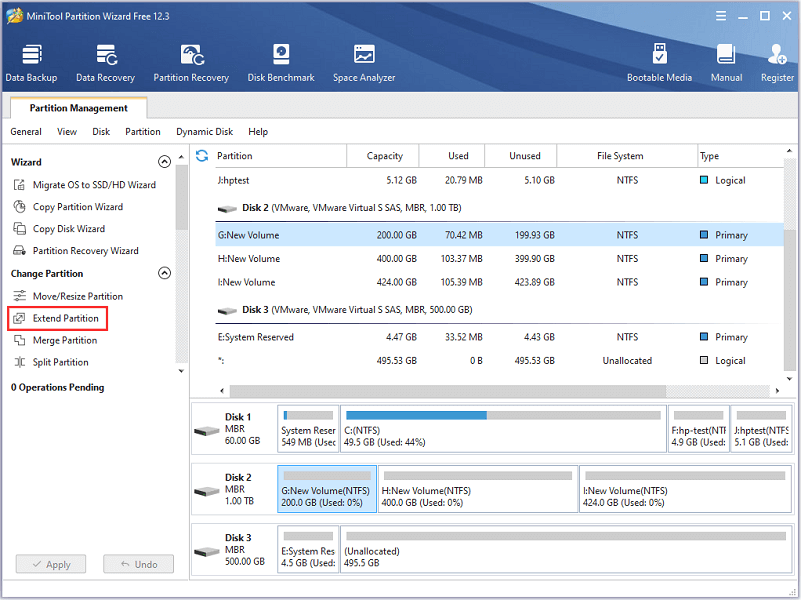
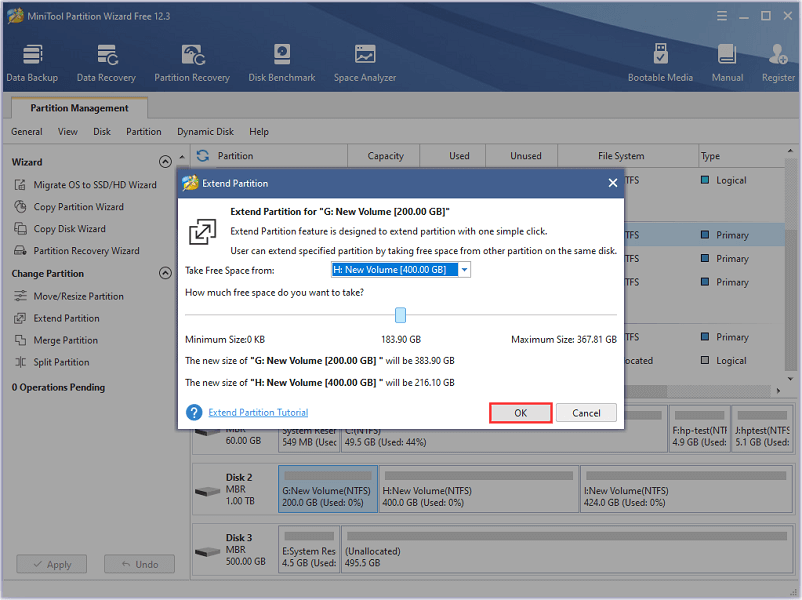
Step 3: In the pop-up window, choose a partition to take space from and decide how much free space to take by dragging the slider. Then click OK to confirm the operation.
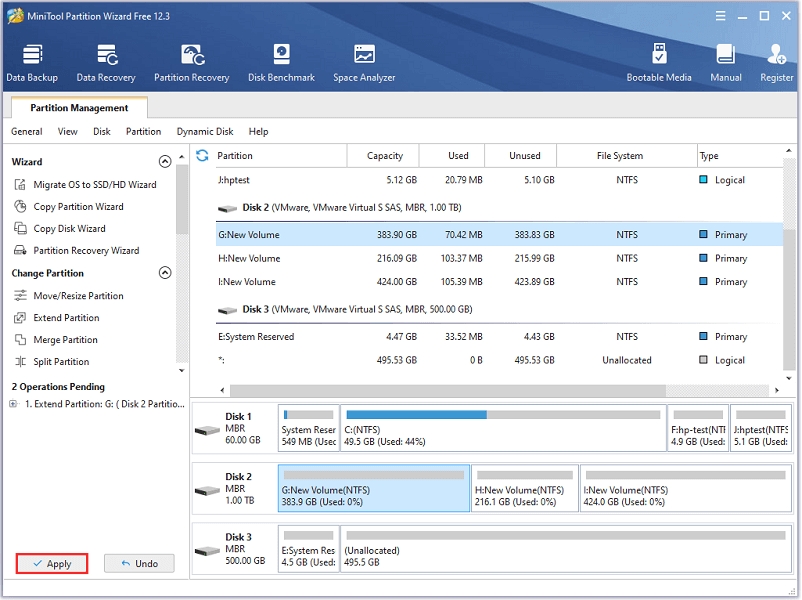
Step 4: Click the Apply button to execute the pending operations.
Wait until the process is finished and you can run Starbound to check if it works properly.
Method 4: Disable Your Antivirus Temporarily
Antivirus software does protect computers from being attacked by viruses and malware, but it could prevent apps from working properly sometimes. Starbound crashing on startup might also happen due to issues with antivirus programs. In this case, you can try disabling your antivirus program temporarily or add Starbound to the exception list to solve the problem.
Method 5: Run the Game in Compatibility Mode
Some programs are incompatible with certain Windows versions. To check if your Starbound keeps crashing on startup due to compatibility issues, you run the game in compatibility mode.
Step 1: Right-click the Starbound shortcut and select Properties.
Step 2: Go to the Compatibility tab, check “Run this program in compatibility mode for” and choose a previous version of Windows compared with the current version, such as Windows 8 or Windows 7.
Step 3: Click Apply and OK to save the changed settings.
Method 6: Verify the Integrity of Game Files
Corrupted or missing game files could also lead to the problem that Starbound keeps crashing on startup. To check and repair them, you can use the Steam feature “Verify integrity of game files”.
Step 1: Launch Steam and go to LIBRARY to view the list of your installed games.
Step 2: Right-click your Starbound and select Properties.
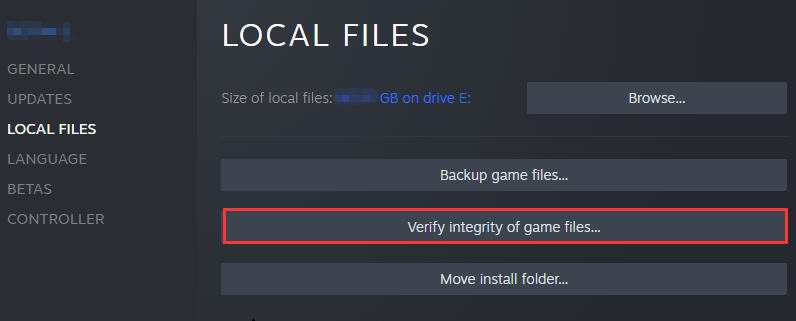
Step 3: In the pop-up window, select the LOCAL FILES tab and click Verify integrity of game files.
Step 4: The process would take some time and you need to wait patiently. When a window showing the message “all files successfully validated” pops up, click the CLOSE button.
After verifying the integrity of your Starbound game files, restart Steam and run your game to check if the crashing issue has been solved.
Method 7: Update Your Graphics Card Driver
A corrupted or outdated graphics card driver is another common reason to Starbound crashes on startup. If you encounter the problem quite frequently, you should also check if there are available updates for your graphics card driver. You can follow the steps below to do it via Device Manager, a built-in tool in Windows.
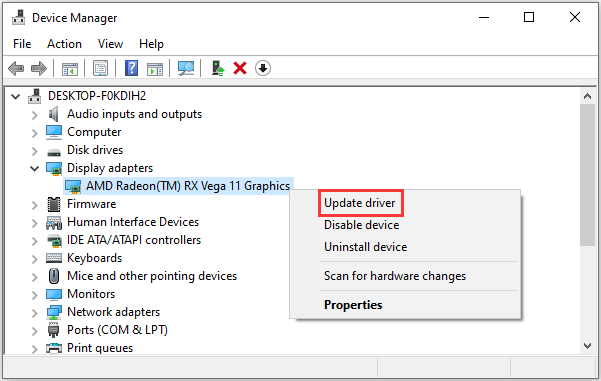
Step 1: Press Win + R to invoke the Run window. Then type devmgmt.msc in the box and click OK to open Device Manager.
Step 2: In Device Manager, double-click the Display adapters to expand the category.
Step 3: Right-click your graphics card adapter and select Update driver.
Step 4: In the pop-up window, choose Search automatically for updated driver software. Then Windows will search your computer and the Internet for the latest driver software for your graphics card. You just need to wait for a while.
Step 5: If there are available updates, Windows will install them automatically. Once it’s finished, restart your computer for executing the changes.
Method 8: Update Windows
If your DirectX or Visual C++ Redistributable is outdated, you might also encounter the problem that Starbound won’t launch. To remove the error and play the game, you should update them by checking for Windows Update.
Step 1: Press Win + I to open Windows Settings.
Step 2: Go to Update & Security.
Step 3: In the left pane, select Windows Update. In the right pane, click Check for updates. Then follow the onscreen instructions to download and install available updates.
After installing the updates, restart your computer and run Starbound.
Method 9: Reinstall Starbound
If all the solutions above failed to solve Starbound crashing on startup, you might need to reinstall the game.
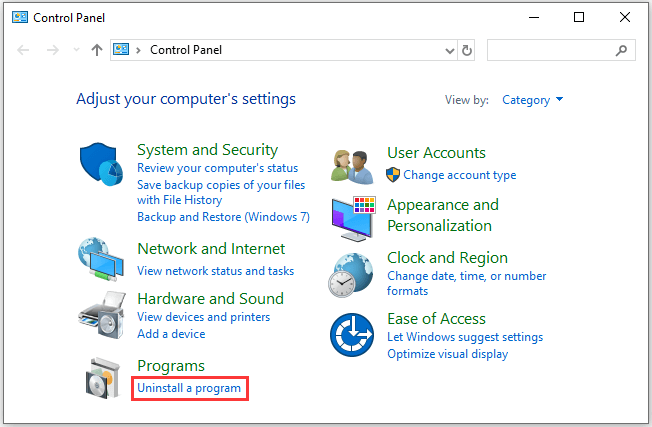
Step 1: Press Win + S to open the Windows Search utility. Then search for Control Panel and open it.
Step 2: Select View by: Category and click Uninstall a program.
Step 3: In the list of installed programs and features, right-click Starbound and select Uninstall. Follow the instructions to finish the uninstallation.
Step 4: Launch Steam and download Starbound again.
When the game is installed, you can run it to check if it works properly.
Bottom Line
This post introduces 9 solutions to Starbound crashing on startup. If you are bothered by the same issue, you can try them one by one to fix it. You can share your ideas with us in the following comment section. For any problems with MiniTool Partition Wizard, you can contact us via [email protected].
User Comments :