The operating systems, software, or gaming applications we use may have bugs. Just like a crack in your house, there are security risks. And a patch is to fix these vulnerabilities to avoid the invasion of exotic risks. While installing the patch, you may encounter a situation where the patch claims not enough disk space. This post from Partition Magic will show you how to fix it.
Examples of Patch Claiming Not Enough Disk Space
A patch is a piece of software designed to update, fix, or improve an existing program or its supporting data. This can include fixing security vulnerabilities, addressing bugs, improving functionality, or enhancing performance.
Patches are typically released by software developers or vendors to ensure that their software remains secure, stable, and up-to-date. They can be applied manually by the user or automatically through update mechanisms built into the software.
When a patch claims not enough disk space, it can be frustrating, especially when it seems like there should be plenty of room. Here are a few examples of the issue:
The most recent update claims to be a download of around 500MB and I have 7.33GB of free space on my hard drive, but it stalls out claiming not enough disk space.https://steamcommunity.com/app/346110/discussions/0/385428458169981465/
The Windows 10 Update Assistant insists that I need to free up 8GB. I have deleted everything from my laptop I can possibly delete, including my printer software and even Microsoft Office. Everything else is on my SD card or OneDrive. There is no option to use some of the space on my SD card for updates, despite the fact that it has 60GB free.https://answers.microsoft.com/en-us/windows/forum/all/insufficient-disk-space-to-update-windows-10/ce66de91-311d-476c-93b0-c7ef5ea0ea84
Possible Reasons for Not Enough Disk Space to Patch the Program
When a patch claims not enough disk space, it can be due to several factors. Here are some common reasons:
- Large Patch Size: The patch itself may be large, requiring more space than is currently available on the disk.
- No Administrator Privileges: If you don’t change the app installation location manually, most programs will be installed by default into the C:\Program Files or C:\Program Files (x86) directory. However, patching apps installed in the 2 directories requires administrator privileges. Otherwise, an error may occur.
- Unrecognized Signs: Users need to choose a language when installing Windows. If the game folder or patch contains symbols or letters in name that are not included in the selected language system, insufficient disk space may occur when we patch a game.
- Disk Error: There may exist bad sectors on the disk, which cause the “not enough disk space but there is plenty” issue.
- Fragmented Disk Space: Even if there is technically enough free space, it might be fragmented into smaller chunks that are not contiguous. However, some patches require contiguous space to install correctly.
Understanding these potential reasons can help users diagnose and resolve issues related to insufficient disk space for patch installations.
Solutions and Workarounds
After analyzing the causes, I will tell you what to do when a patch claims not enough disk space.
Use Disk Cleanup Utility
As we know, the biggest reason why the patch can’t be installed is probably the lack of disk space. With the built-in Disk Cleanup tool in Windows, you can delete temporary files, system cache, system restore points, and other unnecessary files to free up disk space for your patch installations.
In this section, I’ll show you how to use the Disk Cleanup utility to manage your disk space.
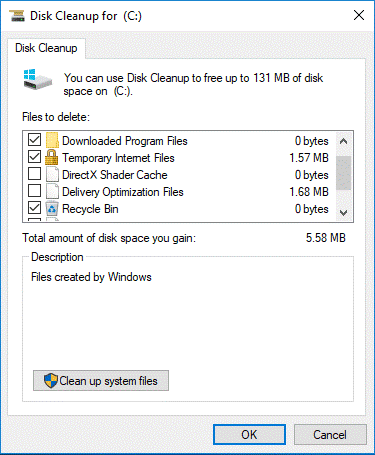
Step 1: Type Disk Cleanup in the search box, and then, select Disk Cleanup. Select the drive you want to manage and then select OK. After that, wait for a while. The computer needs a few minutes to calculate how much space is available for release.
Step 2: Next, the Disk Cleanup dialog box will list the files that can be cleaned up and the total space that can be freed. Select the files you want to delete. Here, a note will pop up to ask if you are sure to delete these files permanently, click OK to execute the operation.
Delete Unused Files or Folders
If the partition where the program is installed really does not have enough disk space to save the patch, you can delete the useless files. In spite of large files that are clearly visible in the File Explorer, you still need to be concerned about hidden files
Hidden files are likely to cause hard drive space disappearing without any attention. If you have set the PC to hide some special files and you want to delete them, you need to make these files reveal on your PC first. Then, you can delete unnecessary hidden files.
Or you can use the Space Analyzer feature of MiniTool Partition Wizard. This feature helps users scan the hard disk, allowing users to better understand the hard disk space usage, manually explore hidden files, and delete unnecessary files and applications.
Run the App as Administrator
As mentioned above, patching apps installed in the C:\Program Files and C:\Program Files (x86) directories requires administrator privileges.
How to run an application as an administrator? The way is very simple. You just need to right-click an app icon and choose Run as Administrator.
If you want to run an app as administrator permanently, you need to right-click this app and choose Properties. Then, check the option Run this program as an administrator under the Compatibility tab and apply the change.
You can also choose to reinstall the program into another location so as to avoid running it with administrator privilege every time a patch is available. If you do so, remember to transfer needed data like game saves and installed updates/patches to the same folder under the newly installed game.
Set the Folder of the Program or the Patch with Correct Name
When insufficient disk space error appears due to unrecognized signs, you can fix the issue by naming the folder or patch with signs or letters existing in the selected language system.
Extend the System Partition
Extending the size of your drive is the direct solution to not enough disk space issue. Here we recommend a powerful partition management tool – MiniTool Partition Wizard. With this software, you can recover hard drive data, clone hard drive, format FAT32, migrate OS, and do many more.
With its various powerful features, you can fully control your hard disk and partitions, and extend the partition without data loss. Here we will tell you how to extend the partition:
MiniTool Partition Wizard FreeClick to Download100%Clean & Safe
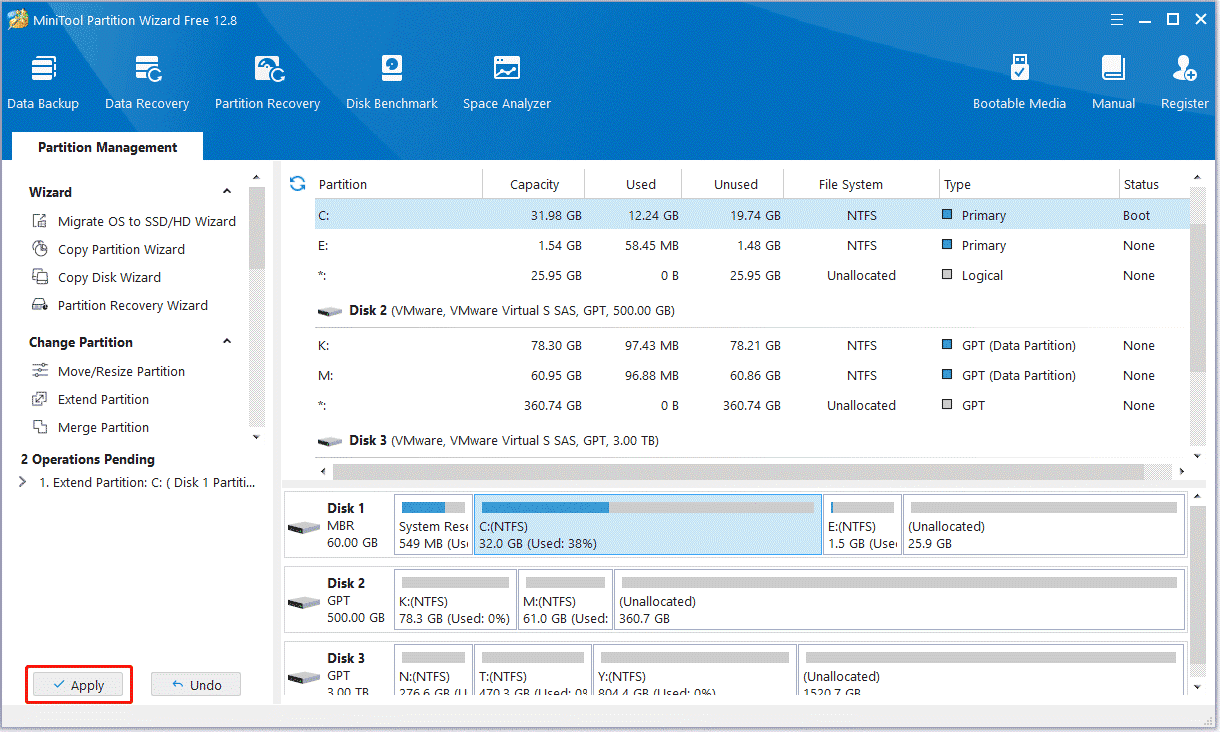
Step 1: Install and launch MiniTool Partition Wizard to get the general disk partition map. Select the partition you want to extend and choose Extend Partition from the left operation panel.

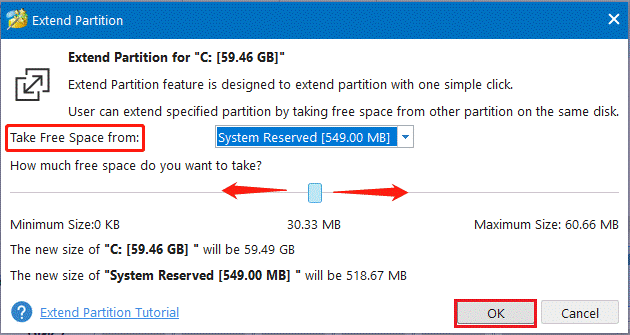
Step 2: Increase the size of the partition in two steps:
- Select a partition or unallocated space from the drop-down Take Free Space from list to extend the partition. Any partition or unallocated space on the same disk can be used.
- Drag the sliding handle left or right to decide how much space to take. After that, click OK to continue
Step 3: In the main interface, you can preview the changes in the disk map. Then, click Apply to save all changes.
Change the Game Download Location
While installing patches required for games, we may face the situation where there is not enough space to install the patch. So, we can change the default download location of the game patch files to a new disk or a partition with enough space to ensure that the patch has enough disk space to download and install.
Changing the download location for games on platforms like Steam and Epic Games can help manage the storage space. Here’s a step-by-step guide for both platforms:
#1. Steam Change the Download Path
- Launch the Steam client on your computer. Click on Steam in the upper-left corner of the client, and select Settings from the dropdown menu. In the Settings menu, select Downloads from the sidebar.
- Click on the Steam Library Folders button. This will open a new window showing your current library folders. In the new window, click the Add Library Folder button. Navigate to the location where you want to create a new download path, and select the folder. This can be on another drive or a different folder on the same drive.
- Once you’ve added the new folder, right-click on it and select Make Default Folder. This will set the new location as the default path for all future downloads and installations.
- If you want to move existing games to the new folder, go to your Steam Library, right-click on the game you want to move, select Properties, go to the Local Files tab, and click on Move Install Folder. Choose the new library folder as the destination.
#2. How to Change Download Location on Epic Games
- Launch the Epic Games Launcher on your computer. Click on your profile icon in the bottom-left corner and select Settings from the menu.
- Scroll down to the Installation section. Click on the Edit button next to the current install directory path. Browse and select the new location where you want to install your games and patches.
- If you want to move existing games to the new location, navigate to the current installation folder of the game you want to move, copy the game’s folder to the new location, and then go to your Library. Click on the three dots next to the game you moved and select Uninstall. This removes the game from the launcher without deleting the files you copied.
By following these steps, you can easily change the download path in Epic Games and Steam to better organize your files and patches according to your preferences.
Organize Debris Sectors
If the sector storage on the disk is not contiguous, there will not be enough free sectors left. You may also get a “patch claims not enough disk space” error. Try to fix this problem by using Windows Disk Defragmenter.
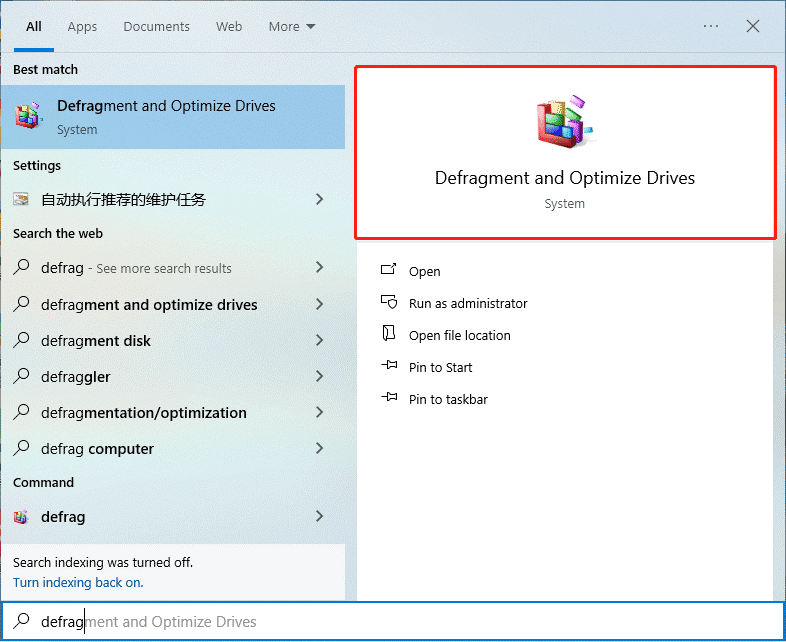
Step 1: Click on the search box and input defrag.
Step 2: Select Defragment and Optimize Driver and click Open.
Step 3: On the Optimize Driver window, select the partition you want to manage, and select Optimize. This will start analyzing the defragmentation level of the partition and defragmenting it.
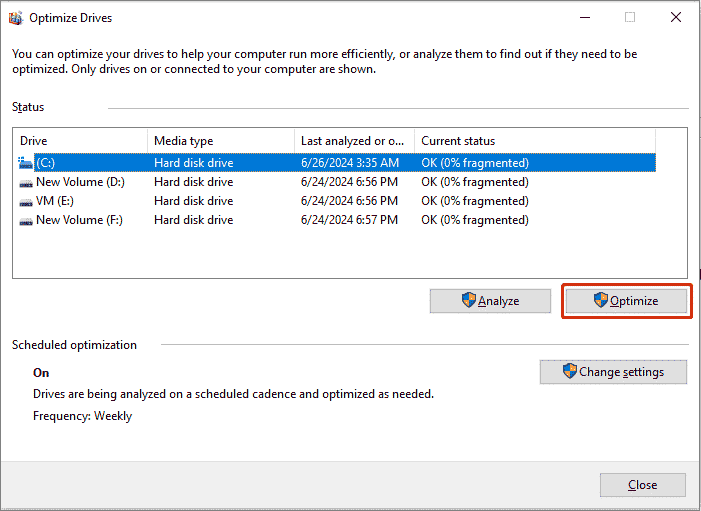
Step 4: When the defragmentation is completed, click OK.
Check the Disk Error
Bad sectors are small parts of your hard drive that simply don’t work any longer. They have been damaged and the PC cannot write or read any data on them. Therefore, if you have enough disk space, but you cannot successfully install a patch, you can check for errors in the disk.
MiniTool Partition Wizard can help you in this case since it provides the Surface Test function to scan each sector’s status by reading data from them.
MiniTool Partition Wizard FreeClick to Download100%Clean & Safe
Step 1: Launch MiniTool Partition Wizard to enter its main interface.
Step 2: Right-click the disk you want to scan and select Surface Test.
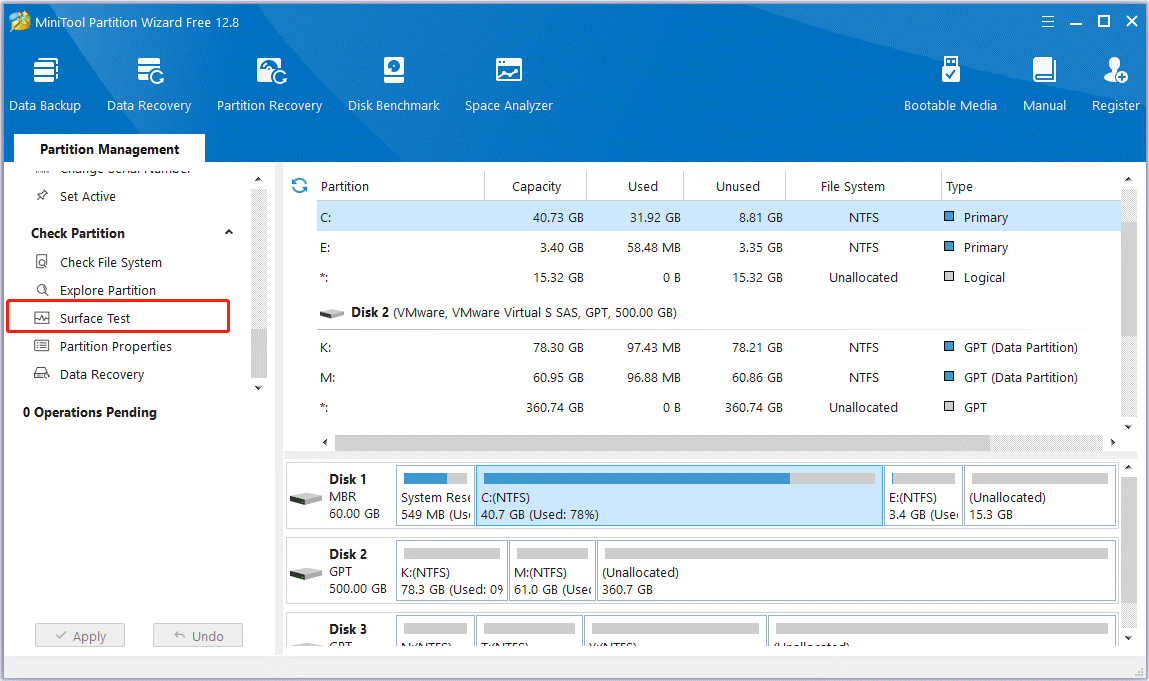
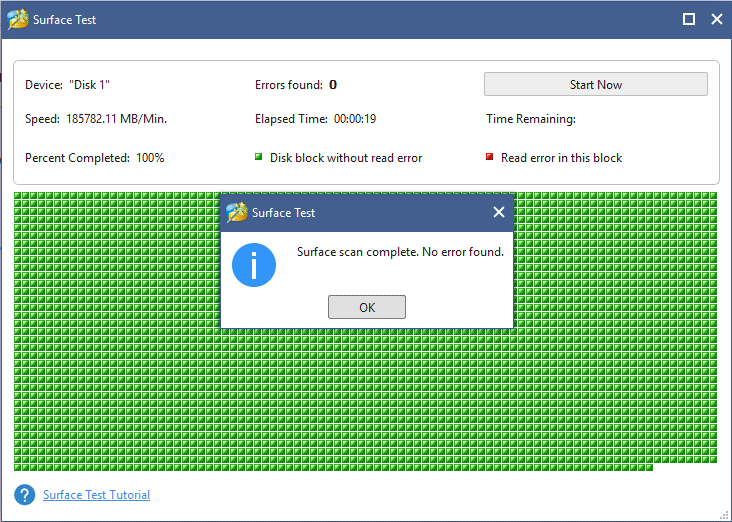
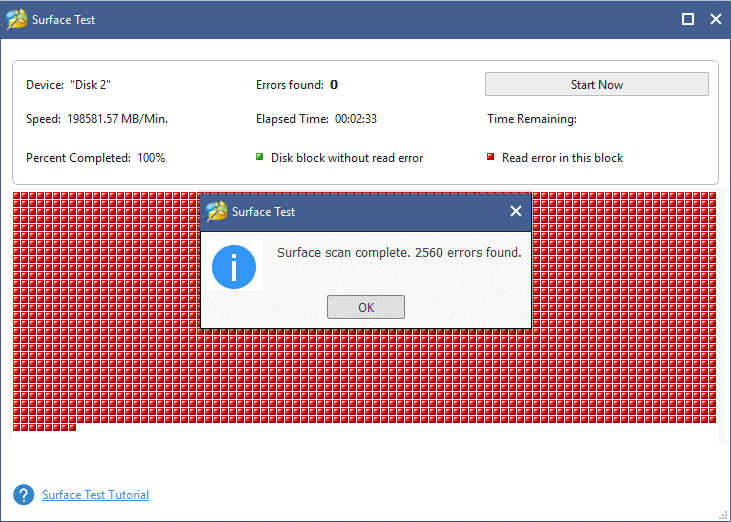
Step 3: Click Start Now. After a while, the scan is completed and the results are displayed. Sectors without reading error will be marked with green color, and sectors with reading error will be marked with red. If there are too many bad sectors, it is recommended to replace the hard drive.
If bad sectors are detected, MiniTool Partition Wizard will display them as follows:
Bottom Line
If you are also suffering from the problem of patches claiming low disk space, try the above methods immediately. In addition, if you have any problems when using MiniTool Partition Wizard, you can always contact us via the email [email protected]. Thanks in advance.
User Comments :