Do you want to create an Ubuntu VM on Windows? You can use VMware, which is one of the best VM software. This post from MiniTool Partition Wizard shows you how to install Ubuntu on VMware step by step.
What Is Ubuntu?
Ubuntu is an open-source Linux distribution based on Debian and developed by Canonical. It has four editions: Ubuntu Desktop, Ubuntu Server, Ubuntu for IoT (Internet of Things) devices, and Ubuntu Cloud. Most people will use the Ubuntu Desktop edition.
Ubuntu Cloud is a cloud computing solution based on Eucalyptus, used to connect and manage multiple servers.
Ubuntu releases a new version every 6 months and offers support for 18 months after a version is released. In addition, every two years, it releases LTS (Long Term Support) versions that are supported for 5 years. If you want to experience new features early, use the common Ubuntu version. If you want a more stable system, use the LTS version.
Why to Create an Ubuntu VM
According to Statista’s reports, Windows (73.7%), macOS (15.3%), Chrome OS (2.2%), and Linux (2.1%) are the leading desktop operating systems worldwide by market share. Although Linux’s market share is not overwhelmingly high, it performs well in software development. 47% of Pro developers are enthusiastic about using Linux operating systems.
At the same time, Ubuntu accounts for 33.9% of Linux’s market. If you want to experience the Linux system, Ubuntu is the best choice. However, unlike Windows, Ubuntu has a slightly steep learning curve. If you are an Ubuntu beginner, creating an Ubuntu VM on Windows is a good choice.
After you are familiar with the operation of Ubuntu, you can then switch to Ubuntu thoroughly.
Requirements to Install Ubuntu on VMware
To create an Ubuntu VM on Windows, you need to use virtual machine software like Hyper-V, VirtualBox, VMware, etc. In terms of user experience, VMware is recommended. It is user-friendly and easy to use.
To install Ubuntu VMware, your PC needs to meet VMware’s requirements and Ubuntu’s requirements at the same time.
Ubuntu’s requirements are as follows:
- 2GHz dual-core processor or better.
- 4GB system memory.
- 25GB of free hard drive space.
VMware’s requirements are as follows:
- 3GHz or faster core speed.
- 2GB RAM minimum/ 4GB RAM or more recommended.
- 2GB of available disk space.
If you need to use the Ubuntu VM frequently, 25GB may be not enough because the Ubuntu VMware image file will become bigger and bigger as you use it. If possible, 50GB is recommended to install Ubuntu VMware.
Now, you need to check if your PC meets the above requirements. If your PC doesn’t meet the requirements, you need to take corresponding measures.
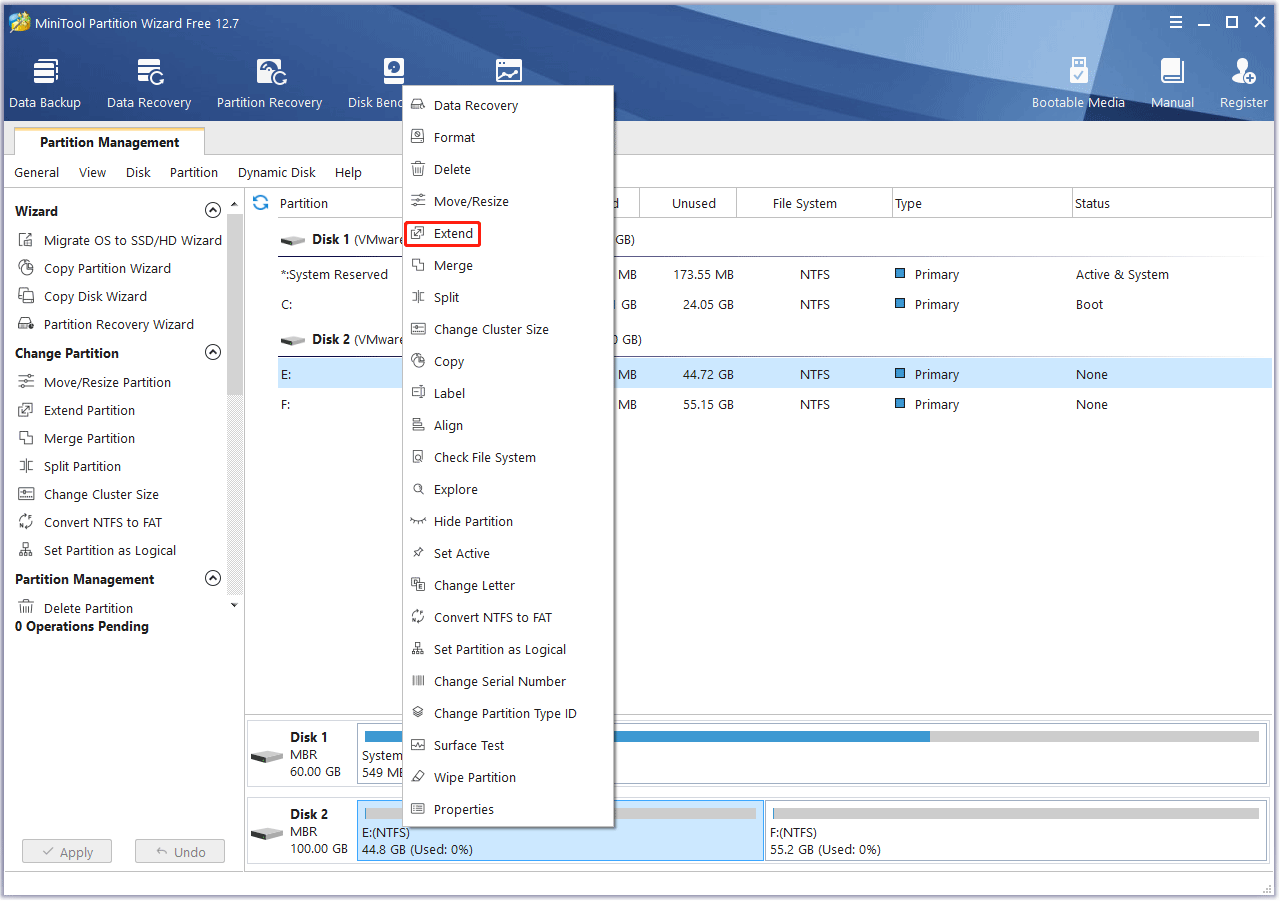
If you find the CPU is not suitable, the only solution is to replace it. If the RAM is not enough, you can take measures to get more RAM. If your PC doesn’t have enough hard drive space, you can use MiniTool Partition Wizard to extend the partition where you want to install Ubuntu VMware. Here is the guide:
MiniTool Partition Wizard FreeClick to Download100%Clean & Safe
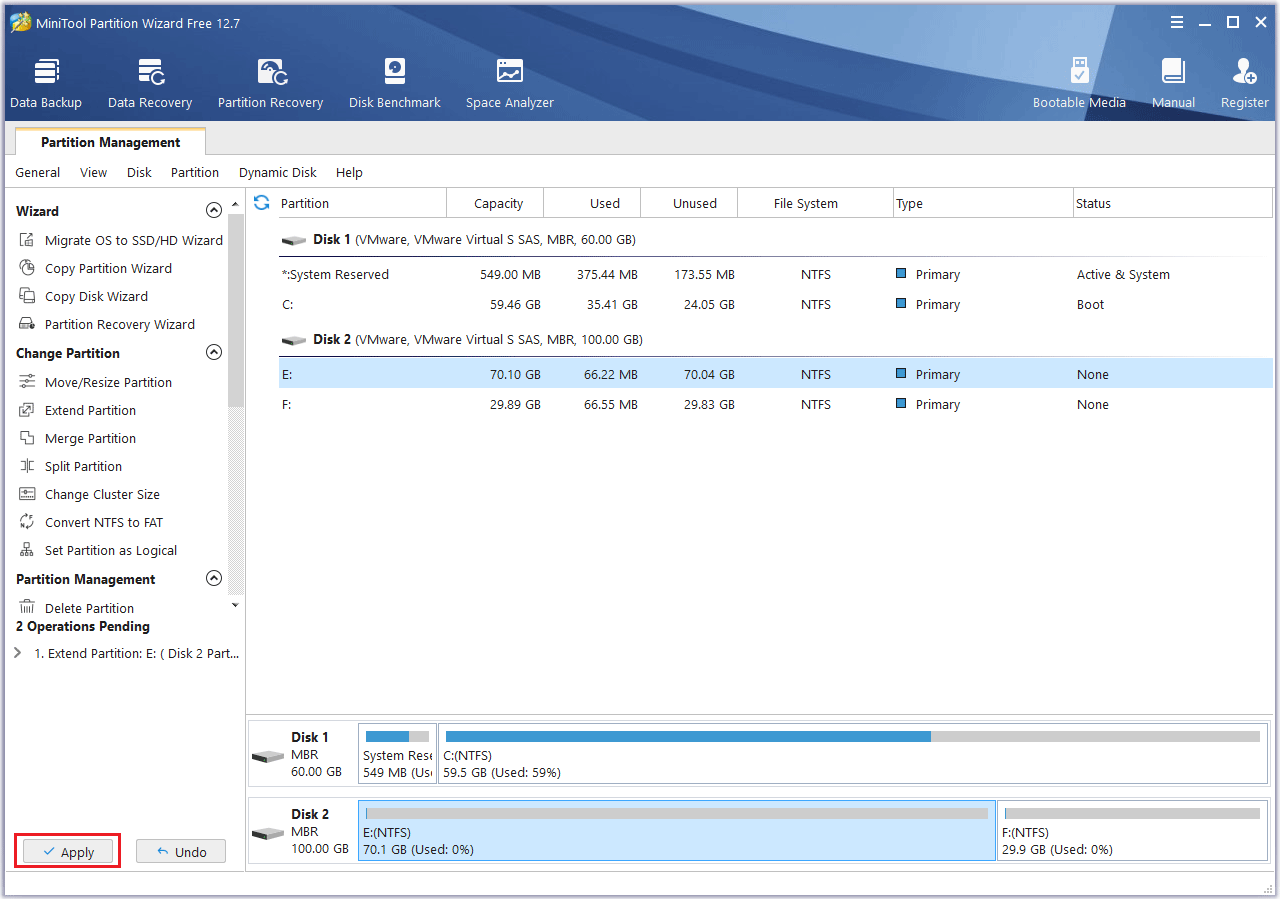
Step 1: Launch MiniTool Partition Wizard. Right-click a partition (the C drive or other drives) and select Extend.
Step 2: Choose another partition to take up space. Drag the blue button to determine how much space you want to take. Then, click the OK button.
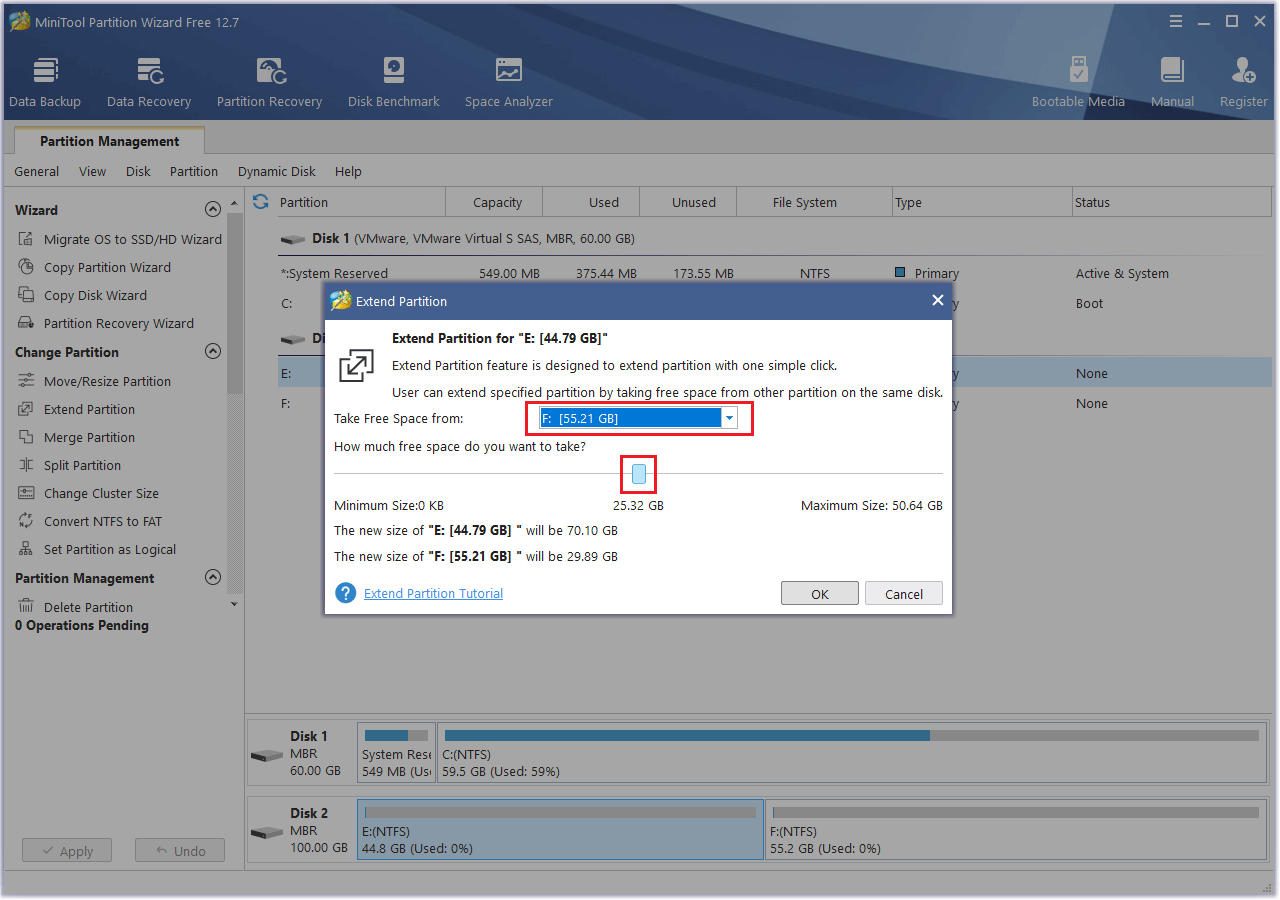
Step 3: Click the Apply button to execute the pending operation.
How to Install Ubuntu on VMware
To install Ubuntu VMware, you can follow the guide below.
Stage 1. Install VMware and Download Ubuntu ISO
To create the Ubuntu VM, you need to install the VMware software first. Go to the VMware official website to download the installer file and then run it to install the latest VMware.
If you have VMware installed already, you can skip this step, even if the VMware version is a little older.
Then, you need to go to the Ubuntu official website to download the Ubuntu ISO.
- On the Ubuntu website, click the Download button at the top banner to expand it.
- Click the Ubuntu Desktop link.
- On the new page, an Ubuntu LTS ISO download and a latest Ubuntu ISO download will be offered. You just need to click the Download button.
Stage 2. Install Ubuntu on VMware
In this part, I will show you how to install Ubuntu on VMware step by step.
Step 1: Launch VMware and click File > New Virtual Machine. You can find it in the top left corner of the VMware window. On the pop-up window, select Custom (advanced) and click Next. On the next window, click Next again.
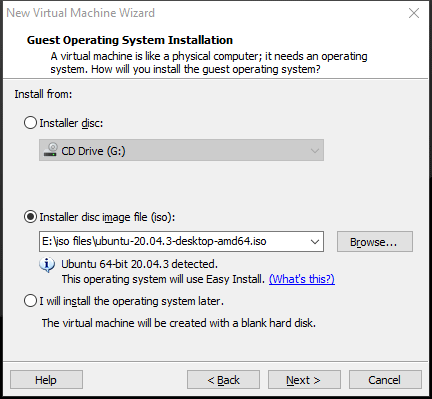
Step 2: Select the Installer disc disk image file (iso) option and click the Browse button. On the Browse window, navigate to the Ubuntu ISO file and click the Open button. Then, click Next. As you can see, the Ubuntu system will use Easy Install, which will install the guest operating system and VMware Tools automatically after the virtual machine is created.
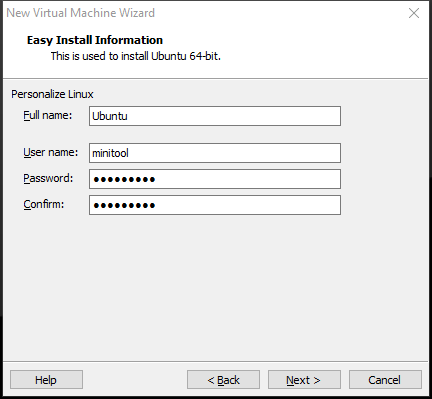
Step 3: Fill out the Easy Install Information. This window only appears when Easy Install is used.
- Full Name: The name to use to register the guest operating system if registration is required. Workstation Pro uses the first name to create the hostname for the virtual machine.
- User Name: It’s your user name. You can use lowercase letters, numbers, and dashes, but avoid using user names that begin with a dash. Do not use the name “root”.
- Password: The password for the User name and the root user.
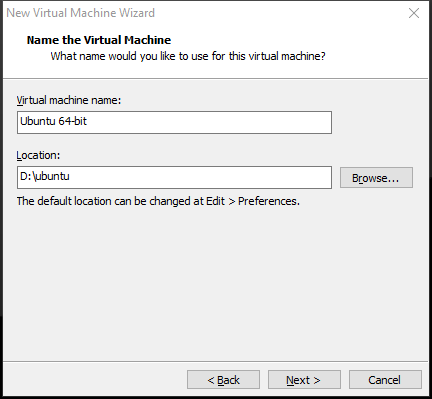
Step 4: You are asked to name the new virtual machine and confirm its location. If you want to change the location, just need to click the Browse button. Then, click Next.
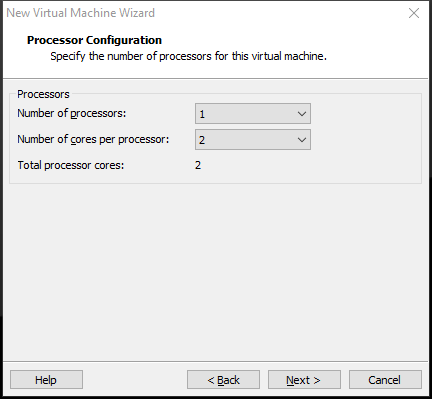
Step 5: You are asked to allocate the number of processors. Make sure the total processor cores are 2 or more. Then, click Next.
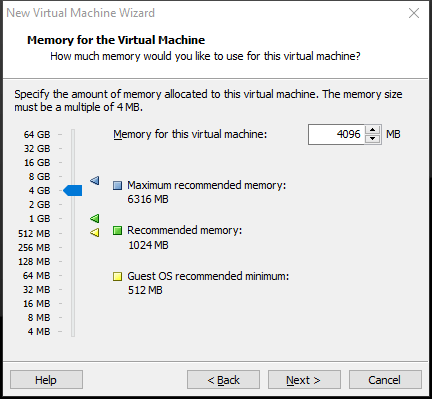
Step 6: You are asked to specify the memory size. Change the memory size to 4GB or more and then click Next.
Step 7: You are asked to select the Network Type, I/O Controller Types, and Disk Type. You just need to keep the default values and click Next all the way through. Then, you are asked to select a disk, select the Create a new virtual disk option and click Next.
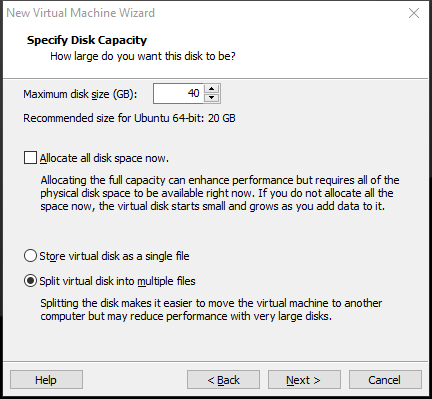
Step 8: Specify the disk capacity. You can keep them as the default and click Next. But if you want to install some software on the VM, you can change the Maximum disk size to a larger number.
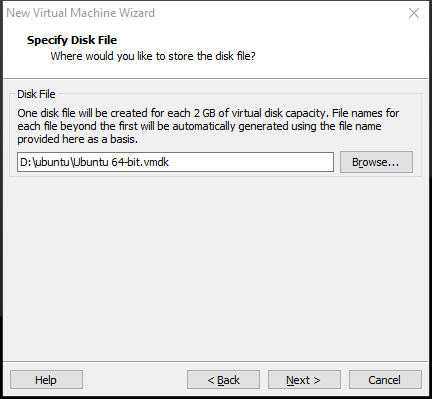
Step 9: Specify the disk file. You can keep the default value and click Next. Of course, you can also click the Browse button to change the disk file location.
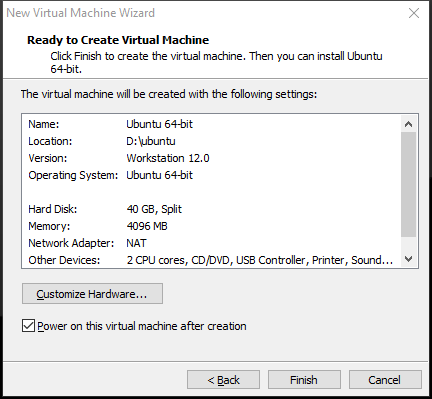
Step 10: Review all the virtual machine settings. If they are OK, click Finish. Of course, if you want to change some settings, click the Customize Hardware button.
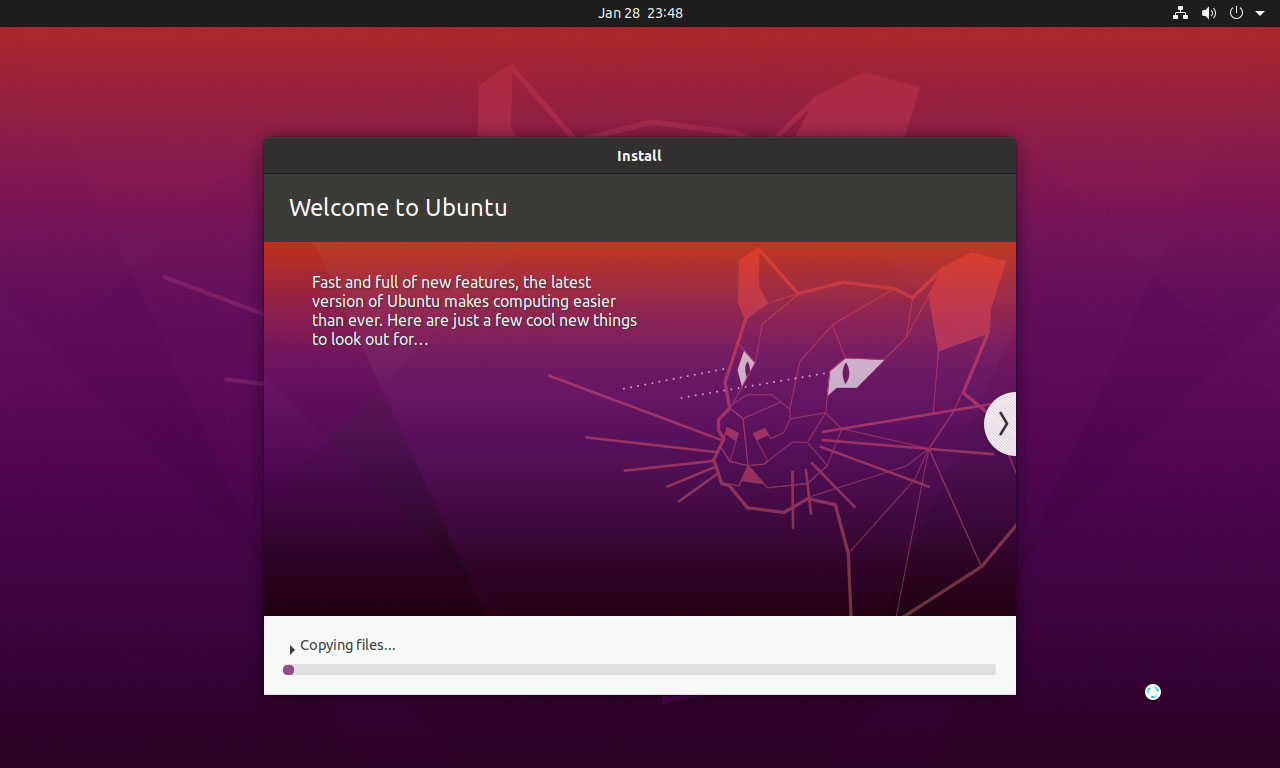
Step 11: The Ubuntu VM will power on and go through the installation process automatically. All you need to do is wait until the installation process is completed.
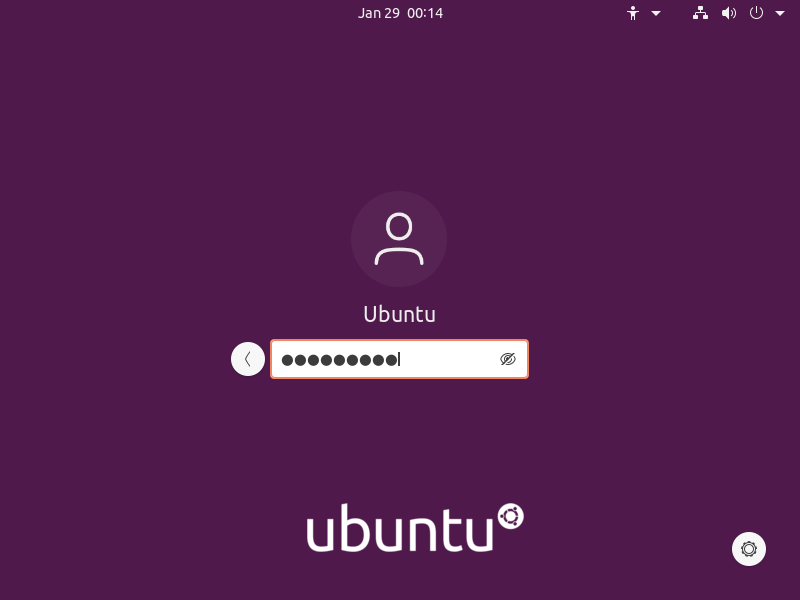
Step 12: After the Ubuntu installation is completed, you need to enter the password to log in to Ubuntu. The password is what you set in the Easy Install Information.
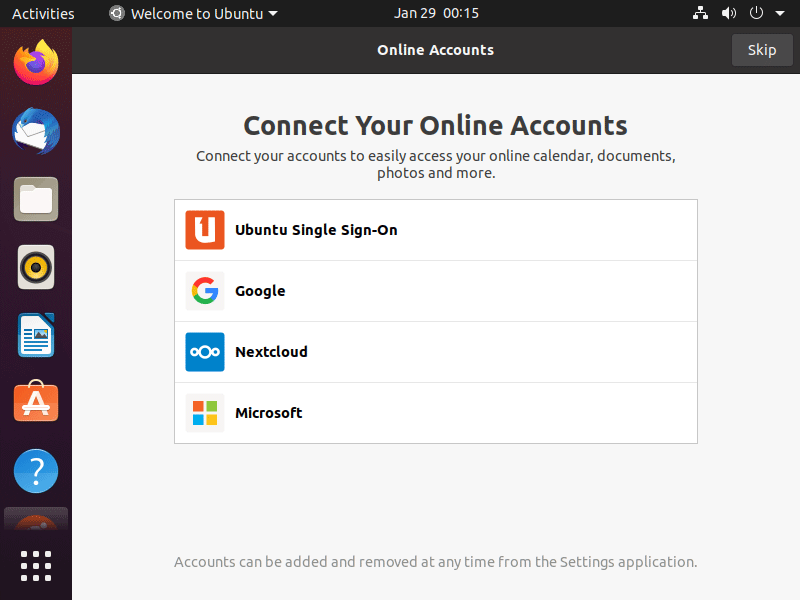
Step 13: After you log in to Ubuntu, you are asked to go through the OOBE (Out of Box Experience) process. For example, connect your online accounts, select some software to install, etc. The process is very simple. You can even skip these settings.
Some people may share Ubuntu VMware images online. You can get the Ubuntu download for VMware and then import it to VMware to get an Ubuntu VM directly. To do that, you just need to click File > Open on VMware and browse to the Ubuntu VMware image. The Import Virtual Machine window will open. Keep the default options and press Import.
How to Install Ubuntu on VirtualBox? Here’s the Full Guide
Troubleshooting & Tips
#1. What If Ubuntu Easy Install Fails
The Ubuntu Easy Install may fail if the key settings (like processor and RAM) of the Ubuntu VM are wrong. It may also encounter some errors for other reasons.
If the Ubuntu Easy Install fails, you can delete the Ubuntu VM and create a new one, but this time you need to select the I will install the operating system later option when you are asked where to install the guest OS from.
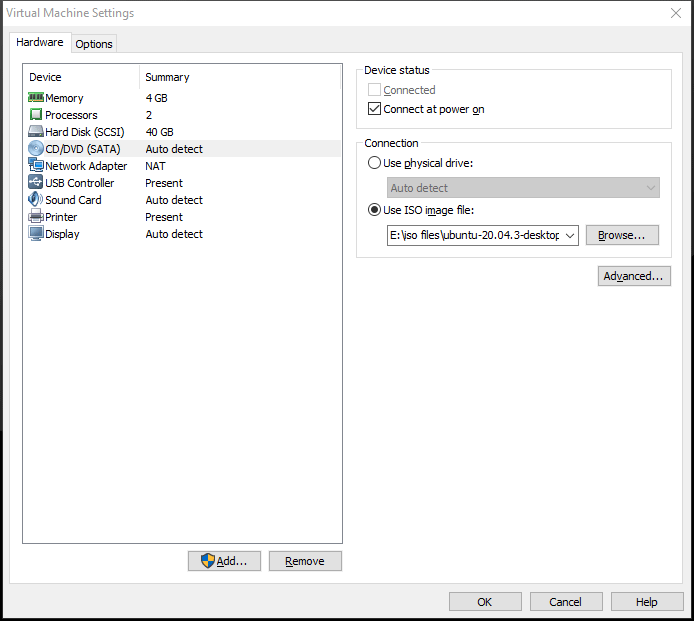
Then, you are asked to select a guest OS. Make sure Linux and Ubuntu 64-bit are selected. As for other steps, you just need to choose the same options. After the new Ubuntu VM is created, click the Edit virtual machine settings link at the top left section of the Ubuntu VM window.
On the pop-up window, go to Hardware > CD/DVD (SATA) and select Use ISO image file. Click the Browse button and select the Ubuntu ISO file you downloaded before. Then, click the OK button to save changes.
Click the green startup icon to power on the virtual machine. After Ubuntu boots, the Ubuntu Install wizard will open. Click Install Ubuntu and go through the Ubuntu installation step by step. After the detailed steps, you can refer to this post: How to Install Linux (Ubuntu) on Windows 10 [Ultimate Guide].
#2. The Ubuntu Display Is Too Small
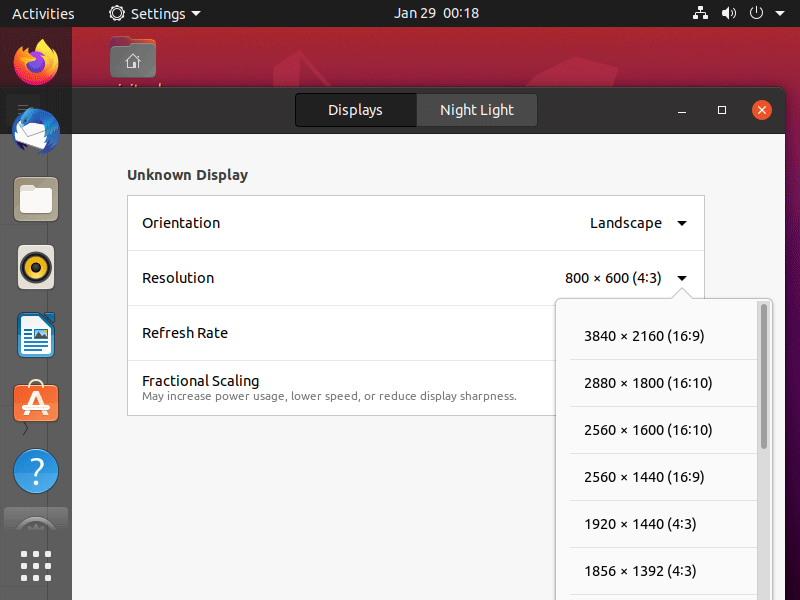
The Ubuntu VM’s default display resolution is 800 x 600, which is too small for some users. If you are also bothered by the same issue, you can change the resolution in the following way:
- Right-click the desktop and choose Display Settings.
- On the pop-up window, change Resolution and click Apply.
- The Ubuntu display size will change accordingly. If you are satisfied with the new display size, click Keep Changes.
Bottom Line
Do you encounter problems when following the above guide to install Ubuntu on VMware? Do you have some questions or ideas about this post? If so, leave comments in the following zone. In addition, if you encounter problems when using MiniTool Partition Wizard, please feel free to contact us via [email protected]. We will get back to you as soon as possible.
About The Author

Position: Columnist
Linda has been an editor at MiniTool for seven years. She continuously learns about computers and puts her knowledge into practice. Moreover, she is particularly knowledgeable in disk management, data recovery, system installation, and PDF editing. Her articles typically reference multiple examples or are based on her own experience, providing users with the most suitable solutions.
User Comments :