In the field of the embedded desktop operating system, Windows, Mac OS, and Linux are three major operating systems occupying nearly all markets. For computer users, Windows is the most commonly used operating system, but Linux is always a dual-boot trying due to its various advantages: open source, more secure, stable, flexible, revive old computer, totally free, and more.
Thus, a lot of Windows users would like to have a try on Linux, and they wonder how to install Linux on Windows 10.
In fact, Linux is divided into many distributions, and Ubuntu (distribution based on Debian) is probably the most well-known one. Here are top 10 Linux distributions according to PCworld:
- Ubuntu
- Fedora
- Linux Mint
- openSUSE
- PCLinuxOS
- Debian
- Mandriva
- Sabayon/Gentoo
- Arch Linux
- Puppy Linux
Since Ubuntu is the one most people have heard of, today I will go through the process of how to install Linux on Windows 10 using Ubuntu for example. Installing the other has a very similar process.
Way 1. Install Linux (Ubuntu) on Windows 10 for Dual Boot
Step 1. Download Ubuntu IOS
To install Ubuntu on Windows 10, the first thing you need to prepare is the ISO file of Ubuntu. You can get it by visiting clicking here. Just select the OS you prefer.
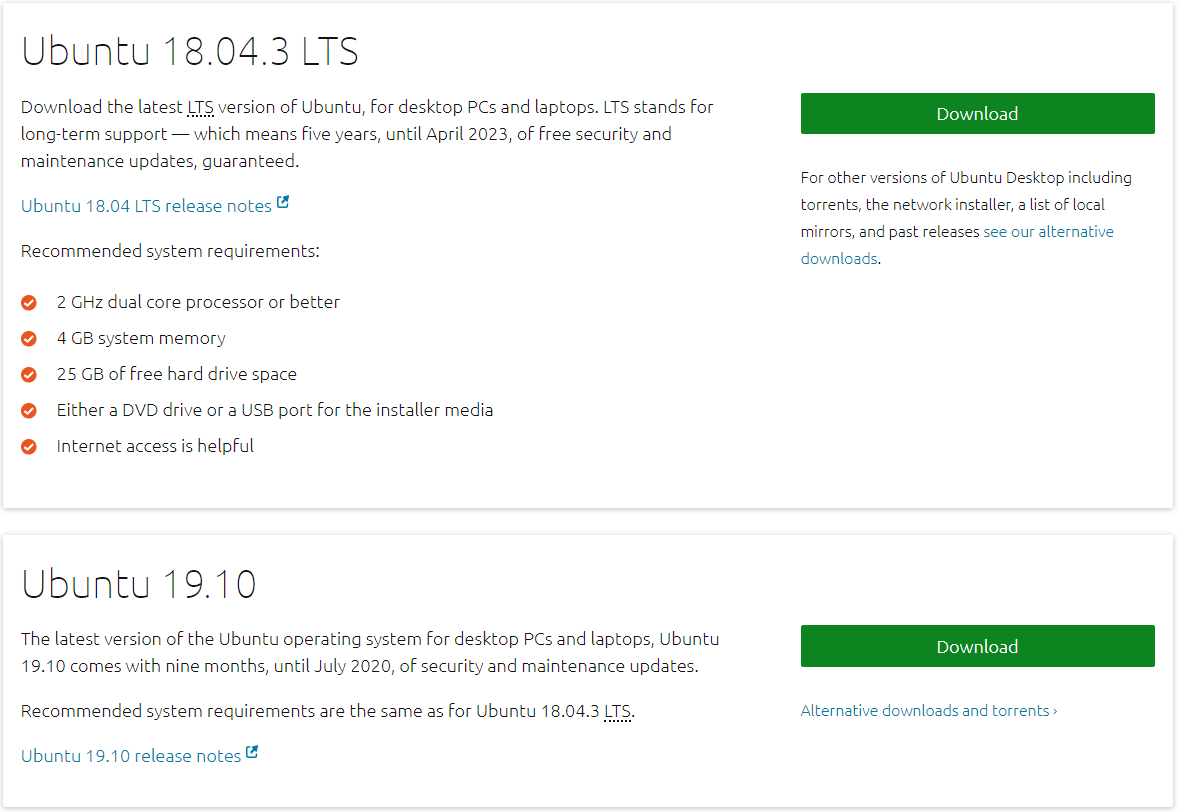
–image from ubuntu.com
Step 2. Create a Bootable USB Drive for Ubuntu
Now prepare a USB flash drive that is formatted to FAT32. Check out how for format USB drive to FAT32. Then use a tool like UNetbootin and Rufus to burn the Ubuntu ISO to this USB drive.
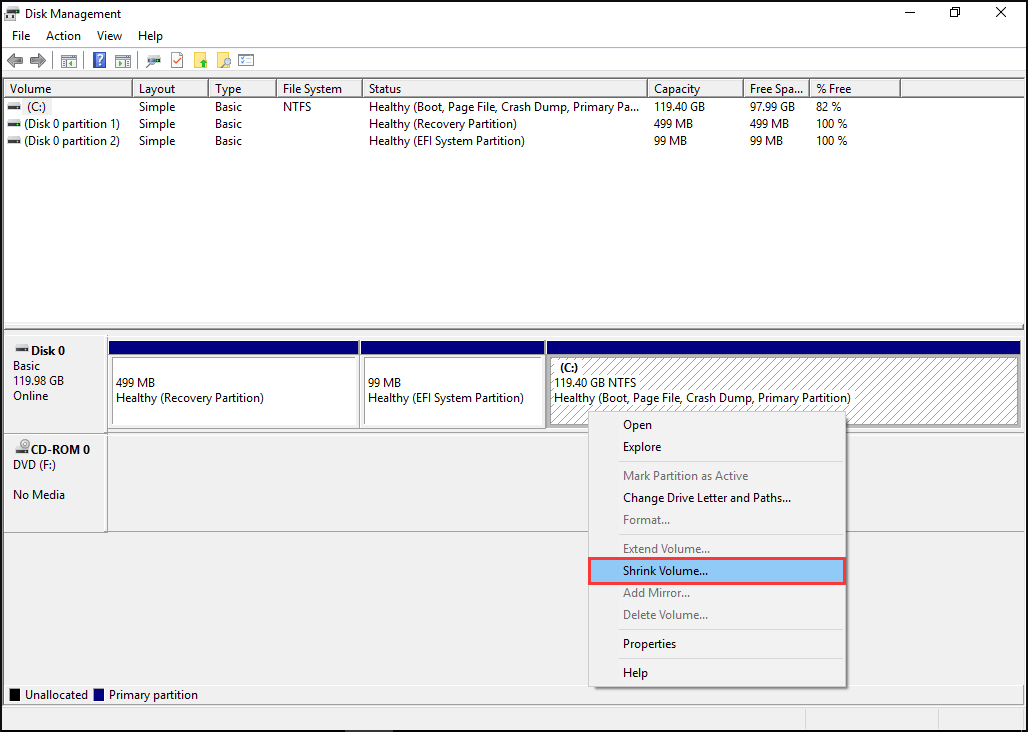
Step 3. Make Unallocated Space Where Ubuntu Will Be Installed
To install Linux on Windows 10, it is recommended that your computer has at least 10 GB free space (2 for the OS, while the rest for the files and applications). So now you have got the task to release some free space form your Windows computer.
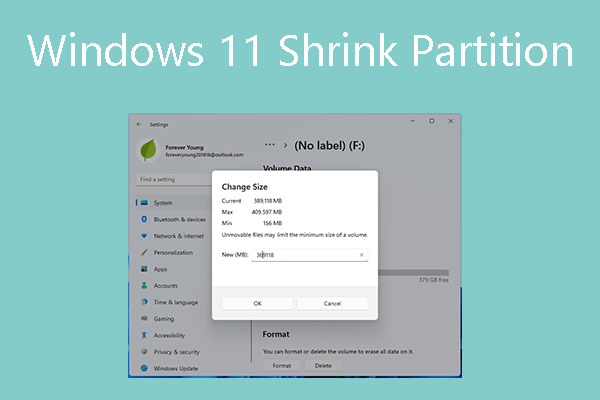
Here you have multiple choices. If you are familiar with Windows Disk Management utility, you can shrink the C drive, or delete a non-system partition to make some unallocated space (please ensure that you have made the file backup before the deletion).
For those who are unfamiliar with this tool, or who get stuck in receiving the error “
there is not enough space available on the disk(s) to complete this operation”, I believe using MiniTool Partition Wizard is much easier due to its wizard-like interface and its stable functioning.
MiniTool Partition Wizard FreeClick to Download100%Clean & Safe
Step 4. Install Ubuntu along with Windows 10
Here comes to the main point of how to install Ubuntu on Windows 10, please take care of the step-by-step guide.
#1. Boot from the USB Drive
First of all, set your device to boot from the bootable Ubuntu USB drive. To do this, you will need to enter the BIOS setting and change the boot priority.
Usually, you can get into the BIOS system by pressing a specific key repeatedly before the Windows logo appears. That key can be F2, F10, F12, Dele, or some combinations. Please read the instructions of your mainboard to check.
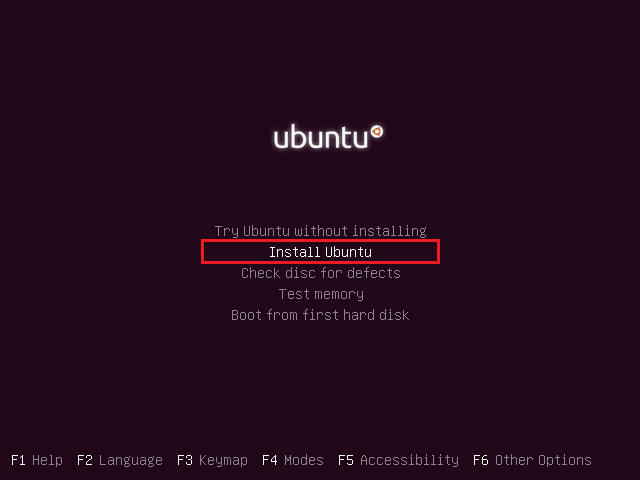
When you are in, navigate to Boot Option and set the target to boot from the USB flash drive. Once the USB media boots up, a new grub screen should appear on your monitor where you are able to select Install Ubuntu to continue.
#2. Complete Installation Process
When you see a functional Ubuntu system running in live-mode, select Install Ubuntu, then the installer will start. Select the Language to perform the installation and click Continue to proceed.
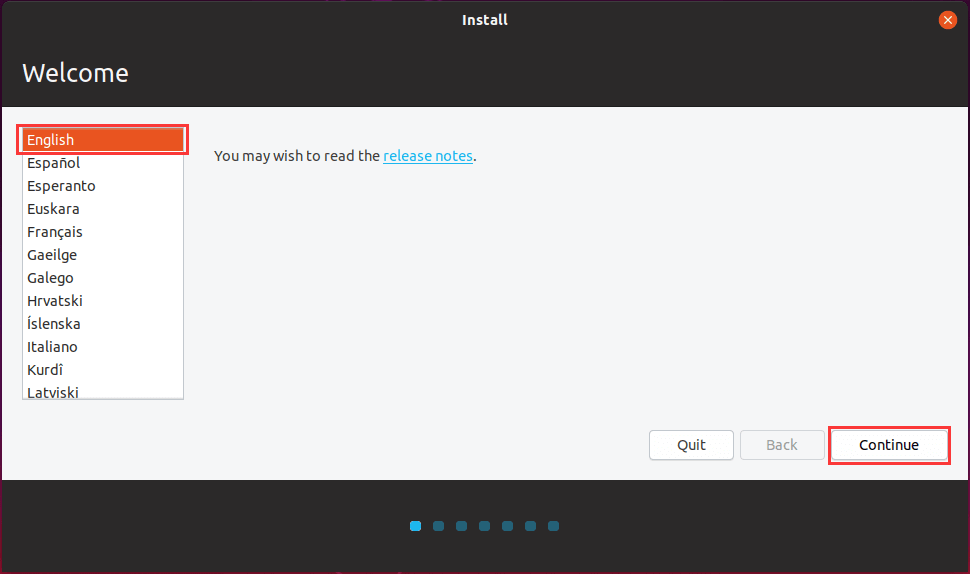
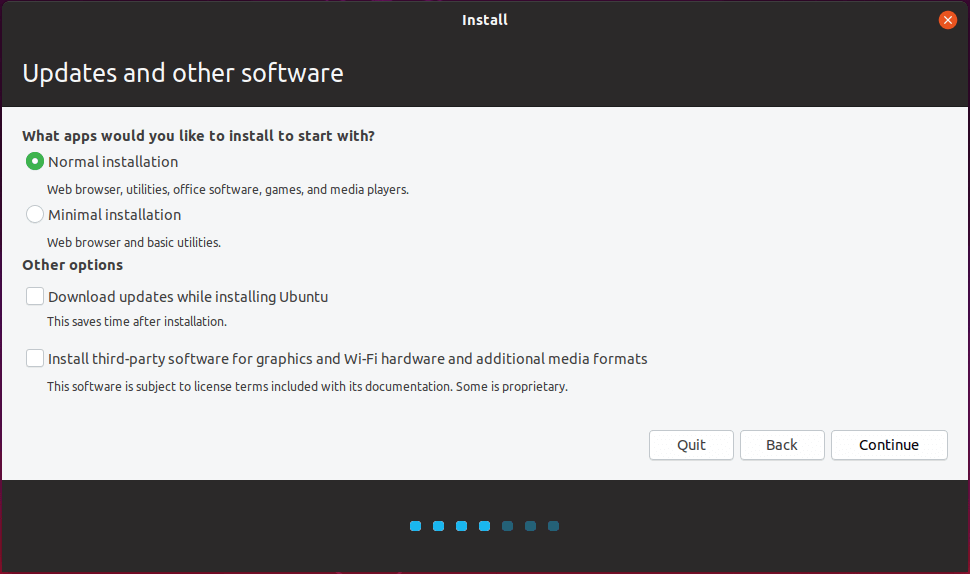
In the next screen, choose the first option Normal installation, then click Continue.
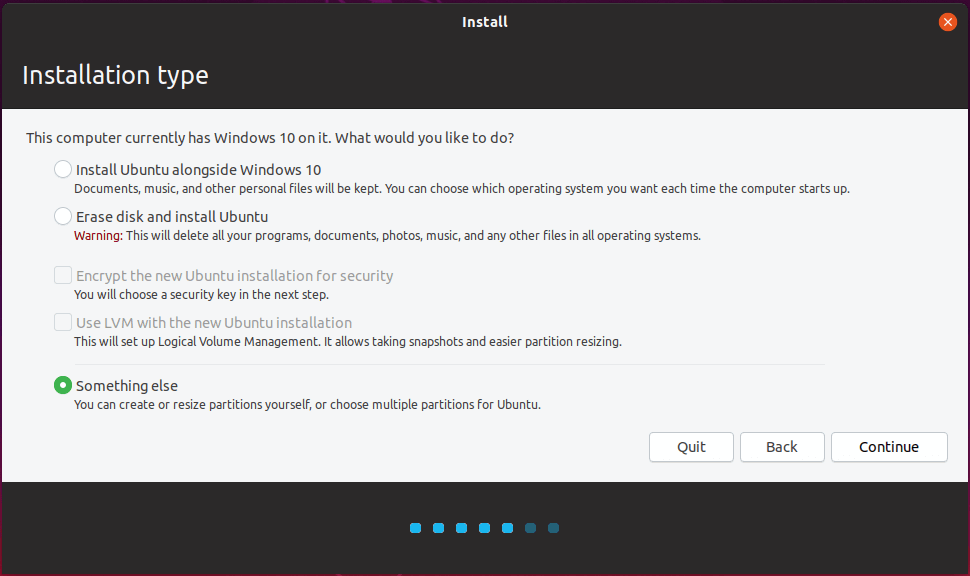
In the next window, you get 3 options to choose from:
- Install Ubuntu alongside Windows 10: If you choose this to continue, all the options will be made automatically for the partition steps. please take care of the information on the new window showing what will happen to your disk before you confirm. Otherwise, select Something else to make further changes manually.
- Erase disk and install Ubuntu: This will erase the whole disk and then install Ubuntu. Do not choose this option if you are intending for dual boot Windows 10 and Linux.
- Something else: Customize the partition for Ubuntu. How to go through Something else setting? Check the details below.
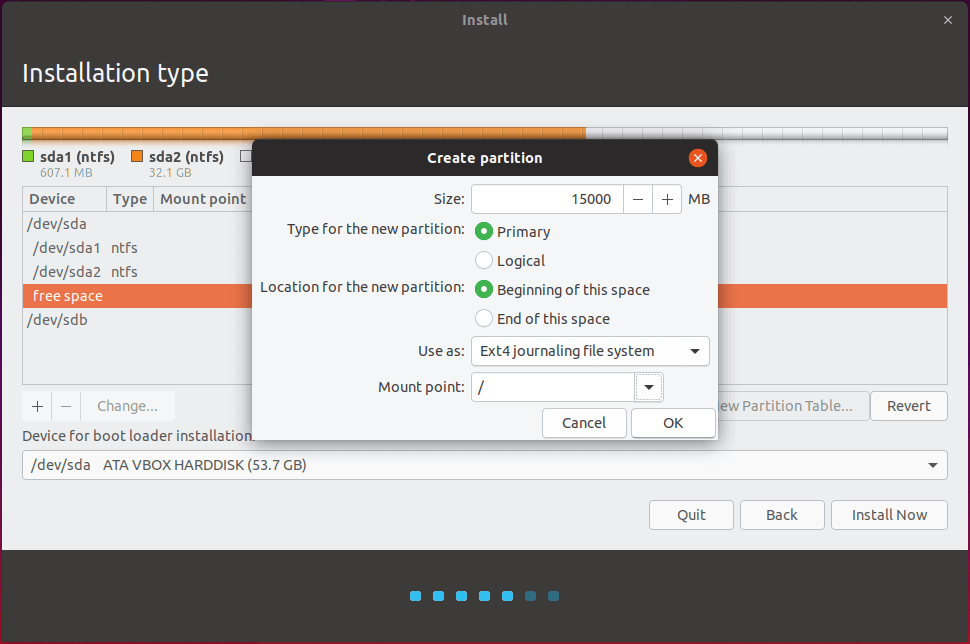
In short, this is to require you create necessary partitions for Ubuntu. You are suggested to create 2 partitions, one for root and the other one for home accounts data. Swap partition is not indispensable. Use a Swap partition only when you have limited RAM resources.
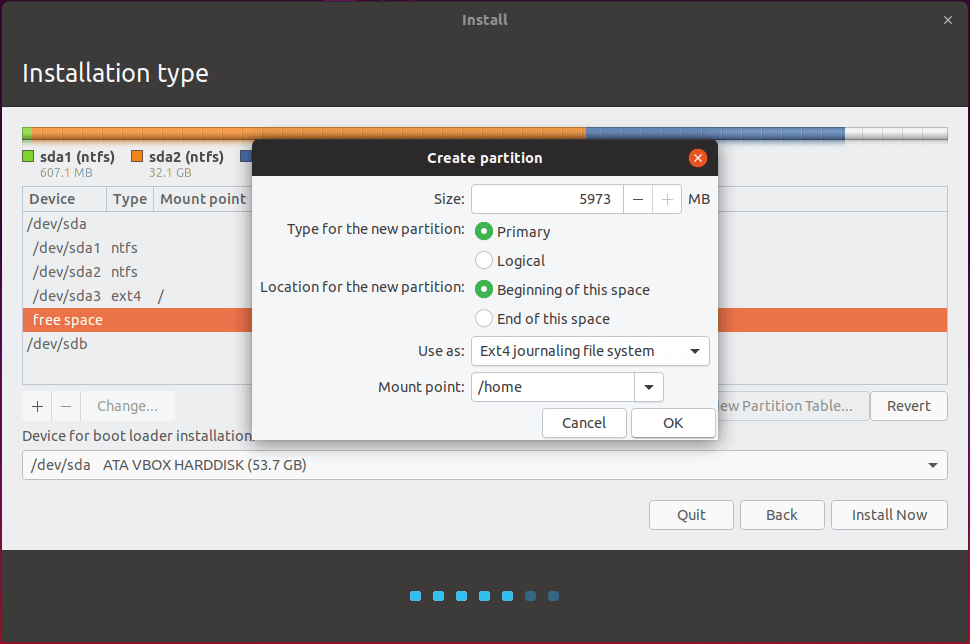
To create the first partition, the root partition, select the free space which you obtain from Step 3 and hit the + icon from the lower-left corner.

Please use the following configurations for the first Root partition and hit OK to apply changes:
- Size: at least 20000 MB
- Type for the new partition: Primary
- Location for the new partition: Beginning of this space
- Use as: Ext4 journaling file system
- Mount point: /
Create the second Home partition using the same steps as above. The partition configurations should look like this:
- Size: all remaining free space
- Type for the new partition: Primary
- Location for the new partition: Beginning of this space
- Use as: Ext4 journaling file system
- Mount point: /home
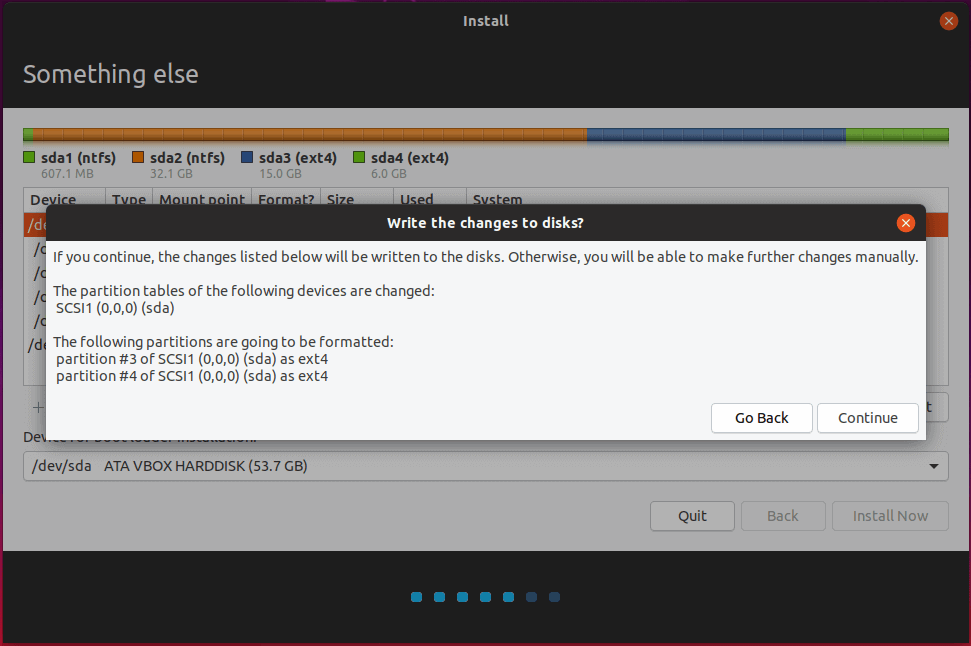
When finished, hit the Install Now button and read carefully the message in the pop-up window before you click Continue. Be sure it is the newly created partitions to be changed.
The installation process will now start. Please hang on, for this is the whole story.
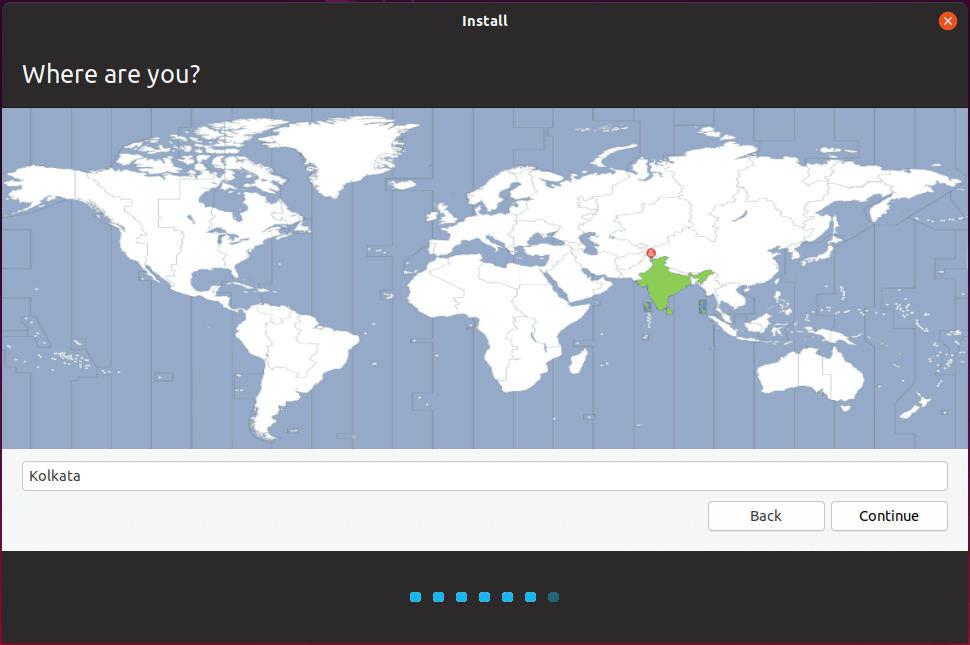
The next screen will ask you location. Just select your city or a city nearby from the map. When done, hit Continue to move ahead.
If you are asked to select your keyboard layout, make your own choice and continue.
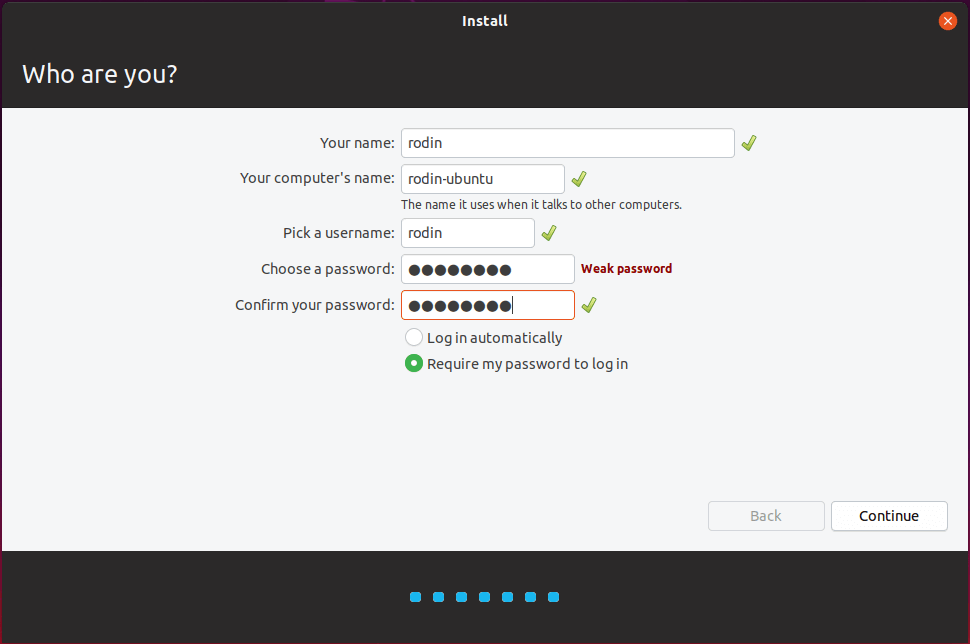
Next, it will ask your name, your computer name, username, and password to create a default user. Please input and save the information as they are required for the Ubuntu login in the future. After doing these, hit Continue to finalize the installation.
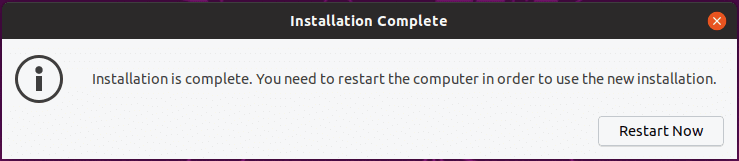
Now all the settings required for customizing Ubuntu installation are finished. From here on the installation process will run automatically until it reaches the end. Click Restart Now.
How to install Ubuntu on Windows 10? See the detailed guide here!Click to tweet
Step 5. Dual Boot Windows 10 and Linux
Here is a simple guide to dual boot Windows 10 and Linux.
Once the system has been rebooted, you will see the Grub menu asking which operating system you want to start. Select Ubuntu (default) or Windows 10 as per your requirement.
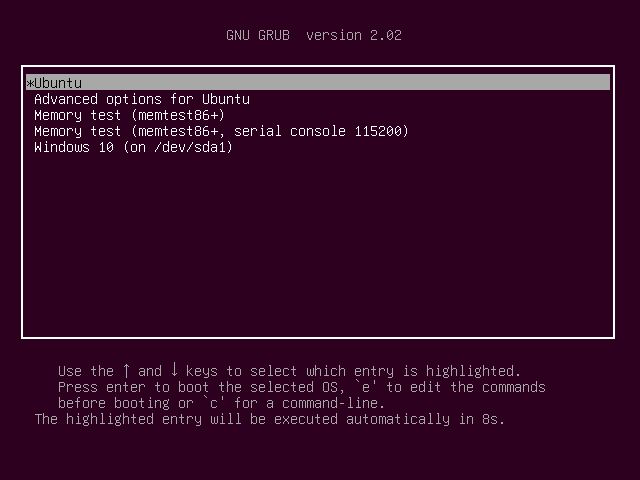
That’s it! In case you need to switch back to Windows 10, reboot your computer and select Windows from the Grub menu.
Further reading: How to install Kali on Windows 10?
Way 2. Install Linux on VirtualBox on Windows 10
If you only want to use Linux for a trial sometimes, you can install Linux on VirtualBox. Installing Linux will take you at least 15 GB free disk space. Use MiniTool Partition Wizard to help you in this case.
Here is a simple guide for you to install Linux on VirtualBox:
- Click to download VirtualBox.
- Obtain Linux OS (Linux Mint) from here.
- Run VirtualBox, set the system name, type (Linux), and version.
- Set how much RAM for this Linux OS to use.
- Set the hard drive.
- Choose the iso file of your Linux.
- Install and configure the Linux OS.
Wrapping Things Up
Now I believe you already know how to install Ubuntu inside Windows 10 and dual boot Windows 10 and Linux. The whole procedure is quite simple if all the steps are followed correctly. Let us know if you have successfully installed Ubuntu on Windows 10 in the comment zone below. Any questions using MiniTool software, contact [email protected].
Install Linux on Windows 10 FAQ
About The Author

Position: Columnist
Rodin is an enthusiastic IT writer focusing on Windows trends, disk partition management and data recovery. She loves to write and share her idea about the useful tips and tricks on personal computers' maintenance. If you are looking for methods to improve your computer performance, manage hard drives and recover data from different devices, Rodin can provide reliable solutions for data management.
User Comments :