Why Merge C Drive and D Drive in Windows 7?
When using Windows 7, many computers have multiple partitions, such as a C drive and a D drive.
Over time, this partitioning can become inconvenient, especially when the C drive runs out of space, and the D drive is underutilized.
Merging the C and D drives is a practical solution that not only improves disk space allocation but also simplifies file management and maintains smoother system performance.
Next, two methods for merging the C drive and D drive in Windows 7 will be introduced in detail, allowing you to select a method based on your actual requirements.
To avoid confusion, C drive and D drive in this article refer to the C: partition and D: partition, respectively.
Merge C and D Drive in Disk Management – Data Loss
If users want to combine C and D via Disk Management, they need to back up all important data on D drive in advance, because this partition will be deleted. Naturally, all data saved in this drive will be lost. To back up data in a fast way, view the help tutorial Copy Partition to get instructions.
Requirements for merging partitions in Windows Disk Management
- Adjacent space limitation: If the two partitions to be merged are not adjacent (e.g., separated by other partitions), they cannot be merged directly.
- File system requirements: The disk partition to be expanded must be formatted as an NTFS file system.
- Extending partitions to the right only: Windows Disk Management only supports extending to the right; space on the left cannot be merged directly.
Then, let’s see how to merge partitions in Disk Management.
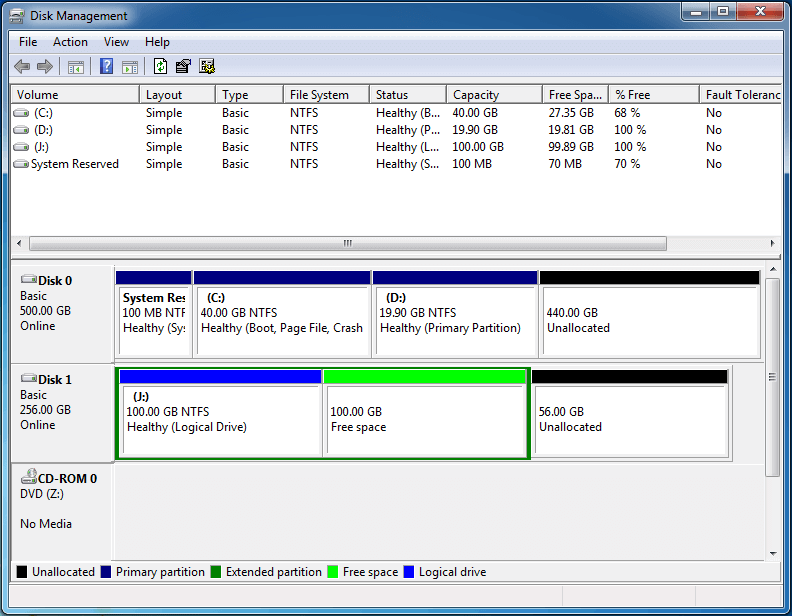
Step 1. Press Win+R to call out the Run box, input diskmgmt.msc and hit the Enter key to load Windows Disk Management. (Another approach: right-click the Computer icon on the desktop, choose Manage and then Disk Management.)
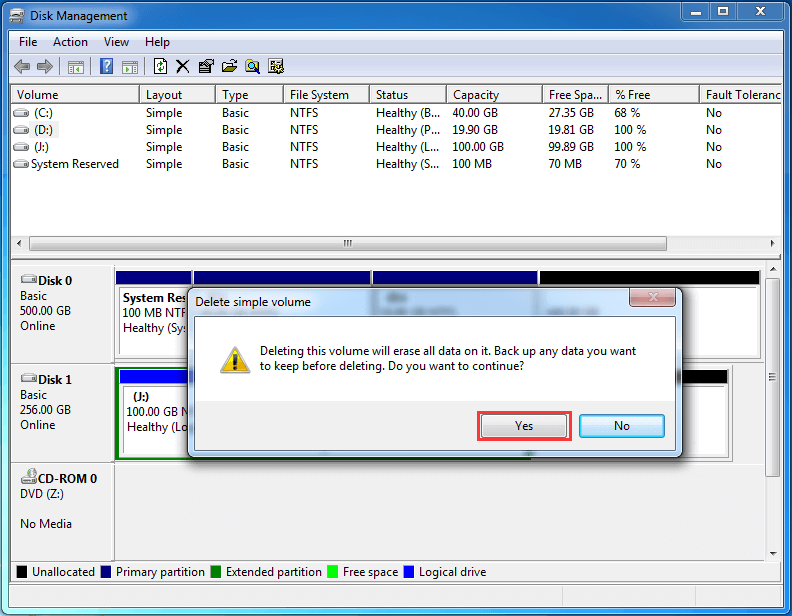
Step 2. Right-click partition D and then choose Delete Volume button to release unallocated space.

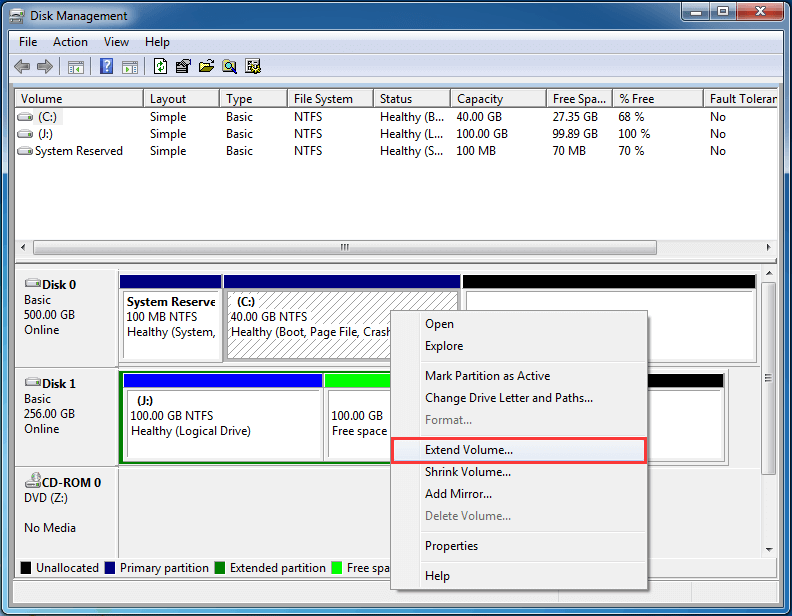
Step 3. Right-click partition C to choose Extend Volume button. Then, extend volume C by following Extend Volume Wizard.
See Also: Why Is Extend Volume Grayed out and How to Quickly Fix It? Possible reasons for Extend Volume Grayed out are shown here, and users will be given corresponding solutions at the same time.
From the demonstration above we know although Windows Disk Management tool can help us merge partitions, it will lead to data loss unless we create a backup in advance.
Well, is it possible to merge partitions without losing any data? Of course, with the help of third-party partition manager, it is easier to merge C and D drive in Windows 7.
Merge C and D Drive with Third Party Partition Manager – No Data Loss
To perform such an operation, you can ask MiniTool Partition Wizard for help, which is a green, safe, and easy-to-use disk partitioning program for Windows users.
MiniTool Partition Wizard offers a bundle of features for Windows users to reorganize their drives while keeping existing contents intact. To merge C and D drive in Windows 7, it is strongly recommended to use MiniTool Partition Wizard Pro to avoid accidents.
Kind Remind: For a successful merge, please pay attention to the following 2 issues:
- Drive C and Drive D should be adjacent.
- Both partitions should be formatted with NTFS. If one of them is formatted with FAT32, please convert it to NTFS in advance.
Then, how to combine partitions? Let’s see detailed steps.
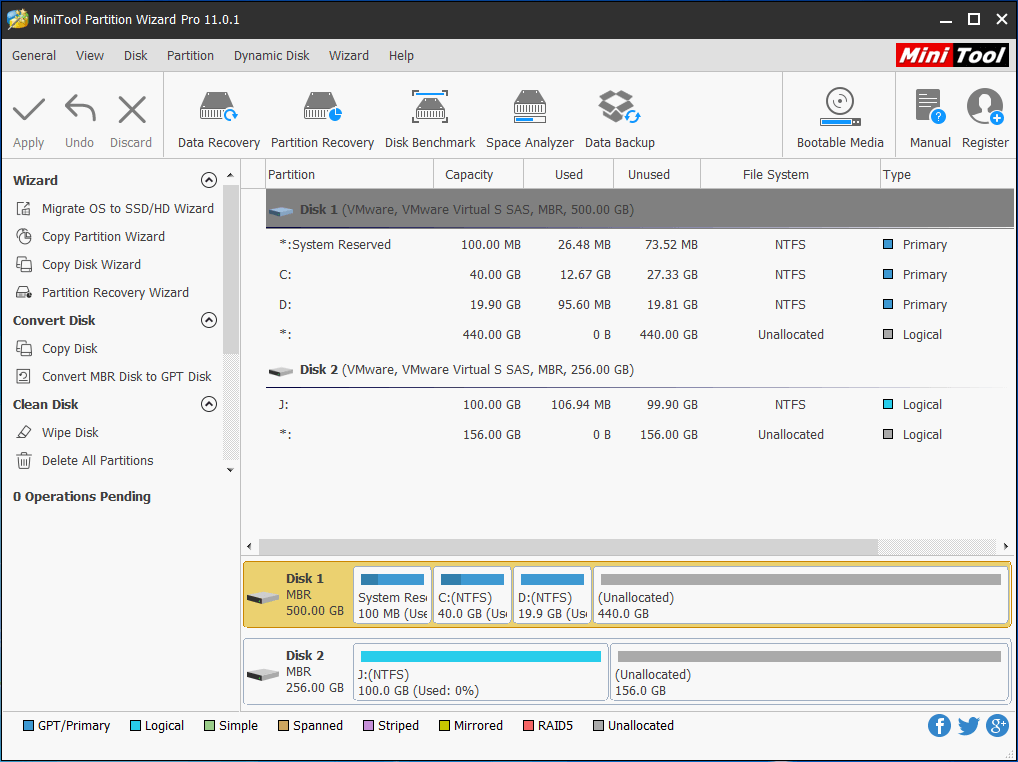
Step 1. Users need to launch MiniTool Partition Wizard to get its main interface.
Step 2. Now follow these two guides to create a bootable media and then boot your computer from this media.
- How to Create a Bootable CD/DVD/USB Flash Drive with MiniTool Media Builder?
- How to Boot Computer from MiniTool Bootable Media?
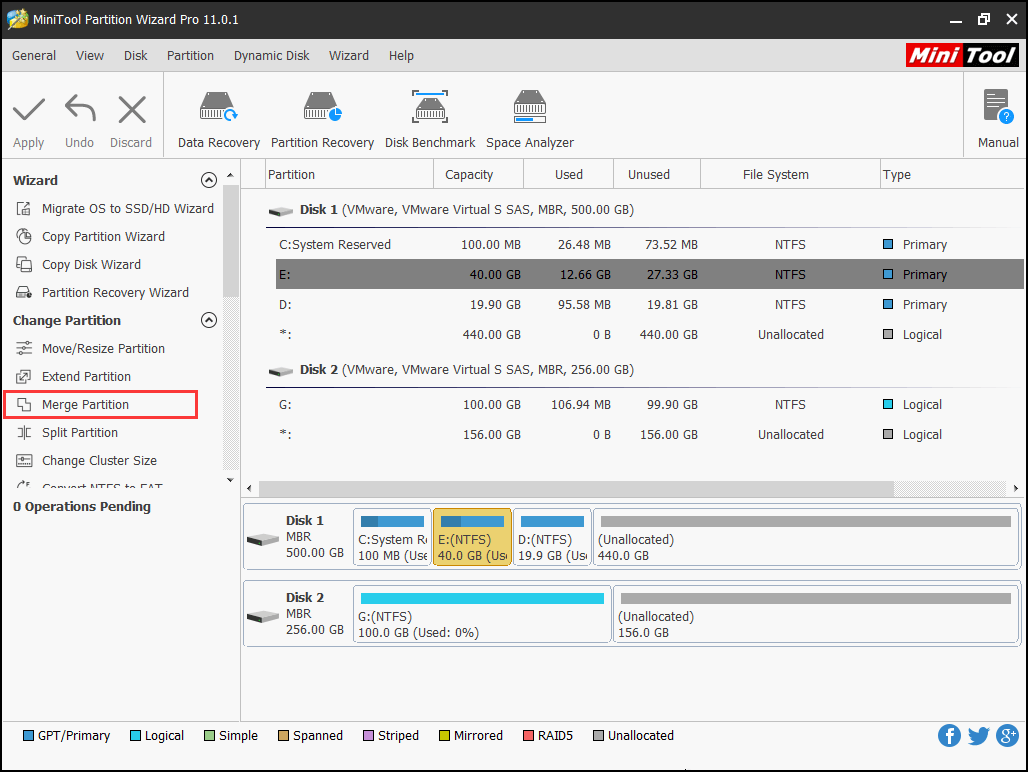
Step 3. Select C drive and then choose Merge Partition from the left action panel to enter its operating interface. Please note that the drive letters can be changed from what they are in the running Windows. Use the Explore Partition feature to confirm.
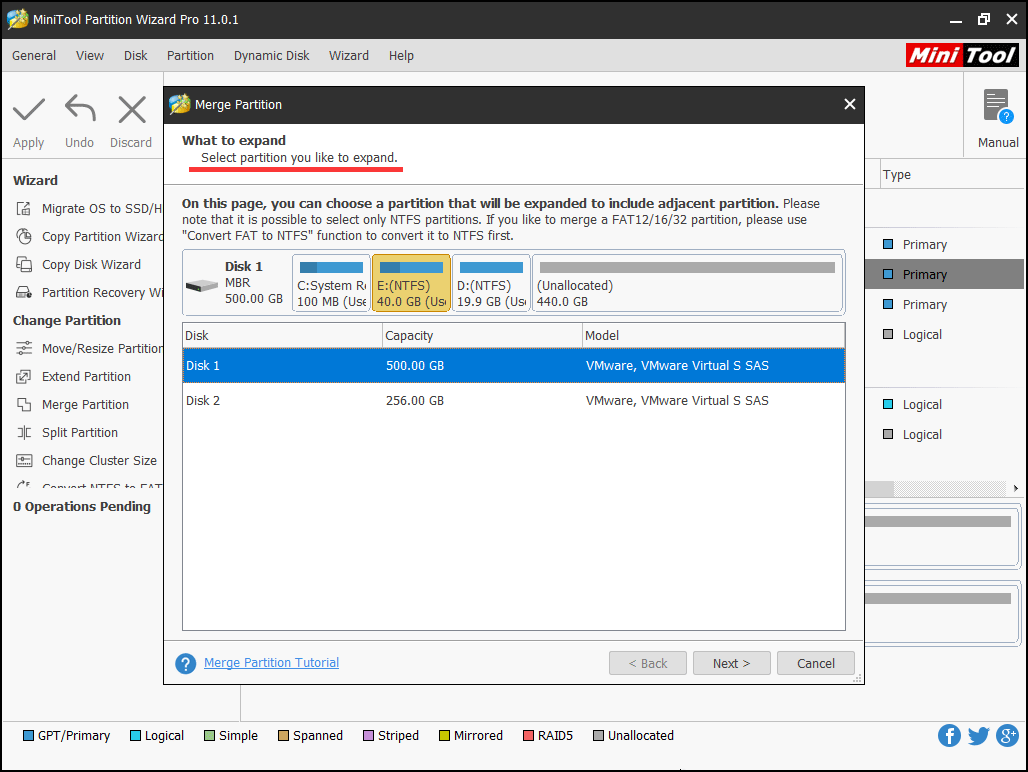
Step 4. Click Next button to get the following window.
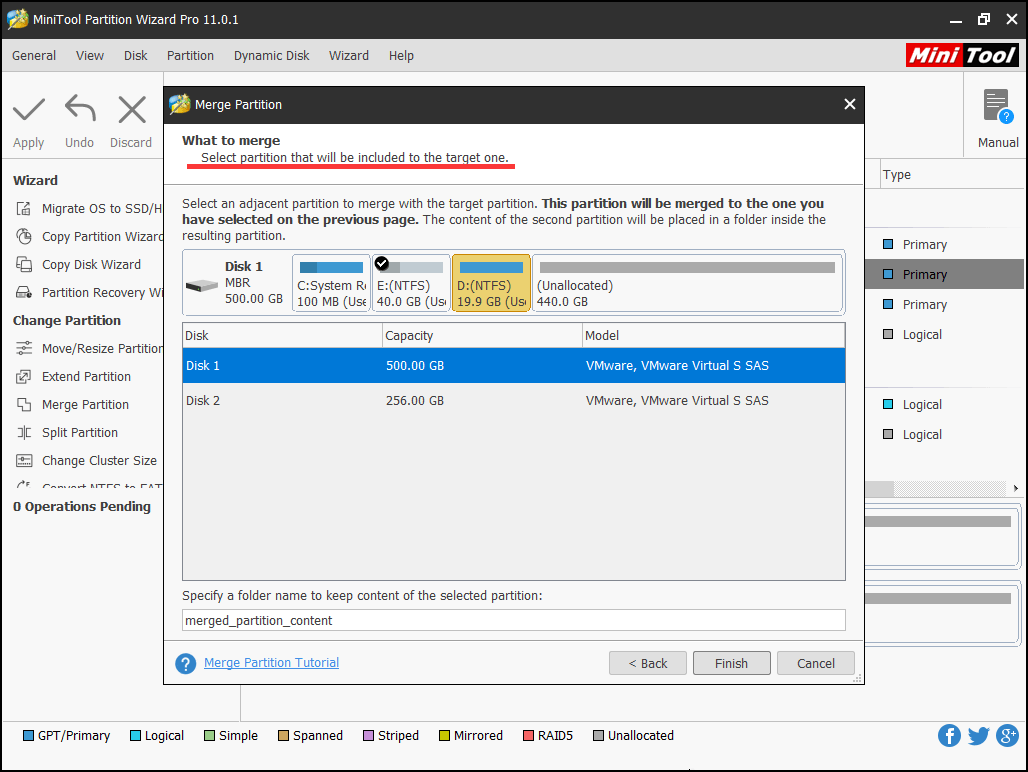
Step 5. Select partition D to get merged and click the Finish button.
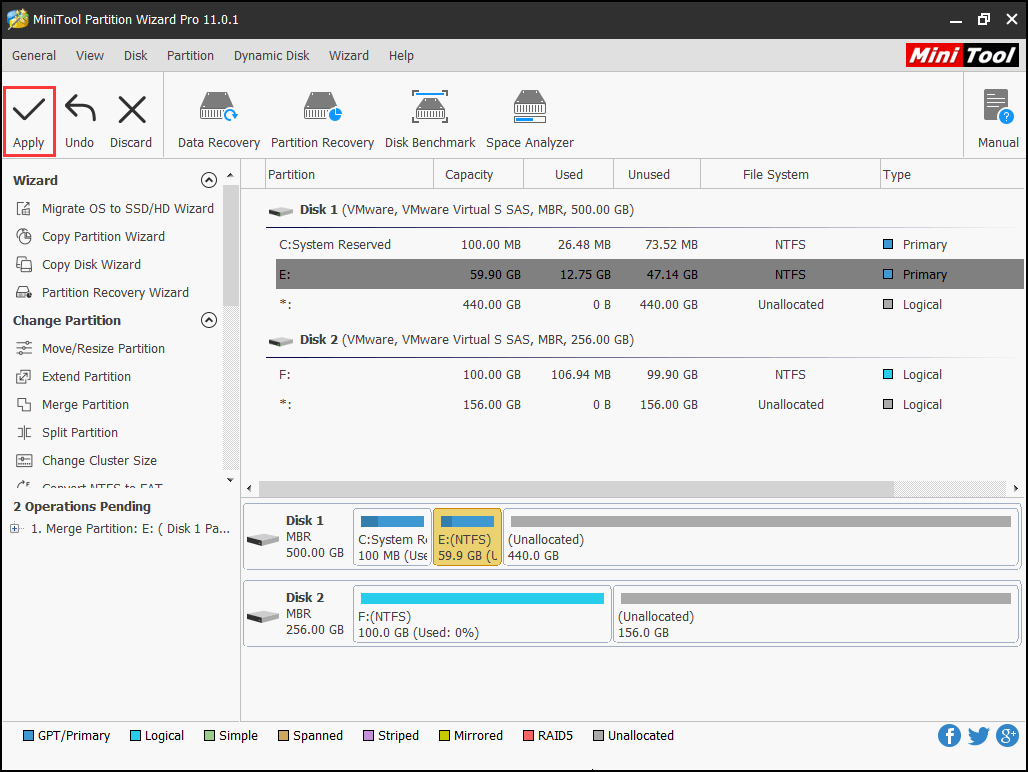
Step 5: Click Apply to perform all changes.
Actually, if there are some unallocated space or more partitions that have much free space, it is more flexible to extend partition rather than merge partition.
After all operations are done, users have finished merging C and D drive in Windows 7 by using MiniTool Partition Wizard, and no data loss is generated.
Disk Management vs. MiniTool Partition Wizard
Windows Disk Management is a utility for managing hard drives, capable of performing tasks such as partition creation and disk formatting.
However, while it has advantages in functionality, it also has certain limitations.
The table below compares the main features of the Windows 7 Disk Management tool with MiniTool Partition Wizard, helping you choose the appropriate tool based on your actual needs.
Features | MiniTool Partition Wizard | Windows Disk Management in Windows 7 |
Merge Partitions | Supports merging adjacent and non-adjacent partitions | Does not support direct partition merging |
Extend Partition | Can extend to the left or right | Only supports extending to the right |
Move Partition | Supported | Not supported |
Data Preservation | Data can usually be retained during some operations | Deleting a partition erases data |
Create Bootable Disks | Supported | Not supported |
Copy dynamic volume, copy disk/partition | Supported | Not supported |
Comparing these 2 methods, we can find resorting to third-party partition manager is much better since it can help combine partitions without data loss. Just get one have a try!
For any question towards how to merge C drive and D drive in Windows 7, don’t hesitate to let us know by leaving comments below.
Merge C and D Drive Windows 7 FAQ
- Boot your computer using MiniTool Bootable media.
- Get into Merge Partition wizard.
- Select the system partition C as the one to be enlarged and then partition D as the one to be merged.
- Confirm the merging operation and Apply.
- Run MiniTool Partition Wizard.
- Select the partition located in front of the unallocated space and use the How do I move unallocated space to C drive? feature to drag it to the right side of the unallocated space.
- Repeat the former step until the unallocated space is located at the right side of the C drive.
- Now use Move/Resize Partition feature to extend the C drive.
We can easily increase the size of C drive by using MiniTool Partition Wizard Pro.
- Create a MiniTool bootable media and use it to boot your computer.
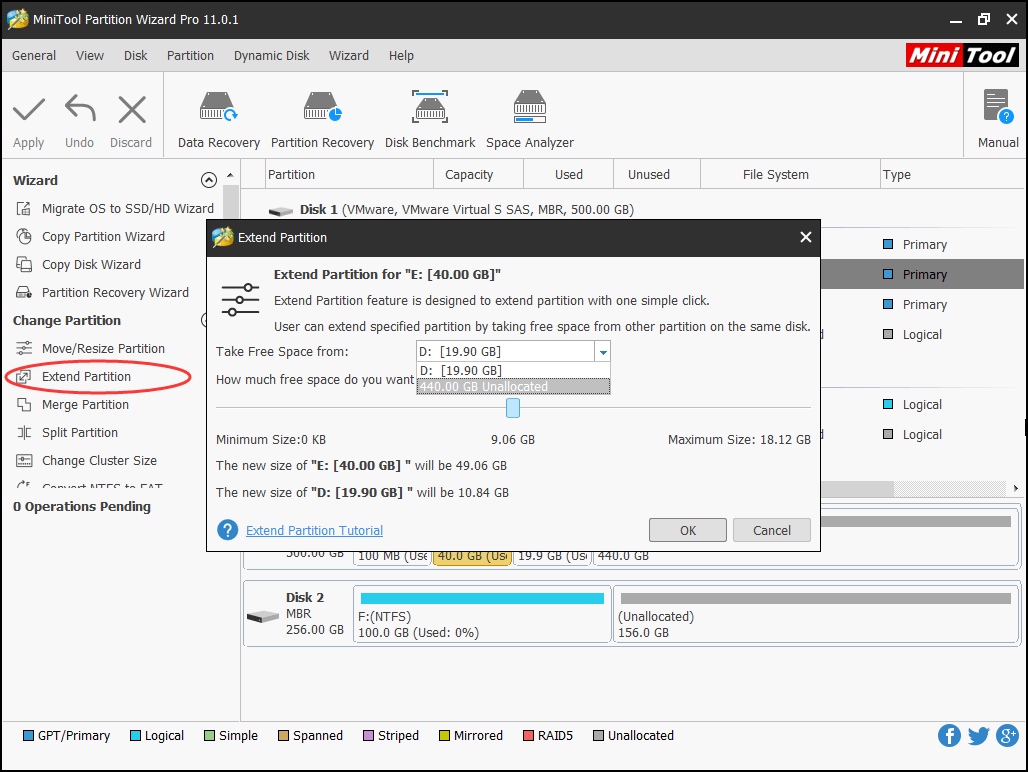
- Find the real system partition and choose Extend Partition.
- Follow the wizard to complete.
About The Author

Position: Columnist
Cecilia has been an editor at MiniTool for two years. She primarily focuses on disk and partition-related content, with particular expertise in disk cloning, partition recovery, and PDF document conversion. She is dedicated to providing users with clear and accurate solutions to help them efficiently resolve common computer problems.
User Comments :