Do you like to play Destiny 2? Have you ever encountered Destiny 2 stuck on initializing? Reasons for this problem might be various, but you don’t need to be anxious. In this post, MiniTool Software offers 8 solutions to help you.
About Destiny 2
Destiny is an online multiplayer shooter video game, developed by Bungie. It is supported on various platforms, such as PS4, Xbox and Windows. It was first released on September 9, 2014, and in September 2017, Destiny 2 was released.
Since then, Destiny 2 have attracted a lot of game lovers for its great storyline and exciting shooting competition.
However, many Destiny 2 users report that they have encountered a problem: Destiny 2 stuck on initializing. It usually happens while they’re trying to download, update or launch the game.
How to stop Destiny 2 from initializing? You can get some solutions in the following contents.
Solution 1: Run Blizzard Client as Administrator
The problem Destiny 2 download stuck on initializing could be caused by privilege issue. You can try running your Blizzard Battle.net (the game platform where you can play Destiny 2) as Administrator to fix it.
Step 1: Press Ctrl + Shift + Esc to open Task Manager. Under Processes tab, right-click Blizzard Battle.net App and select End task to exit Blizzard completely.
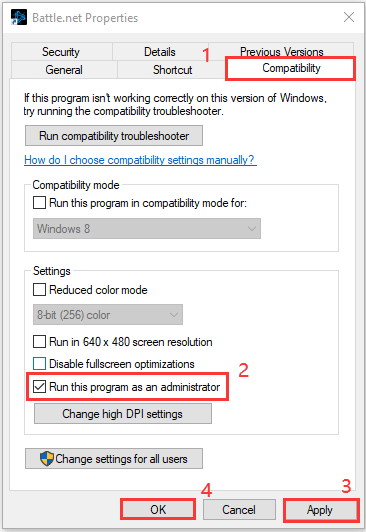
Step 2: Right-click the Blizzard shortcut on your desktop and choose Properties.
Step 3: Switch to Compatibility tab and check Run this program as an administrator option. Then click Apply and OK to save the changes you have made.
Step 4: Open Blizzard and try launching Destiny 2 to check if the problem disappears.
If you still see Destiny 2 stuck on initializing error, you can try the next solution.
Solution 2: Change Blizzard Settings
When you encounter Destiny 2 download stuck on initializing or Destiny 2 update stuck on initializing, you might need to change some download settigns in Blizzard, which may help you increase the download speed.
Step 1: In Blizzard application, click the BLIZZARD loge from the upper right side and select Settings.
Step 2: In the left panel of Settings, select Game Install/Update. In the right pane, scroll down and find Network Bandwidth section.
Step 3: Change the value of Latest updates and Future patch data to 0 KB/s.
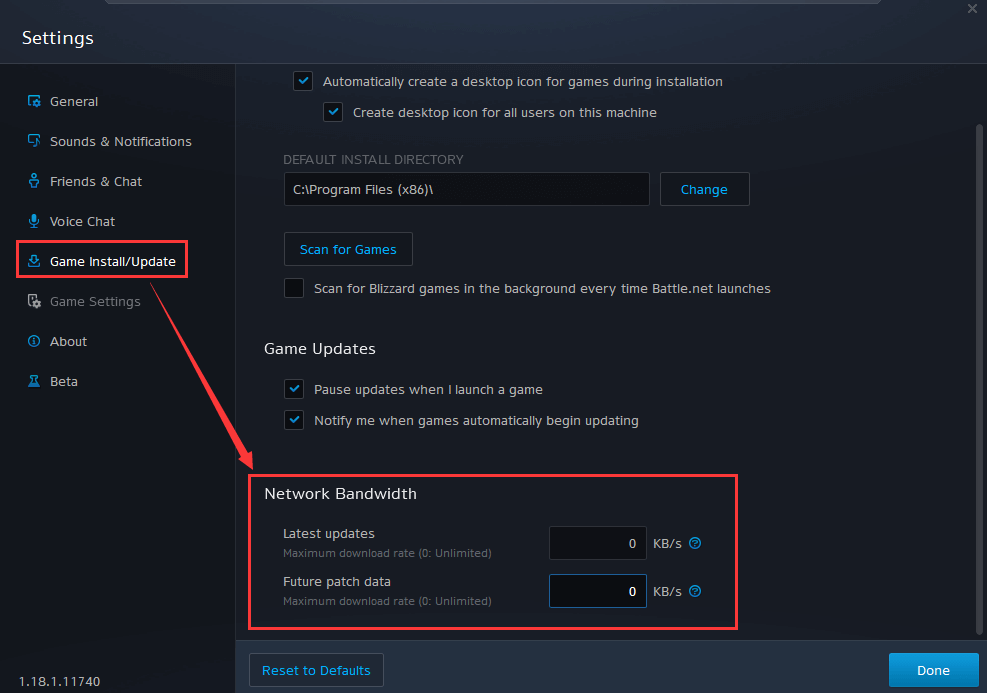
Step 4: Click Done to save the changed settings.
Then you can continue to download or update Destiny 2 to see if this solution works.
Solution 3: Disable Third-party Antivirus Software
Some antivirus applications might mark a valid program as malicious, which causes problems like Destiny 2 stuck on initializing.
If you’re using a third-party antivirus, you can try disabling or uninstalling it temporarily. Then restart your PC and check if you’re able to download or update Destiny 2.
Solution 4: Rename the Destiny 2 Folder
Another way to solve Destiny 2 update stuck on initializing is to rename the game folder. Here is how to do it.
Step 1: Close the Battle.net client completely.
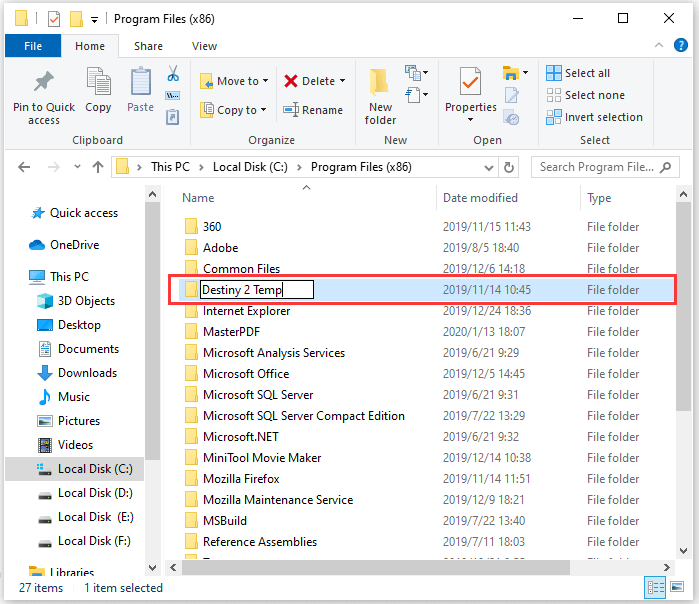
Step 2: Press Win + E to open File Explorer and then navigate to your Destiny 2 installation folder. By default, you can find it in C:Program Files (x86).
Step 3: Rename the Destiny 2 folder to Destiny 2 Temp.
Step 4: Open Battle.net and find the game Destiny 2. Then click Install. When the installation process starts, change the folder’s name back to Destiny 2. After that, go back to Battlt.net and click Start Install.
Then the updating process will move on and you just need to wait patiently. After it’s updated, you can launch the game and check if it works properly.
Solution 5: Delete Blizzard Configurations
Every game has temporary configurations stored on the computer. They hold the initial settings and parameters which are needed to launch the game. If these configurations are missing or corrupted, you may see some problems like Destiny 2 stuck on initializing.
To solve the problem, you need to delete Blizzard configurations files. When you run after that, these files will be created automatically.
Step 1: Press Win + R to invoke Run window. Input %appdata% in the box and click OK. Then a directory will open. Click AppData in the address bar to move a step back and you will see three folders:
- Local
- LocalLow
- Roaming
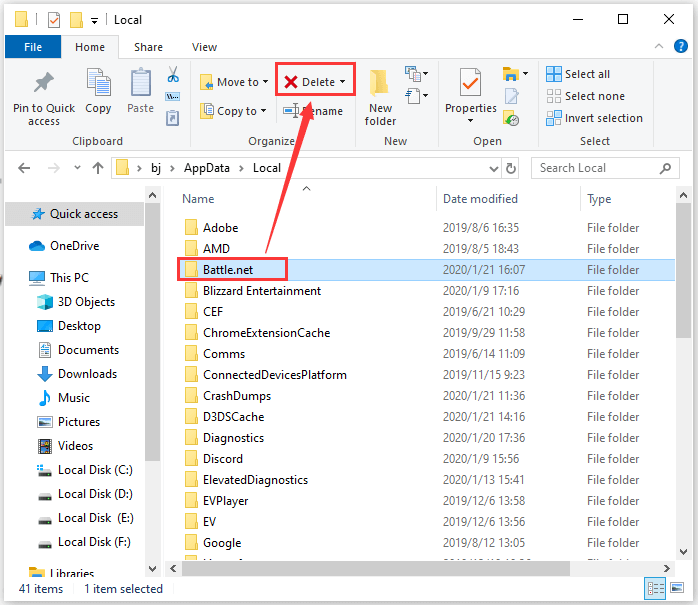
Step 2: Navigate to each folder one by one and delete Battle.net (or Blizzard) folder in it.
Then you can restart your computer and launch Blizzard app to check if your problem has been solved. When you try to launch the game after you delete the folders, there might be a delay. Please be patient and wait until the game runs properly.
How to stop Destiny 2 from initializing? You can get the answer in this post.Click to Tweet
Solution 6: Make Sure Windows Secondary Logon Is Enabled
Windows Secondary Logon is a service which allows you to log on with a non-administrator account to perform administrative tasks. If the services is disabled, Blizzard games might fail to be installed or updated. This could lead to Destiny 2 update stuck on initializing.
Here is how to enable Windows Secondary Logon.
Step 1: After invoking Run window, type services.msc and press Enter to open Services.
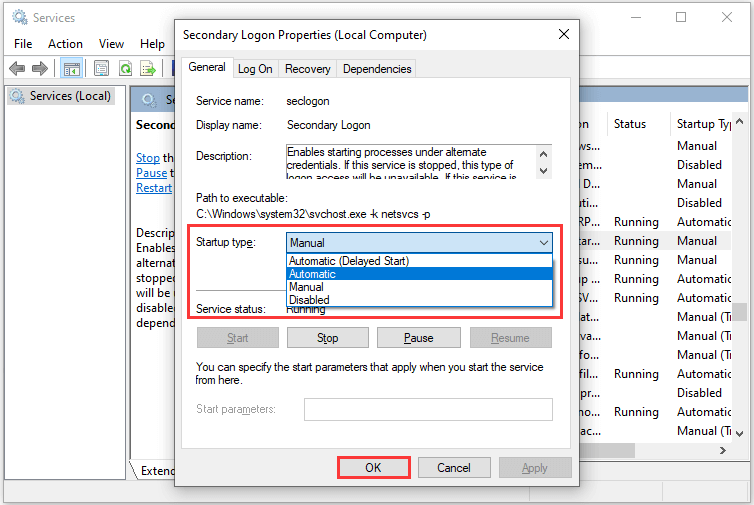
Step 2: Right-click Secondary Logon from the right pane and select Properties.
Step 3: Under General tab, set Startup type as Automatic and then click OK to save the change.
Then you can restart your computer and check if Destiny 2 stuck on initializing has been fixed.
Solution 7: Clear Storage Space
If you still face Destiny 2 download stuck on initializing problem after you tried the solutions above, you need to check if your hard drive is running out of space.
You should make sure there is at least 8-10 GB of free space in the drive where Destiny 2 is installed to run the game correctly. Usually, Destiny 2 is installed on Local Disk C by default. If you have installed it in another drive, you need to check that drive.
You can double-click This PC icon on your desktop to check how much free space your drives have. If there isn’t enough free space on the drive where Destiny 2 is installed, here are 4 options for you to solve the problem:
- Option 1: run Disk Cleanup to clean junk files.
- Option 2: remove excessive programs.
- Option 3: use disk space analyzer.
- Option 4: extend the partition.
You can get the detailed steps in the following contents.
Option 1: Run Disk Cleanup
Disk Cleanup is a built-in feature which can help users remove unnecessary files and free up storage space quickly. To solve your problem, you can use this feature to clean junk files.
Step 1: Press Win + S to open Search. Then type disk cleanup in the box and select Disk Cleanup App from the results.
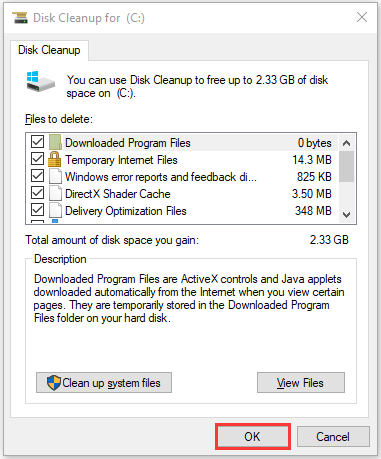
Step 2: Select the drive you want to clean up. I choose C drive as an example. If you install Destiny 2 on another drive, you need to select it in this step. Then Disk Cleanup will calculate how much space you will be able to free up. Just wait patiently.
Step 3: Check the files you want to delete and click OK. In the pop-up window, click Delete Files to confirm the operation.
Option 2: Remove Some Programs
As you can see, the storage space which Disk Cleanup can help you gain is limited. If you still need more, you can remove some apps and programs that you don’t use to solve the issue.
Step 1: Open Control Panel. Then choose View by Category on the upper right corner and click Uninstall a program under Programs category.
Step 2: Right-click the program you want to remove and select Uninstall.
Step 3: Follow the onscreen instructions to finish the process. Then repeat the operation to uninstall all the programs which you don’t use.
Option 3: Use Disk Space Analyzer
MiniTool Partition Wizard is a wonderful partition manager with various features, including Space Analyzer. You can use it to find out what occupies your disk space and delete the files that take up much space.
Let’s see how to do it.
Step 1: Click the following button to download and install the manager.
MiniTool Partition Wizard FreeClick to Download100%Clean & Safe
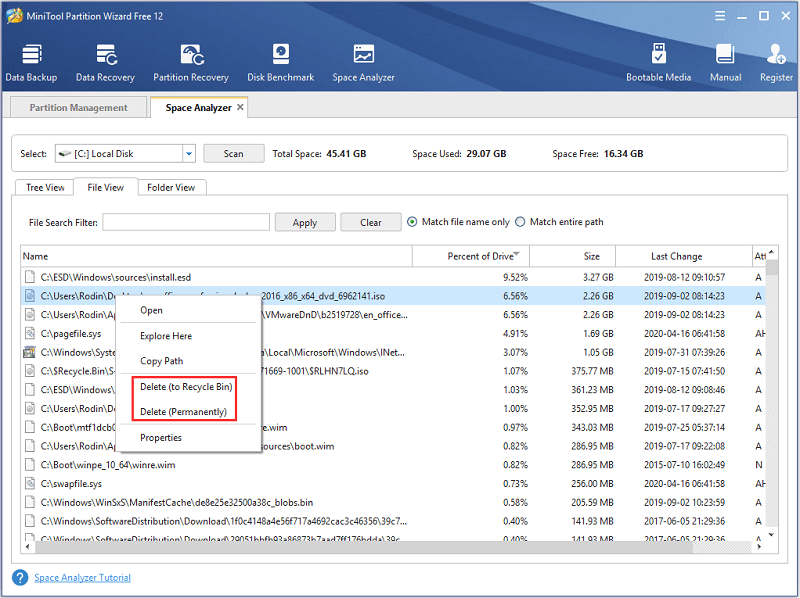
Step 2: Launch the manager. When you get the interface, click Space Analyzer form the tool bar.
Step 3: Select the partition which is running out of space and then click Scan. Then MiniTool Partition Wizard will start analyzing disk space usage, and you just need to wait patiently.
Step 4: Check the scanned files by clicking File View. Then right-click delete these which take up too much space and select Delete (to Recycle Bin) or Delete (Permanently) to free up disk space.
Read the following article to get more detailed information about Space Analyzer: What Is Taking up Space on Windows 10? Disk Space Analyzer Helps!
After you delete some files, you can restart your computer and launch Destiny 2 to check if your problem has been solved.
Option 4: Extend the Target Partition
You can also extend the partition where your Destiny 2 is installed to solve Destiny 2 download stuck on initializing. Just get MiniTool Partition Wizard by clicking the button below and then follow the steps.
MiniTool Partition Wizard FreeClick to Download100%Clean & Safe
Step 1: Open the software.
Step 2: Right-click the partition you need to extend and then choose Extend.
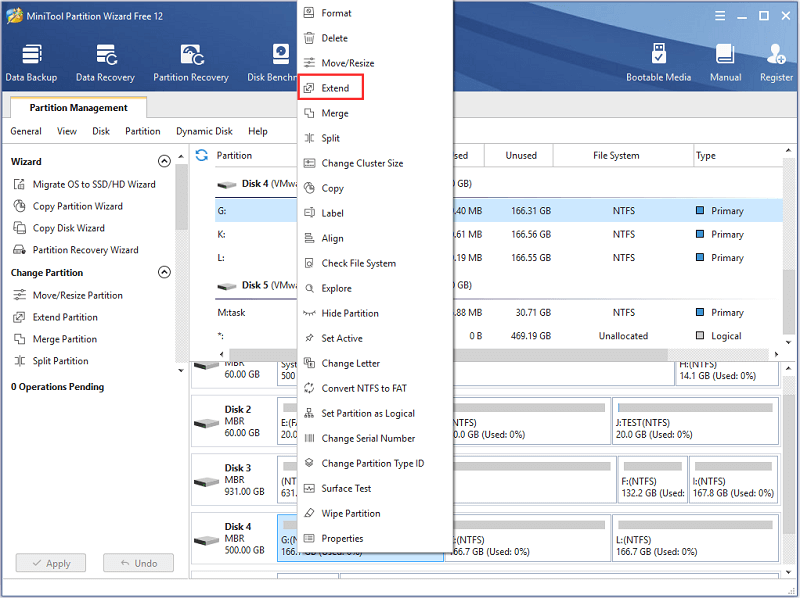
Step 3: In the pop-up window, decide where to take free space and how much space to take. Then click OK to confirm the operation.
Step 4: Click Apply to execute the pending operations.
Then you can restart your computer. Launch Blizzard and check if you can update or download Destiny 2.
Solution 8: Reinstall Destiny 2
If all the solutions above fail to help you solve the problem, you may need to uninstall Destiny 2 and then reinstall it.
Step 1: Type appwiz.cpl in Run window and then press Enter to open Programs and Features.
Step 2: Right-click your Destiny 2 and select Uninstall. Then follow the instructions to finish uninstalling the program.
Now you can restart your computer and reinstall Destiny 2 from Blizzard client and the problem Destiny 2 stuck on initializing should have been fixed.
Bottom Line
It’s annoying to encounter Destiny 2 stuck on initializing for game lovers. Hope the solutions in this post could help you resolve the problem.
If you have any questions, please don’t hesitate to post them in the comment section. By the way, for any problems about MiniTool Partition Wizard, you’re welcome to contact us via [email protected].
Destiny 2 Stuck on Initializing FAQ
To run Battle.net as administrator, you just need to right-click the shortcut and select Run as administrator. If you want to run it as administrator every time when you launch it, you can:
- Right-click the shortcut of Battle.net and select Properties.
- Click Compatibility and check Run this program as an administrator.
- Click Apply and OK. Then launch net.
- Right-click the shortcut of the program.
- Go to Compatibility tab and uncheck Run this program as an administrator.
- Click Apply and OK.
User Comments :