If your Windows 10 is running on low disk space, you are likely to find the most suitable solution here for Disk cleanup Windows 10. Here 10 solutions are listed. Read and try them out!
Before trying the nine ways to clean up disk space, you can try Disk Cleanup first. What Disk Cleanup is? What does Disk Cleanup do? It is a maintenance tool that scans your computer’s hard drive for files that you don’t need. When your Windows 10 is running on low disk space, you can utilize the tool. But if it does little help, you are likely to find the most suitable solution here for Disk cleanup Windows 10.
Fix #1. Upgrade Hard Drive
Sounds wired? We will explain. Although there are several solutions (Fix #2-9) that help computer cleanup, the allocated free space is limited to a great extent. In fact, the best way is to upgrade hard drive to a larger one. To transfer Windows 10 as well as all data on the hard drive, MiniTool Partition Wizard Free is recommended here for its two useful features:
- “Migrate OS to SSD/HD” helps migrate Windows 10 to another hard drive like an SSD.
- “Copy Disk” helps clone the whole system disk to another hard drive that offers larger capacity.
Take “Copy Disk” feature for example. First of all, press the button below to get this free partition manager.
MiniTool Partition Wizard FreeClick to Download100%Clean & Safe
Step 1: Connect the larger SSD/HD that you want to use as the new system disk to your PC. Ensure it is successfully detected by Windows and can be formatted.
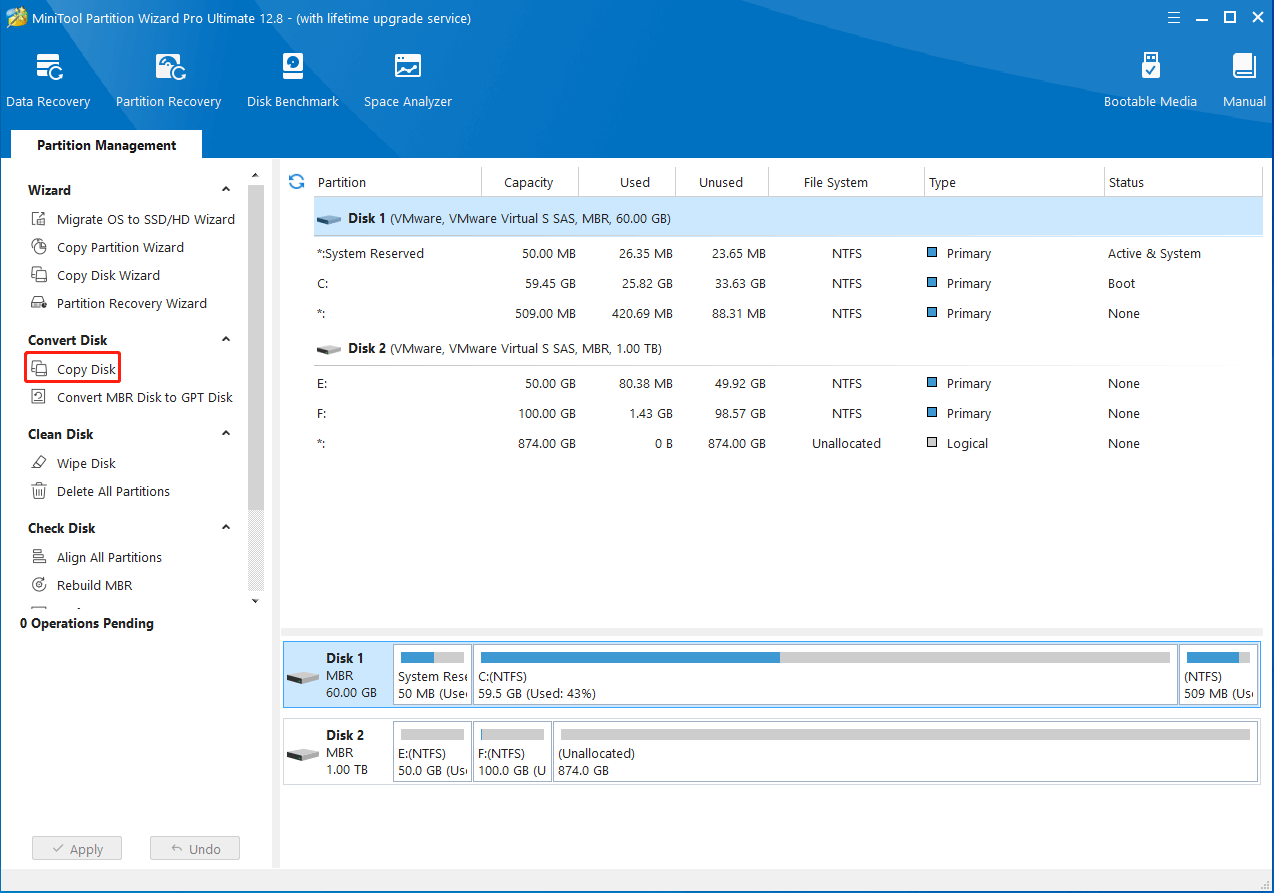
Step 2: In the main interface of MiniTool Partition Wizard Free, you can see that the system disk is selected by default. Please select “Copy Disk” from the action panel.
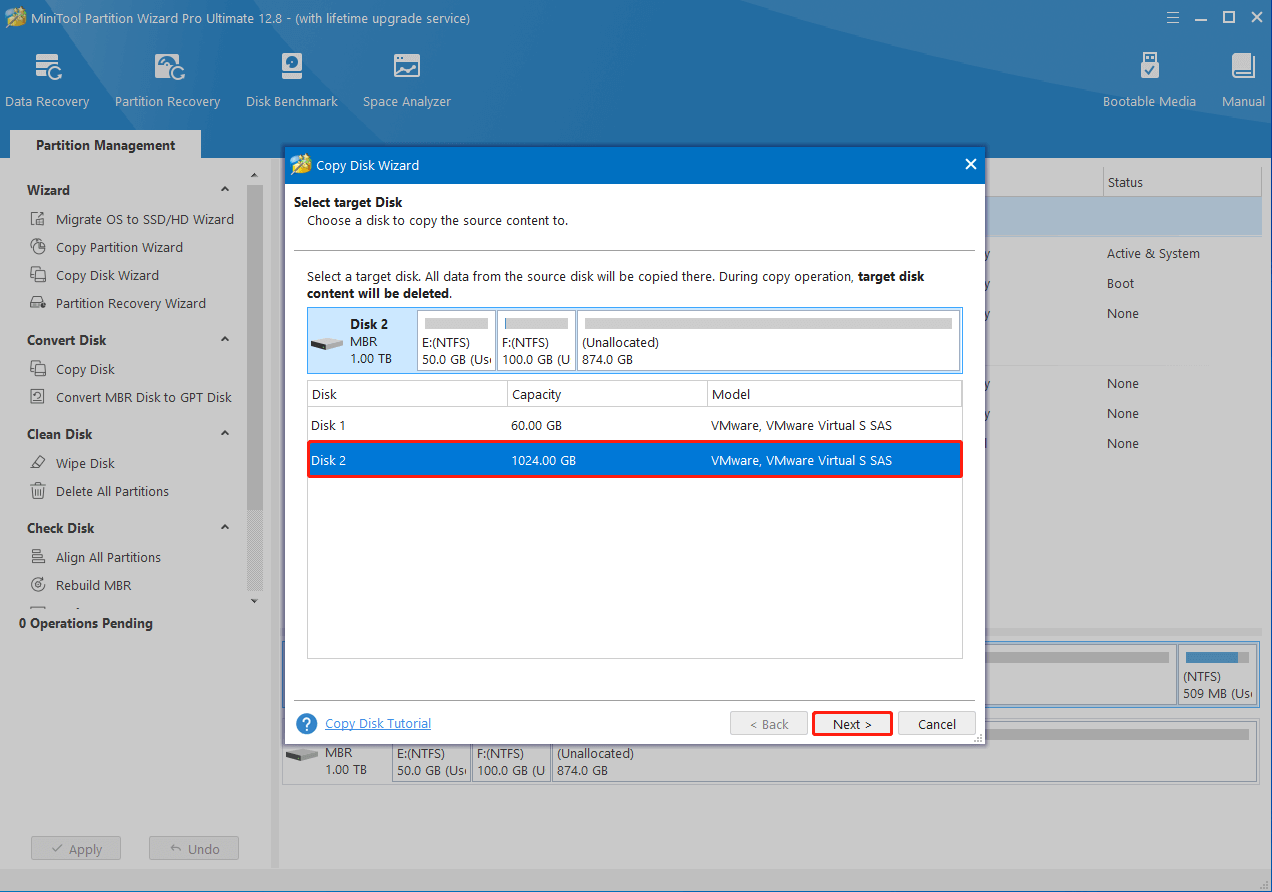
Step 3: In the next pop-up window, select the new connected SSD/HD as the target disk and click Next. Confirm the operation in a warning box.
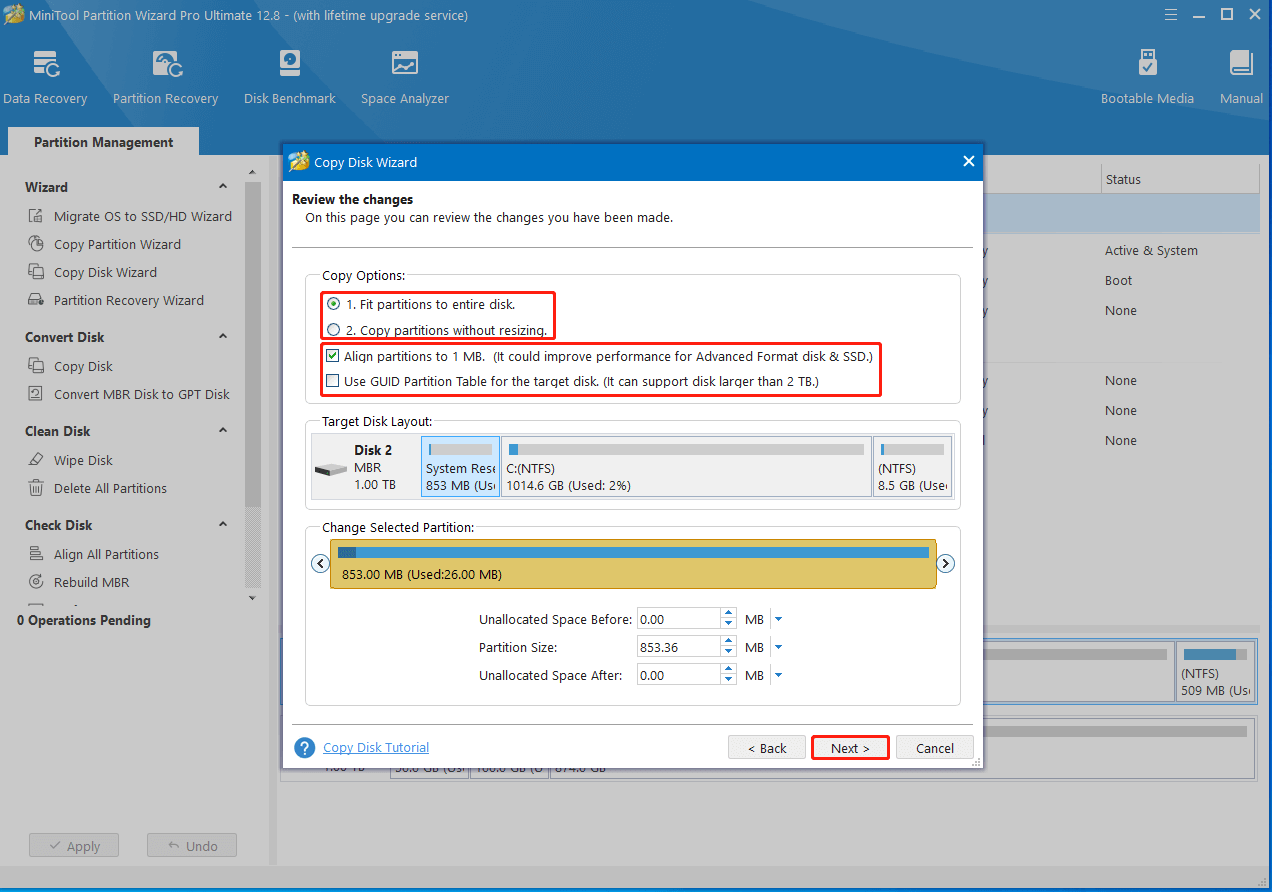
Step 4: Accept the default copy options or make some changes. Be aware that the last option “Use GUID Partition Table for the target disk” is a paid feature that helps clone MBR system disk to GPT.
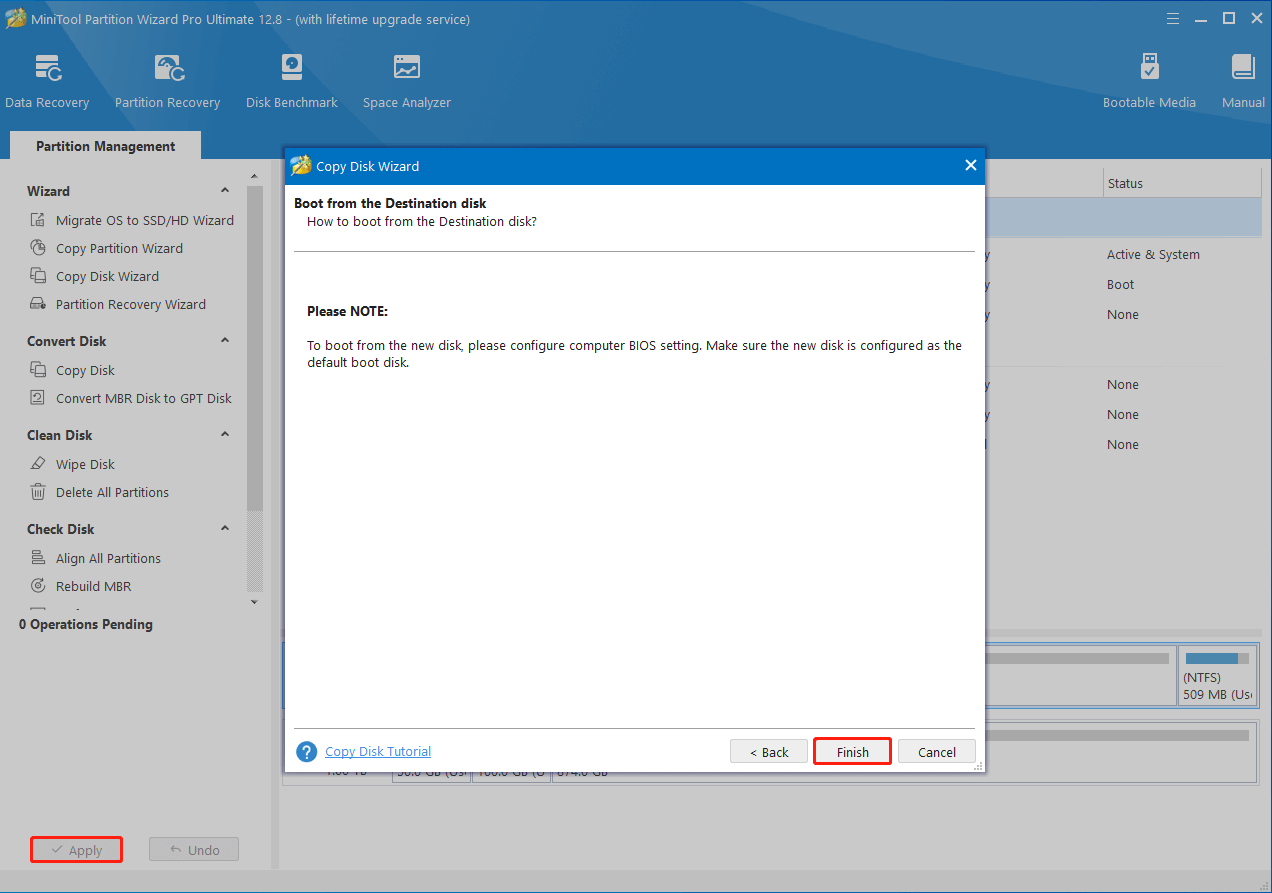
Step 5: You will be reminded to configure computer BIOS settings so as to boot from the new disk. Click “Finish” then. Press “Apply” button on the menu bar to start the copy. MiniTool Partition Wizard needs a restart to finish the job.
When MiniTool Partition Wizard completes, you can set your PC to boot from the larger hard drive. In addition, you can further configure your hard drives using this free partition manager.
But if you do not have a larger hard drive or you do not have the plan to buy a new drive, we still have the best options for you. How to clean your computer Windows 10? We just keep reading.
Fix #2. Delete Duplicate Files
Over time, your computer will be filled with duplicate files. Deleting these duplicate files can clean up disk space.
MiniTool Partition Wizard is a duplicate cleaner that helps you detect and delete duplicate files stored across your PC with just a few clicks.
MiniTool Partition Wizard FreeClick to Download100%Clean & Safe
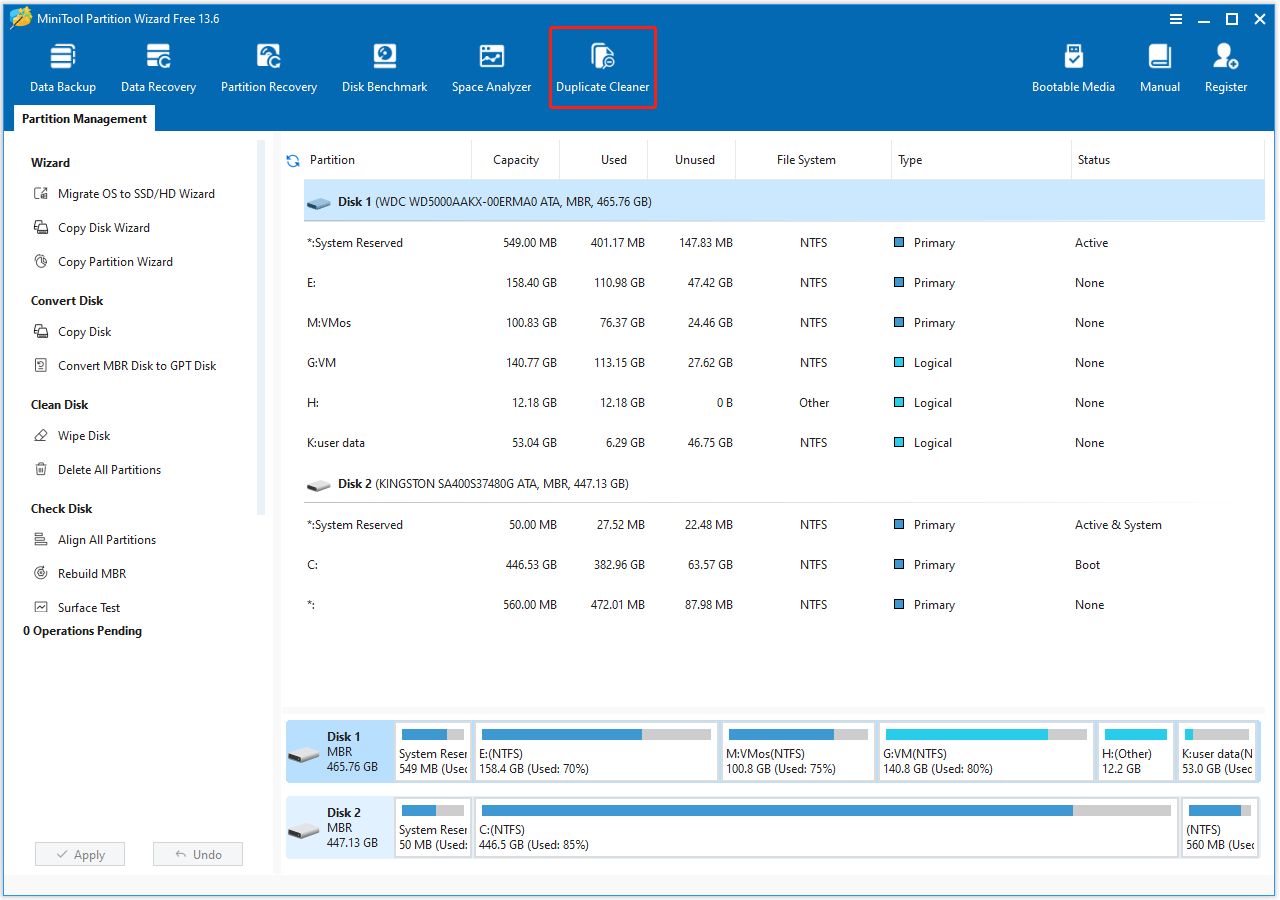
Step 1. Launch MiniTool Partition Wizard to enter its main interface. Then click the Duplicate Cleaner feature on the top toolbar.
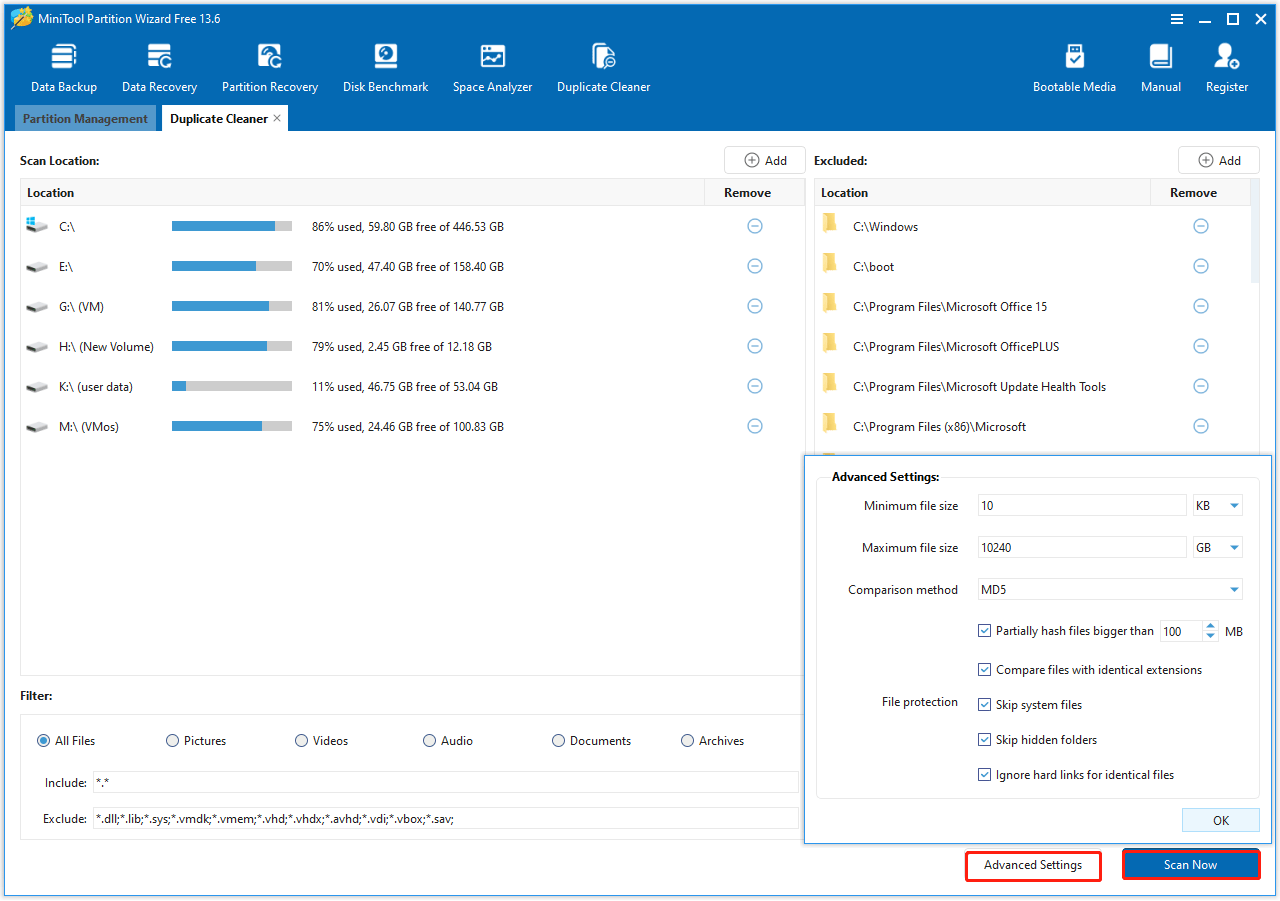
Step 2. In the following interface, configure the scan settings, including location and file type. Then click Scan Now.
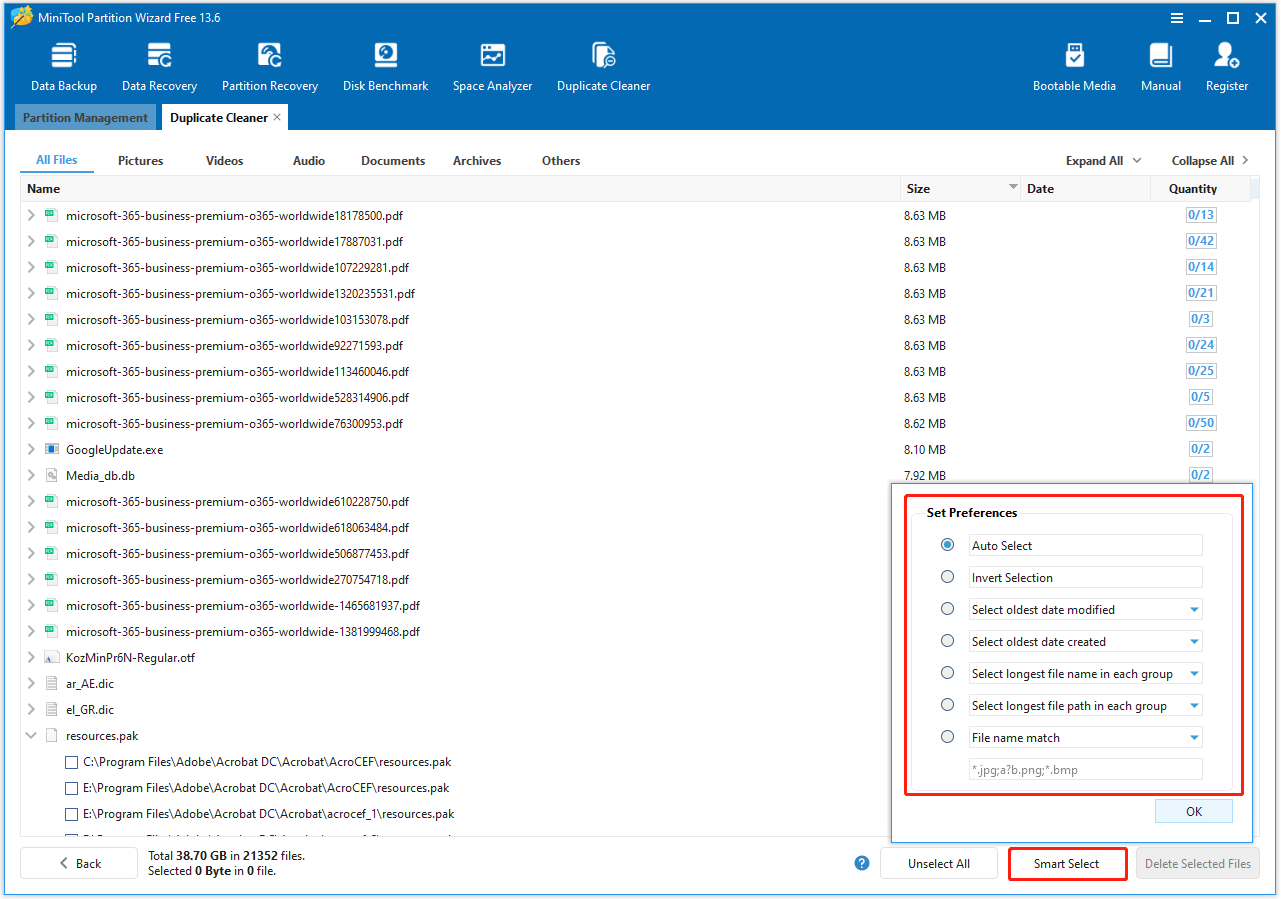
Step 3. After that, the scanning results will show all duplicate files with their size and quantity. Click Smart Select, then select the selection method that best suits your needs.
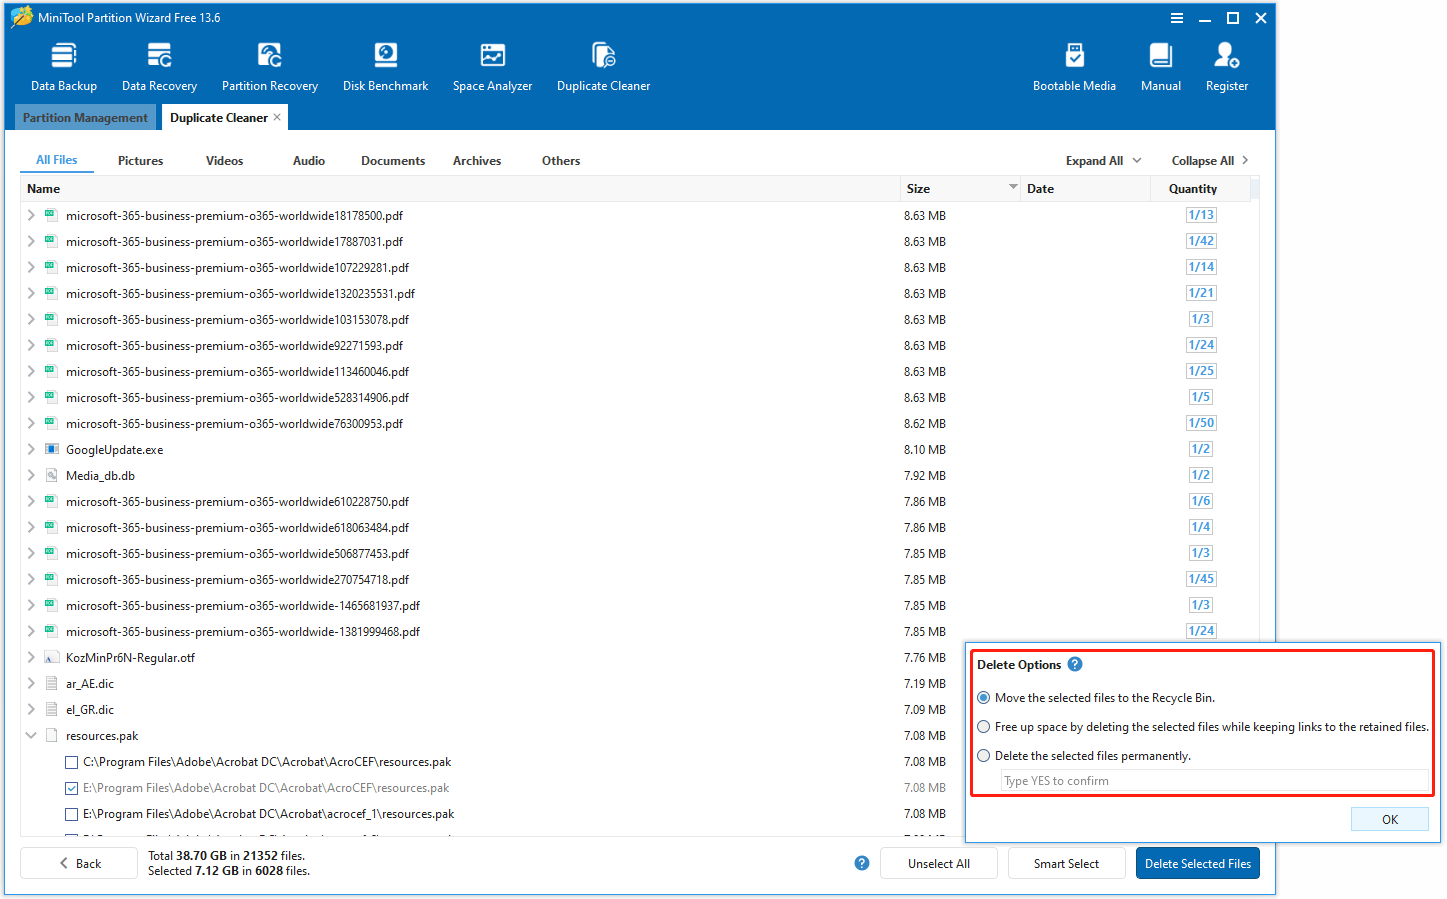
Step 4. Click Delete Selected Files to choose different deletion options. Then click OK.
Fix #3. Empty Recycle Bin
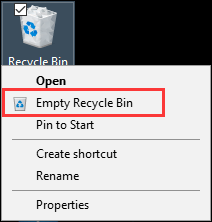
Files we delete usually go to the Recycle Bin if not permanently deleted. If you do not clean the Recycle Bin for a long time, there can be a large number of unwanted files. So the first trying we think is to empty the Recycle Bin. Right-click the Recycle Bin on Windows 10 desktop and choose “Empty Recycle Bin” from the context menu, thus helping disk cleanup Windows 10.
Fix #4. Disk Cleanup
Windows Disk Cleanup is a hard drive cleaner commonly used by advanced users to remove unnecessary files, including system files, system restore and shadow copies, which can help users to regain free space. To use Disk Cleanup utility in Windows 10, follow these steps:
Step 1: At Cortana search box, type “disk cleanup” and choose “Disk Clean-up” from the best match.
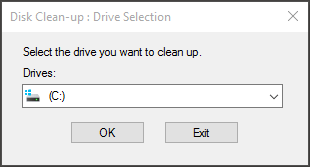
Step 2: In the pop-up window, the system drive is selected by default. Usually, only the C drive contains the unnecessary files. Click “OK” to continue.
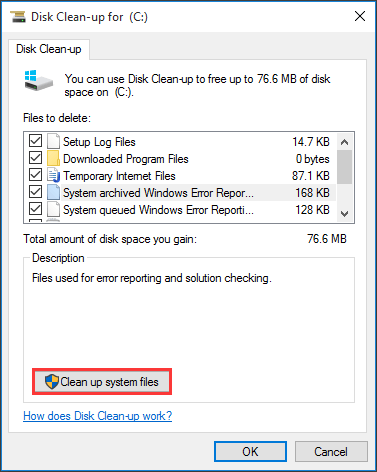
Step 3: After several minutes’ calculating, you will see how much disk space you can get in total by deleting all files listed in the box, including:
- Windows Upgrade Log Files.
- Setup Log File.
- Downloaded Program Files.
- Temporary Internet Files.
- System archived/queued Windows Error Reporting.
- Delivery Optimization Files.
- Recycle Bin.
- Temporary Windows Installation Files.
- Previous Windows installation(s).
Select the file types you want to remove and click “OK“.

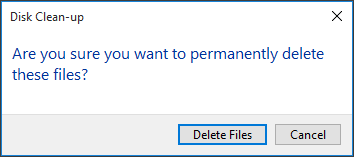
Step 4: Confirm that you want to permanently delete theses files.

Fix #5. Enable Storage Sense
Storage Sense is an optional feature that can delete temporary files, files in the Recycle Bin for more than 30 days, files in the download folder that haven’t changed in 30 days, as well as the previous version of Windows 10 after an upgrade. If your Windows 10 is running on low space, enabling Storage Sense helps free up disk space Windows 10.
Follow the steps below to enable and set up Storage Sense:
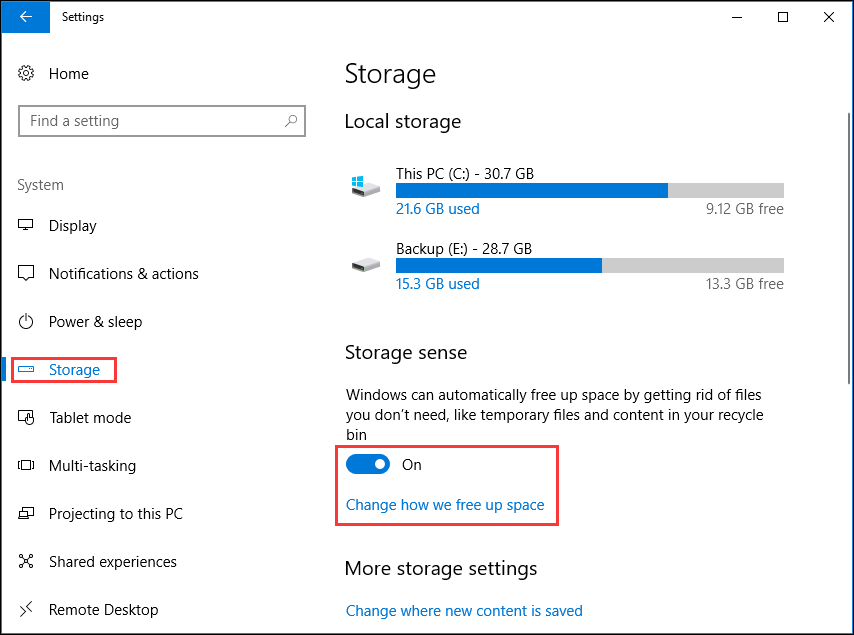
Step 1: Click Windows 10 Start menu and open Settings. Then click on “System” and “Storage“.
Step 2: Under “Storage sense,” click on “Change how we free up space“.
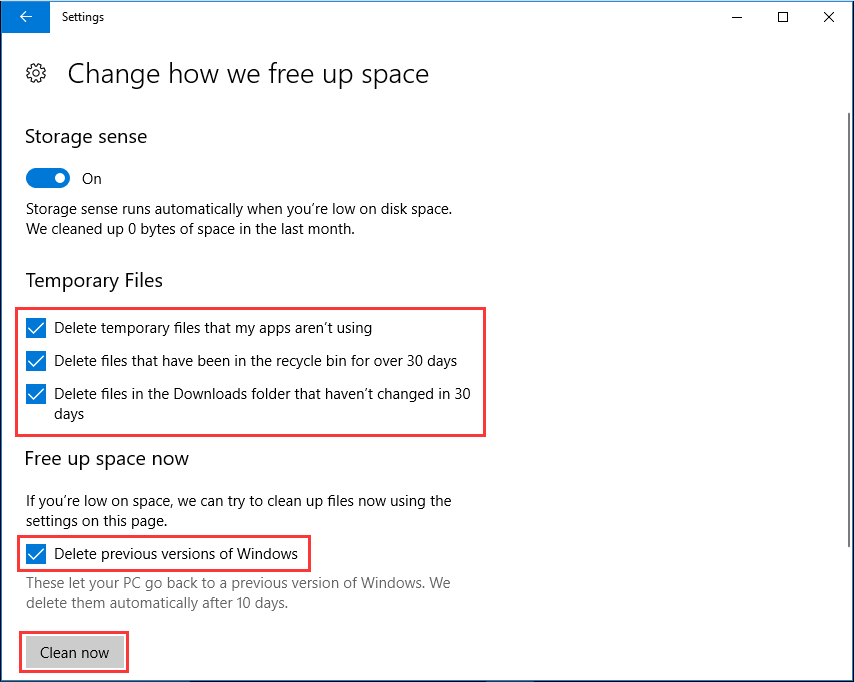
Step 3: Under “Temporary files,” check the files you want to delete, including:
- Delete temporary files that my apps aren’t using.
- Delete files that have been in the recycle bin for over 30 days.
- Delete files in the Downloads folder that haven’t changed in 30 days.
Then under “Free up space now,” you can also select “Delete previous versions of Windows”. However, note that this option is only available during the first 10 days after installing a new update. Finally, click “Clean now” button for Windows 10 cleanup.
Fix #6. Uninstall Apps You Never Use
To make disk cleanup Windows 10, scanning your applications and removing the ones that you don’t use is helpful. For example, you can uninstall those that came preinstalled with your computer or the ones that you installed for one-time problem-solving usage.
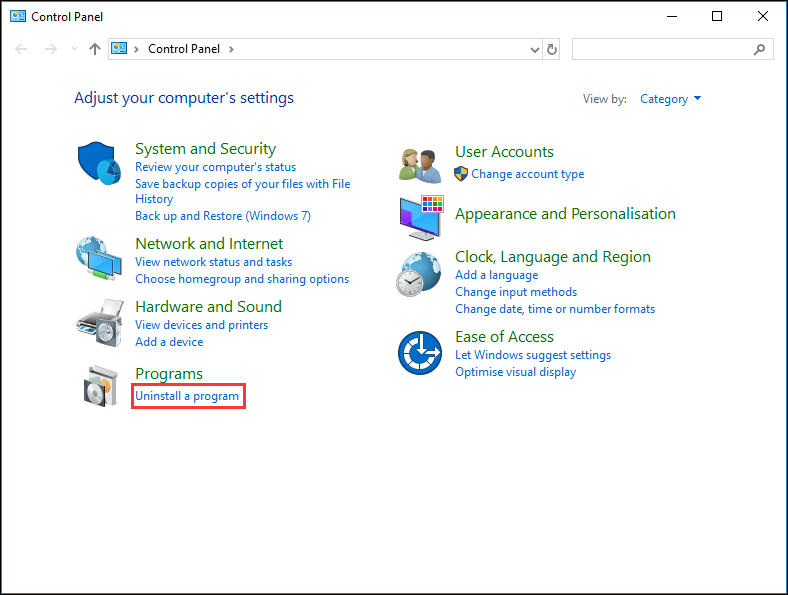
Step 1: Open Windows 10 control panel and click “Uninstall a program“.
Step 2: Right-click the unwanted app or game, and select the “Uninstall” option.
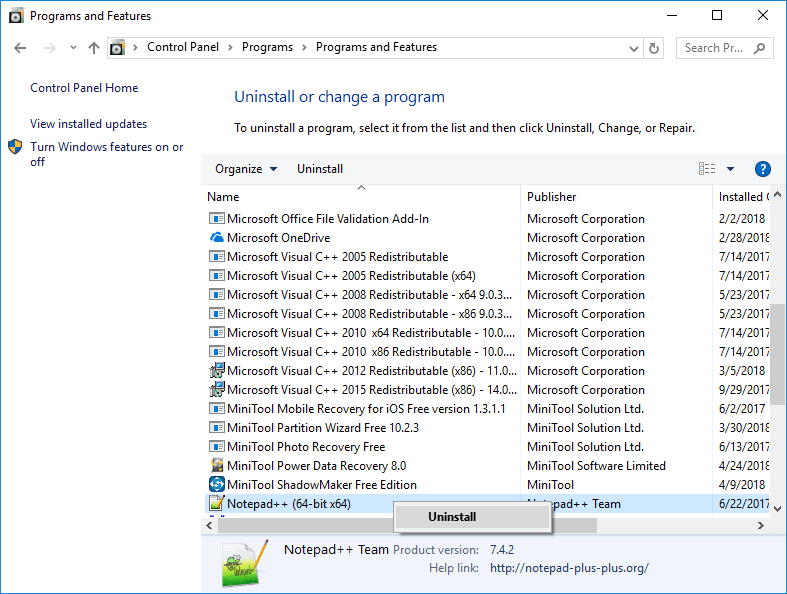
Step 3: Repeat the same instructions to remove more games and apps that you don’t need anymore.
Fix #7. Use OneDrive Files on Demand Feature
OneDrive Files on Demand is a new feature introduced to Windows 10 with the Fall Creators Update, which allows you to access your files saved in OneDrive by scanning Windows 10 File Explorer instead of having to save them in local storage and synchronize them in the cloud.
If PC is running out of space, use Files on Demand to upload and keep your files in OneDrive and download them only when you need them.
First Move: Enable OneDrive Files on Demand Feature
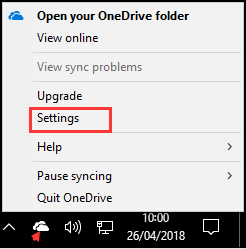
Step 1: Right-click the OneDrive cloud icon in the notification area, and select “Settings“.
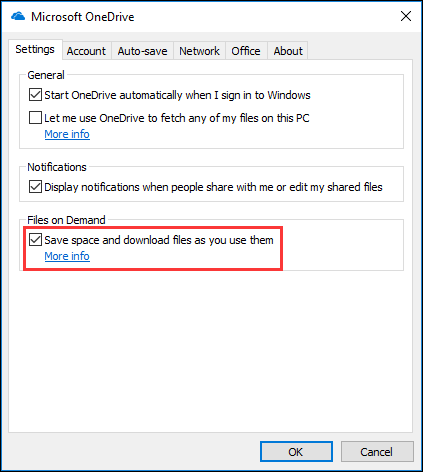
Step 2: In the pop-up window, navigate to the “Settings” tab. Then check the “Save space and download files as you use them” under “Files on Demand” to enable this feature. Finally, click “OK“.
Second Move: Free up Disk Space
Now you can move your files to the OneDrive folder and make them available only online to free up disk space Windows 10.
Step 1: Open your OneDrive folder.
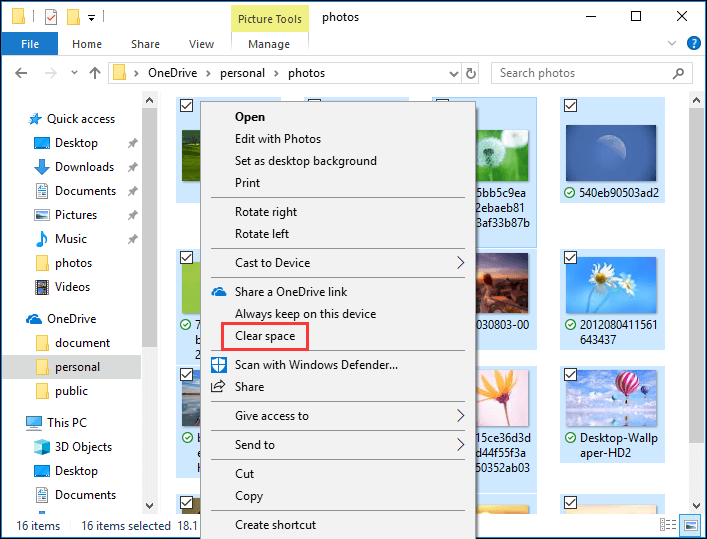
Step 2: Select the files and folders to keep only in the cloud. Then right-click the selection and choose “Clear space”.
When finished, the icon under each file changed to a white cloud. You will be able to access them in File Explorer when there is network connection. To free up more disk space, you can move some files saved in the default folders to the OneDrive folder, and then repeat the above steps to free up disk space Windows 10.
It’s worth noting that you can only save up to 5GB files if you are using the free version of OneDrive.
Fix #8. Use Compact OS
Compact OS is Microsoft’s newest take on Windows 10. It decreases the operating system’s size and enables you to run the operating system from compressed files. It also reduces the footprint of Windows apps. For Windows 10 cleanup, you can reclaim 2GB around disk space by enabling Compact OS.
Step 1. Run Command Prompt as administrator and allow its changes to your PC.
Step 2. Type the following command to compress the Windows 10 and applications and press the Enter key:
Compact.exe /CompactOS:always
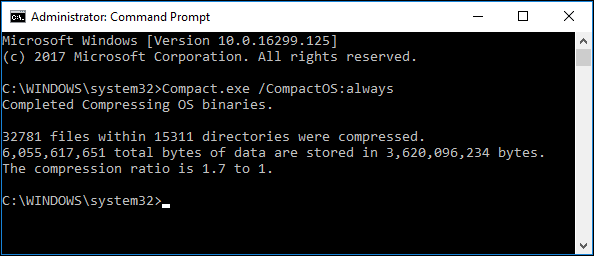
The whole process can take about 10 to 20 minutes, please be patient.
Fix #9. Disable Hibernation on Windows 10
Hibernation is a feature that saves the content in memory to the hard drive, thus you can shut down your device completely without losing the current session. Although Hibernation is useful, it requires several gigabytes of disk space to save the content in RAM to the hiberfil.sys file on the hard drive.
If you want to optimize the available storage on your computer, you can disable the feature for Windows 10 cleanup.
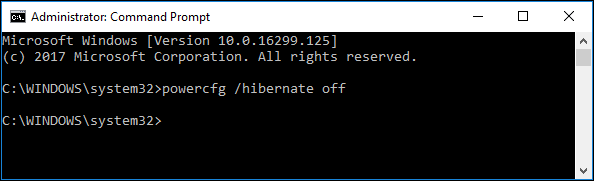
Step 1: Search for Command Prompt, right-click the result, and select Run as administrator.
Step 2: Type the following command to turn off Hibernation and press Enter:
powercfg /hibernate off
Fix #10. Move Files to External Hard Drive
Usually, for convenience, we would save files to local storage instead of an external hard drive or removable devices. However, to overcome the storage limitation, you should consider saving files to external hard drive if you’re still low in capacity after trying all methods.
With an external hard drive, you can move existing files on your Windows 10 to the new storage. Also, you can change the default file storage location for the new content, making more room on the main system drive.
First Move: Move Existing Files to External Hard Drive
Step 1: Connect the removable drive to your PC.
Step 2: Open File Explorer and then go to the location where you have files to move.
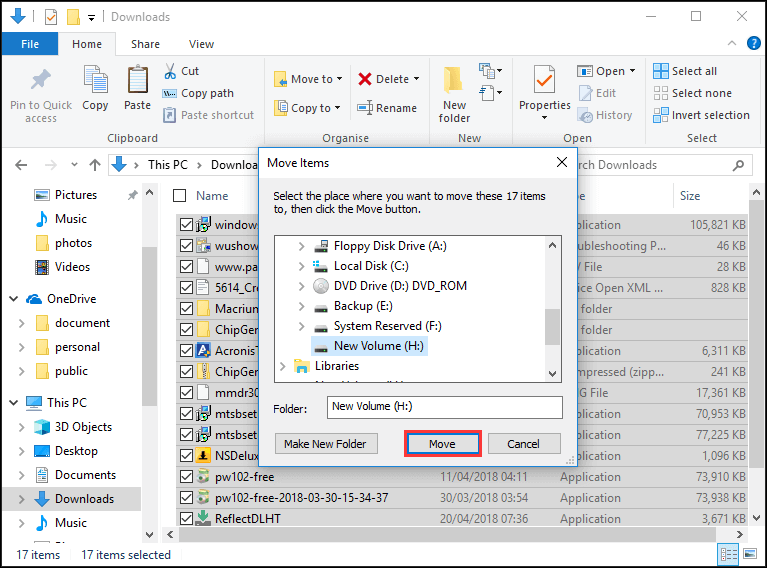
Step 3: Select the items you want to relocate and click the “Move to” button under “Home” (You may need to press Ctrl + F1 so as to expand the ribbon.) Then select “Choose location…“

Step 4: In the pop-up window, select the external hard drive and click the “Move” button.
You’ll need to repeat the steps to move files on other locations to the new external drive. If you want to move all files on a specific partition, you can use “Copy Partition” feature of MiniTool Partition Wizard Free.
Second Move: Save New Content to the New Drive
Besides, for computer cleanup, you can appoint the locations for new contents. To automatically save files to a new location, you can use these steps:
Step 1: Connect the removable drive to your PC.
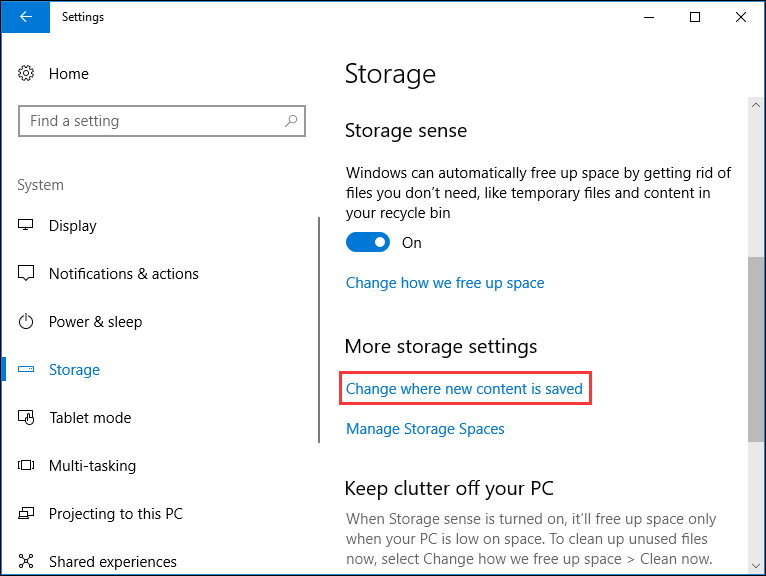
Step 2: Open Settings -> System -> Storage.
Step 3: Under “More storage settings“, click “Change where new content is saved“.
Step 4: Use the drop-down menu to select the new location that Windows 10 should use to save new files automatically for each file type.
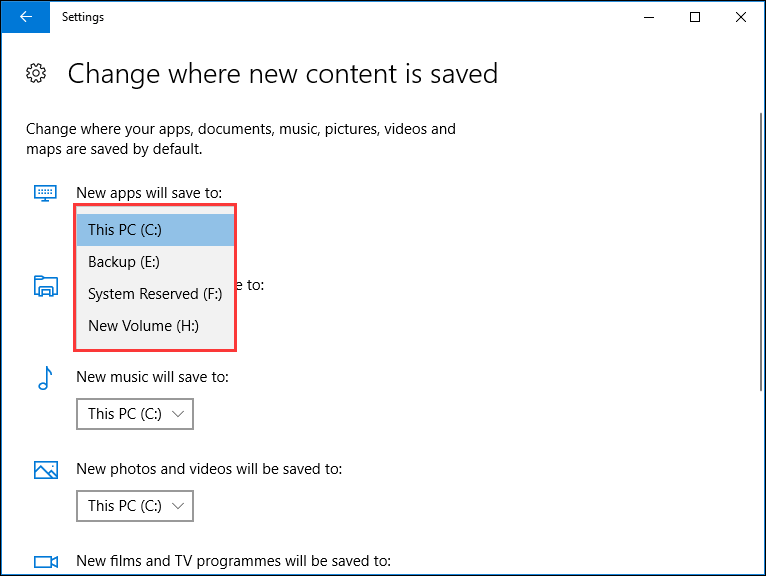
When completes, Windows 10 and related apps will save files to the new specified location, making more room for your system drive.
Bottom Line
Reading here, we believe you have got some skills in coping with Windows 10 disk cleanup. Do you know more ways for disk cleanup Windows 10? Share your tip in the comment section. For any questions towards using MiniTool software, contact us via [email protected].
About The Author

Position: Columnist
Vega enjoys helping people with computer problems, including disk management, data recovery, data backup, and more. She is constantly expanding her knowledge in related fields. And she will continue to bring more easy-to-understand professional articles to help people solve various problems on the PC.
User Comments :