Are you unable to install the available update for your Windows 10 due to the error code 0xc1900107? If your answer is Yes, please read this post in which MiniTool offers you reasons for this error and the corresponding solutions.
Windows 10 Upgrade Error 0xc1900107
Many Windows 10 users are willing to install the major updates for Windows 10 to have the best possible experience and performance.
However, some users reported that they ran into various update error codes during Windows 10 update. These error codes are 0x8007007e, 0x80070422, 0x80070002, and many others.
In this article, MiniTool introduces the error code 0xc1900107. Some users reported that they ran into this error when trying to install the major update for Windows 10 Anniversary Upgrade or Creators Update.
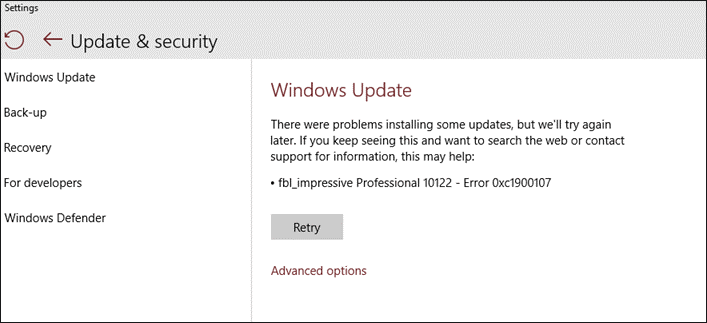
When error 0xc1900107 shows up, the downloading process of Anniversary Update has been stopped. Now, let’s see the culprit (malware is not included) behind the error 0xc1900107 and the corresponding solutions.
# Complete Previous Pending Update
The first cause of 0xc1900107 is that the previous update is uncomplete. Therefore, please go to check if there is previous pending update. The checking way is easy as you just need to move your cursor on the power button and click it to see Update and Restart or Update and Shutdown is available or not.
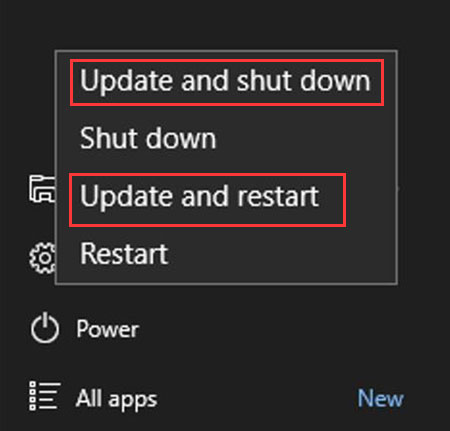
If yes, it is clearly that there is an uncompleted update. In this situation, you should restart your PC to end the previous pending update. And then go on updating Windows 10.
If no, please keep reading to explore other reasons for this error code and the corresponding solutions.
# Free up or Enlarge Disk Space
The error code 0xc1900107 can be ascribed to the not enough free space on the hard drive as well. Thus, you can try freeing up your disk space to see if this error is fixed.
#Remove Temporary Files to Free up Disk Space
Removing the temporary files from the hard drive may stick to your mind first when talking about freeing up disk space. Sometimes, this way is helpful and the methods on freeing up disk space are various. Here one way is displayed to help you clean the temporary files.
Step 1: Hit the Windows key, select the Settings icon and select System.
Step 2: In the System window, please select Storage from the left pane. Then select Free up space now from the right pane.
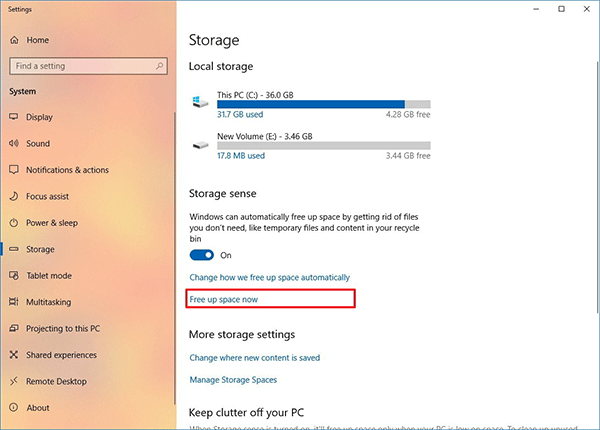
Step 3: Select the files you want to delete, including:
- Window upgrade log files;
- System created Windows Error Reporting files;
- Windows Defender Antivirus;
- Windows Update Cleanup;
- Thumbnails;
- Temporary files;
- Recycle Bin;
- Temporary Internet Files;
- Delivery Optimization Files;
- DirectX Sharer Cache;
- Previous Windows Installation(s).
Step 4: Click the Remove files button.
# Use MiniTool Partition Wizard to Enlarge Partition Size
There is another way to help you get enough free hard disk space with ease. That is using MiniTool Partition Wizard – a free and reliable partition manager.
This program can help enlarge your C drive without data loss by its two features in this situation, and it can also help you upgrade to a larger hard drive when the whole disk space is running out.
The two methods are activating the Extend Partition feature and Move/Resize Partition feature respectively. Let’s see how to use them step by step.
MiniTool Partition Wizard FreeClick to Download100%Clean & Safe
Method 1: Activate the Extend Partition Feature
MiniTool Partition Wizard is excellent in enlarging the partition size due to its built-in Extend Partition feature. But note that using this feature requires the unused space should be available on the hard drive where the partition you want to enlarge is located.
Now, let’s follow the tutorial on using the Extend Partition feature to extend partition size.
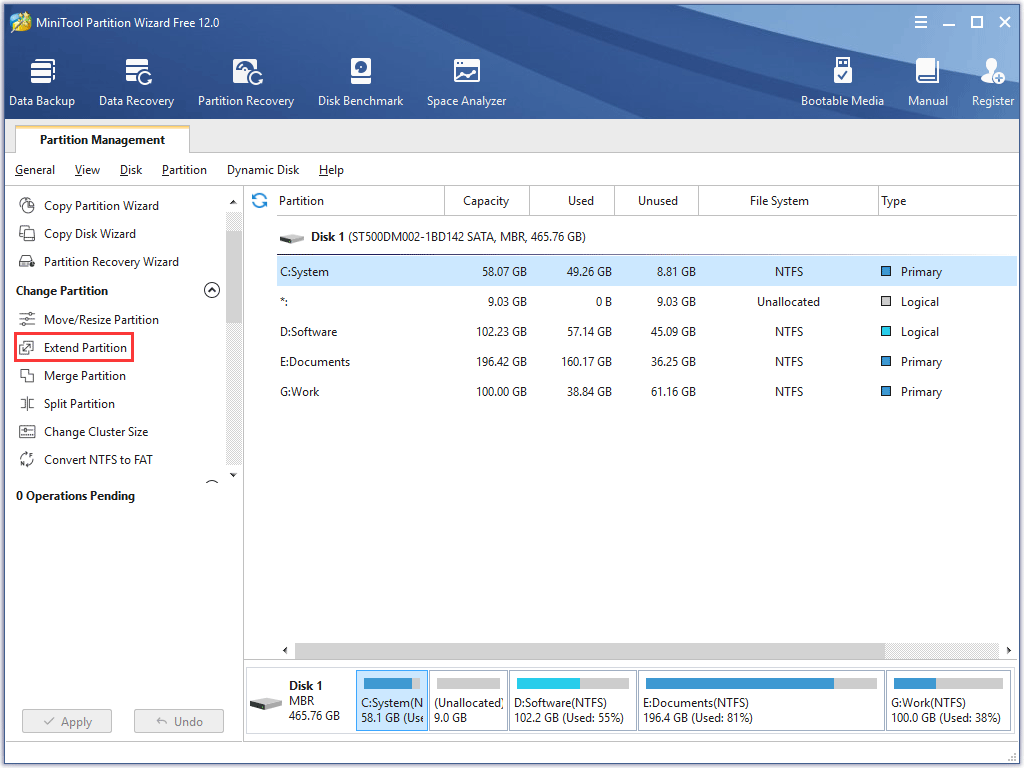
Step 1: Download this free program by clicking the offered downloadable button, install it and launch it to get its main interface.
Step 2: Highlight partition C in the Disk Map and then select the Extend Partition feature from the left panel or right-click the partition to call out the Extend feature.
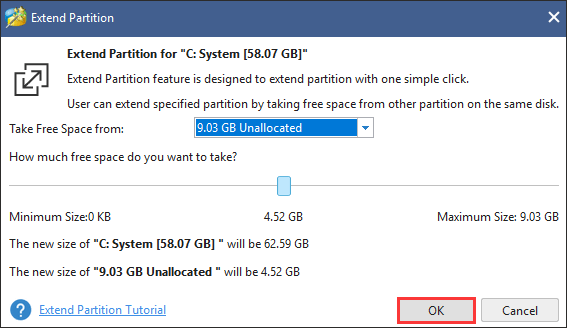
Step 3: When accessing the Extend Partition window, open the drop-down list of Take Free Space from and choose a partition or unallocated space to take free space. Then drag the handle leftwards or rightwards to decide how much to take. After that, click OK to continue.
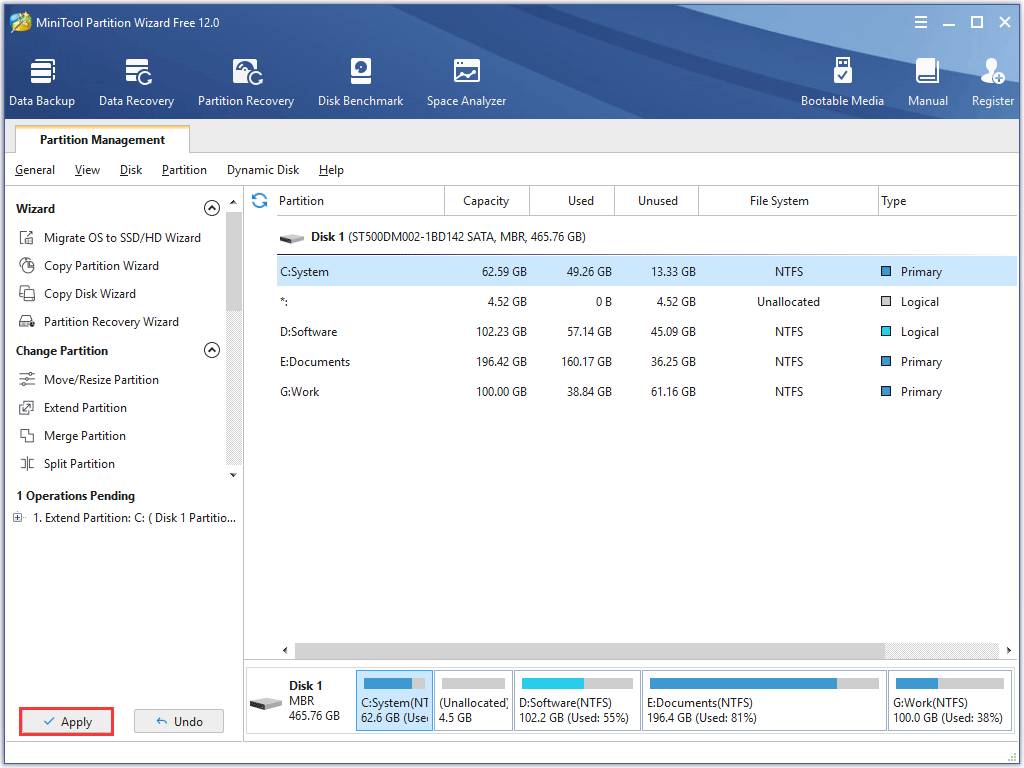
Step 4: Click the Apply button on the main interface to execute all changes. After that, your partition C has been enlarged.
Look! MiniTool also tailors a post that displays other methods on freeing up disk space on Windows 10 computers. If you are interested in that, you can read the following recommended article:
10 Ways to Free up Disk Space in Windows 10 [2019 Update]
Method 2: Activate the Move/Resize Partition Feature
The second way to enlarge partitions is using the Move/Resize feature. To use the feature, you should make sure that the unallocated space and the partition you want to expand should be on the same disk and the former should be adjacent to the later.
If your situation meets the above requirements, let’s see how to use the Move/Resize Partition feature of MiniTool Partition Wizard.
Step 1: Launch MiniTool Partition Wizard to get its main interface.
Step 2: Select partition C, find the Move/Resize Partition feature from the left panel and click it.

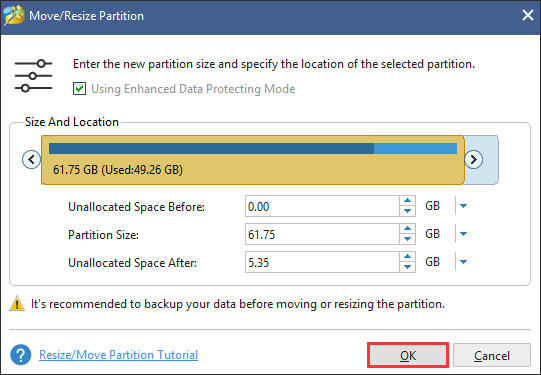
Step 3: In the Move/Resize Partition window, please move the handle to enlarge the selected partition. Then click OK button to confirm the changes.
Step 4: Click the Apply button to complete these changes. After that, you can also see the partition C becomes larger.
After freeing up or enlarging the disk space, you can try installing Windows 10 update again to check if 0xc1900107 is addressed.
# Delete $WINDOWS.~BT Folder
Another cause of this update error code may be corrupted files in the $WINDOWS. ~BT folder. This folder is a temporary folder created by Windows Update, containing update logs and files downloaded by the Windows update process. By default, it is hidden and exits at the root of your system drive.
In case that the corrupt files in $WINDOWS. ~BT folder lead to the error code 0xc1900107, let’s try deleting this folder.
How to delete this folder? Please follow the instructions below.
Step 1: Open File Explorer by pressing the Windows key and E key at the same time.
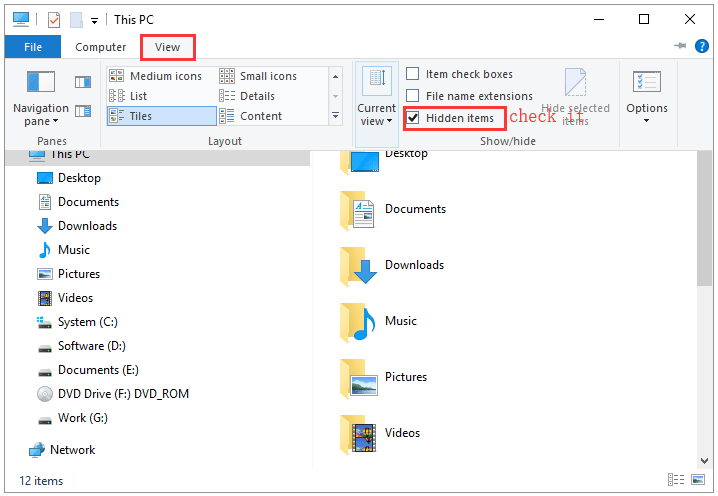
Step 2: In the File Explorer, please navigate to the View tab and then check the Hidden items box if it is not checked.
Step 3: Select the Local Disk C, find $WINDOWS. ~BT folder, and right-click it to call out the Delete option. (You may see a message saying that you don’t have permission to delete the folder. In this situation, you can rename this folder to anything other than $WINDOWS.~BT, and this has the same effect as deleting it.)
Step 4: After removing this folder, this error code should be removed successfully. So, please run the update process to enjoy your new Windows 10 computer.
# Reset Windows Update Compound
When Windows Update Components get damaged or corrupt, you will fail to install the Anniversary update and may face the error code 0xc1900107. Therefore, it is wise to reset the Windows Update Components and check this error is fixed or not.
To complete this resetting, you need to run Command Prompt and then type some commends:
Step 1: Type Command Prompt in the Cortana’s search bar, right-click the most-matched search result and select Run as Administrator.
Step 2: Then you should type the following commands one by one and hit the Enter key after typing each command to run them:
- net stop bits
- net stop wuauserv
- net stop appidsvc
- net stop cryptsvc
- ren %systemroot%SoftwareDistribution SoftwareDistribution.bak
- ren %systemroot%system32catroot2 catroot2.bak
- net start bits
- net start wuauserv
- net start appidsvc
- net start cryptsvc
Step 3: Exit from Command Prompt and restart your computer to see if the Windows 10 upgrade error 0xc1900107 has been fixed when installing the update again.
# Run SFC Scan or DISM Scan
Considering that SFC scan can fix various system issues, including the update errors, you can try performing this Windows’ built-in tool to fix 0xc1900107.
To use this tool, please carry out the following steps.
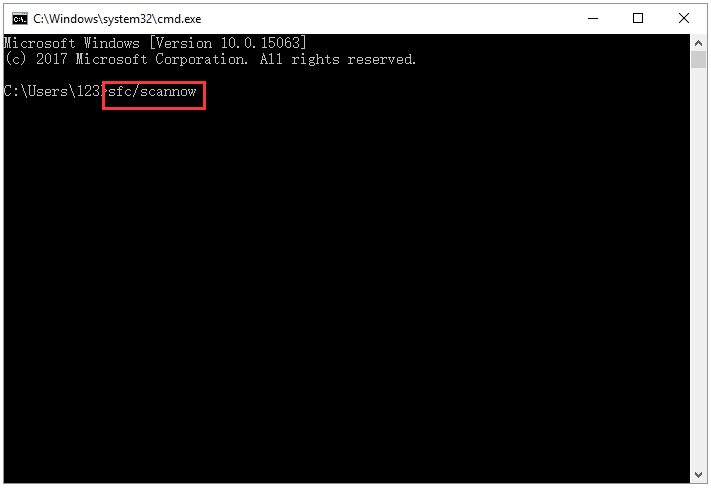
- Run Command Prompt as administrator, type the command line: sfc/scannow, and press Enter to run this command.
- Wait for this process coming to an end and then close the window.
- Reboot your system and see if you can install the Windows 10 update.
If SFC scan is unable to fix error code 0xc1900107, you might try DISM scan instead. To do that, please follow the tutorial below.
- Open Command Prompt as administrator again.
- Type the DISM /Online /Cleanup-Image /RestoreHealth command and then hit the Enter key to run this command. After hitting, DISM scan will now start.
- Wait for the process comes to an end. Please note that it can take about 20 minutes or more and any interruption is not allowed.
- Once the process finishes, please check if the error code 0xc1900107 persists when updating Windows 10 again.
# Run Windows Update Troubleshooter
The last fix is to run the Windows Update Troubleshooter that is designed to resolve update-related issues.
Let’s run this tool to fix 0xc1900107:
Step 1: Download Windows Update Troubleshooter.
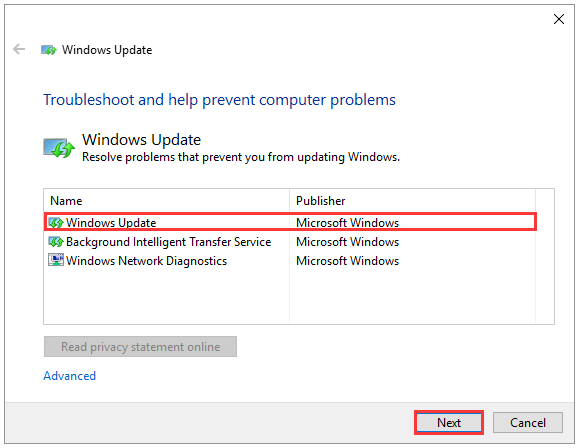
Step 2: Click the downloaded file to open it and select Windows Update and click the Next button on the window as the following image shows.
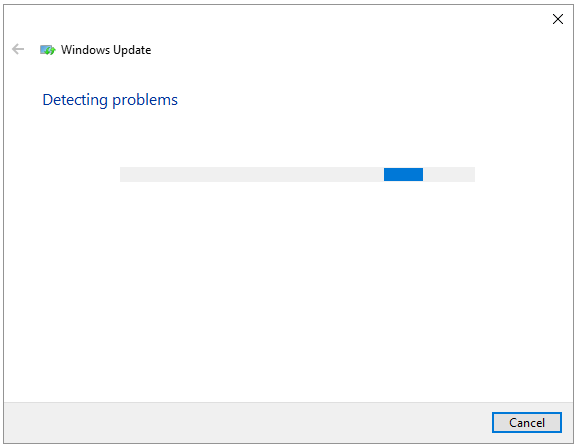
Step 3: Wait for this tool detecting the errors and fixing them automatically.
Step 4: Exit the current window and then restart Windows 10 to update it again.
Bottom Line
All 6 fixes have been displayed in this post. Have they helped you address Windows 10 Upgrade Error 0xc1900107?
If you have other helpful solutions to this update error code, please share them with us by leaving them in the comment zone. If you have some doubts about the tutorials mentioned in this post, please do not hesitate to let us know by sending an email to [email protected].
0xc1900107 FAQ
The possible reasons are:
- The components of Windows Update have been damaged.
- There are corrupted files on your operating system.
- The updating process might be interrupted by the anti-virus software.
- The device drivers are out of date.
- There is not enough free space on the hard drive.
User Comments :