Do you want to install Windows 11 easily without prompting? An unattended Windows 11 installation is a great choice. How to create an unattended installation of Windows 11? Now, this post from MiniTool Partition Wizard will discuss everything related to the topic.
As it’s well known to us all, installing Windows 11 requires your PC to meet stringent system requirements, including 64GB storage space, 4GB RAM, UEFI firmware, enabled TPM, etc. This process is complex and time-consuming and needs to confirm many dialog boxes. So, many users want to create an unattended installation of Windows 11. Here’s a true example from the answers.microsoft.com forum:
Windows 11 unattended installation. Hi, I am trying to install "windows 11" with the answer file but it's failing with the error “The product key entered does not match any of the Windows images available for installation”. A similar procedure works fine with Windows 10 but fails with Windows 11. Any help in this regard is highly appreciated. Thanks!https://answers.microsoft.com/en-us/windows/forum/all/windows-11-unattended-installation/38bcef24-2975-433a-b4cc-bee0b9adfa40
What Is a Windows 11 Unattended Installation
What is a Windows 11 unattended installation? It is an ongoing installation way without prompting you for information. Before the Windows 11 installation, you can place all the answers to the installation questions in a text file, also known as an unattend.xml file. Then the Setup program will automatically use the answer file instead of prompting you for each answer during installation.
That’s to say, you don’t have to spend much time sitting in front of your computer to confirm many dialog boxes, such as “where Windows should be installed”, “which components should be installed on the PC”, etc. The following are some benefits of an unattended Windows 11 installation:
- Allows you to perform automated tasks and complete the installation faster than a manual installation.
- Allows you to customize the installation according to your needs and preferences.
- Can run on multiple computers using the same installer file.
- No need for user intervention, so no user password or account sign-in requests.
What Does an Unattended Windows 11 Installation Require
To perform an unattended installation of Windows 11, your computer needs to meet some installation requirements. Here we summarize them as follows:
Hardware requirements:
- At least 4 GB of RAM
- At least 64 GB of free hard disk space
- A USB flash drive or external hard drive that has at least 8 GB of free space and is formatted to FAT32 or NTFS
- Don’t need an internet connection for the Windows 11 unattended setup because you will install Windows 11 offline.
Software requirements:
- Windows 11 product key: You need a generic product key for the unattended installation. This unique key enables you to install the same setup on multiple computers. If you don’t know the key, you can refer to this post “How to Find Windows 11 Product Key Using CMD”.
- Ventoy tool: It’s a free open-source tool that enables you to write the Windows 11 ISO file to a USB flash drive for creating a bootable drive.
- Windows 11 Disk Image (ISO): It’s used to create a bootable drive for the Windows 11 unattended setup.
- Windows ADK tool: It is used to create the answer (unattended) file for the Windows 11 installation.
Preparations for the Windows 11 Unattended Installation
Before you perform an unattended installation of Windows 11, it’s important to meet the requirements we just listed above, especially for hardware requirements. If not, you need to upgrade your computer’s hardware. How to do that? You can follow the guides below:
For RAM: You can upgrade the memory by referring to this guide “How to Get More RAM on Laptop—Free up RAM or Upgrade RAM”.
For Hard Disk: An unattended Windows 11 installation requires your hard disk/SSD to have at least 64 GB of free space. However, it may not be easy for many users to free up so much space at one time. You can delete all unnecessary large files or uninstall some programs, but it is not the most effective way.
Another better way is to directly extend the partition where you’re ready to install the attended Windows 11 setup. You just need to integrate all free/unallocated space into the partition using MiniTool Partition Wizard. It’s a comprehensive and free partition manager that can extend/resize/move partitions to even non-contiguous unallocated space. Let’s see how to extend the partition using the MiniTool software.
MiniTool Partition Wizard FreeClick to Download100%Clean & Safe
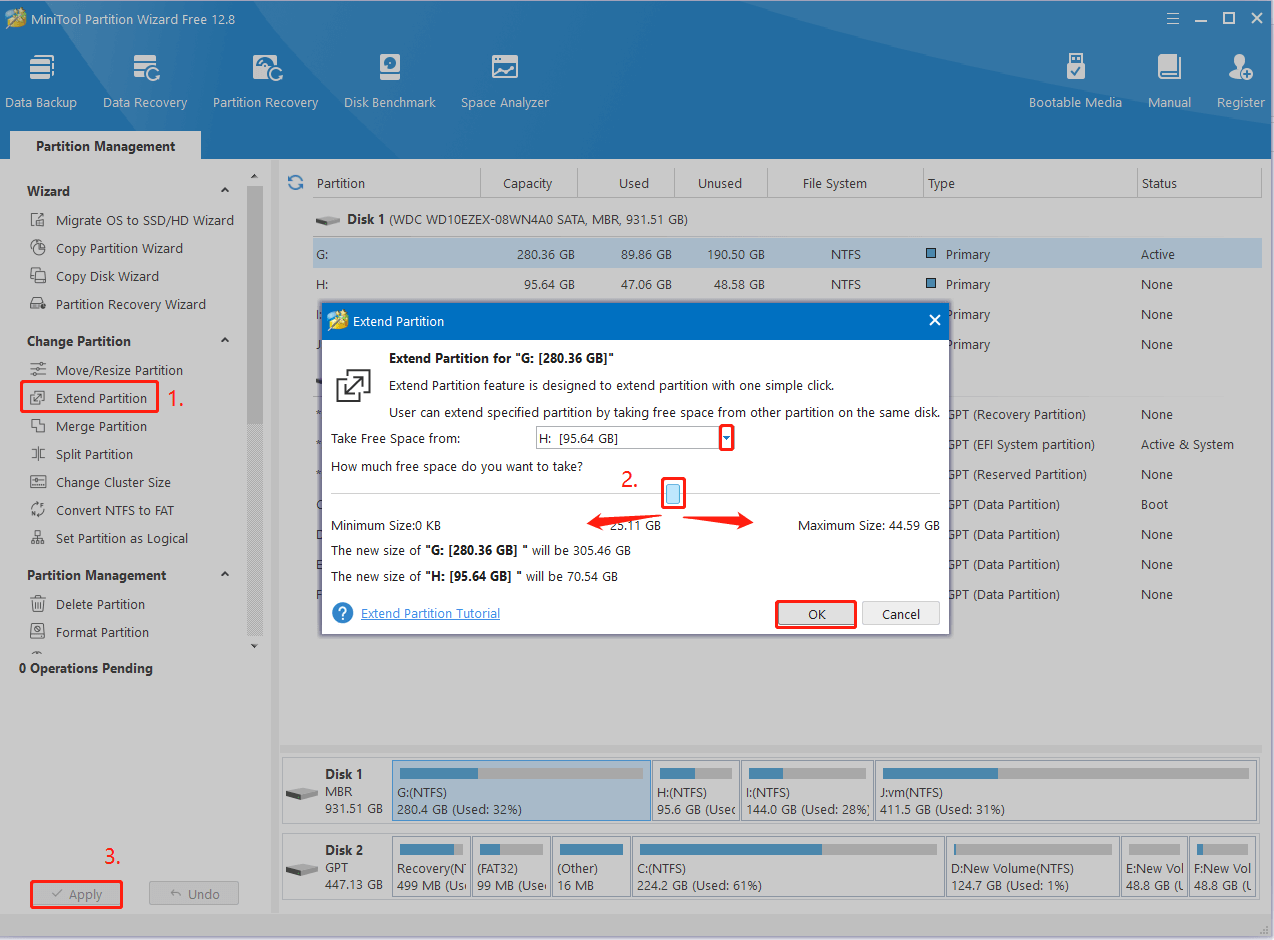
Step 1. Run MiniTool Partition Wizard to enter its main interface, select the partition where you want to perform an unattended installation of Windows 11, and click on Extend Partition from the left action pane.
Step 2. Select the drive that you want to take free space from the drop-down menu, and then drag the slider bar to occupy the free space and click on OK to confirm it.
Step 3. Click on Apply to execute the process.
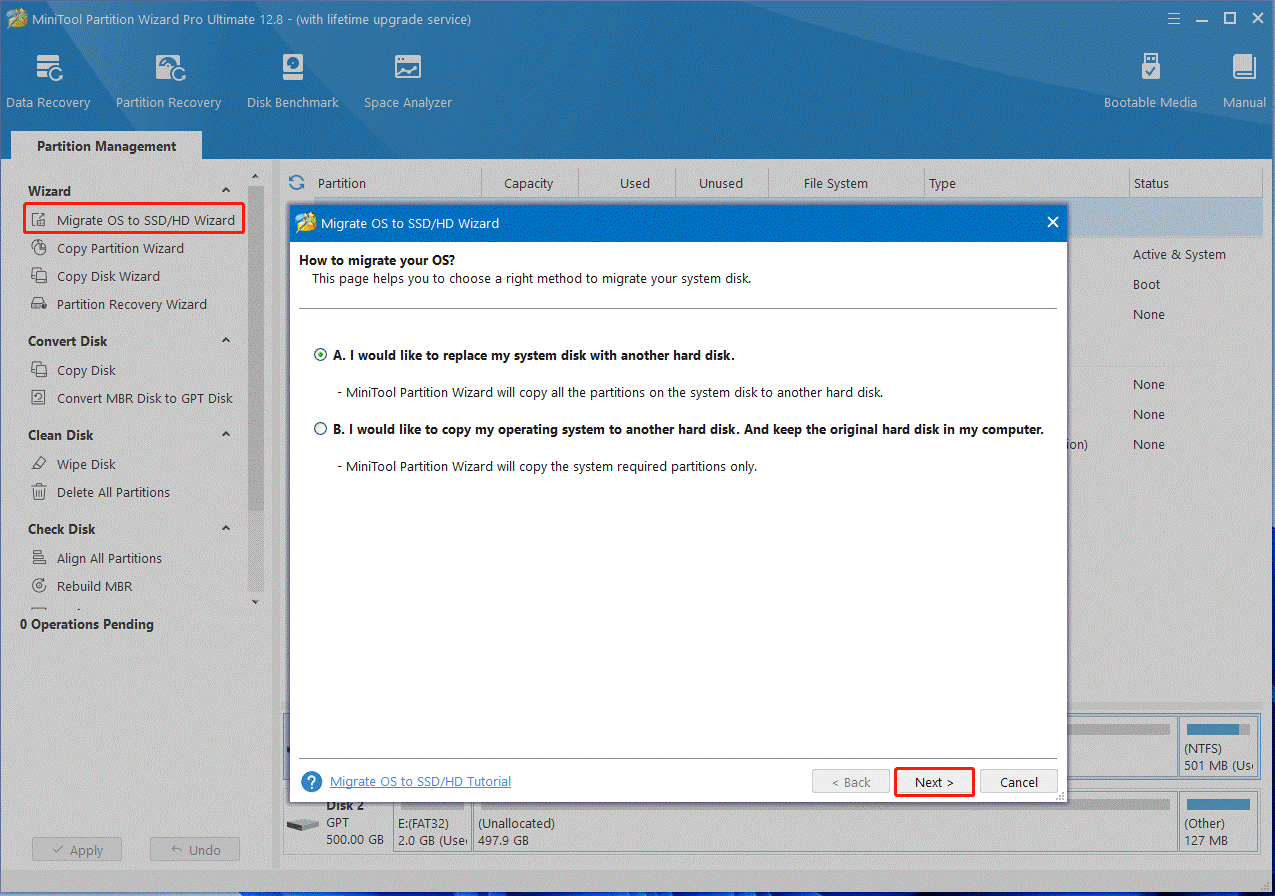
Well, if your hard disk comes with a small capacity and cannot free up, you can consider upgrading the disk to a larger HDD/SSD. Here the MiniTool software can upgrade the disk without reinstalling OS. It’s also a powerful disk manager that can clone a hard drive, migrate OS to SSD, convert MBR to GPT, and more.
For USB Drive: As discussed above, the USB drive or external hard drive is required to be formatted FAT32 or NTFS. If it doesn’t, you can follow the steps below to format the drive on Windows 11/10.
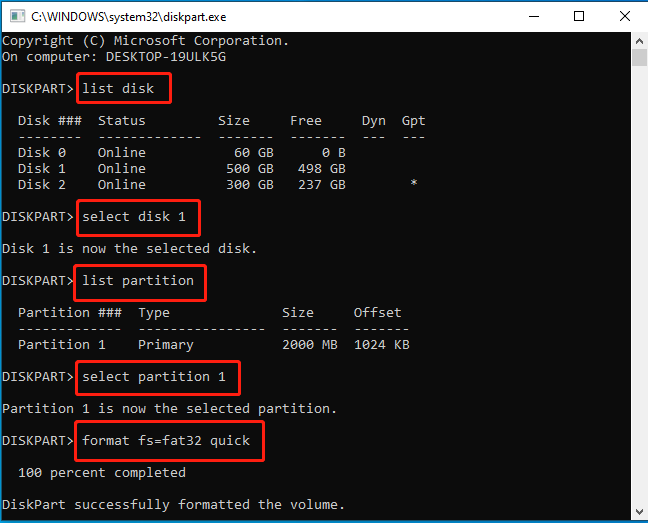
Step 1. Press the Win + R keys to open the Run dialog box, and then type diskpart in it and press Enter. Then click on Yes to open the tool in Command Prompt.
Step 2. In the pop-up window, type the following commands in order and press Enter after typing each one.
- list disk
- select disk * (* represents the USB drive number)
- list partition
- select partition * (* represent the partition number on your USB drive)
- format fs=fat32 quick (you also can run format fs=ntfs quick)
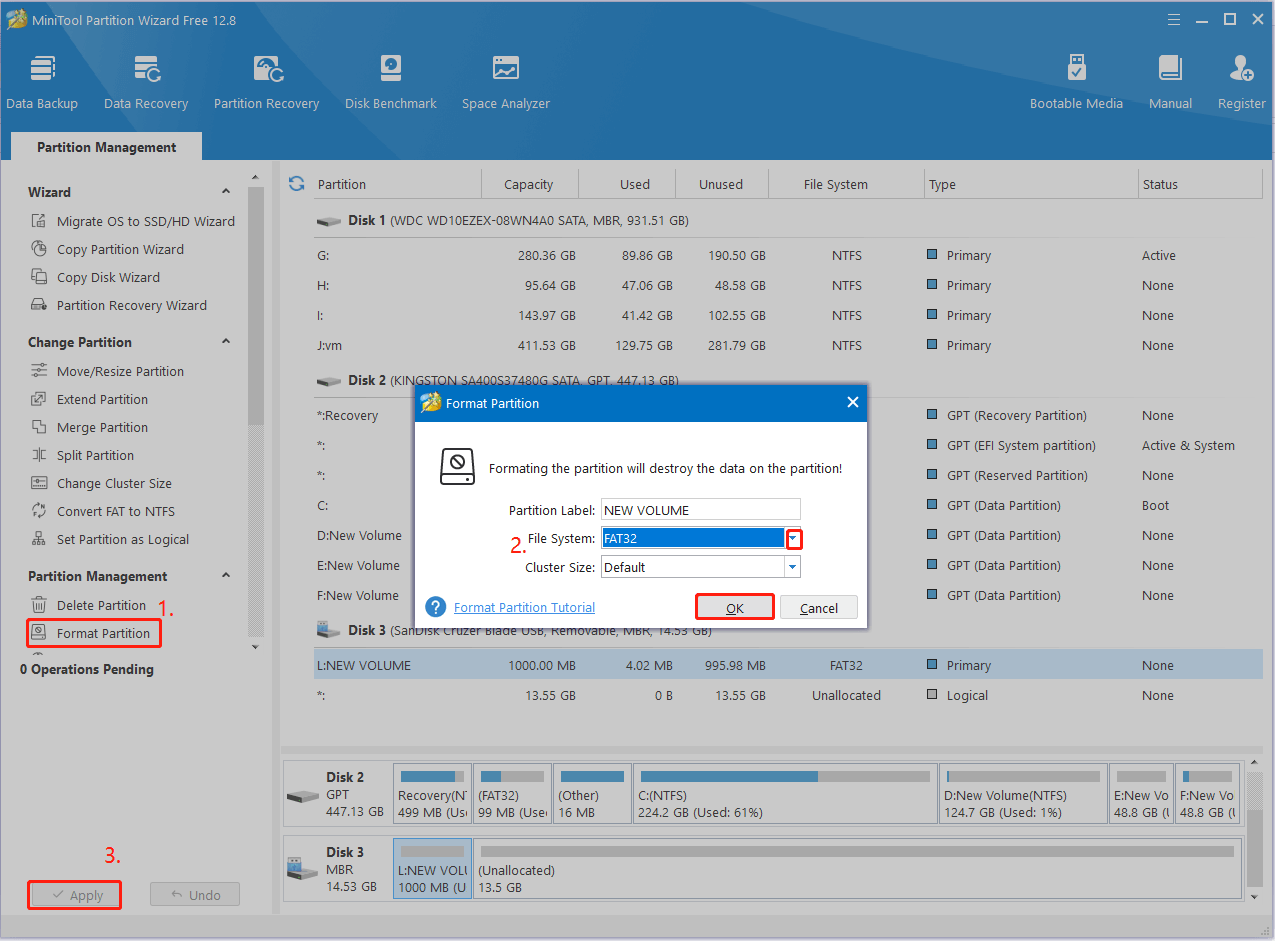
Sometimes the Windows tool may run into some errors, like “DiskPart format stuck at 0”, or can’t format a USB larger than 32 GB to FAT32. In this case, you can use the professional USB format tool – MiniTool Partition Wizard. It cannot only format a drive to NTFS/FAT32/exFAT/Ext but also convert FAT32 to NTFS without data loss.
How to Create an Unattended Windows 11 Installation
How to create an unattended installation of Windows 11? This process can be divided into the following 2 parts. The first part is to create a bootable USB drive using the Ventoy tool, and the second part is to set up the answer (unattended) file using the ADK tools.
Part 1. Create a Bootable USB Drive
Ventol tool, known as Ventoy’s GitHub repository, is a free image creator that can help you write Windows 11 ISO files to the USB drive. Let’s see how to create a bootable USB drive using the tool.
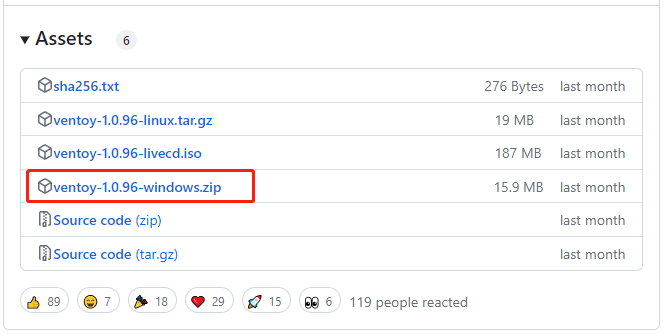
Step 1. Visit Ventoy’s GitHub repository, scroll down the page to the Assets section, and download the windows.zip file.
Step 2. Once downloaded, right-click on the folder and select Extract All to extract the file.
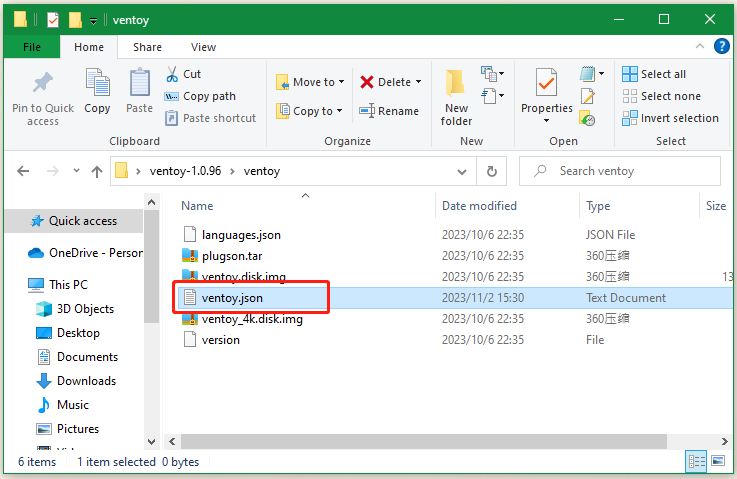
Step 3. Open the extracted folder and then open the subdirectory named Ventoy. Right-click empty space in the folder and select New > Document to create a new text file named ventoy.json. Then copy and paste the following text inside the file and save it.
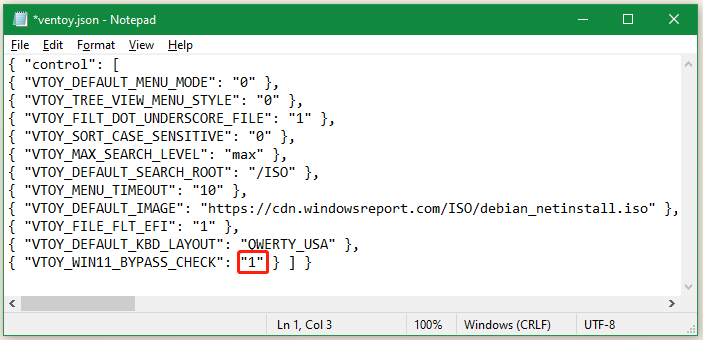
{ "control": [ { "VTOY_DEFAULT_MENU_MODE": "0" }, { "VTOY_TREE_VIEW_MENU_STYLE": "0" }, { "VTOY_FILT_DOT_UNDERSCORE_FILE": "1" }, { "VTOY_SORT_CASE_SENSITIVE": "0" }, { "VTOY_MAX_SEARCH_LEVEL": "max" }, { "VTOY_DEFAULT_SEARCH_ROOT": "/ISO" }, { "VTOY_MENU_TIMEOUT": "10" }, { "VTOY_DEFAULT_IMAGE": "https://cdn.windowsreport.com/ISO/debian_netinstall.iso" }, { "VTOY_FILE_FLT_EFI": "1" }, { "VTOY_DEFAULT_KBD_LAYOUT": "QWERTY_USA" }, { "VTOY_WIN11_BYPASS_CHECK": "1" } ] }
Step 4. Set the last argument to 1 and save the change so that the computer can be able to avoid certain registry checks, such as Windows 11’s secure boot with Ventoy.
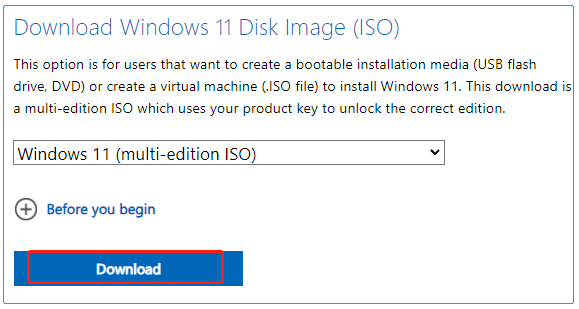
Step 5. Now, visit the official website of Windows 11 ISO file, select the Windows 11 OS version, and language, and click on Download.
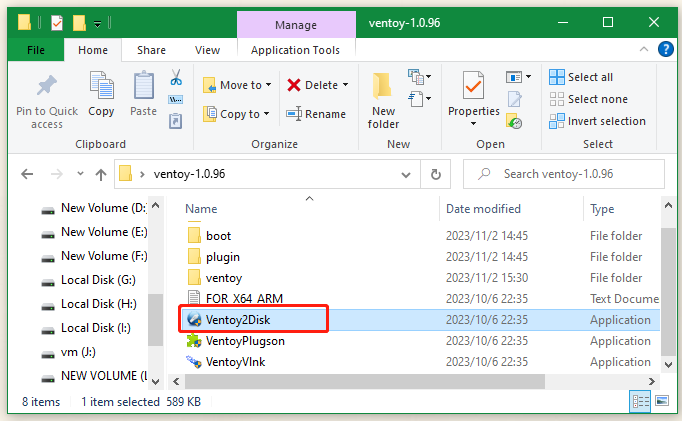
Step 6. Come back to the extracted Ventoy folder, double-click the Ventoy2Disk file, click on Yes to run it, and insert your USB drive into the computer.
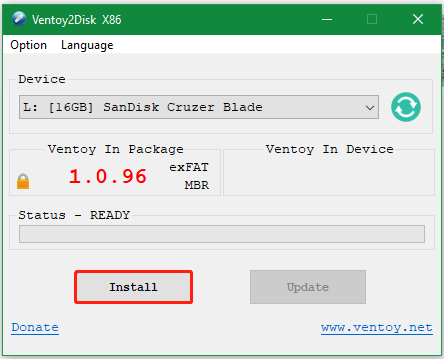
Step 7. In the pop-up window, select the USB drive from the drop-down menu and click on Install > Yes.
Step 8. Now, you can move the Windows 11 ISO file to the Ventoy USB flash drive.
Step 9. Restart your computer and press F2 or Delete key or other required key before the computer is booted to enter BIOS. Change the boot order so the USB drive is set to the first location, save the change, and continue with the installation process.
Part 2. Configure the Answer File for the Windows 11 Unattended Installation
The answer file (unattended) file contains the answers to the questions asked by Windows 11 Setup during a manual installation. Here you can configure the answer file of Windows 11 unattended setup using the Windows Assessment and Deployment Kit tool.
Step 1. Visit the official website of Windows ADK Tools and download the file.
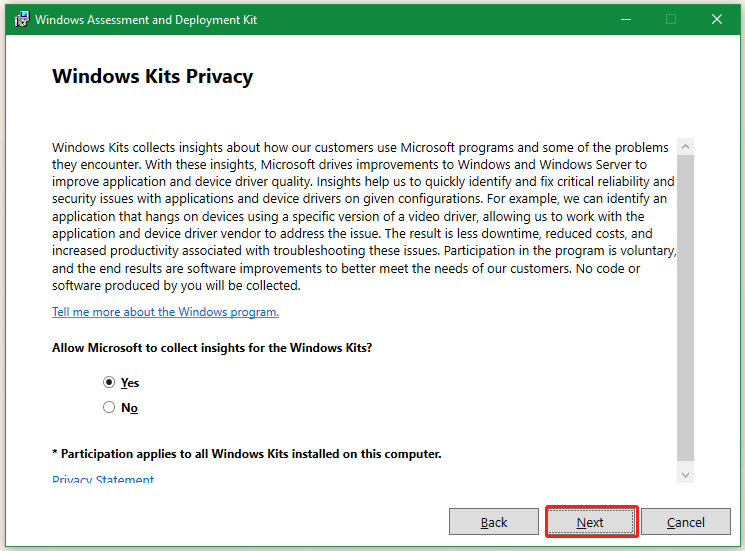
Step 2. Launch the setup file and click on Run, then follow the on-screen instructions to install the program.
Step 3. Search for the Windows System Image Manager and launch it. Then select File from the upper left corner and click Select Windows Image.
Step 4. Choose the Windows 11 ISO file from the drop-down menu and click on OK.
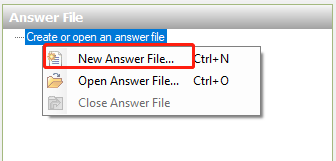
Step 5. Click on Create or open an answer file and select New Answer File > Yes.
Step 6. Expand the Components and various stages for customization will be listed here. Add all components, click on File > Save Answer File, and make sure the file is saved in XML format, then eject the bootable USB.
Step 7. Power off your computer and insert the bootable USB, start the PC from the USB, and then Windows 11 should install automatically.
We Need Your Feedback
Here comes the end of the post. Have you any thoughts about the Windows 11 unattended installation? Share them with us in the comment section below. Besides, if you have difficulty using MiniTool Partition Wizard, contact us via [email protected] and we will back to you as soon as possible.
User Comments :