Lots of users complain that Raspberry Pi won’t connect to WiFi. What causes Raspberry Pi not connecting to WiFi? How to fix the issue? Now, let’s explore these questions together with MiniTool.
After analyzing many user reports and posts, we find the Raspberry Pi not connecting to WiFi issue is mainly caused by the issues with SSID. Moreover, network inconsistency, incorrect network configuration, corrupt Ethernet cable, and even hardware issues are responsible for Raspberry Pi 3 won’t connect to WiFi. Don’t worry. Here are 5 applicable ways to fix it.
![How to Set up a Raspberry Pi Plex Server? [Complete Guide]](https://images.minitool.com/partitionwizard.com/images/uploads/2021/09/raspberry-pi-plex-server-thumbnail.jpg)
Solution 1. Restart Your WiFi Router
An inconsistent network connection is the main reason you can’t find Raspberry Pi on network. Resetting the WiFi router can remove all the internet cache and help improve the internet speed, which may fix the issue. Let’s have a try.
Step 1. Turn off the router and unplug the power cable from the wall socket.
Step 2. Hold the Power button on the back of your router for about 15 seconds until the router is turned off completely. Or, you can disconnect the Ethernet cable from your modem.
Step 3. Then wait for about 5 minutes, and plug the power cable into the socket again and press the Power button to restart it.
After that, you can check if the “Raspberry Pi not showing up on network” problem is fixed.
Solution 2. Check the Ethernet Port and Cable
You also need to check if the connection is loosened or the Ethernet cable is unplugged by mistake or damaged. To do so, you can try using a different Ethernet cable on the router or connect it to another port. If you still can’t find Raspberry Pi on network, you can try updating the router’s firmware or move down to the following potential fixes.
Solution 3. Check SSID for Issues
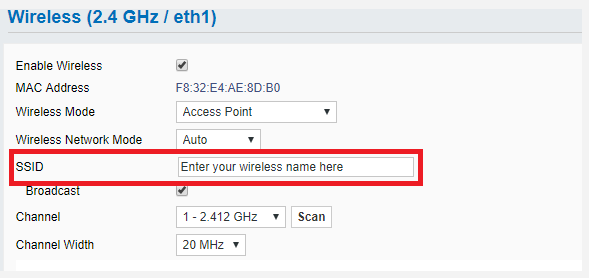
As mentioned above, the improper SSID settings can cause the “Raspberry Pi not connecting to WiFi” issue. To check it, open your Wireless Settings window, and then go to the SSID/Wireless Network Name (SSID) section and make sure your name doesn’t have any underscores or other invalid characters. If there is an underscore, remove it and connect your Raspberry Pi to WiFi again, and see if the issue gets fixed.
Solution 4. Reinstall Raspbian
Sometimes the Raspberry Pi can’t connect to WiFi when your Raspbian image gets corrupted. In this case, you can try reinstalling Raspbain by the following steps.
Step 1. Click here to download the latest version of Raspberry Pi Imager.
Step 2. Launch the installer to install the imager. Once installed, connect your SD card to the Raspberry Pi.
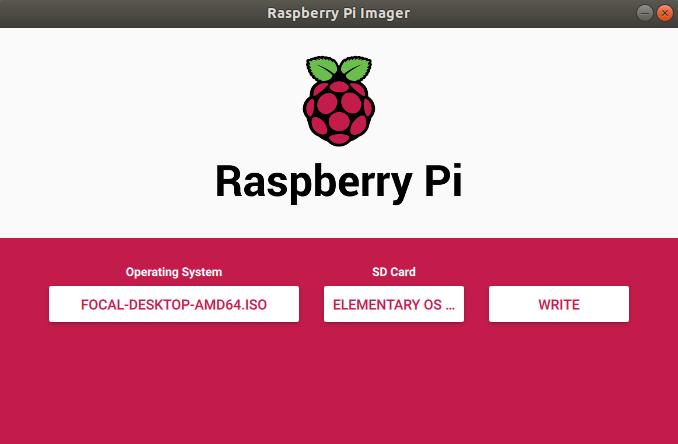
Step 3. Run the Raspberry Pi Imager and select the required OS from the drop-down menu.
Step 4. Select the SD card and click on Write to start installing the OS on the SD card.
Once done, you can restart your Raspberry Pi using the SD card and check if the “Raspberry Pi won’t connect to WiFi” problem is resolved. If the “Raspberry Pi 3 won’t connect to WiFi” issue still occurs, you can try downgrading to an earlier version of Raspbain to see if it works.
![How to Install Windows 10 on Raspberry Pi 4 [Full Guide]](https://images.minitool.com/partitionwizard.com/images/uploads/2021/08/windows-10-on-raspberry-pi-4-thumbnail.jpg)
User Comments :