How to convert partition to FAT32? If you are curious about this question, this post is what you need. Here, Partition Magic offers a comprehensive guide on converting different file system partitions to FAT32.
Why Convert Partition to FAT32
NTFS, exFAT, and FAT32 are three key file systems in the Windows operating system, each with its strengths. NTFS is best for internal drives, and exFAT excels with large external storage. However, there are valid reasons to convert a partition to FAT32 despite its more advanced alternatives.
Let’s have an overview of these three file systems first:
NTFS (New Technology File System): It offers robust features like journaling, advanced file permissions (ACLs), file compression, encryption (EFS), hard links, symbolic links, shadow copies, and support for large files (>4GB) and partitions (>256TB). However, it has limited native compatibility outside Windows.
exFAT (Extended File Allocation Table): A successor to FAT32, it removes the 4GB file limit and supports larger partitions. It’s lightweight, widely supported on modern devices, but lacks journaling and advanced permissions like NTFS.
FAT32 (File Allocation Table 32): The format is highly compatible but limited to a 4GB file size, approximately 8TB partitions, and lacks features such as journaling, permissions, encryption, or compression, making it susceptible to fragmentation.
From the above content, you can know the definition of these three file systems. Now, let’s see the reasons of why convert partition to FAT32:
- Universal Compatibility: FAT32 works seamlessly with Windows, macOS, Linux, Android, gaming consoles (e.g., PlayStation, Xbox), and media players.
- Lightweight Performance: Ideal for removable drives (USB sticks, SD cards) and devices with limited resources.
- Legacy Support: Required for firmware updates, embedded systems, or older hardware that doesn’t support NTFS.
- Easier Data Recovery (Sometimes): The FAT32 structure is simpler than NTFS’s Master File Table (MFT) or exFAT’s structures, making it easier for recovery tools to reconstruct data on a severely corrupted FAT32 drive.
Preparation for Converting Partition to FAT32
Before performing the FAT32 conversion, you’d better clone your data to a safe location to avoid data loss. To do that, I highly recommend MiniTool Partition Wizard. It offers the Copy Disk feature to help you clone data from one disk to another empty disk with ease.
Moreover, it offers a variety of tools for managing your partitions and disks. For instance, it can help you partition hard drive, check disk for errors, change cluster size, convert MBR to GPT, rebuild MBR, recover data from hard drive, and more.
Here’s how to use its Copy Disk feature:
Step 1. Click the Download button to get MiniTool Partition Wizard’s installation package. Then, run the downloaded file and follow the on-screen instructions to install it on your computer.
MiniTool Partition Wizard FreeClick to Download100%Clean & Safe
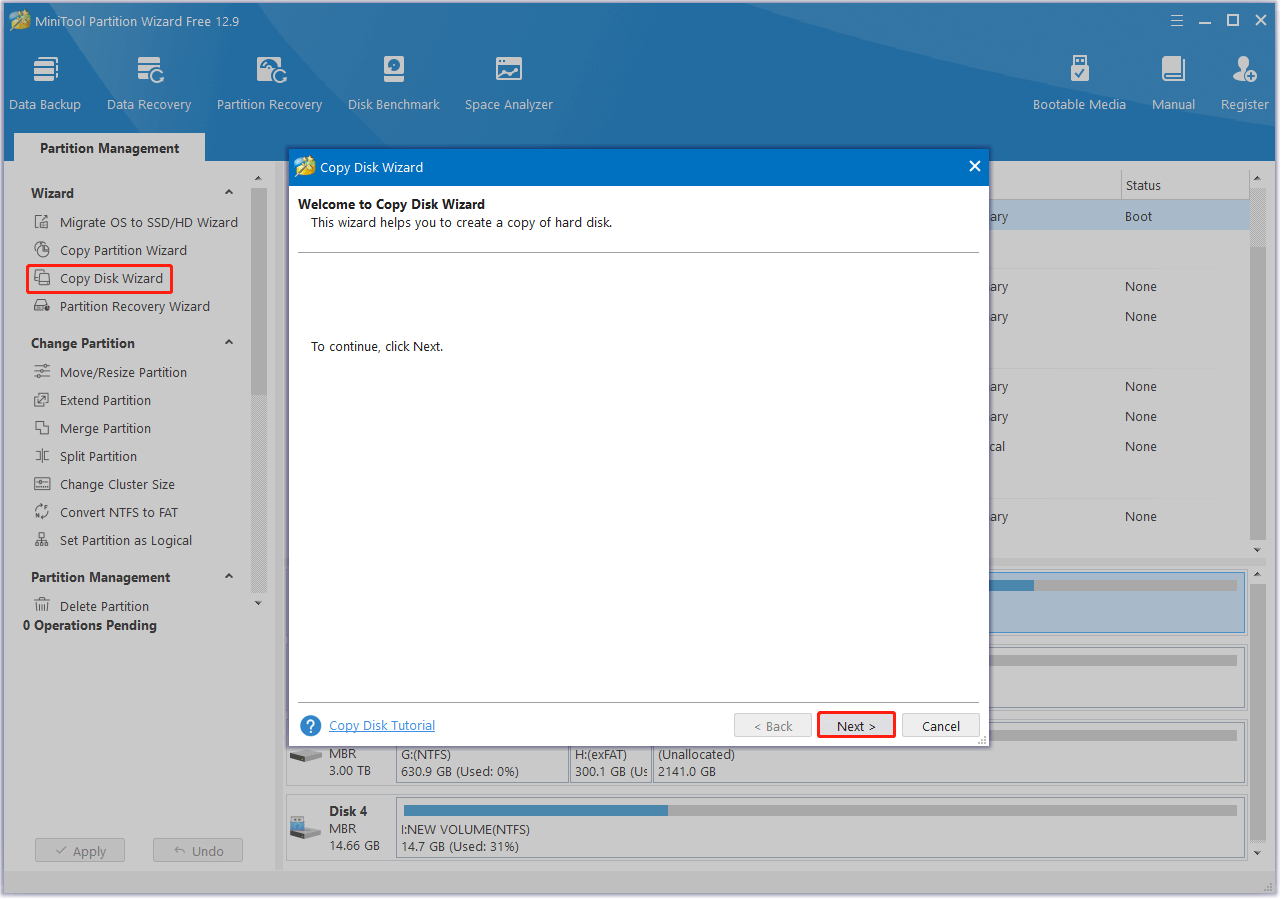
Step 2. Launch this app to enter its main interface and select Copy Disk Wizard from the left panel. Then, click Next in the prompt window.
Step 3. Choose the disk that you want to clone and click Next.
Step 4. Choose the target disk and click Next. Note that all data on the target disk will be erased after performing the disk copy operation.
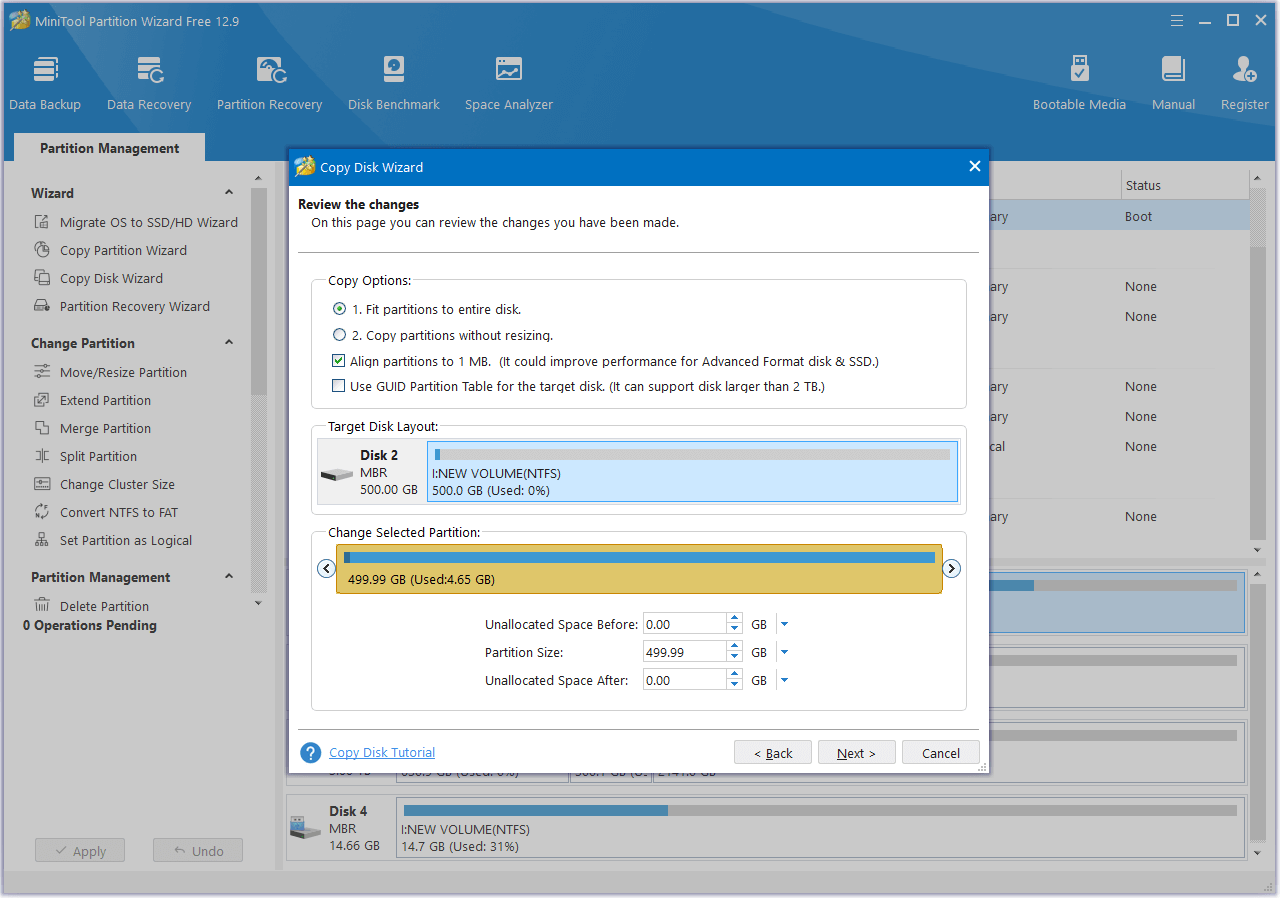
Step 5. In the next window, set the Copy Options and adjust the Target Disk Layout. Then, click Next to move on.
- Fit partitions to entire disk: If you select this option, the target disk partition size will automatically be adjusted to fit the entire disk.
- Copy partitions without resizing: If you select this option, the source disk partition sizes will be applied.
- Align partitions to 1MB: This option can help enhance performance for SSDs and advanced format disks, so please keep it selected if users are utilizing such devices.
- Use GUID Partition Table for the target disk: This option allows you to utilize the full capacity of a hard disk larger than 2TB, provided that UEFI boot is enabled in the BIOS settings.
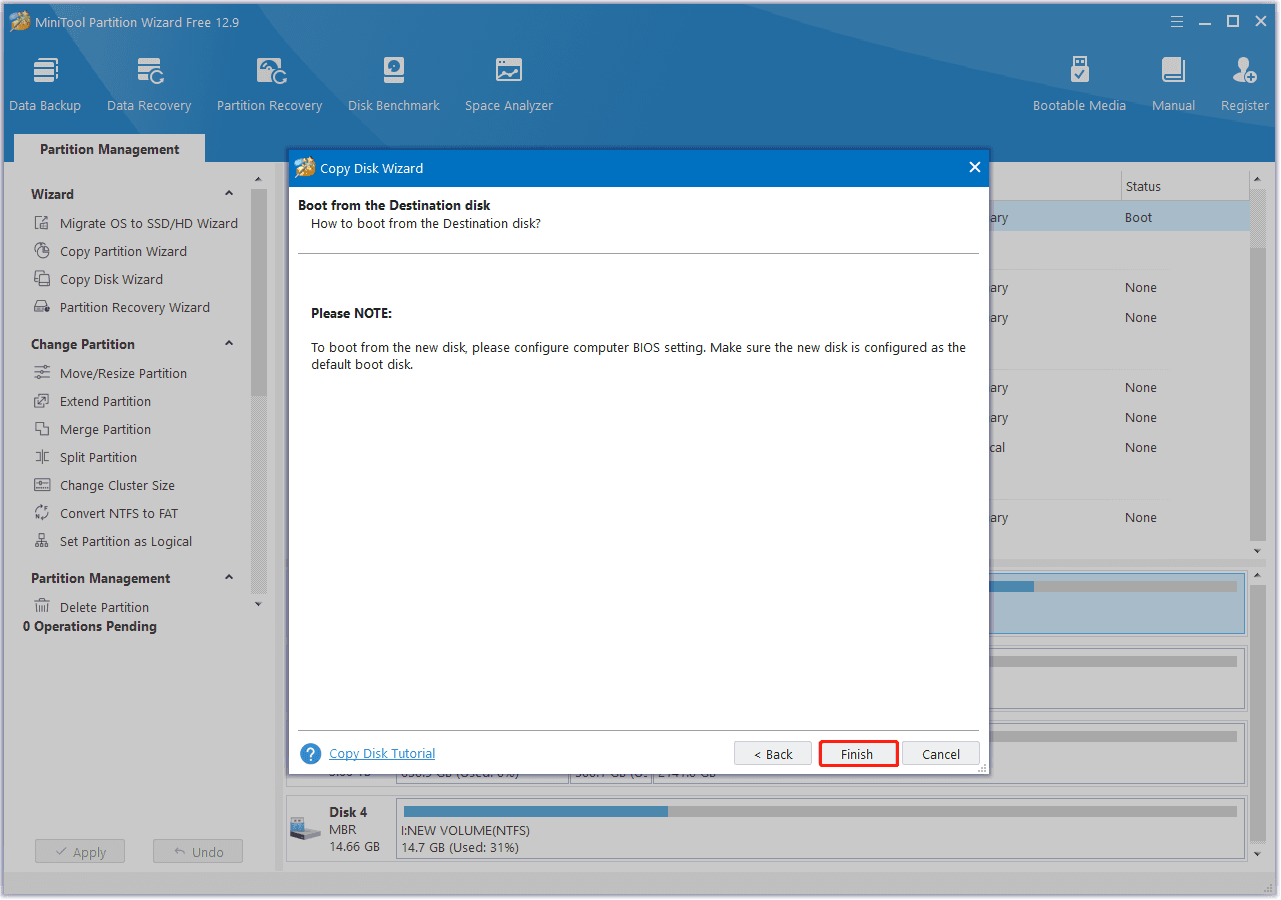
Step 4. Next, read the Note carefully and click Finish to continue.
Step 5. After that, click the Apply button in the bottom left corner to perform the pending operation. Next, click Yes in the pop-up window to confirm.
Once the process is complete, you can successfully clone the entire disk to another disk. Afterwards, you can proceed to convert the partition to FAT32 without any concerns.
How to Convert a Partition to FAT32
If you want to know how to convert a partition to FAT32, you can find a step-by-step guide in this section. Here, I summarize some useful methods to help you do FAT32 conversion. You can choose the method you like to perform.
Method 1. Use MiniTool Partition Wizard
To convert a partition to FAT32, you can use MiniTool Partition Wizard as well. It provides the Convert NTFS to FAT32 feature, enabling you to perform the conversion without losing data. Additionally, you can utilize its Format Partition feature to format other file systems to FAT32.
Here’s the guide on two options for you to use MiniTool Partition Wizard to do FAT32 conversion.
Option 1. Convert NTFS to FAT32
If the partition that you want to convert is NTFS, you can use MiniTool Partition Wizard’s Convert NTFS to FAT feature to convert it into FAT32 without data loss. Here’s the guide:
Step 1. Launch MiniTool Partition Wizard Pro or higher edition to enter its main interface.
MiniTool Partition Wizard DemoClick to Download100%Clean & Safe
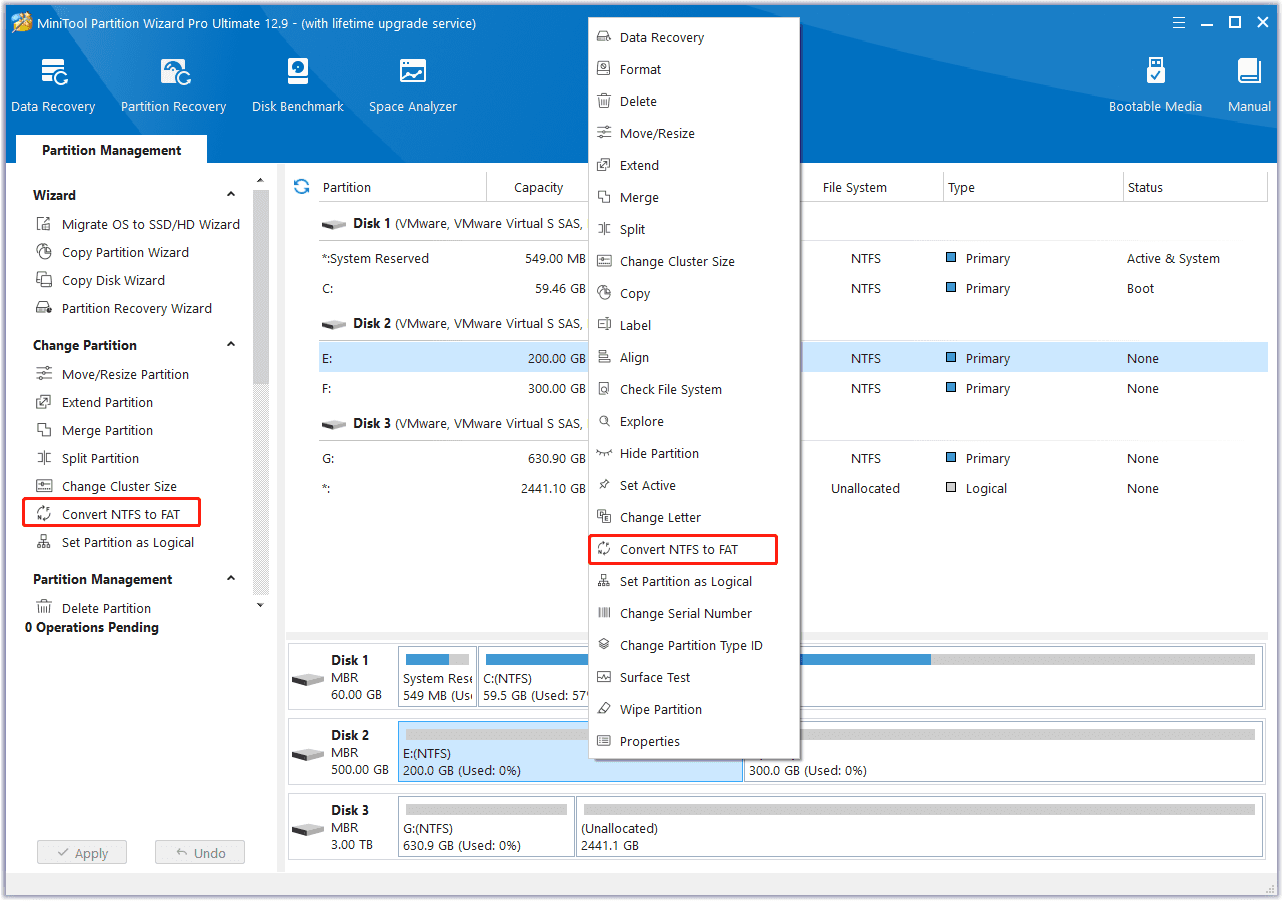
Step 2. Choose the NTFS partition that you want to convert from the disk map, right-click it, and select Convert NTFS to FAT. Also, you can click the feature from the left panel.
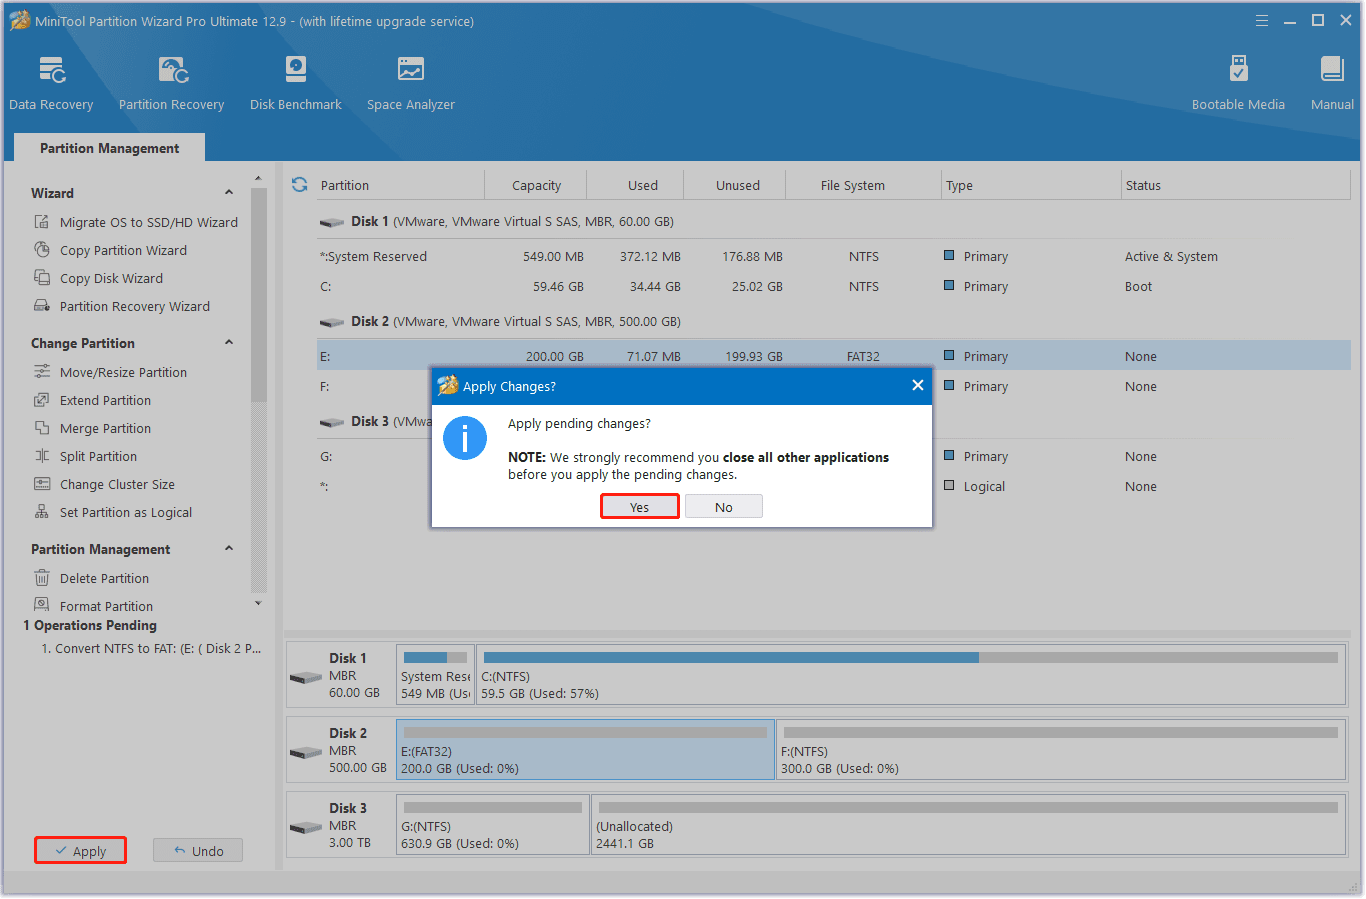
Step 3. Then, click Apply and Yes sequentially to execute the pending operation. Once done, you can convert NTFS to FAT32 successfully without data loss.
Option 2. Format NTFS and exFAT to FAT32
If your partition file format is exFAT, you can choose the Format Partition feature to convert exFAT to FAT32. Also, if there isn’t any important data in your NTFS partition, you can choose this feature to help you do the conversion. Here are the detailed steps:
Step 1. Launch this software on your PC.
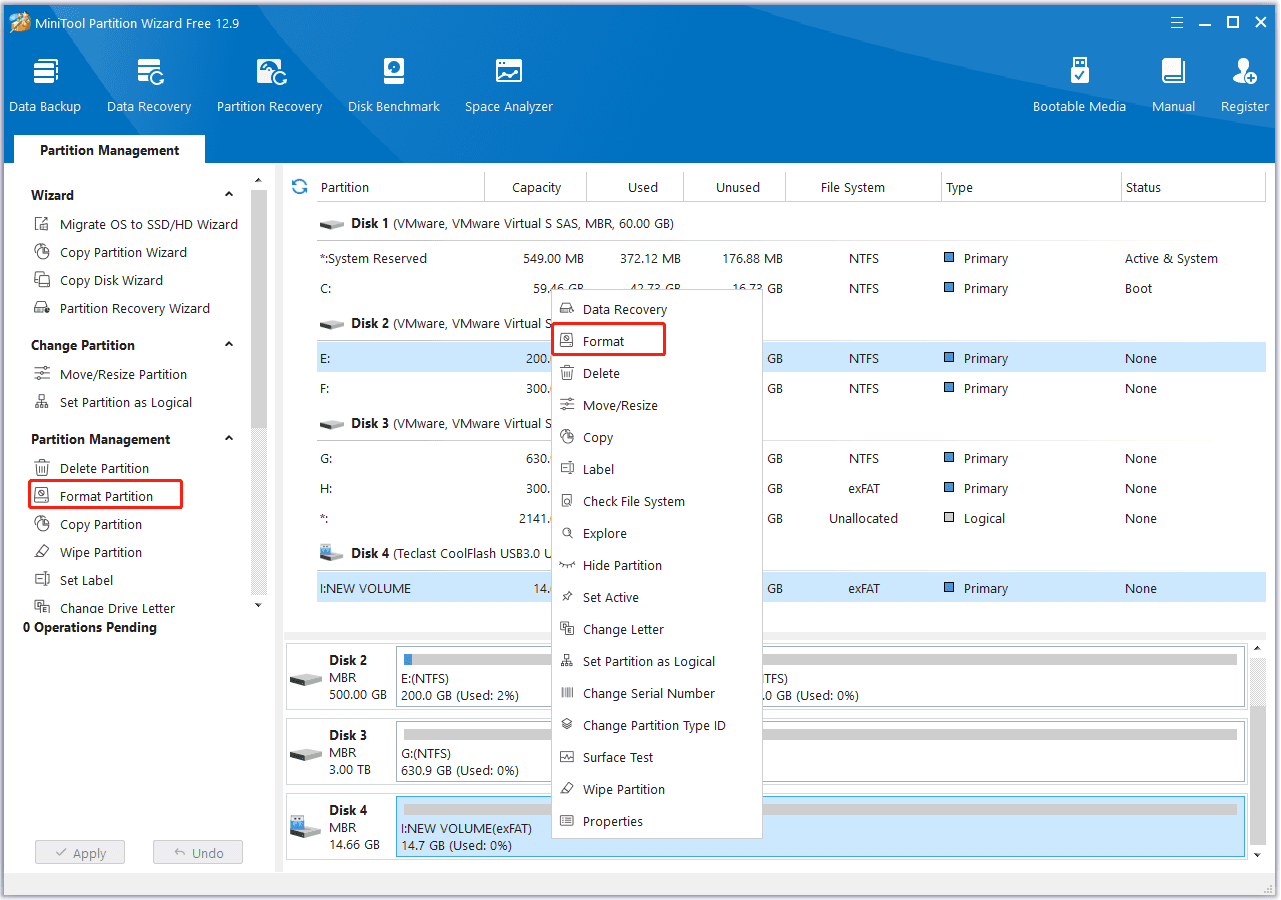
Step 2. Choose the exFAT partition from the disk map, right-click it and select Format or click Format Partition from the left panel.
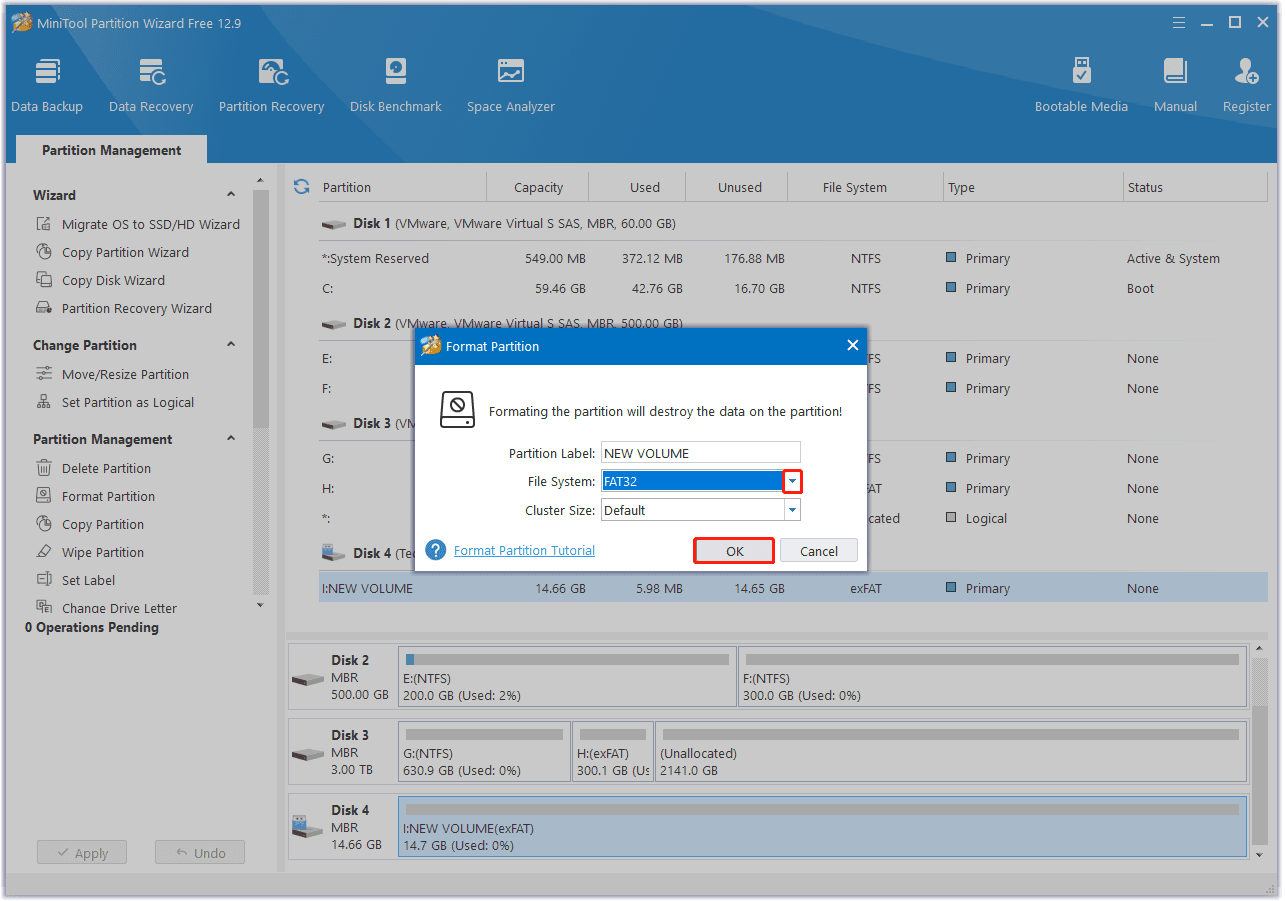
Step 3. In the pop-up Format Partition window, click the down arrow of File System, select FAT32 from the menu. Next, set Partition Label and Cluster Size as you need, and then click OK to continue.
Step 4. Click Apply and Yes one by one to confirm the operation. Once done, you can convert exFAT to FAT32 successfully.
Method 2. Use File Explorer
File Explorer is the file management tool in the Windows operating system. It allows users to navigate, manage, and organize files and folders on their computer, as well as on external drives and cloud storage. Therefore, you can try formatting the partition to FAT32 via File Explorer. If you want to try this way, you can do the following steps:
Step 1. Press the Win + E keys simultaneously to open the File Explorer window. If the partition that you want to convert is on an external storage device, you need to connect it to your Windows PC first.
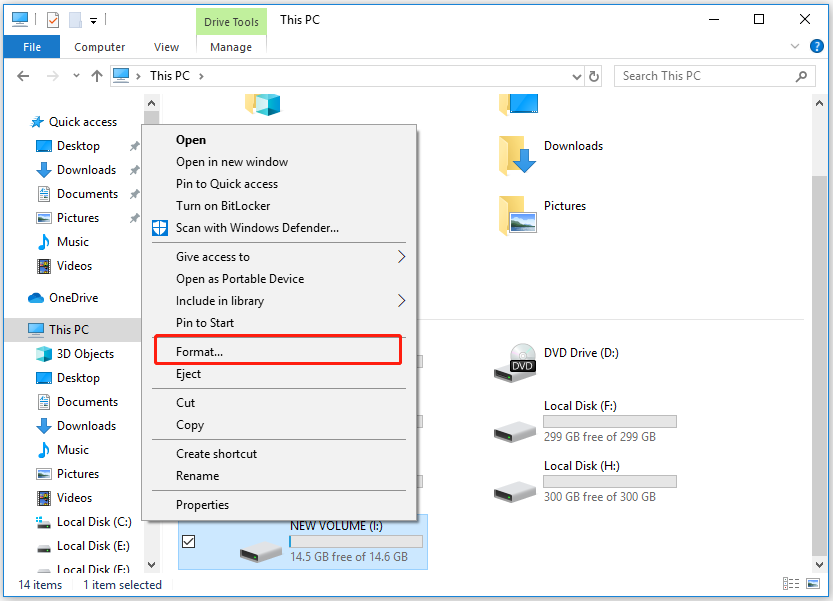
Step 2. Locate and right-click the partition that you want to convert to FAT32 and select Format.
Step 3. Set the FAT32 as the target file system, choose Allocation unit size, and name a Volume label. Next, ensure to check the box of Quick Format, and click Start to start the formatting.
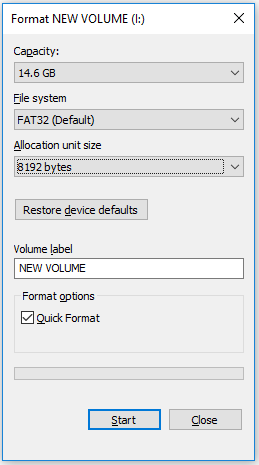
Step 4. When the process is complete, click OK to confirm. Now, the selected partition is formatted with FAT32.
Method 3. Use Disk Management
Disk Management is the default tool on Windows to help users manage partitions and disks. It also offers the Format feature to help users format partition to FAT32. If you want to try this way, you can do as follows.
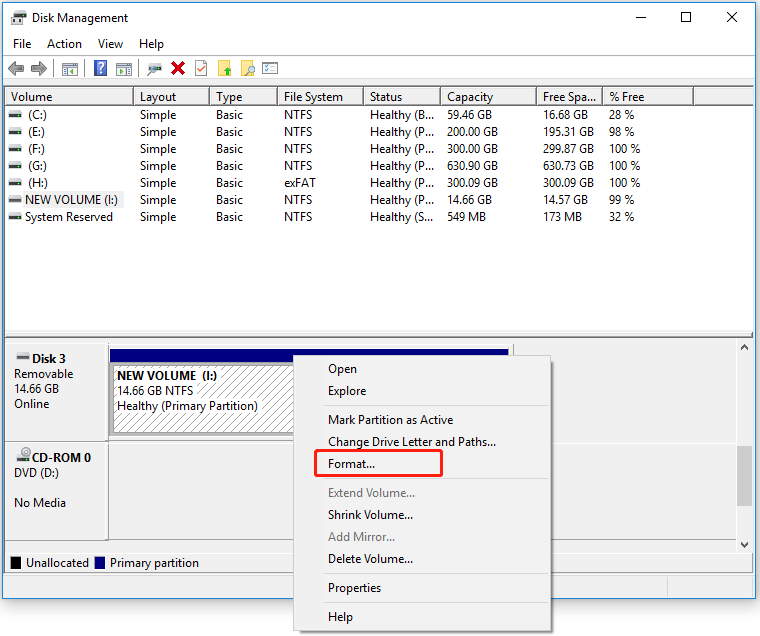
Step 1. Press the Win + X keys simultaneously to open the Quick Link menu, and select Disk Management from the menu.
Step 2. Select the partition you want to convert to FAT32, right-click it, and choose Format from the pop-up menu.
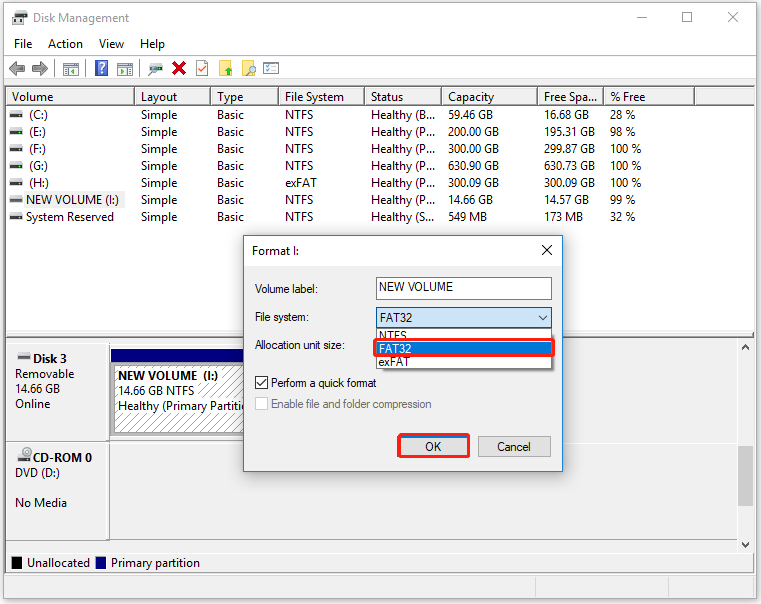
Step 3. Set the Volume Label, select FAT32 as the desired file system, and then choose the proper Allocation unit size. Then, click OK to continue.
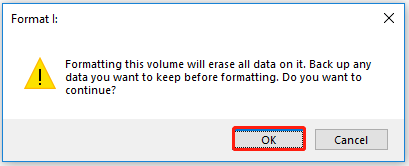
Step 4. After that, you may receive a warning window with the message “Formatting this volume will erase all data on it. Back up any data you want to keep before formatting. Do you want to continue?” If you have made a backup, click OK to finish this conversion.
Method 4. Use Command Prompt
Command Prompt is a command-line interpreter application that allows users to use different commands to manage files, partitions, disks, and other components in Windows OS. So, in addition to using the above methods, you can also use Command Prompt to help you convert partition to FAT32. Here’s how to do that:
Step 1. Press the Win + S keys simultaneously to open the Search window, and type “cmd” in the search box. Then, right-click on Command Prompt and select Run as administrator.
Step 2. In the elevated Command Prompt window, type “diskpart” and press Enter.
Step 3. Next, type the following command lines and hit Enter each time:
- list disk
- select disk 0 (Replace 0 with the disk number of your target device)
- list volume
- select volume 1 (Replace 1 with the volume number of your device)
- format fs=fat32 quick
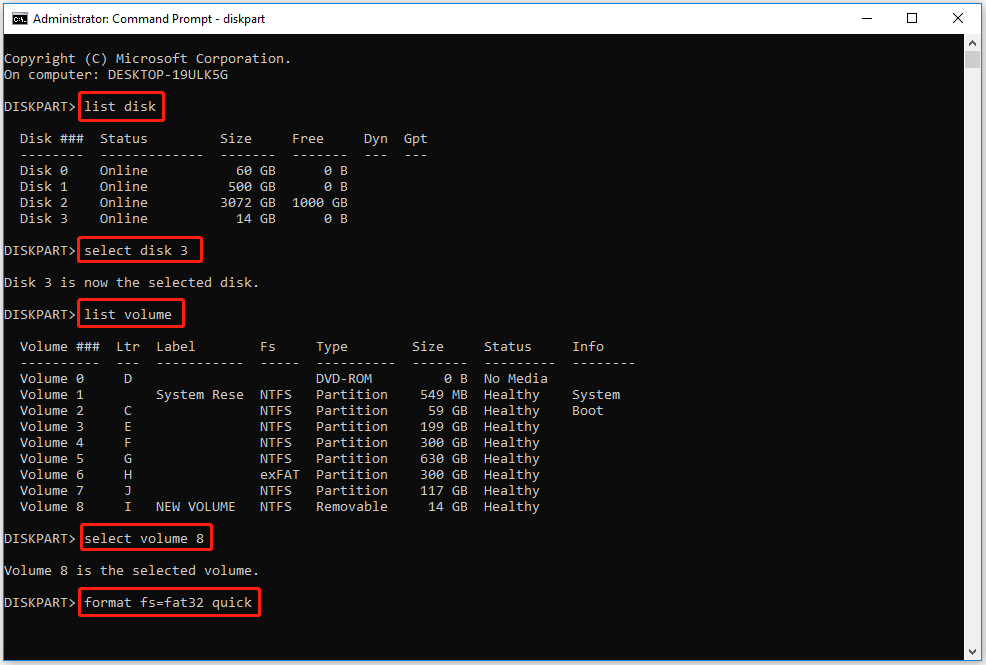
Step 4. When the formatting process is complete, type “exit” and press Enter twice to close DiskPart and the Command Prompt window. After this, your device is now with FAT32.
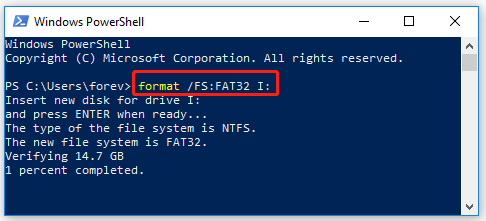
Method 5. Use PowerShell
If you want to convert the partition on your external storage device into FAT32, you can use PowerShell to help you do the conversion. After connecting the external storage device to your computer, you can do the following steps:
- Open the Quick Link menu.
- Select Windows PowerShell (Admin).
- Type “format /FS: FAT32 D:” and press Enter. (Replace “D” with the drive letter that you want to convert).
To Sum Up
How to convert different partitions to FAT32? After reading this post, you may already know the answer. This post provides several effective methods to assist you with the FAT32 conversion. What’s more, if you have any suggestions or encounter any issues while using MiniTool Partition Wizard, you can send emails to [email protected]. We will respond as soon as possible.
About The Author

Position: Columnist
Charlotte is a technology columnist with a strong focus on the Windows operating system, specializing in disk management, backup, and data recovery. She is passionate about analyzing computer errors, identifying root causes, and delivering practical solutions. In her free time, she stays updated on the latest developments in computer systems and hardware while continuously learning new technologies to broaden her expertise. Her writing style is clear and easy to understand, making complex technical topics accessible even to users with limited computer knowledge.
User Comments :