Do you want to check Windows uptime? If you are also searching for a guide, this post of MiniTool is worth reading. It provides 4 simple ways to help you check uptime on Windows 10/11 PCs.
What Is Windows Uptime
What is Windows uptime? Generally speaking, the system uptime is the amount of time that your computer has been up and running since the last time it needs a restart. The larger the number of Windows uptime, the longer your computer has been working.Understanding the uptime can help you monitor your system environment and find out the root cause of some issues system crashing, memory leaks, lagging applications, and more. So, it’s important to have a Windows uptime check when you need to troubleshoot these problems.![How to Reinstall the Settings App in Windows 11? [3 Simple Steps]](https://images.minitool.com/partitionwizard.com/images/uploads/2023/01/how-to-reinstall-the-settings-app-win11-thumbnail.jpg)
How to Check Your System Uptime in Windows 10/11
How to check uptime Windows 10/11? After investigating extensive user reports and posts, we summarize the following 4 ways to check uptime command in Windows easily and quickly without using any third-party utilities.Here is a video guide:
# 1. Check Windows Uptime via Task Manager
The first and most common way for the Windows uptime check is to use the Task Manager. Here’s a full guide:Step 1. Press Ctrl + Shift + Esc hotkeys to open the Task Manager window.Step 2. Click on More details and navigate to the Performance tab.Step 3. Select CPU from the left panel and check the Up time at the bottom of the right panel.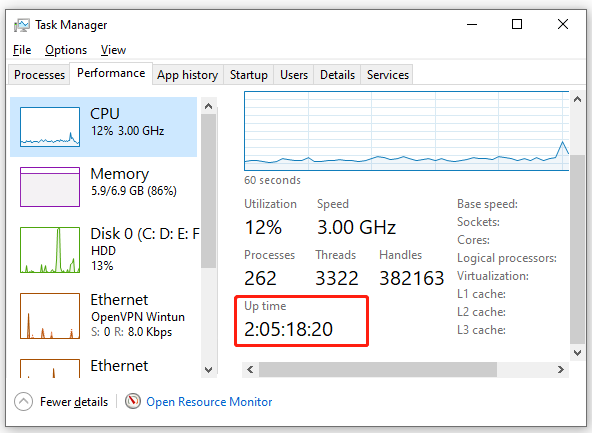
# 2. Check Windows Uptime via Network Duration
The “Duration” number indicates the uptime of your network connection that resets every time your computer starts. It can help you deduce the Windows command uptime.Note:
This method only works for the situation in which you didn’t reset your network connection since the last reboot.
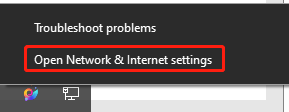 Step 2. Scroll down the right sidebar and select Network and Sharing Center.
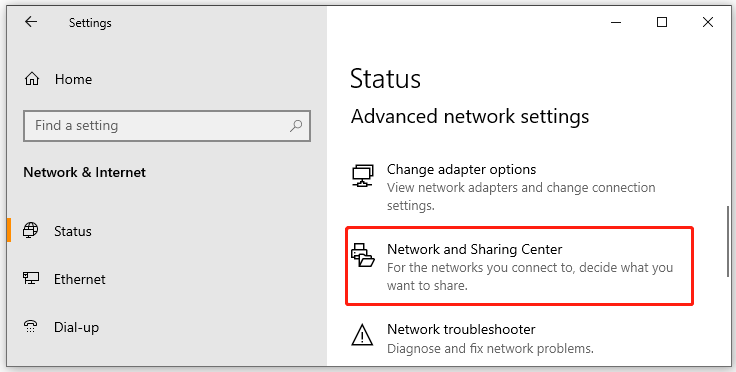 Step 3. Select Change adapter settings in the pop-up window, and then double-click the active network and check the Duration time in the Network Status window.
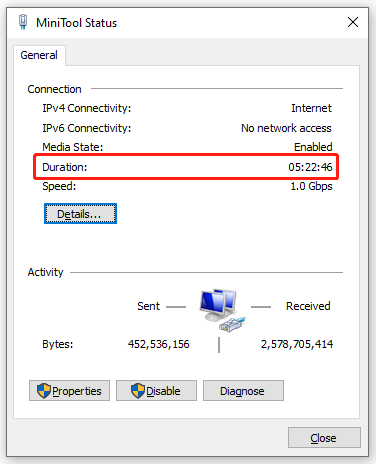 On Windows, you can search for Network Settings and select Advanced network settings, and expand the active network connection to check the Duration time.
# 3. Check Windows Uptime via CMD
CMD is a powerful Windows built-in command line tool that can be used to do many works, such as CMD rename files, CMD ping test, CMD list files, etc. There are different ways to check Windows uptime in Command Prompt.Way 1. Use WMIC1. Type cmd in the Search box, and then right-click the Command Prompt app and select Run as administrator.2. In the elevated Command Prompt window, type the following command and hit Enter to check the uptime command in Windows.wmic path Win32_OperatingSystem get LastBootUpTime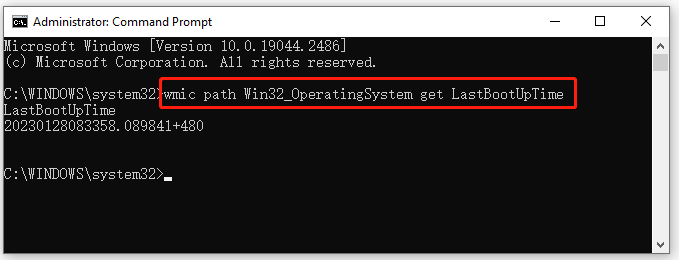 3. Now, you can check the LastBootUpTime: 089841+480. In my case, the Uptime can be broken down into the following sections. It means that my computer has been up and running since January 28, 2023, at 08:33 AM. Then you can deduce the uptime according to the information.Way 2. Use System Information UtilityTo check the uptime command Windows, open the Command Prompt window, type the following command, and hit Enter to get the last boot time of your computer. Then you can deduce the system uptime by subtracting the last boot time from your current time.systeminfo | find “System Boot Time:”
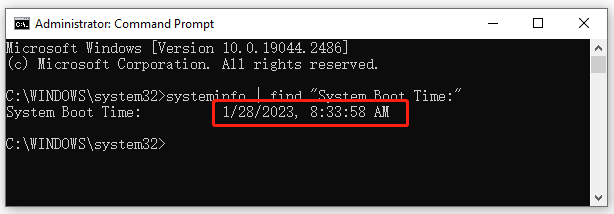 Way 3. Use Net Statistics CommandThe Net Statistics command can help you get the last boot time of your computer so that you can deduce the uptime command Windows. To do so, open the Command Prompt window and type the following command, and hit Enter.net statistics workstation
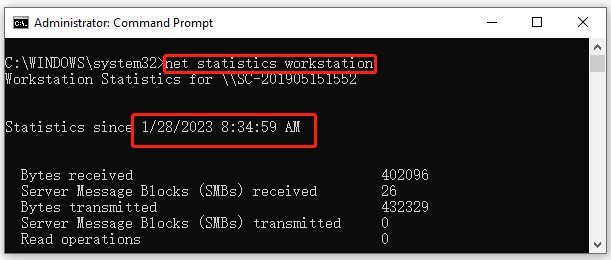
# 4. Check Windows Uptime via PowerShell
PowerShell is another powerful Windows tool like CMD that you can use to check the system uptime quickly. Here’s how to make PowerShell get uptime on Windows 10/11.Step 1. Right-click the Start button, select Windows PowerShell (Admin) from the context menu and click on Yes to confirm it.Step 2. In the elevated PowerShell window, type the following command and hit Enter to get the uptime of your computer. Then you will get the uptime information, including days, hours, minutes, seconds, etc.(get-date) – (gcim Win32_OperatingSystem).LastBootUpTime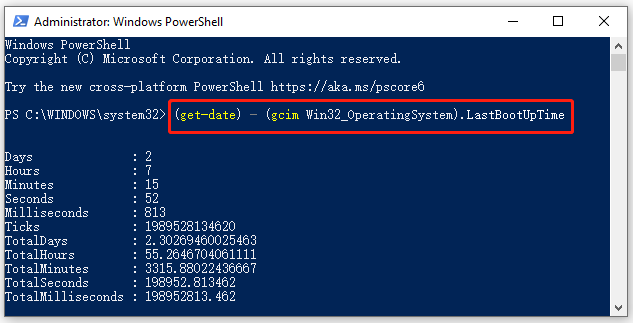 Further reading: If you enter some issues like file system corruption and low disk space on Windows 10/11, don’t worry. MiniTool Partition Wizard can help you fix them easily by checking file system errors, extending/resizing partitions, analyzing disk space, upgrading to a larger hard disk, etc.
![PowerShell Get Current Username on Windows 11/10/8/7 [Full Guide]](https://images.minitool.com/partitionwizard.com/images/uploads/2023/01/powershell-get-current-username-thumbnail.jpg)
User Comments :