If you download everything to one drive, the drive will run out of space very soon. However, it might cost you some time to move files to another drive. Fortunately, you can change the default save location in Windows 11. And this post from the MiniTool Partition Wizard website introduces how to do it.
Windows 11 is a new operating system released by Microsoft a few months ago. It is designed with a new outlook and some new features that previous Windows systems don’t have.
If you have upgraded to Windows 11, you might feel confused as the interface is different from Windows 10.
To help you get familiar with this new operating system, I provide some tutorials. And today, I will help you change the default save location in Windows 11. If your drives are running out of space, it is a good idea to change the location where files save to free up space.
And here are two methods:
- Method 1: change the default download location via Documents Properties.
- Method 2: change the default download location via Windows Settings.
Now, let’s see them one by one.
Change the Default Save Location in Windows 11 via Properties
You can change the default save location in Windows 11 by visiting the Properties of Downloads, Music, and more in File Explorer. You just need to:
Step 1: Press Windows Key + E to open File Explorer quickly.
Step 2: Right-click Downloads in File Explorer and select Properties in the pop-up menu.
Step 3: When you get the Downloads Properties window, switch to the Location tab and click the Move button.
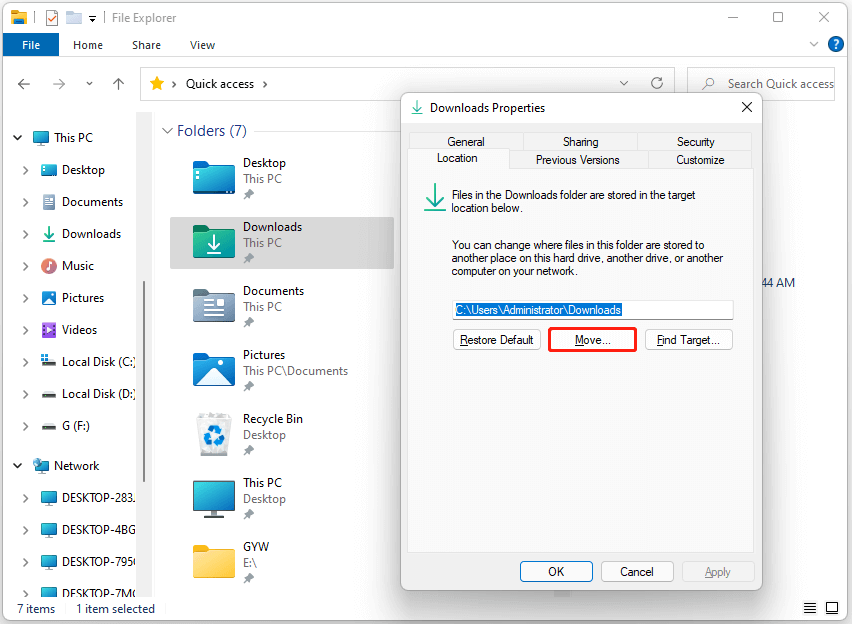
Step 4: In the pop-up window, select a folder on another drive to save downloaded files. Then click Apply > OK.
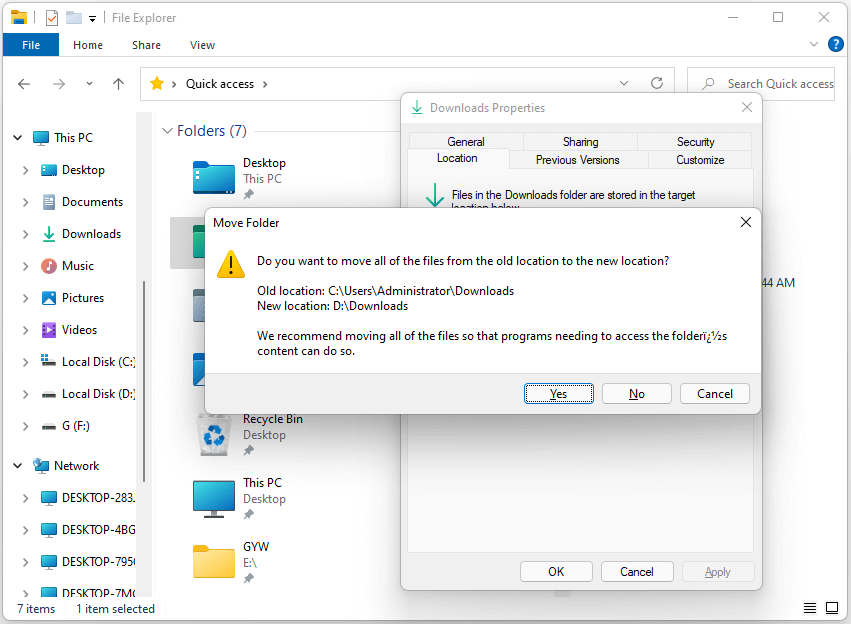
Step 5: In the pop-up window that asks you to move current files in Downloads to the new location, choose Yes or No according to your needs.
You can also repeat the steps above to move the locations of Desktop, Documents, Music, Pictures, and Videos to other drives if you want to.
![How to Find Disk Space on Windows 11 [3 Ways]](https://images.minitool.com/partitionwizard.com/images/uploads/2021/08/find-disk-space-on-windows-11-thumbnail.jpg)
Change the Default Save Location in Windows 11 via Settings
Another way to change the default download location is to change the settings. And you can set different types of files to be saved on different drives. Here are the detailed steps.
Step 1: Press Windows Key + I to open Windows Settings quickly.
Step 2: In the left pane, select System. In the right pane, click Storage.

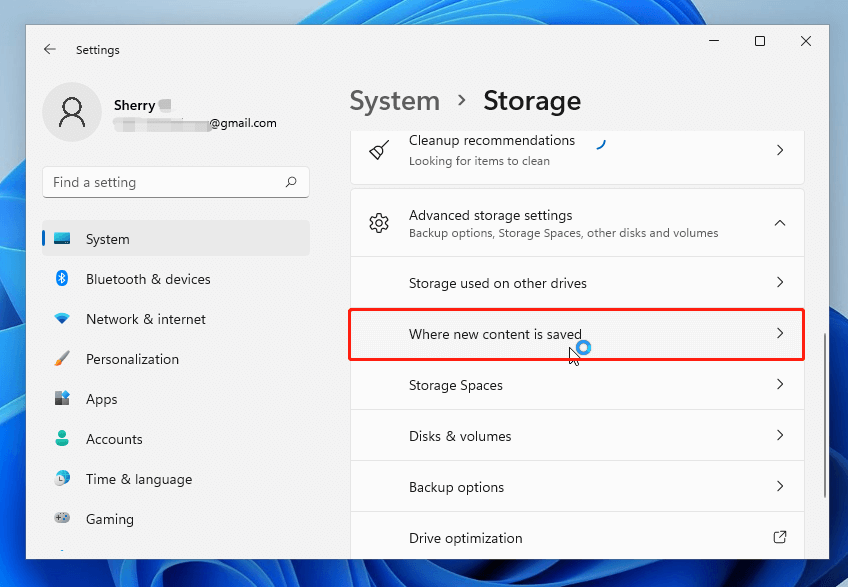
Step 3: On the following page, click Advanced storage settings > Where new content is saved.
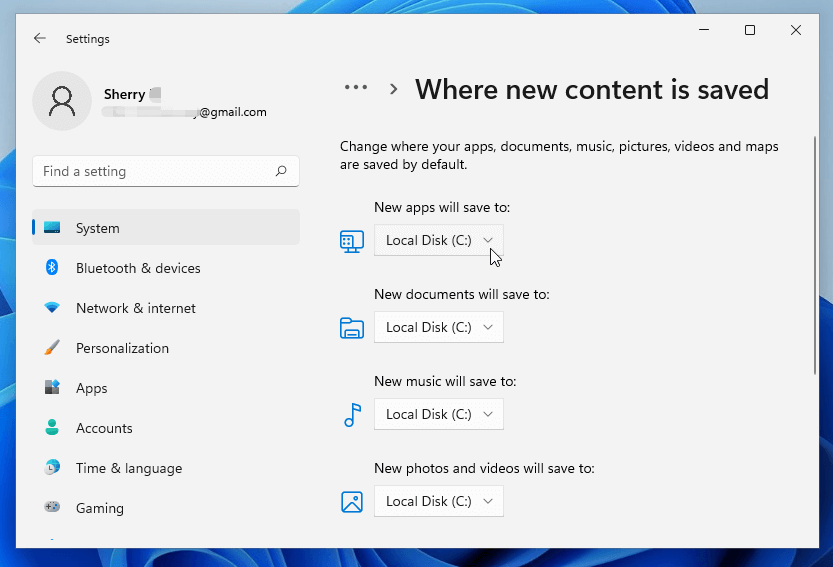
Step 4: Configure the drives to save different files. In this window, you can choose drives to save new apps, documents, music, photos, videos, movies TV shows, and offline maps. By default, the system drive (C drive) is selected. You can change the settings according to your needs.
Which method do you prefer? Now it is your turn to have a try. Hope this post can help you free up space on Windows 11.

User Comments :