If your PC is running on low disk space, you are likely to go through the C drive and check what files are taking disk space. Usually, to explore all files saved on the drive, you need to change the View settings of the Folder Options.
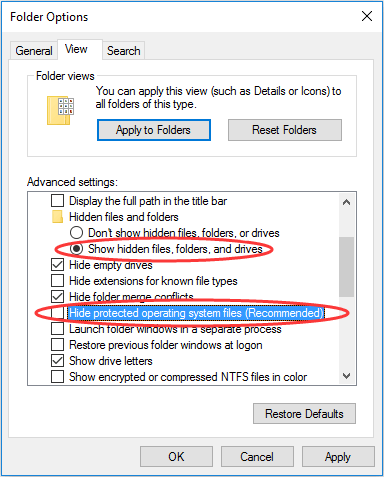
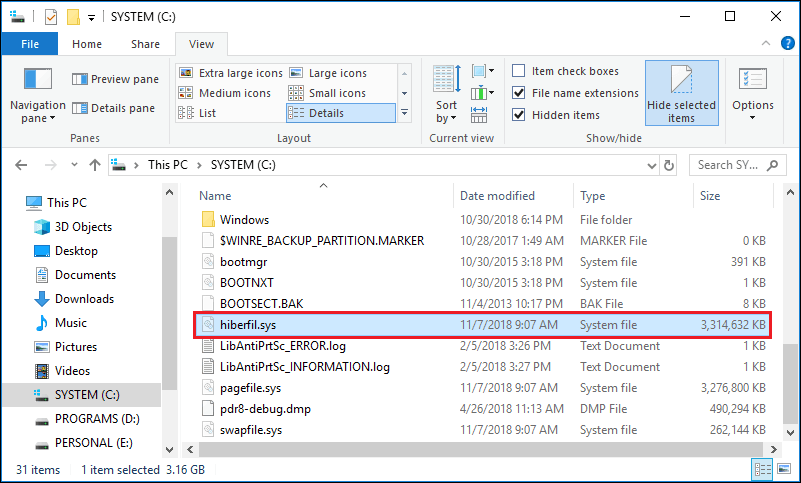
By selecting Show hidden files, folders, and drivers, unchecking Hide protected operating system files (Recommended), and oppressing OK, you will find a hiberfil.sys file in the root directory of the C drive, which usually takes up several GBs or even more disk space.
Do you know what hiberfil.sys file is and is it possible for Windows 10 hibernate off? We show you all.
About Hibernation File
In fact, hiberfil.sys is a file created by OS (operating system) when computer goes into Hibernation Mode. To explain, we need to mention another term named Sleep Mode.
Usually, when you are to leave your PC for a short while, you may put your PC into Sleep Mode. Sleep Mode saves your current session to RAM and then puts Windows in a low-power state. When you get back, you can instantly reach where you left off.
Different from Sleep Mode,Hibernation Mode goes one step further. Instead of saving your session in RAM (which will be lost without power supply), hibernation saves it to hard drive then shuts down the desktop. With hibernation, you could resume right where you left off. When the desktop is powered on, your sessions will be transferred to the RAM.
Hibernation is more frequently used if you are going to leave for a longer time and you are worried about your machine’s battery dying.
How to Delete Hibernation File Windows 10
You need to know that Windows 10 disable hibernation won’t be completed if you just remove hibernation file located in the C drive, for Windows will recreate it later unless the hibernation mode is disabled. So the issue is how to disable hibernation mode in Windows 10 in fact.
Well, how to disable hibernation file to prevent it from forming again? To delete hiberfil.sys Windows 10, you can follow the guideline here:
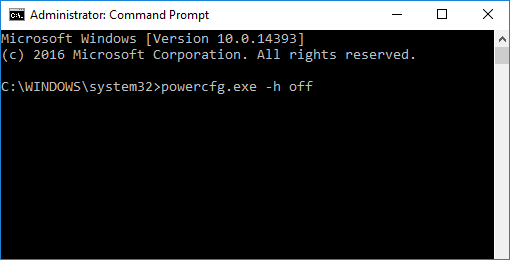
- Run Command Prompt as administrator. Then in the command line window, type powercfg.exe -h off and run it by pressing the Enter key.
- Windows will disable hibernation Windows 10 as well as delete the hiberfil.sys file automatically and you won’t see Hibernate as an option in Power Options. By doing this, you get some free space back to your C drive.
Further Reading: How to Enable Hibernate
In case you want to enable the hibernation file someday, here is the way to enable hibernation file in Windows 10 for your reference.
Run Command Prompt as administrator. Then in the command line window, run powercfg.exe -h on instead.
OR you can follow the next approach provided that you haven’t run the command for Windows 10 disable hibernation:
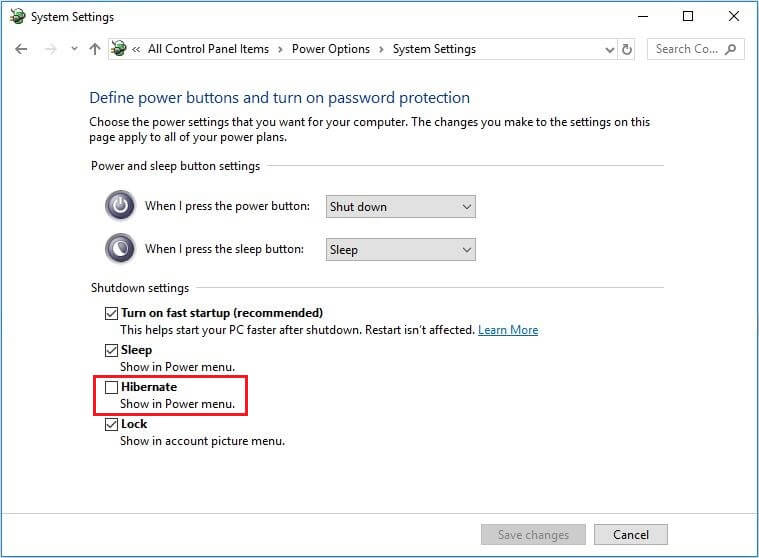
- At the Cortana search box, type power & sleep settings and select the best match from the search result.
- Select Additional power settings from the right panel -> select Choose what the power buttons does from the left panel -> click change settings that are currently unavailable from the upper part -> check Hibernate box.
Should You Delete Hibernation File Windows 10 Really?
Although it is too easy to remove hibernation file in Windows, do we really need to delete this file?
As far as we can concern, the only need to delete hibernation file is to save disk space. If your hard drive is small, and the hibernation files take too much disk space from the C drive, disabling hibernation file makes sense.
But if your hard drive has plenty of disk space, there is no need to disable hibernation. Just give Windows 10 hibernate a try, you will definitely find that your PC boots faster and you are able to return to the state when you left last time just in one minute.
Sounds good? Want to give it a hint but are bothered by the stretched hard drive space? Here are some simple solutions that may help you enjoy the benefit brought by Windows 10 hibernate mode.
How to Enable Hibernation with Low Disk Space
As you know, by default the hibernation file is saved on the root directory of the C drive. So generally speaking, as long as the C drive can obtain more disk space, you are able to enjoy the wonderful experience brought by this feature without bothered by slow computer performance.
But if your hard drive is unable to supply more free space to enable Hibernation Mode, you have to find a way to allocate more free space to the C drive. But how?
Don’t worry! You have multiple options! Here we just show you the most efficient one, which is to use a professional partition manager.
Remove Unnecessary Files and Rarely Used Applications
This is not a good suggestion in fact. Usually, we would not save personal files and installations on the system drive, so the space released by deleting such files is relatively small. However, it’s better than nothing.
- Open the C drive and then check the non-system files carefully, delete the ones that are unnecessary.
- Search Programs and Features and open it. Then scroll down to check each program and think twice if it is no longer needed. Right-click the one to be abandoned and click Uninstall.
Extend the C Drive
MiniTool Partition Wizard enjoys great reputation all around the world and is regarded as the best partition manager for Windows home users. It has rich features and is rather easy to operate. To extend the C drive to keep Windows 10 hibernation file, its Extend Partition feature helps you get out of the dilemma you are getting stuck with.
Click this button to get MiniTool Partition Wizard Pro Edition, install it on computer and follow the guidelines below:
Step 1: Run MiniTool Partition Wizard to get its main interface. Then choose Bootable Media from the menu bar, and then follow the tutorials below to finish the preparatory job.
- How to Build Boot CD/DVD Discs and Boot Flash Drive with Bootable Media Builder?
- How to Boot from Burned MiniTool Bootable CD/DVD Discs or USB Flash Drive?
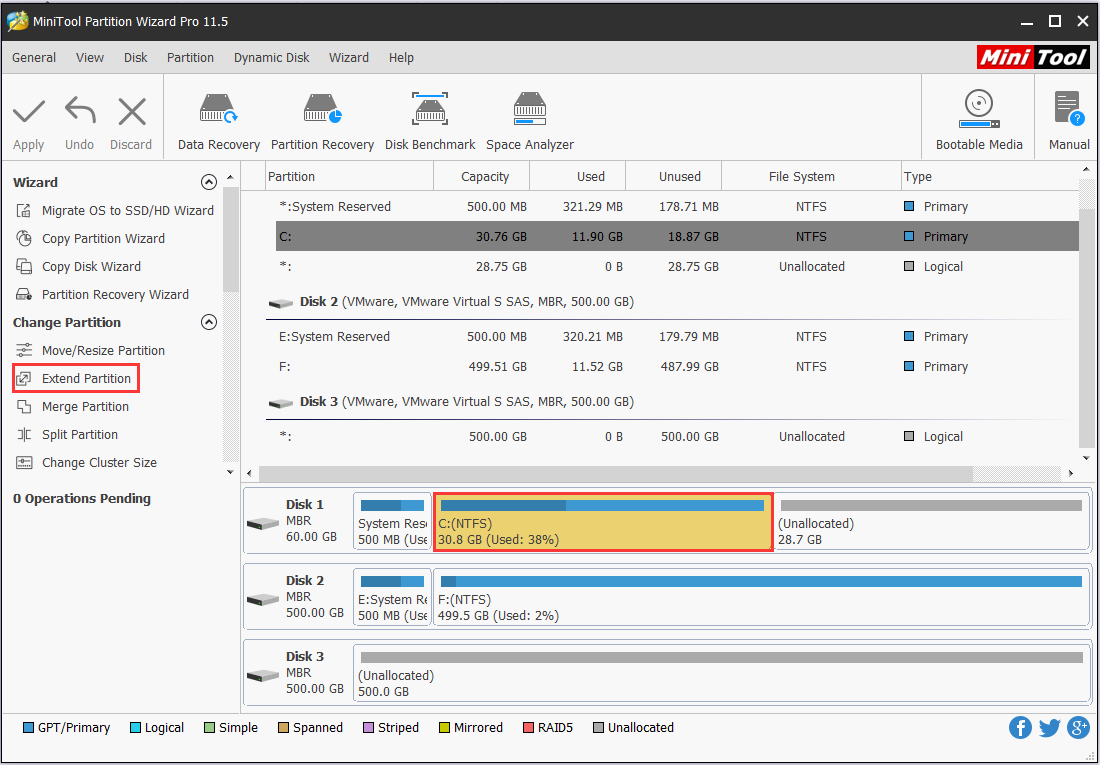
Step 2: In the bootable Partition Wizard, please focus on the right panel which shows your disk map, select the C drive and then choose Extend Partition feature from the action panel.
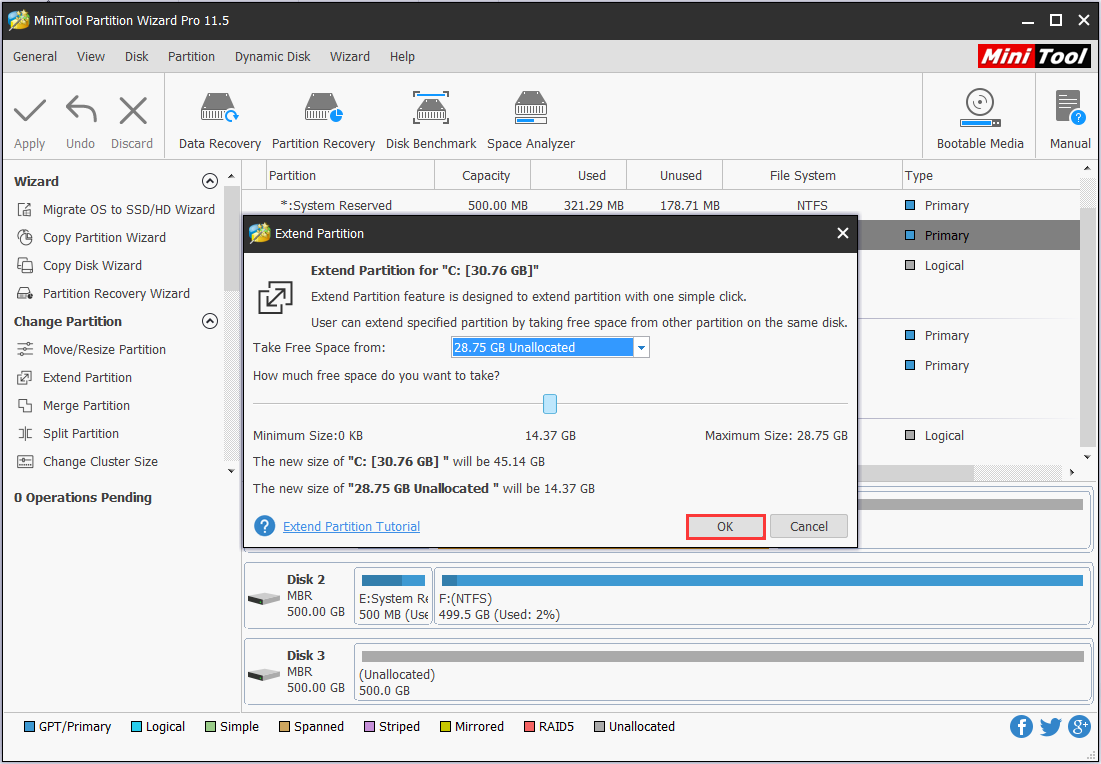
Step 3: A pop-up window appears on which you are able to select a partition or unallocated space (by dropping down the partition box) to take some free space and add it to the C drive. Next, slide the bar leftwards or rightwards to determine how much free space you want. Then click the OK button.
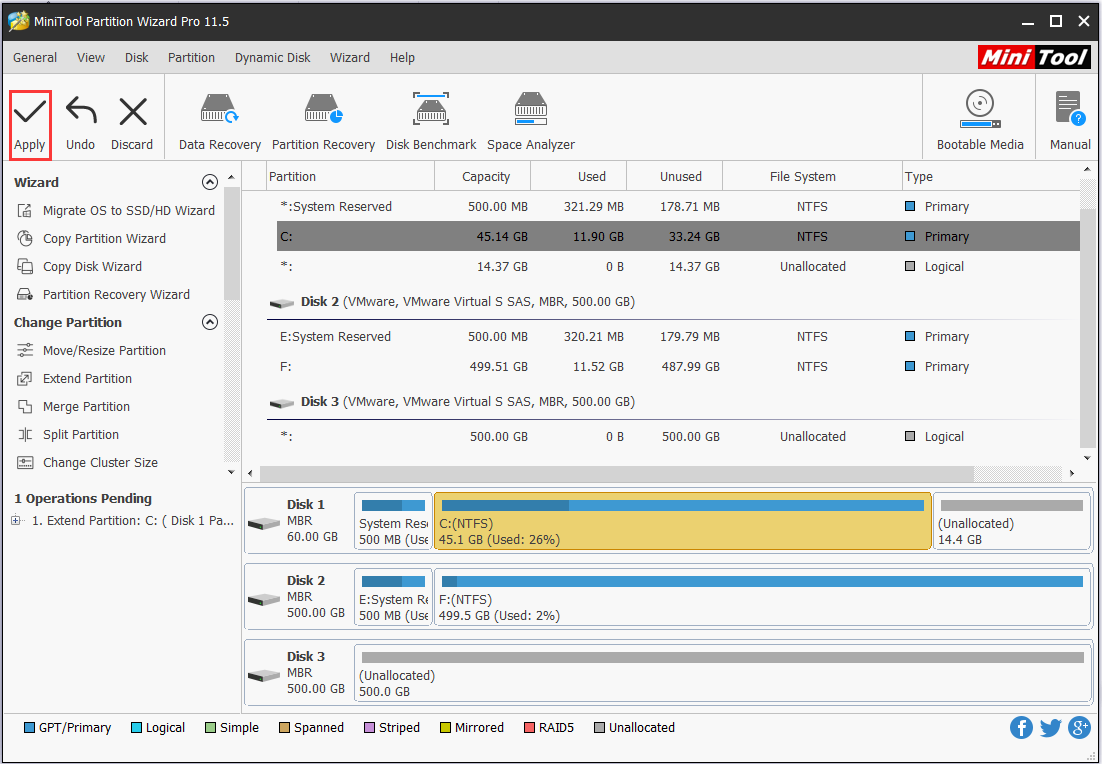
Step 4: When you are back to the main interface, you can preview the changes to be made. Obviously, the disk space of the C drive becomes larger. To put this change into effect, you still need to click the Apply button located on the top left corner.
Upgrade Hard Drive
If you are planning to upgrade the current small hard drive to a larger one, you have another choice: perform disk cloning.
This is the best resolution in our opinion. How do we say this? Well, considering you are keeping saving data to the hard drive continuously as time goes by, a hard drive with larger disk space is absolutely the better choice.
Here is how to upgrade hard drive from a small one to a larger one with all data transferred. You may do the job under the Windows operating system or finish it in the bootable edition.
Preparatory job:
If you are a desktop user, connect the larger drive to your machine via SATA or another interface that matches. If you are a laptop user, connect the larger drive via SATA-to-USB adaptor.
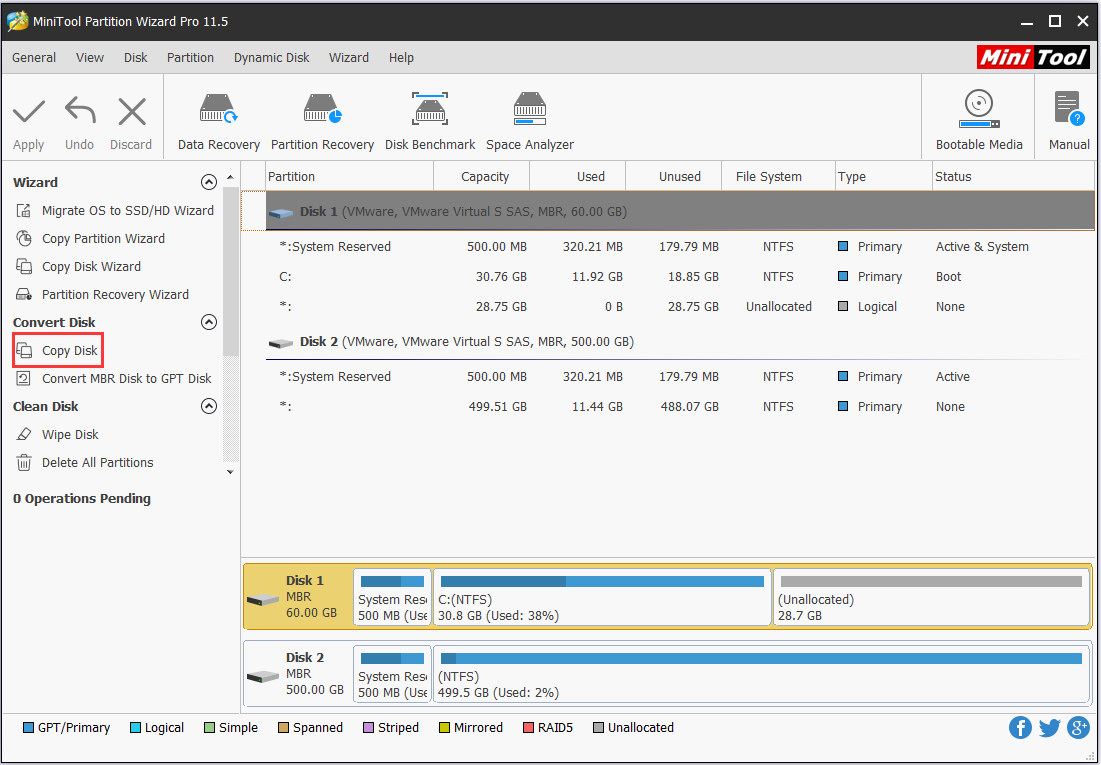
Step 1: Run MiniTool Partition Wizard. At the main interface, select the system disk and choose Copy from the context menu in the left.
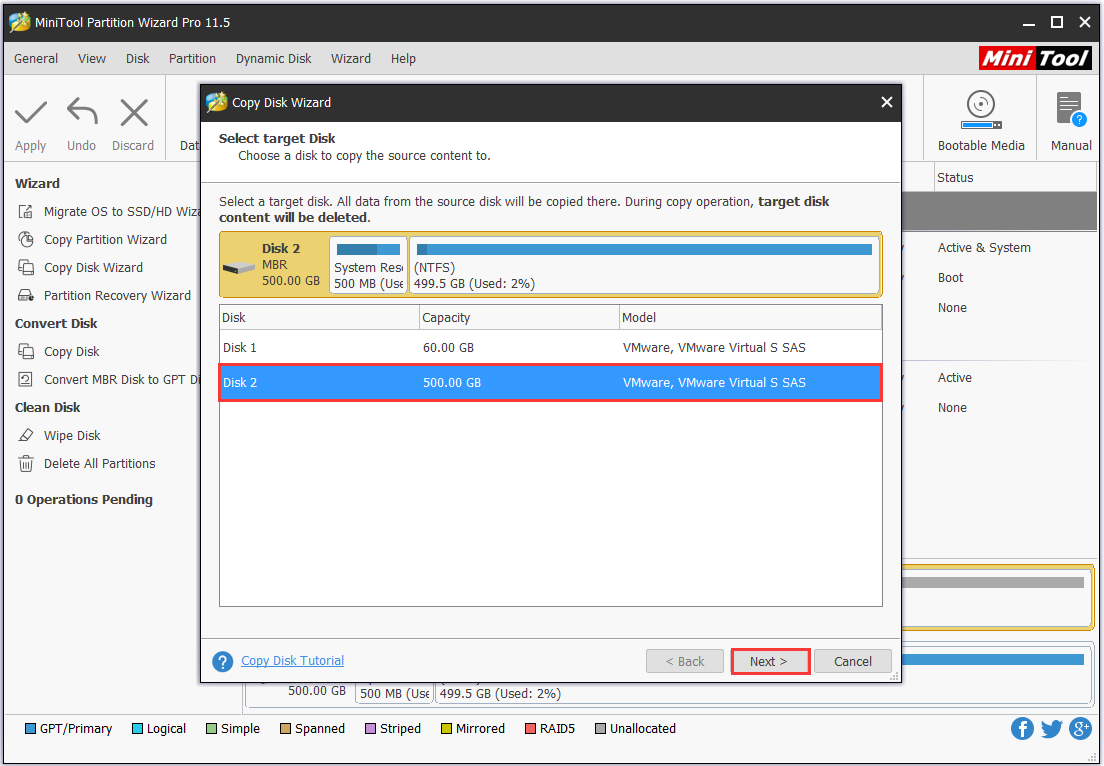
Step 2: Next, in the Copy Disk Wizard, you are expected to select a target disk. Here the larger drive should be selected from the list. But note that the drive will be cleaned during the copying process. So be sure the drive is ready for the copy. Otherwise, transfer data to a safe location first. Click Next to go on.
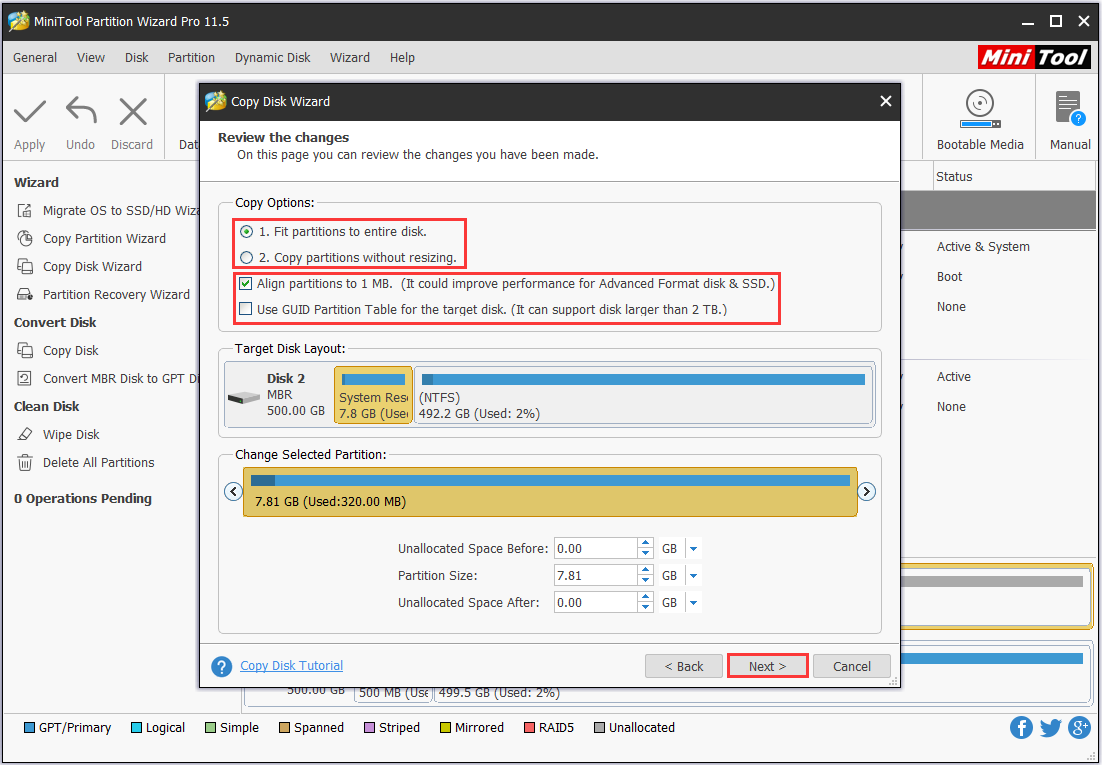
Step 3: Choose the copy options. Here you will see form copy options listed in the panel. No matter you choose “copy partition without resize” or “fit partitions to entire disk”, you are able to resize the C drive by dragging the slider bar in the lower part. Then click Next to go on.
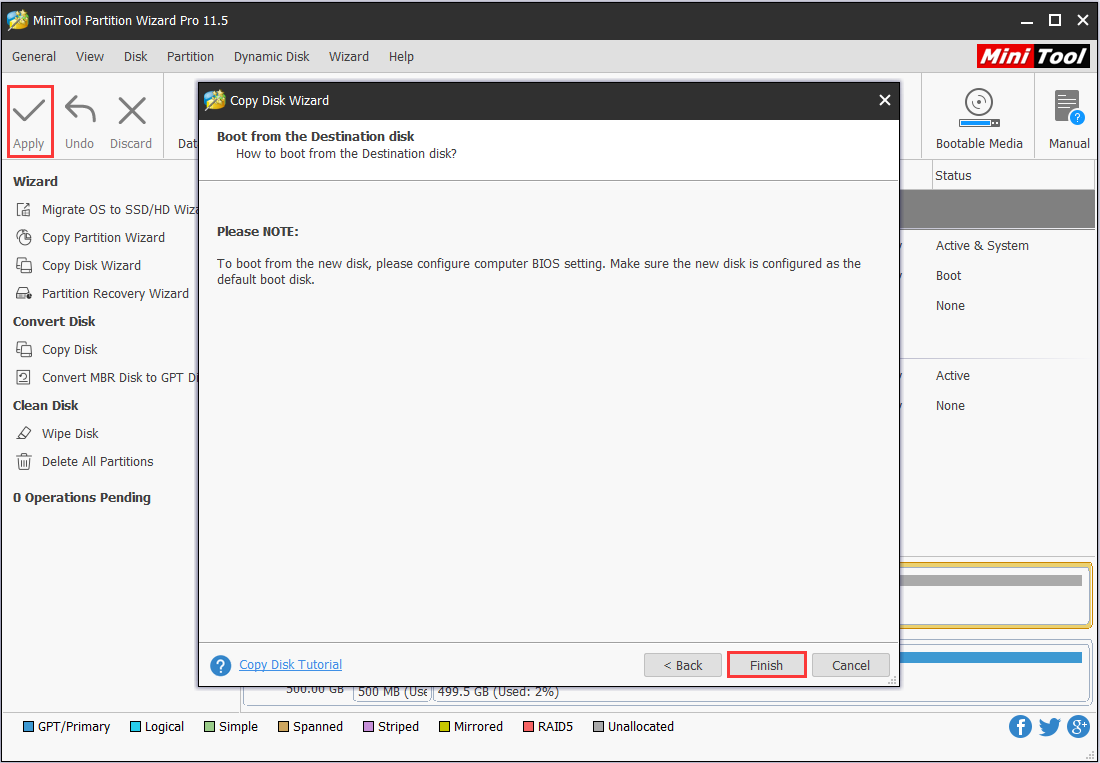
Step 4: The next page tells you how to boot from the target disk. Please keep the information in mind and the press the Finish button.Back to the main interface, it is time to preview the copy effect and execute the copy process by hitting Apply.
Step 5: When you are asked to allow the restart, save all the tasks carried out on the other applications and then close these programs. Later please allow MiniTool Partition Wizard to take the restart. After doing these, you just need to wait patiently until it finishes its job.
Step 6: When all is done, shut down your PC, cut off the power supply, take the smaller drive out (for laptop users only), connect the larger drive to PC, get power supply, and power on your PC.
You might also be interested in: Hard Drive Is Full without Reason? Solutions Are Here.
Bottom Line
In this post, we show you what hibernation file is and how to delete Windows 10 hibernation file, preventing it from generating again. Whereas, if you are able to allocate more disk space for the C drive, you are suggested to keeping this file running normally.
Now it is your turn to have a try. Does the way described in this post really help delete hiberfil.sys Windows 10? Please leave your comment in the following area. We want to hear from you. If you encounter any issue while using MiniTool software, don’t hesitate to contact [email protected].
About The Author

Position: Columnist
Rodin is an enthusiastic IT writer focusing on Windows trends, disk partition management and data recovery. She loves to write and share her idea about the useful tips and tricks on personal computers' maintenance. If you are looking for methods to improve your computer performance, manage hard drives and recover data from different devices, Rodin can provide reliable solutions for data management.
User Comments :