On Windows, free space is the amount of unused storage capacity on a hard drive or other storage device. It represents the available storage that can be used to save new files, install programs, or store operating system updates.
However, some users reported that their Windows was showing wrong hard disk free space. You can find this issue in these scenarios:
When you check your Windows PC’s hard drive for available space and find 20GB free, you try to install an app that uses 10GB, only to receive a “low disk space” error.
Or, you delete several large files, refresh File Explorer, and find that the available space has barely changed.
This article analyzes the possible reasons for Windows showing wrong hard disk free space and offers several solutions to fix it.
Why Is Windows Showing Wrong Hard Disk Free Space?
There are many factors that can cause this issue. Understanding the possible causes can help you find the best solution. Here are the common causes of this problem:
#1. Unit discrepancy
Hard drive manufacturers use the decimal system for capacity labeling, where 1 GB = 1,000,000,000 bytes. However, Windows uses the binary system for storage calculations. In binary, 1 GB = 1,073,741,824 bytes. This is due to decimal vs binary calculation.
This difference results in a smaller reported capacity than labeled on the drive. A 1TB (decimal) drive, when measured by Windows, becomes approximately 931GB (binary). It’s a unit conversion difference.
#2. System Restore points
System restore points and other system files can take up a significant amount of storage space.
#3. Unallocated space
After formatting, some space might be unallocated, meaning Windows hasn’t created a partition to use it.
#4. System and recovery partitions
Windows creates hidden partitions for the operating system and recovery, consuming some space.
#5. System maintenance bug
System maintenance errors can also cause this error and result in incorrect free space estimates.
#6. Rogue trash-bin folder
In some cases, a damaged or malfunctioning Recycle Bin might not delete files correctly, leaving them in hidden folders and taking up space. This can affect File Explorer’s reporting capabilities.
#7. File system errors on the hard disk
Damage or errors, such as corrupted sectors or metadata errors in the hard disk file system, can lead to inaccurate readings.
How to Fix Wrong Hard Disk Space on Windows?
After learning the possible reasons for this issue, you can try the following solutions one by one until the issue is solved.
Method 1. Delete Temporary Files
The built-in Disk Cleanup tool can help clear system temporary files that are not normally accessible.
Step 1. Type Disk Clean-up in the Windows search bar and run it.
Step 2. Choose the drive you want to clean and select OK.
Step 3. Click Clean up system files for a more thorough scan.
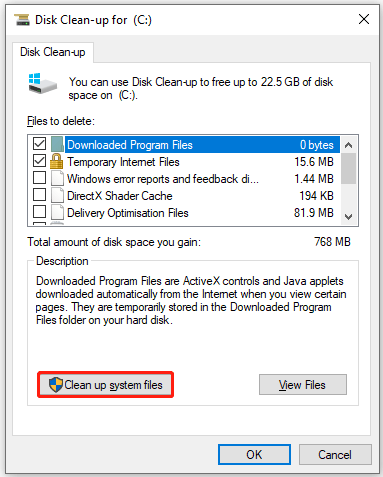
Step 4. Check the boxes next to the types of files to delete, such as temporary files and previous Windows installation files. Then click OK to delete the files.
Method 2. Delete Previous System Restore Points
Windows creates system restore points to help recover from system failures, but they can consume a large amount of storage.
In this case, deleting previous system restore points might resolve the issue of incorrect hard disk free space. Here is the guide:
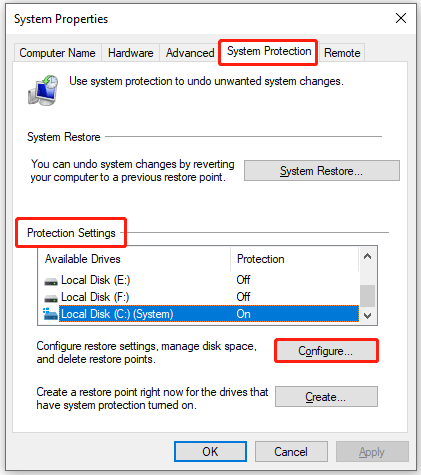
Step 1. Search for Create a restore point and open the System Properties window.
Step 2. Under the System Protection tab, in the Protection Settings section, scroll down to find your Windows system drive and click the Configure button.
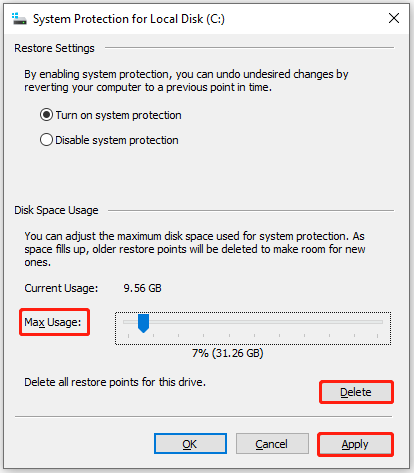
Step 3. In the new pop-up window, drag the blue slider to reduce the Max Usage allocated for restore points and ensure it is not set above 10%. If you have a 1 TB HDD, that’s more than enough.
Step 4. Click Delete to remove all old restore points for this drive.
Step 5. Click Apply to save the changes, and then restart your computer.
Step 6. Then you will receive a warning window saying, “This will delete all restore points on this drive. This might include older system image backups.” Click Continue to go on.
Method 3. Repair File System Corruption
File system corruption can cause Windows to report disk usage incorrectly. Running a disk error check can fix these inconsistencies.
There are two free tools, CHKDSK and MiniTool Partition Wizard, to help you check and fix file system errors. Here, I strongly recommend you use MiniTool Partition Wizard. This free partition manager has a simple operation interface and is easy to use
Option 1. Use CHKDSK
CHKDSK is a command-line tool that can help you detect and repair file system errors on your hard drive. Follow the steps below to perform the task:
Step 1. Type cmd in the Search bar, right-click Command Prompt, and choose Run as administrator.
Step 2. Once Command Prompt launches, type chkdsk x: /f /r and press Enter. Replace “x” with the letter of your drive.
- /f fixes errors found on the disk.
- /r locates bad sectors on the disk, recovers readable information from them, and marks them as bad.

![Windows Can’t Check the Disk While It’s in Use [Solved]](https://images.minitool.com/partitionwizard.com/images/uploads/2023/07/windows-cant-check-the-disk-while-its-in-use-thumbnail.jpg)
Option 2. Use MiniTool Partition Wizard
MiniTool Partition Wizard, a free professional partition manager, can help you check and fix file system errors on the disk. So, it is often used to perform HDD/SSD health checks.
Now, download and install MiniTool Partition Wizard on your PC. Then run it to check file system errors.
MiniTool Partition Wizard FreeClick to Download100%Clean & Safe
Step 1. Launch this free partition manager to enter its main interface.
Step 2. Right-click the drive and select Check File System.

Step 3. In the pop-up window, choose the Check & fix detected errors option and click Start.

It is a multifunctional tool, apart from being able to check file system errors, it is also skilled in converting file systems without data loss (NTFS to FAT32, and vice versa), cloning a hard drive, migrating an OS to SSD/HDD, recovering data from a hard drive, etc.
Method 4. Use Disk Management for Unallocated Space
If your drive is reporting the wrong hard disk free space, you may have unallocated space that isn’t yet assigned to a partition. You can use Disk Management or MiniTool Partition Wizard to create a new partition or add it to an existing one.
Option 1. Use Disk Management
Disk Management is the Windows built-in tool. It can help you perform some basic disk and partition operations, such as creating/formatting/deleting partitions.
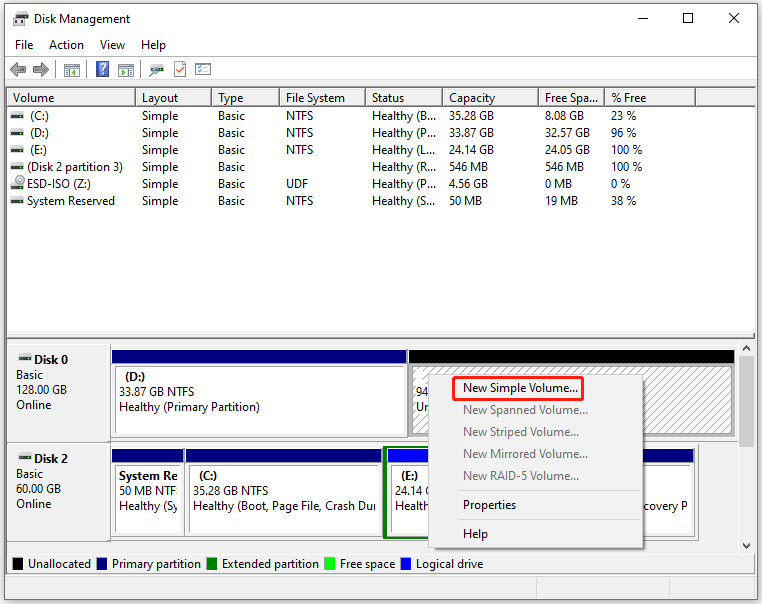
Step 1. Right-click the Start button and select Disk Management.
Step 2. Look for any unallocated space on your drive. Then choose a method to do:
Create a new partition
- Right-click unallocated space and select New Simple Volume.
- Follow the wizard to set the partition size, drive letter, and format for the new partition.
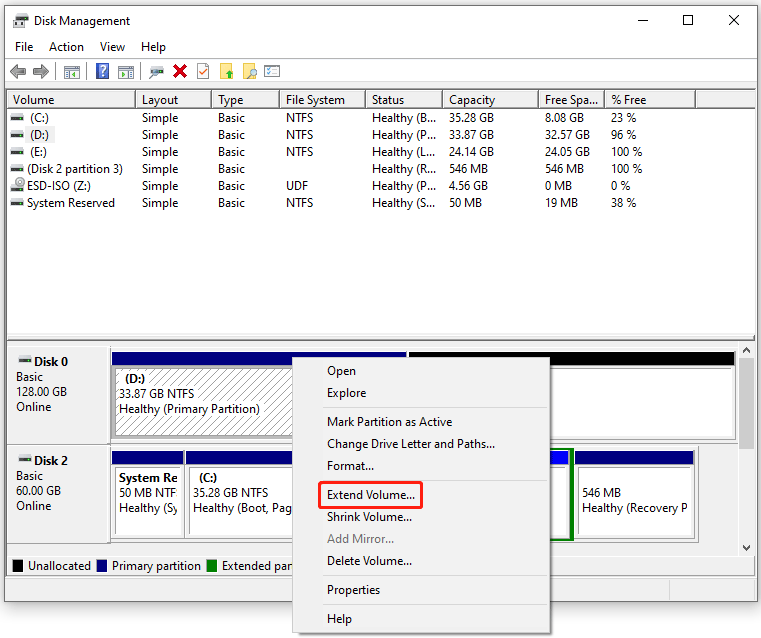
Extend an existing partition
- Right-click an existing partition next to the unallocated space and select Extend Volume.
- Follow the wizard to add the unallocated space to an existing one.
Option 2. Use MiniTool Partition Wizard
You can also use MiniTool Partition Wizard to create a new partition or extend a partition. It is more powerful than Disk Management. Simply follow the steps below:
MiniTool Partition Wizard FreeClick to Download100%Clean & Safe
Create a new partition
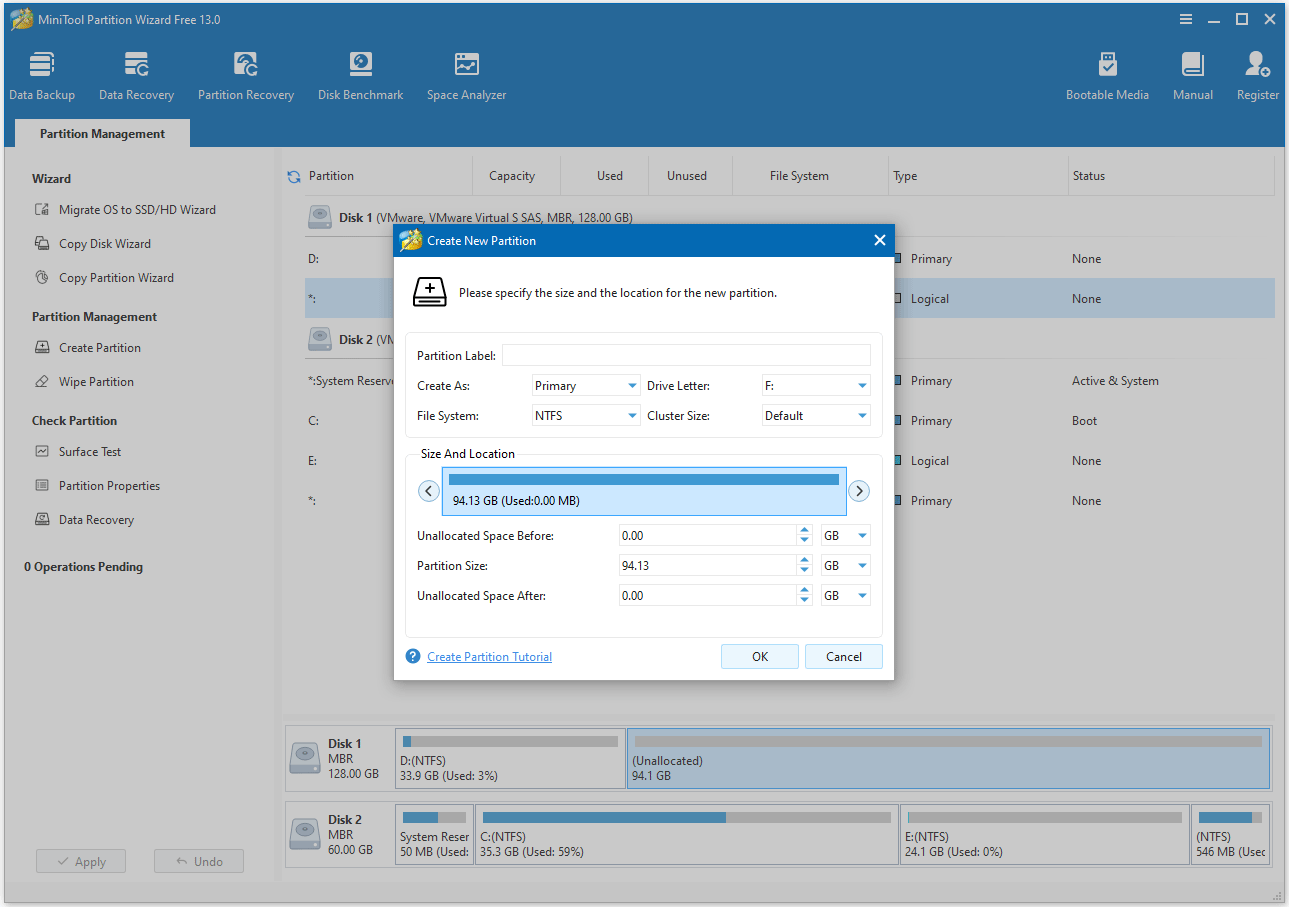
Step 1. In the MiniTool Partition Wizard’s main interface, right-click the unallocated space and choose Create.

Step 2. A dialog box will appear, and you can configure its settings. After that, click OK to go back to the main interface.
- Label: Enter a name for the new partition.
- Partition Type: Choose between Primary, Extended, or Logical.
- Drive Letter: Assign a drive letter for the new partition.
- File System: Select a file system, such as NTFS, FAT32, or exFAT.
- Cluster Size: Adjust the cluster size if needed.
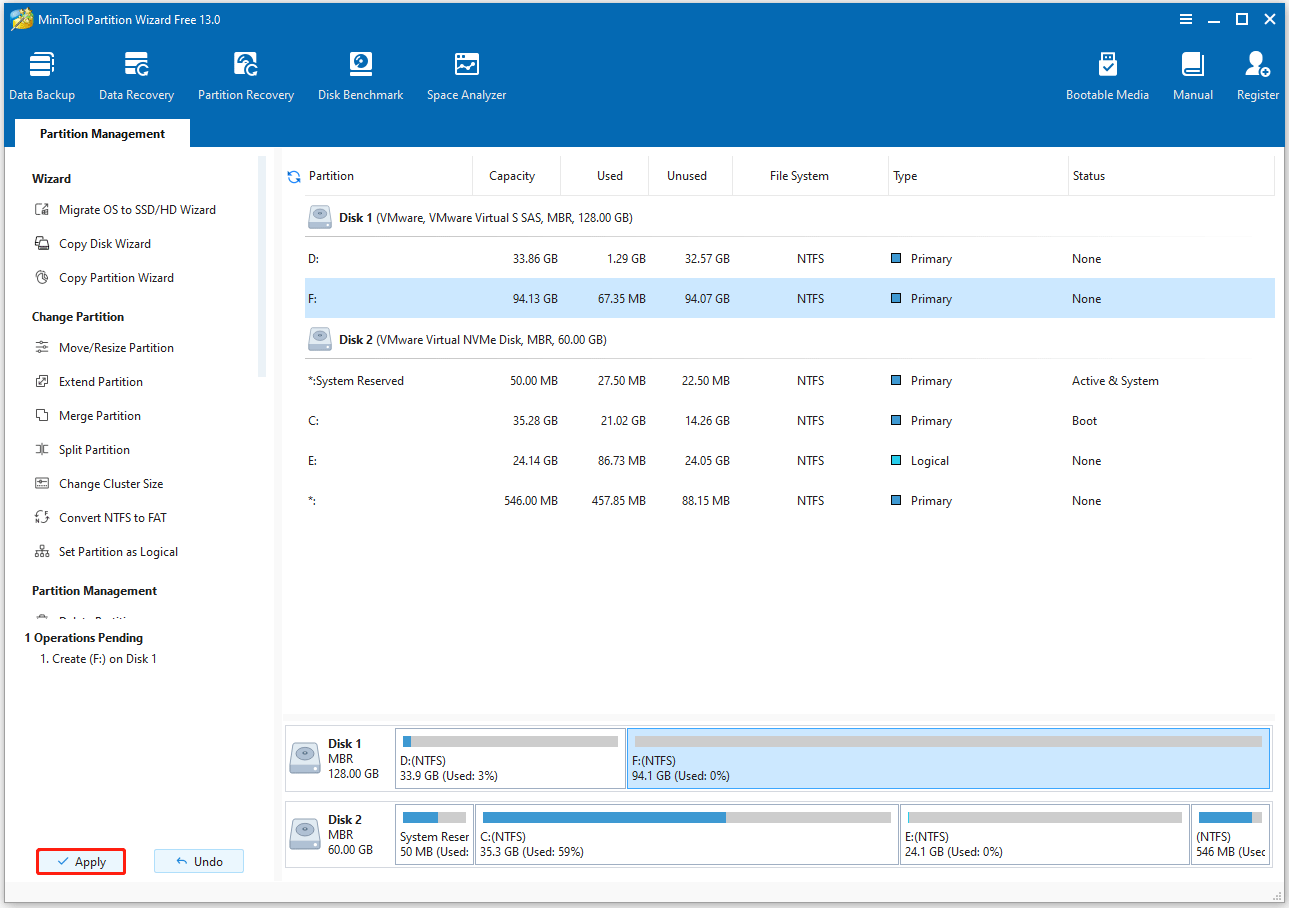
Step 3. Now, you can preview a new partition that will be created. Click Apply to confirm the creation.
Extend a partition
Compared with Disk Management, MiniTool Partition Wizard can extend a partition to non-contiguous unallocated space.
This free partition manager can also extend both FAT32 partitions and NTFS partitions, whether there is unallocated space on the disk or not. This is what Disk Management cannot do.
Now, let’s add an unallocated space to an existing partition using MiniTool Partition Wizard.
Step 1. Right-click the existing partition and choose Extend.
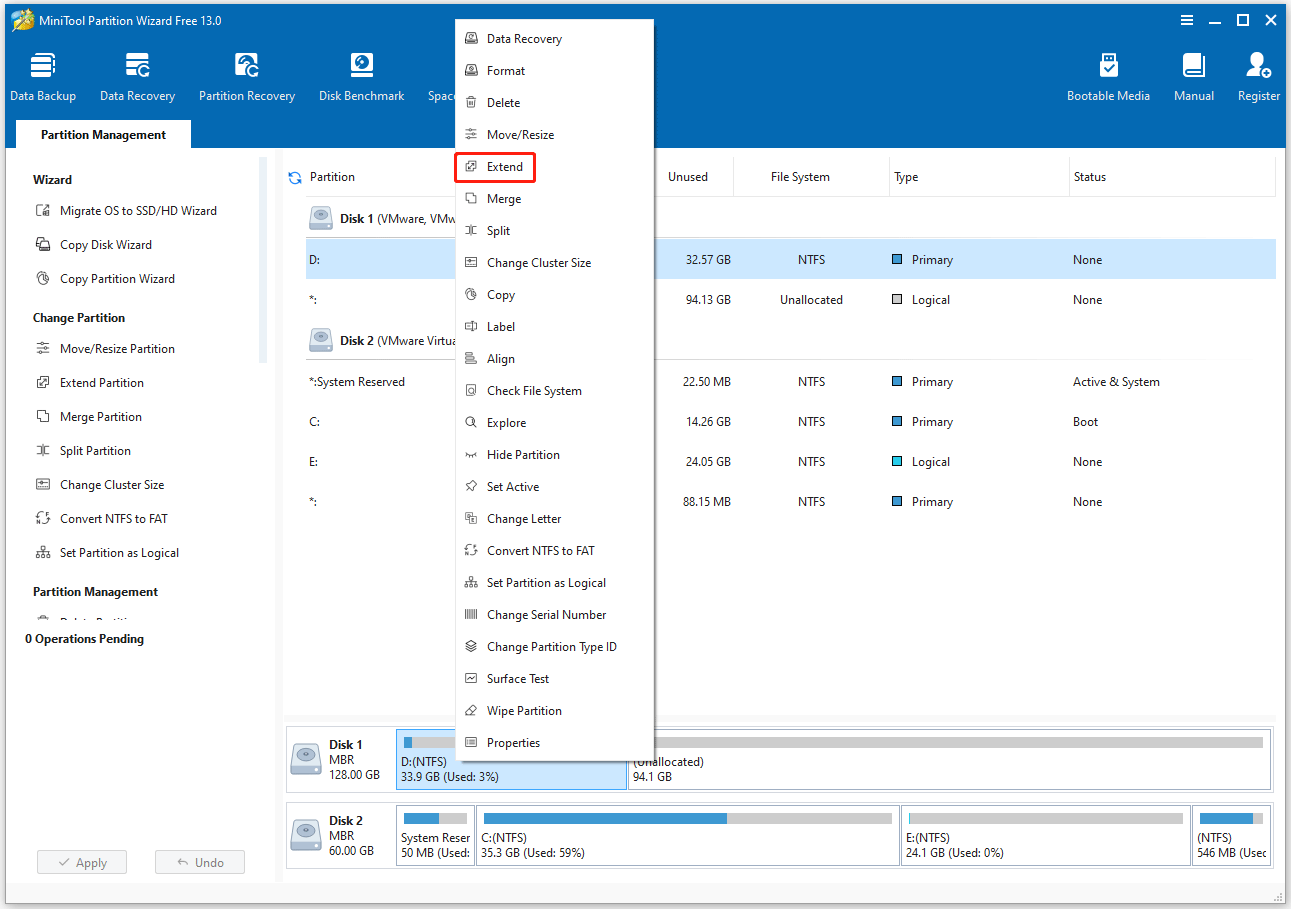
Step 2. Open the drop-down list of Take Free Space from and choose the unallocated space to take. Then you can drag the slider handle rightwards to take full space. After that, click OK to continue.
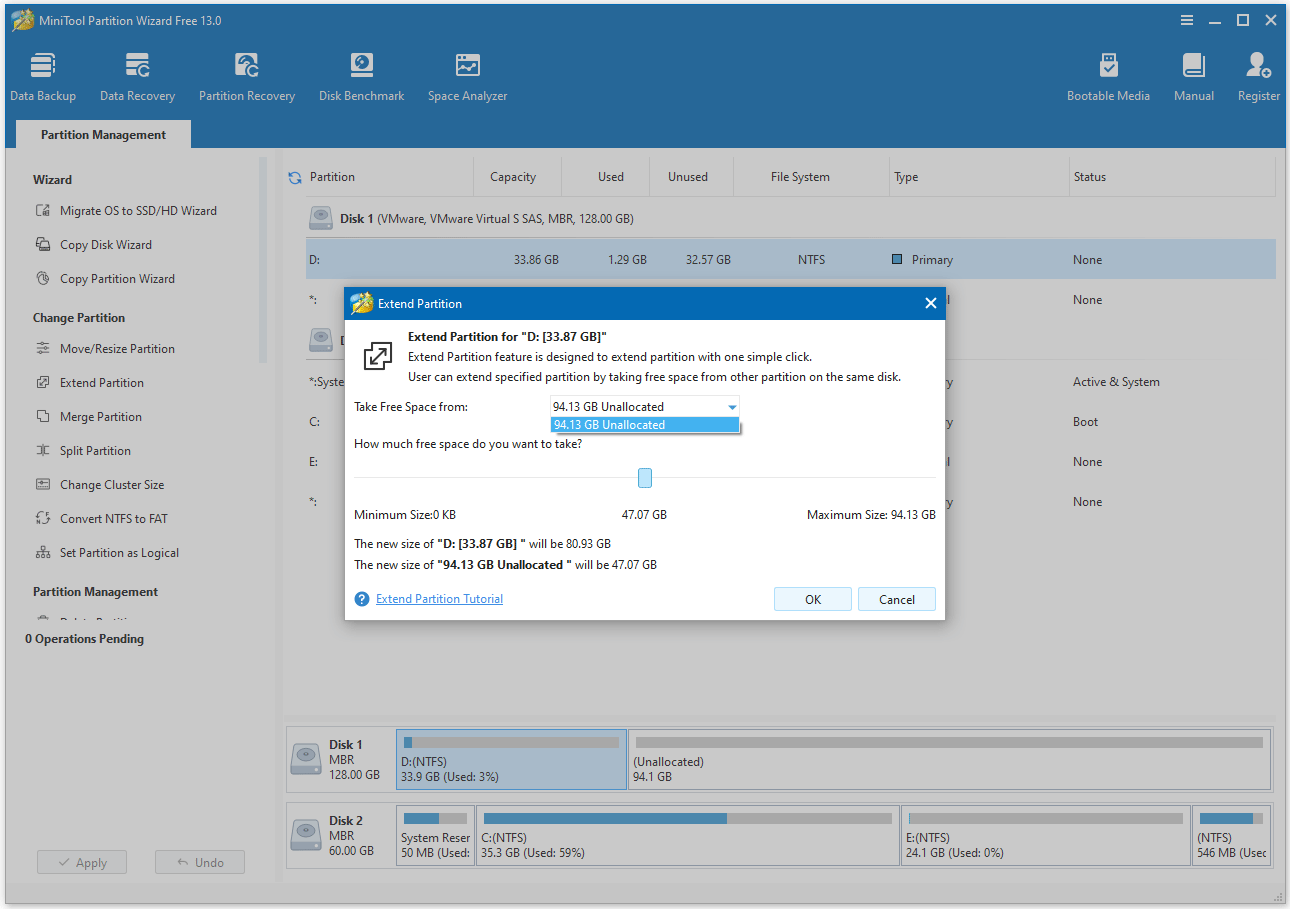
Step 3. Now, you can see the target partition is extended. Then click Apply to execute the changes.

Method 5. Run the System Maintenance Troubleshooter
If this issue is due to a Windows failure, this troubleshooter should be able to identify the inconsistencies and fix the problem automatically. Here is the complete guide you can follow:
Step 1. Type Control Panel in the search box and open it.
Step 2. In the Control Panel window, scroll down to find Troubleshooting and click it. Then click System and Security.
Step 3. Now, right-click System Maintenance and choose Run as administrator.

Step 4. In the pop-up window, click Advanced and select Apply repairs automatically. Then click Next to proceed to the next section.
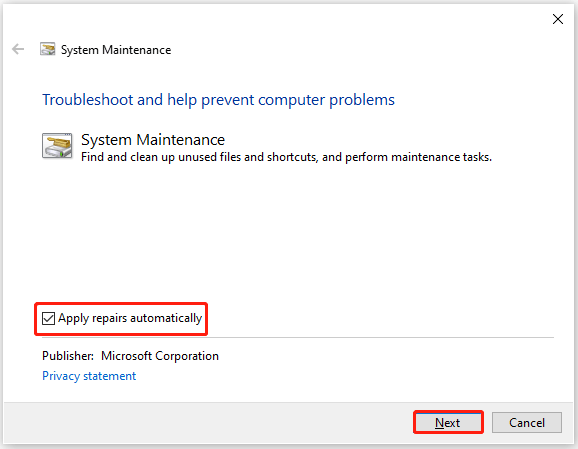
Step 5. Wait for the utility to finish the analysis for the inconsistencies related to free space. If a recommended fix is found, click Apply on the next prompt and wait for the repair strategy to complete.
After the process is complete, restart your computer and check to see if the issue has been resolved.
Method 6. Delete the Rogue Trash-bin Folders
A corrupted Recycle Bin can still hold deleted files, showing the wrong hard disk free space. In this case, you can try deleting the rogue trash bin folder to resolve this issue. Here is the guide:
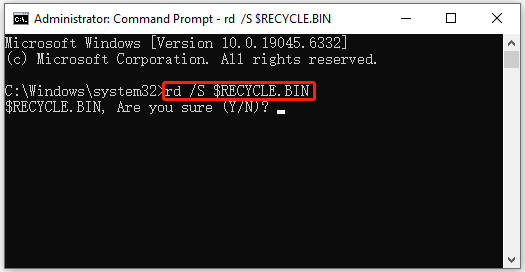
Step 1. Run Command Prompt as administrator again.
Step 2. Type the rd /s $RECYCLE.BIN command and press Enter to execute the deletion of the $RECYCLE.BIN folder.
- “rd” stands for remove directory.
- “/s” removes all subdirectories and files within the directory.
Step 3. When prompted with the message “Are you sure?”, type Y and Press Enter to confirm.
Method 7. Update Windows 10 to the Latest Version
If you’re using Windows 10 version 1803 or earlier, your system likely has an Explorer.exe bug. This causes File Explorer to fail to correctly calculate the size of folders, leading to incorrect hard disk free space calculations.
In this case, you should be able to resolve the issue by updating to the latest Windows version. The steps are as follows:
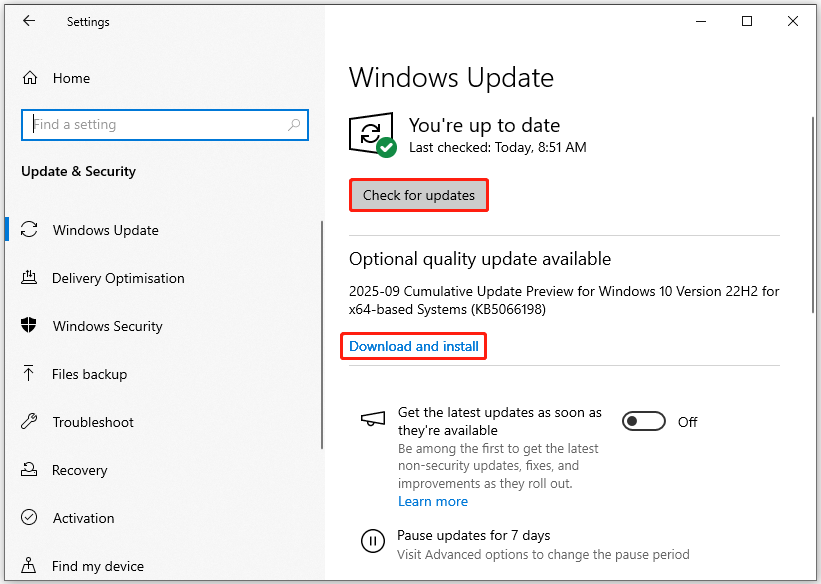
Step 1. Right-click Start and choose Settings.
Step 2. Go to Update & Security > Windows Update.
Step 3. Click the Check for updates button to see if any updates are available for your device.
Step 4. If updates are found, click Download and install. Then follow the on-screen prompts and restart your computer when prompted to complete the installation.
Method 8. Use a Space Analyzer to Identify the Space
Sometimes, the size of files that Windows hides by default can be deceiving. A third-party utility can provide a more accurate analysis of your drive’s content.
MiniTool Partition Wizard is a disk space analyzer. It can scan your hard drive and display the scanning result in Tree View, File View, and Folder View. You can easily identify and delete large, unnecessary files.
Step 1. On its main interface, click the Space Analyzer feature on the top toolbar.
Step 2. Choose the partition to scan from the drop-down menu and click Scan.
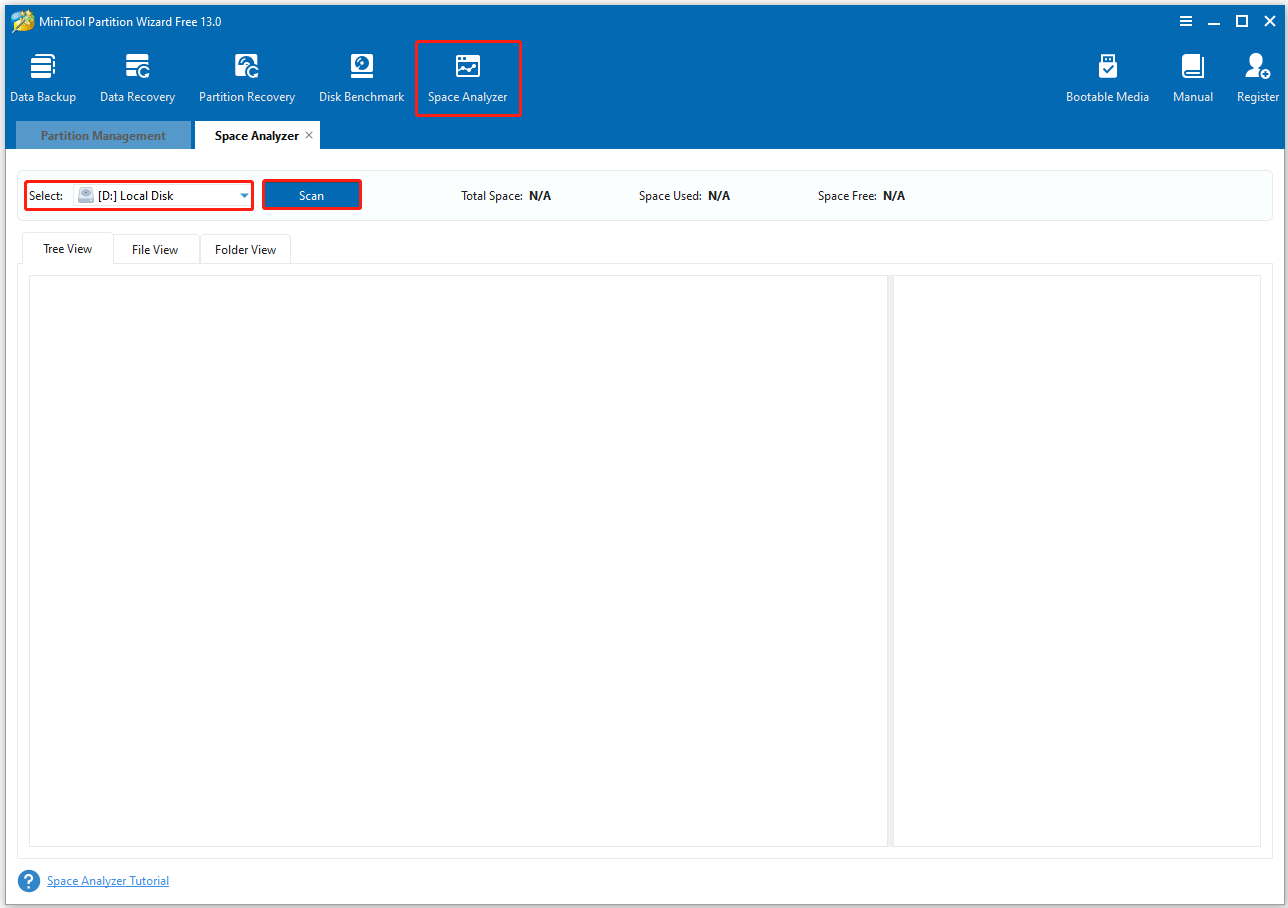
Step 3. Wait for the completion of the scanning. After that, this tool displays scan results in three approaches.
- Tree View: This presents the files and folders on the analyzed hard drive in a hierarchical structure. Each folder can contain multiple subfolders. Files in gray are hidden files and are not visible in This PC.
- File View: This displays all files in descending order by file size. File Search Filter checks the size of a specific file. Match File Name Only requires you to enter the file name to find the desired file. Match Full Path requires you to enter the full path.
- Folder View: This lists all files in a folder. Show all directories lists all folders and displays which one is taking up too much space. Show last level directories only navigates folders to the last level and presents more detailed information for each folder.
Step 4. To delete some unused files/folders that are taking up space, right-click the items and select Delete (to Recycle Bin) or Delete (Permanently).

Bottom Line
Windows reporting wrong hard disk free space is often caused by file system errors, unit discrepancy, or system restore points. By following the solutions in this guide, you’ll be able to solve it.
Additionally, if you encounter any problems or suggestions when using MiniTool Partition Wizard, please contact us by emailing [email protected]. We will respond as soon as possible.
Windows Reporting Wrong Hard Disk Free Space FAQ
Step 1. Open File Explorer.
Step 2. In the left-hand panel, click on This PC.
Step 3. The list of your drives will be displayed, along with their total capacity and the amount of free space available.
When a drive becomes too full, performance can degrade, making it important to have enough free space for the system to function properly.
About The Author

Position: Columnist
Vega enjoys helping people with computer problems, including disk management, data recovery, data backup, and more. She is constantly expanding her knowledge in related fields. And she will continue to bring more easy-to-understand professional articles to help people solve various problems on the PC.
User Comments :