The Font Smoothing function is introduced in Windows 7 and continues in Windows 10 and 11. Although it is not an original function in Windows, lots of Windows users have no idea of it. So, this post from MiniTool Partition Wizard focuses on Windows 10 Font Smoothing and shows you how to configure it.
Windows 10 Font Smoothing
To improve the way Windows displays fonts, Microsoft introduced a new graphical option in Windows 7, and this option can be also found in the latest operating system Windows 11.
The new graphical option is Font Smoothing. This option utilizes an anti-aliasing filter to blur the pixelated edges of the text so that the jagged edges appear smooth. So, Windows 10 Font Smoothing is necessary for a better font appearance.


How to Enable/Disable Font Smoothing Windows 10?
How to enable Font Smoothing Windows 10? By default, Font Smoothing is enabled in Windows 10. So, you need to enable it if it is disabled via one of the following ways.
Keep reading to see how to disable Font Smoothing Windows 10.
Why disable Windows 10 Font Smoothing? The Font Smoothing feature is beneficial to a better font appearance but it requires extra processing, and in other words, it may decrease your computer performance. So, disabling Windows 10 Font Smoothing can increase your computer performance.
Disable Windows 10 Font Smoothing via System Properties
Step 1: Press Windows + R to call out the Run window. Then, type sysdm.cpl and click the OK button.
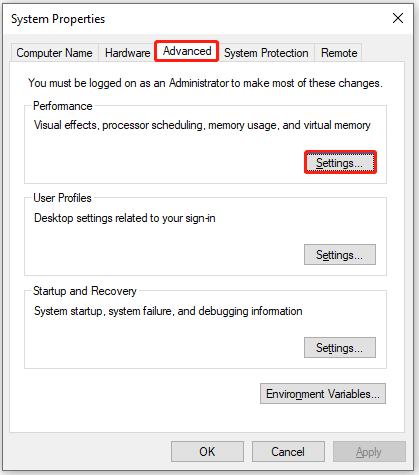
Step 2: When the System Properties window opens, switch to the Advanced tab and then click the Settings button under Performance.
Step 3: Under the Visual Effects tab, select the Custom option. Then, untick the Smooth edges of screen fonts option to disable Windows 10 Font Smoothing.
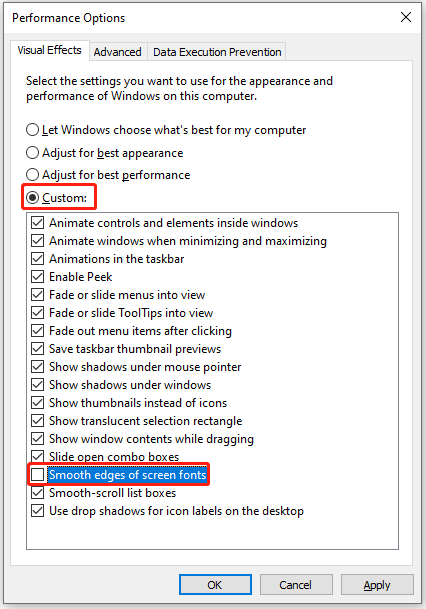
Step 4: Click the Apply button and then the OK button to save the change.
Now your computer should display font in a poor way. If you want to get rid of the awkward situation, just tick the Smooth edges of screen fonts option again on the Perform Options window.
Disable Windows 10 Font Smoothing via Registry Editor
Alternatively, you can disable Windows 10 Font Smoothing via Registry Editor. The steps are below.
Step 1: Press Windows + R to call out the Run window. Then, type regedit and hit the Enter key.
Step 2: Once Registry Editor opens, navigate to the following path:
HKEY_CURRENT_USERControl PanelDesktop
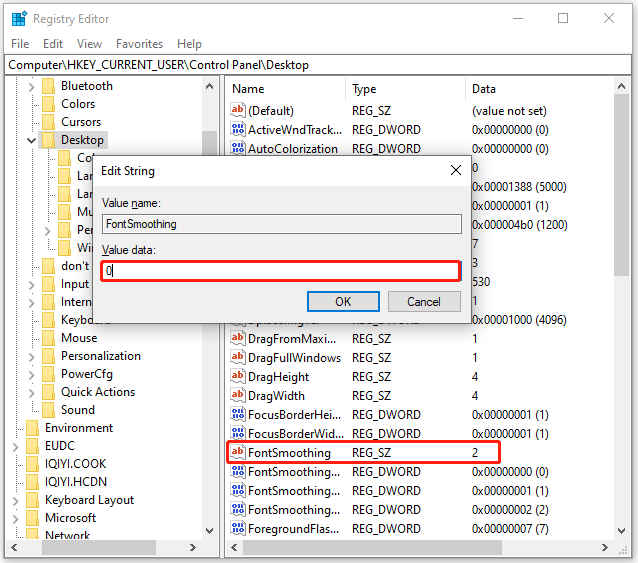
Step 3: Look at the right pane and look for the registry string called FontSmoothing. Then, change its value from 2 to 0. Finally, click the OK button to save this change.
Step 4: Change the value of the registry string called FontSmoothingType from 2 to 1.
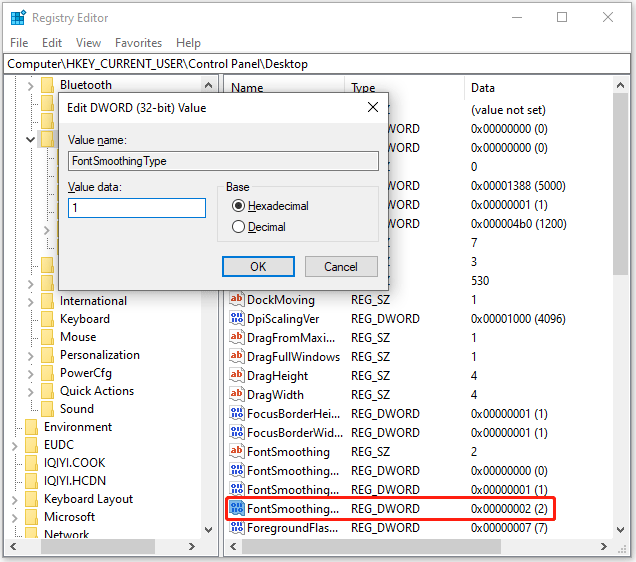
Step 5: Reboot your computer to apply all changes.
If you want to enable Windows 10 Font Smoothing again, just simply tick the Smooth edges of screen font option as shown above.

Bottom Line
What’s Windows 10 Font Smoothing? How to enable Windows 10 Font Smoothing? How to disable Windows 10 Font Smoothing? I believe you now have clear answers to these questions. If you still have doubts about the topic of Windows 10 Font Smoothing, please leave them in the comment zone and I will try to help you figure them out.
User Comments :