“Windows could not automatically detect this network’s proxy setting” is a common problem of network. If you are experiencing the similar proxy issue, 11 solutions introduced in this post will be of great help. In addition, MiniTool Partition Wizard is a good assistant to help you manage hard drive on Windows operating systems.
“Windows could not automatically detect this network’s proxy settings” error can come forth at any time and prevent you from using the internet. If you get a yellow warning sign on your Wi-Fi name, and can’t use your internet or the internet is rather slow, Windows 10 can’t detect proxy settings should be responsible for it.
You may get this error message after installing new applications or making changes for your network configuration. Fortunately, there are 11 solutions to this issue. Let’s see them one by one.
Solution 1: Restart Network Adapter
To fix this error, the simplest way is to restart your network adapter.
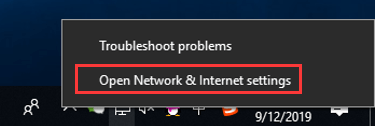
Just right-click the network icon in the toolbar and select Open Network & Internet settings.
In the pop-up window, switch to Ethernet, then click Change adapter settings. When you get another dialog, locate your network connection and rightclick it, then choose Disable from the context menu.
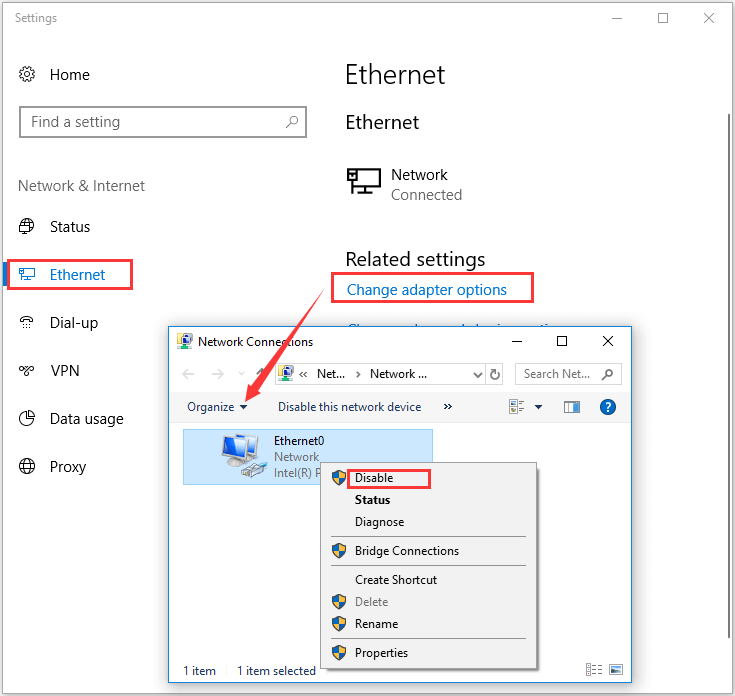
After that, right-click the network again and choose Enable to restart it. In this way, the issue should be removed and you can use your network again.
Solution 2: Enable Obtain DNS Server Address Automatically
Alternatively, you can enable Obtain DNS server address automatically for your network to solve the issue.
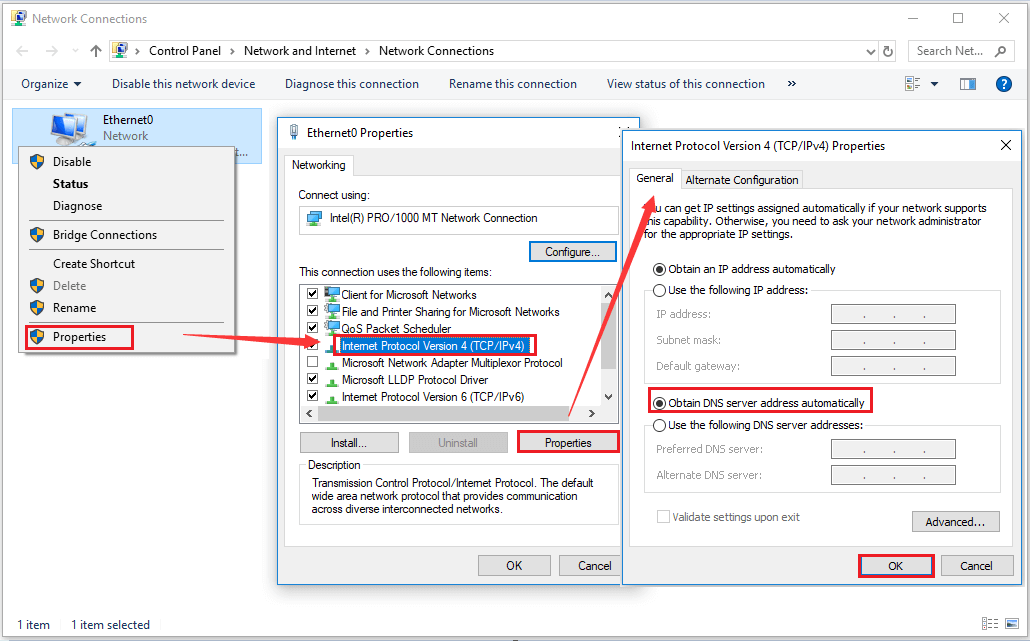
Just as Solution 1, locate and right-click your network connection, but choose Properties. In the pop-up window, select Internet Protocol Version 4 (TCP/IPv4) and click Properties. Then in another dialog, check Obtain DNS server address automatically under General tab and click OK to save changes.
Solution 3: Make Sure the Drives for Network Adapter are the Latest
You should also make sure the drives for network adapter are the latest.
To do that, just follow the given steps:
- Open the Device Manager first by pressing Windows + R, type msc and clicking OK.
- Locate and expand Network adapters, right-click your network and choose Uninstall device.
- Click Action tab and choose Scan for hardware changes.
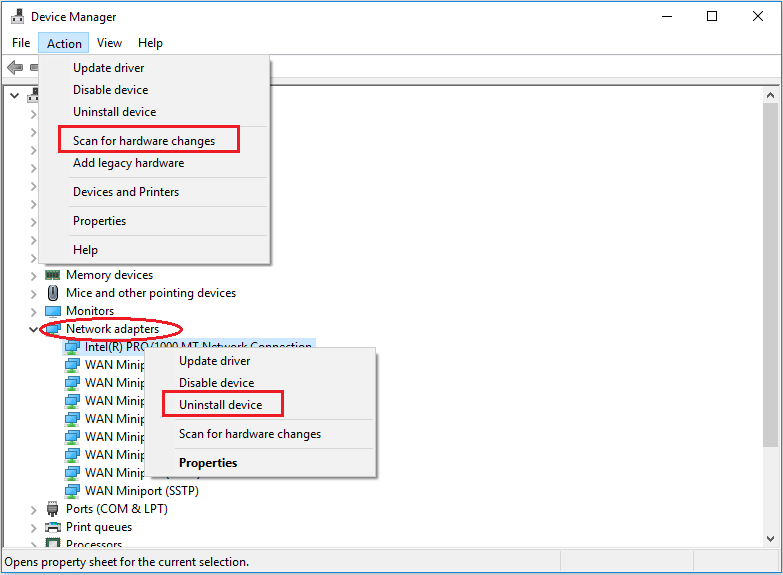
Then, Device Manager will automatically install the hardware uninstalled just now with the newest version. The problem should be solved if it is caused by driver issues.
Solution 4: Uncheck Proxy Server Option
It is also a good choice to ensure that you have unchecked Proxy server options when you encounter “Windows could not automatically detect this network’s proxy settings” issue. The steps are displayed below:
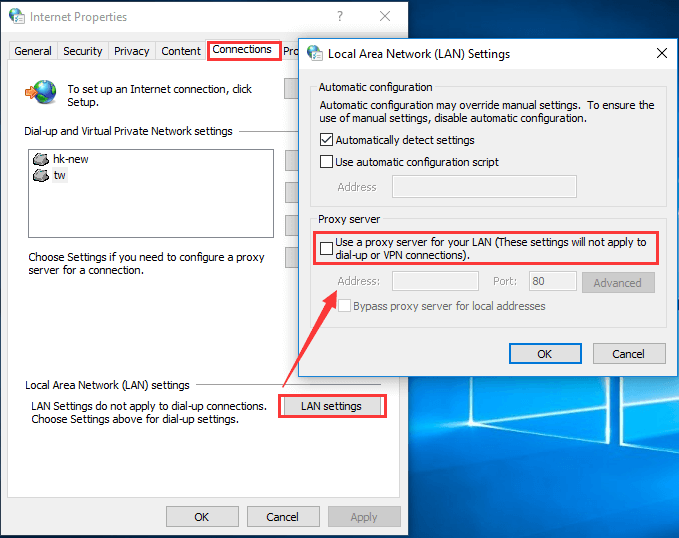
Step 1: Open Run window, type inetcpl.cpl and press Enter to run Internet Properties.
Step 2: Switch to Connections tab and click LAN settings.
Step 3: In the pop-up window, make sure that Use a proxy server for your LAN is unchecked and click OK.
Solution 5: Reset Internet Explorer Settings
For many users, resetting the Internet Explorer settings is also a great choice to solve the issue. But please keep in mind that this operation will delete your personal setting you have set before.
You might be interested in this post: Reset Network Settings on Windows 10: What is the Influence and How to Reset?
To reset Internet Explorer settings, you should also run Internet Properties just as Solution 4, but here you do some different operations as follows:
- Choose Advanced
- Click Reset under Reset Internet Explorer setting
- In the pop-up window, check Delete personal settings and click Reset
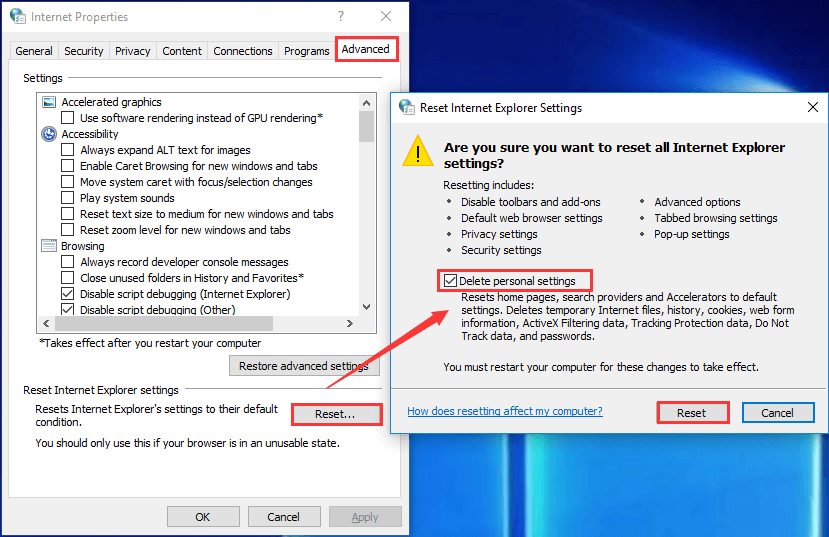
Then you need to restart your computer for these changes to take effect. You can check whether the problem is removed after restarting.
Solution 6: Run Network Adapter Troubleshooter
You can also employ Network Adapter Troubleshooter built-in Windows to fix this problem. It will solve the network problems on its own. Let’s see the detail of this resolution.
Step 1: Right-click Start and choose Settings from the menu.
Step 2: Select Update & security in the main interface.
Step 3: Click Troubleshoot from the left panel, scroll down to locate and click Network Adapter. Then click Run the troubleshooter.
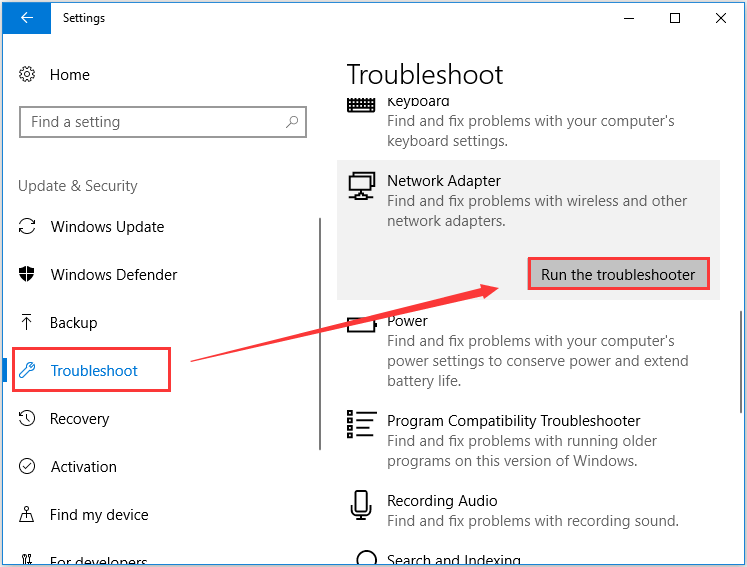
Step 4: Troubleshoot will start detecting problems. You need to wait until it finishes and do as it prompts.
Solution 7: Uninstall Antivirus Software
In some cases, your antivirus software can also lead to proxy issues on Windows 10, including “Windows could not automatically detect this network’s proxy settings”. Hence, it is advisable to uninstall your current antivirus software.
Don’t worry that your computer will be attacked by virus. Windows 10’s built-in feature – Windows Defender can also protect your computer without installing any third-party software.
Solution 8: Reset TCP/IP
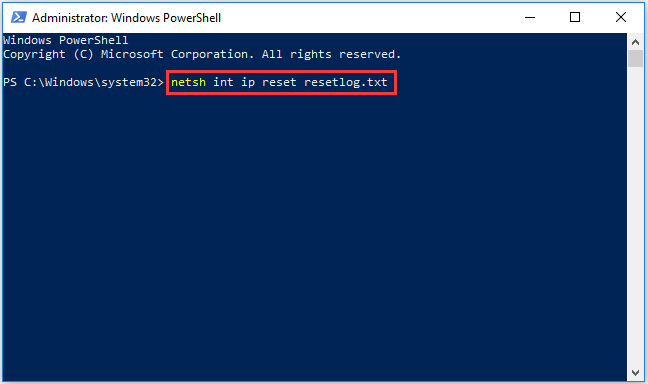
To resolve Windows 10 can’t detect proxy settings by resetting TCP/IP, you need to use Windows PowerShell. Just right-click Start and choose Windows PowerShell (Admin) to run it as administrator. Then type command netsh int ip reset resetlog.txt and press Enter.
Solution 9: Perform SFC Scan
Some users have fixed the problem by performing SFC scan, so you can also try this solution. Just run Windows PowerShell as administrator as Solution 8, then type command sfc /scannow and press Enter.
Wait until the process completes and restart your computer to see if the problem has been removed. If not, you can perform DISM scan by entering DISM /Online /Cleanup-Image /RestoreHealth in Windows PowerShell (Admin), and restart your PC again after the process finishes.
Solution 10: Change Proxy Settings
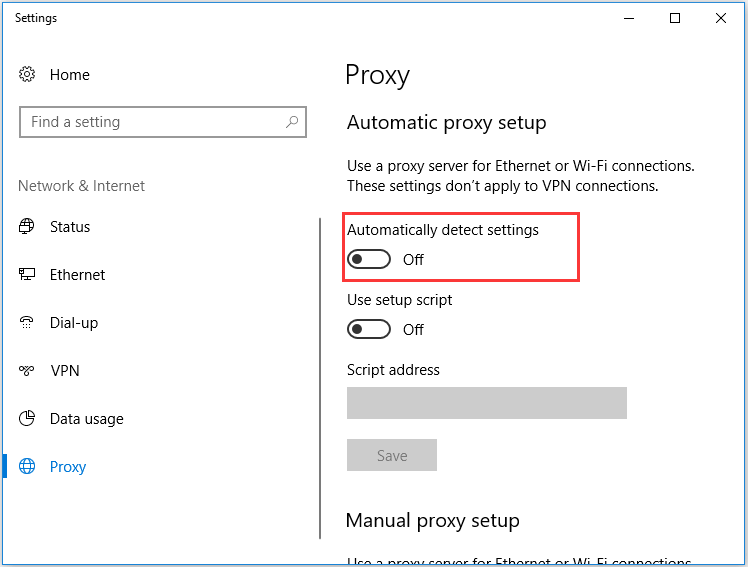
Also, you can fix the issue simply by changing Proxy settings. Just go to Settings -> Network & Internet -> Proxy, and switch off Automatically detect settings.
By disabling this feature, plenty of users have reported that they fixed the problem successfully. So, you can be at ease to try this solution.
Solution 11: Use System Restore
To fix this problem which is related to network proxy settings windows 10, you can use System Restore. The detailed steps are also displayed here.
Step 1: Type Create a restore point in the Search box and click the result to open it.
Step 2: In the pop-up System Properties window, click System Restore button.
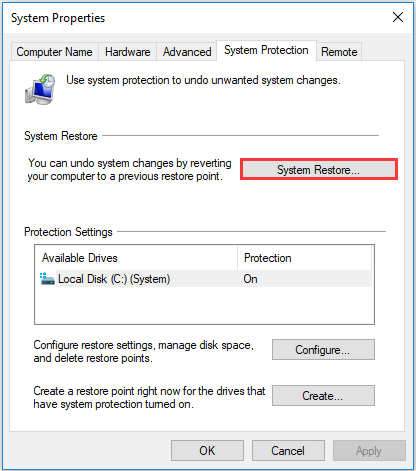
Step 3: Here a suitable restore point has been recommended for you, just click Next to continue.

Then, you just need to follow the instructions on the screen to complete the restoration. After finishing, the error should be resolved and your network can be usable again.
To learn about more information about restoring computer to earlier date/time, you can read this post – How to Restore Computer to Earlier Date in Windows 10/8/7 (2 Ways).
Now that 11 solutions to resolve “Windows could not automatically detect this network’s proxy settings” error have been introduced in detail for you. I hope these solutions can help you fix issues related to network proxy settings windows 10 effectively!
User Comments :