Windows 10/8.1/8 has built-in virtual CD-ROM software. Therefore, they support mounting ISO and IMG files automatically by just double-click. Only when ISO or IMG files are mounted, they can be opened, and then you can run the software contained in the files. But some users may encounter the error “sorry there was a problem mounting the file” when they mount ISO or IMG files.
Reasons for “Sorry, there was a problem mounting the file”
Why can’t mount ISO or IMG files? Based on the information that the users have reported, this error only occurs on the inbuilt ISO mounter. Some common reasons are listed as below:
- The ISO file is already mounted
- MicroSD card interferes with the mounting
- The ISO file is not set to Read-only
- The ISO file is blocked
- ISO file has the sparse attribute set
- Drive Letters interfere with the mounting
- The disk image driver is corrupted
- The file is in a shared folder
How to Fix “Sorry, There Was a Problem Mounting the File”
Now you know the possible reasons for the error “there was a problem mounting the file”. So, how to solve this problem? There are several methods below, and you can start with the first method and then proceed in your own way.
Method 1: Restart the File Explorer
The simplest and easiest way to fix the error “sorry there was a problem mounting the file” is to restart the File Explorer. How to do that? Here is the guide:
Step 1: Open File Explorer. Then, right-click the Start button and choose Task Manager.
Step 2: Under the Processes tab, click File Explorer (also known as Windows Explorer) and click the Restart button. (You can also right-click Windows Explorer and choose Restart.)
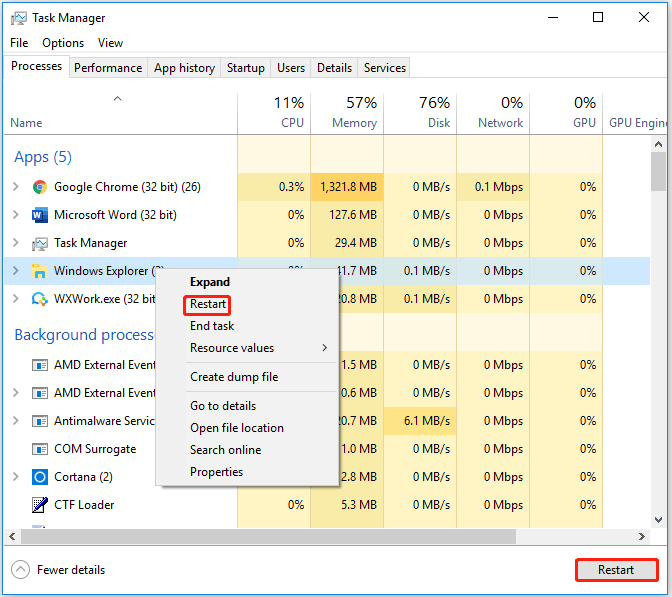
After that, please exit Task Manager and remount the ISO file to see if the error mounting still persists.
Method 2: Confirm If the ISO File Is Mounted
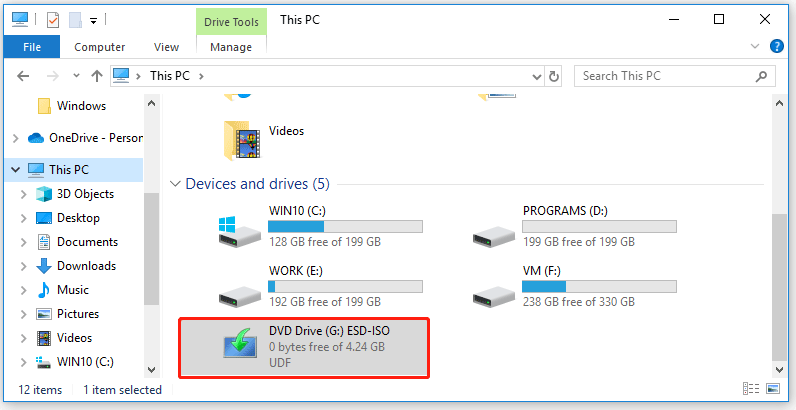
If the ISO file is already mounted, it may trigger the error “sorry there was a problem mounting the file”. Therefore, the second thing that you should do is to confirm if the ISO file is already mounted.
So, how to check if the ISO file is mounted? In this case, you need to open File Explorer. If it is mounted, you can see it as a drive in File Explorer.
Method 3: Remove the MicroSD Card
Sometimes, if there is a microSD card on your computer, you may also receive the error message “Sorry, there was a problem mounting the file”. Under this circumstance, you need to remove the microSD card from your computer.
If this method still can’t solve this problem, please try the next method.
By removing the microSD card, I successfully mount the ISO file on my computer.Click to Tweet
Method 4: Set the ISO File to Read-only
If the ISO file is not set to Read-only, you may encounter the error “sorry there was a problem mounting the file”. Here is how to set the ISO file to Read-only:
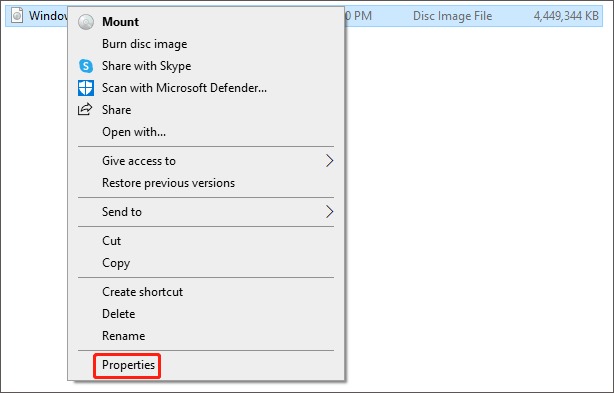
Step 1: Navigate to the location of the ISO file, right-click it and choose Properties from the drop-down menu. (You can also choose the ISO file, and press the Alt + Enter keys on the keyboard to go the same window.)
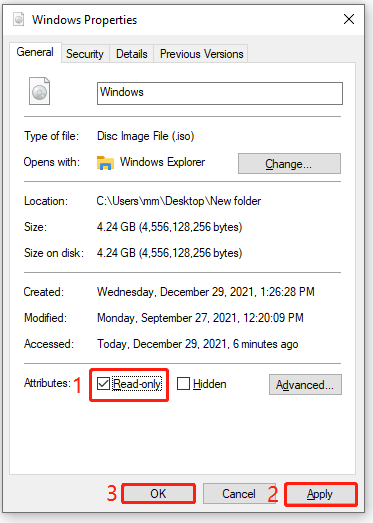
Step 2: In the Properties window, choose the General tab.
Step 3: In the Attributes option, tick Read-only, click Apply to save the changes, and finally click OK.
Once done, please mount the ISO file again and check if there is still the error message “Sorry, there was a problem mounting the file”.
Method 5: Check If the ISO File is Blocked
Generally speaking, Windows will automatically block some files downloaded from the Internet. The inbuilt Attachment Manager in Windows 10 can even block those files that are sent using email. In this case, you need to check if the ISO file is blocked. Here is how to do that:
Step 1: Follow Step 1 and Step 2 in Method 4 to go to the Properties window.
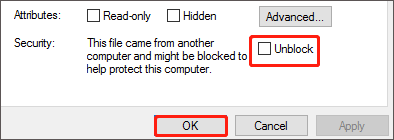
Step 2: Under the General tab, if you see “This file came from another computer and might be blocked to kelp protect this computer” at the bottom, it means that the ISO file is blocked.
Step 3: Now, please tick the Unblock option. Then, try to mount the ISO file again.
If the error “sorry there was a problem mounting the file” is still there, please go to the next method.
Method 6: Remove the Sparse Attribute
Sometimes, Windows operating systems refuse to mount the ISO file because the image is sparse. In this case, you need to remove the sparse attribute. You can do this in two different ways:
In computer science, a sparse file is a type of computer file that attempts to use file system space more efficiently when the file itself is partially empty. This is achieved by writing brief information (metadata) representing the empty blocks to disk instead of the actual “empty” space which makes up the block, using less disk space. The full block size is written to disk as the actual size only when the block contains “real” (non-empty) data.https://en.wikipedia.org/wiki/Sparse_file
1. Remove the Sparse Attribute Using Command Prompt
Step 1: Press the Win + S key on the keyboard, type cmd in the search box, and press Enter to open Command Prompt.
Step 2: Once in the elevated Command Prompt, type the following commands one by one and tap the Enter key after each command:
- fsutil sparse queryflag PathToYouISO (This command helps you know if the ISO file is a sparse file.)
- fsutil sparse setflag PathToYouISO 0 (This command aims to remove the sparse attribute if the ISO file is set as sparse file.)
2. Remove the Sparse Attribute by Copying the ISO File
Generally speaking, when you copy an ISO file, it will remove the sparse attribute. Therefore, if you think it is a bit troublesome to enter these commands, you can try to copy the ISO file and then mount the copied file to see if the error “Sorry, there was a problem mounting the file” is fixed.
Method 7: Change Drive Letter
If you can successfully mount the ISO file, you will see it appear as a new drive in File Explorer. If not, you may receive the error message “Sorry, there was a problem mounting the file”. This may be a drive letter conflict interfere with the mounting.
In this case, you can try to change the drive letter to fix this error mounting. There are two ways below. Choose one of them to do that: (Here I take drive F as an example.)
1. Change Drive Letter in Disk Management
First, you can change the drive letter from the Disk Management. The steps are as follows:
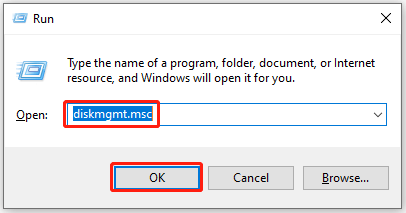
Step 1: Press the Win + R keys to open the Run window on the computer.
Step 2: Type diskmgmt.msc and click OK or press Enter to open Disk Management.
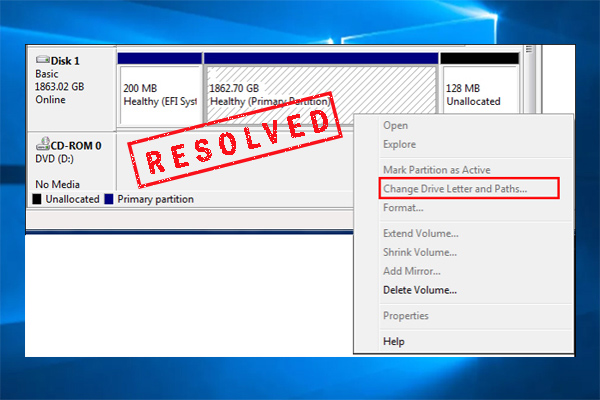
Step 3: Find the drive whose drive letter you want to change, right-click it, and choose the Change Drive Letter and Paths option.

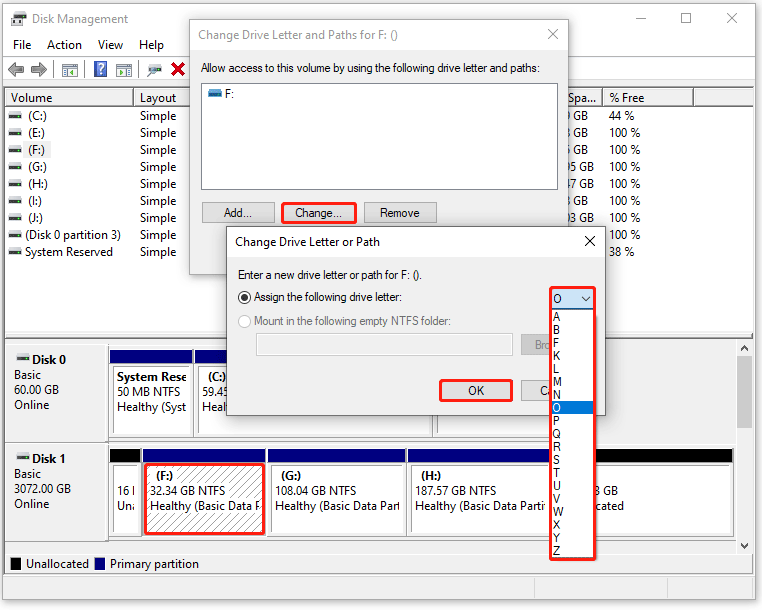
Step 4: Click the Change button, choose another drive letter from the drop-down menu, and then click OK. (Please click Yes to confirm in the pop-up window.)
Thus, the drive letter is changed, and you can mount the ISO file to see if the error “sorry there was a problem mounting the file” is fixed.
2. Change Drive Letter Using MiniTool Partition Wizard
Another way to change the drive letter is to use the MiniTool Partition Wizard software. In addition to changing a drive letter, this software can also help you migrate OS to SSD, reconfigure hard disk, format partition, convert MBR to GPT without data loss, check file system, copy disk, perform disk surface test, wipe disk, and so on.
Using MiniTool Partition Wizard to change the drive letter is simple and easy. Get MiniTool Partition Wizard and follow the on-screen instructions to install it on your computer.
MiniTool Partition Wizard FreeClick to Download100%Clean & Safe
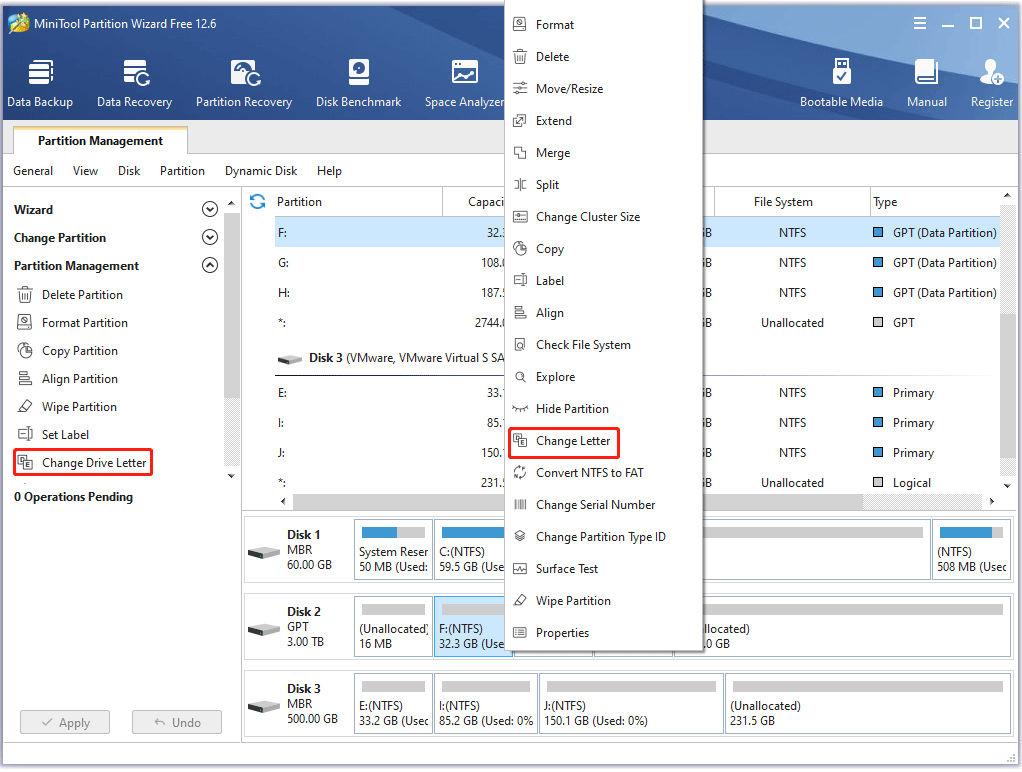
Step 1: Launch MiniTool Partition Wizard to its main interface. Choose one of the following ways to activate the Change Drive Letter function:
- Click the Change Drive Letter option from the left action pane after selecting the target drive.
- Right-click on the target drive, and then choose Change Letter in the pop-up menu.
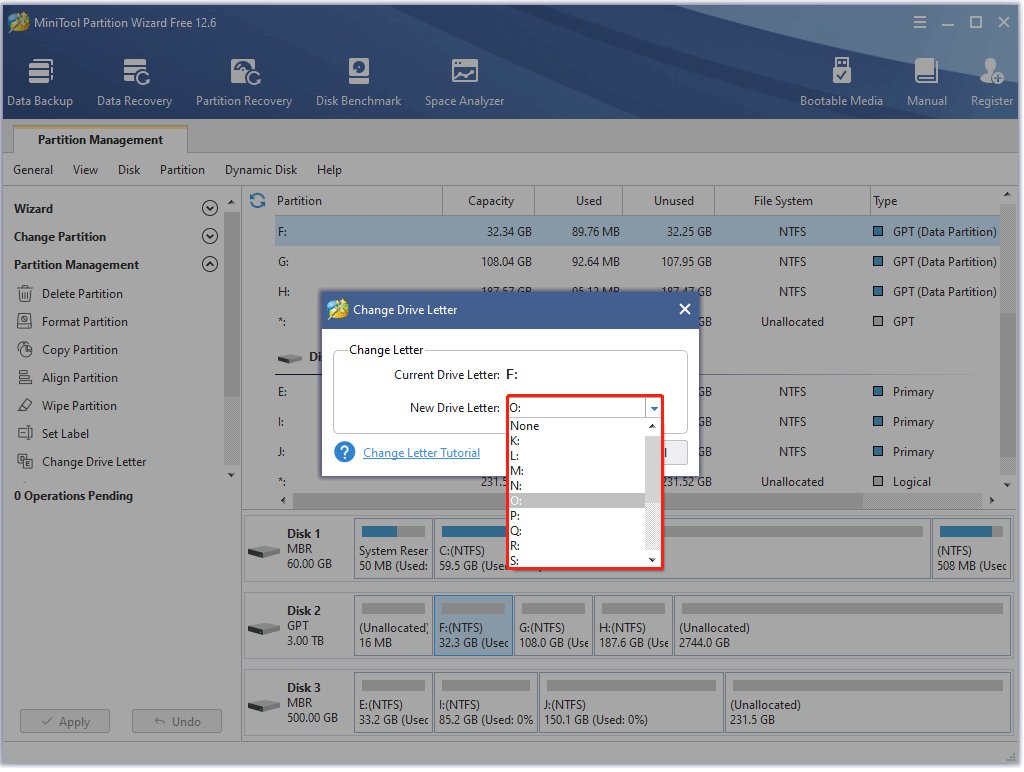
Step 2: Choose a new drive letter from the list, and click OK.
Step 3: Click the Apply button to perform this operation.
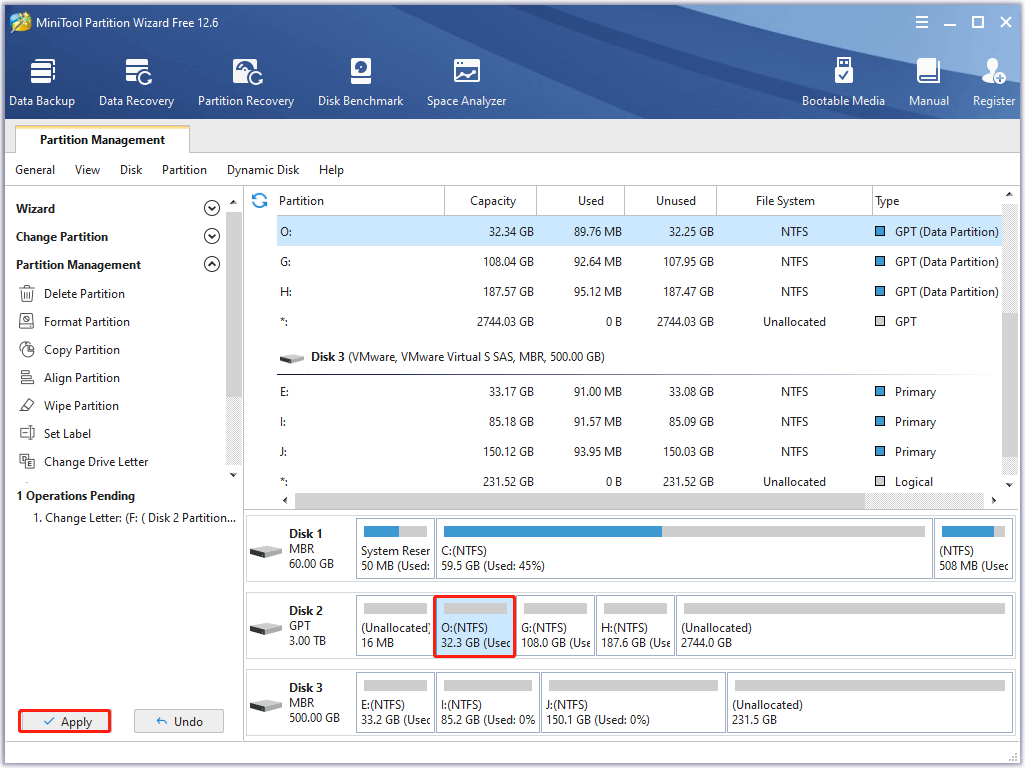
Once you have successfully changed the drive letter, try to mount the ISO file again.
Method 8: Repair the Disk Image Driver
If the disk image driver is corrupted, you may also encounter the error “sorry there was a problem mounting the file”. In this case, you can use the Registry Editor to repair the disk image driver. Here is how to do that:
Step 1: Press Win + R on the keyboard, type regedit in the search box, and then press Enter to open Registry Editor.
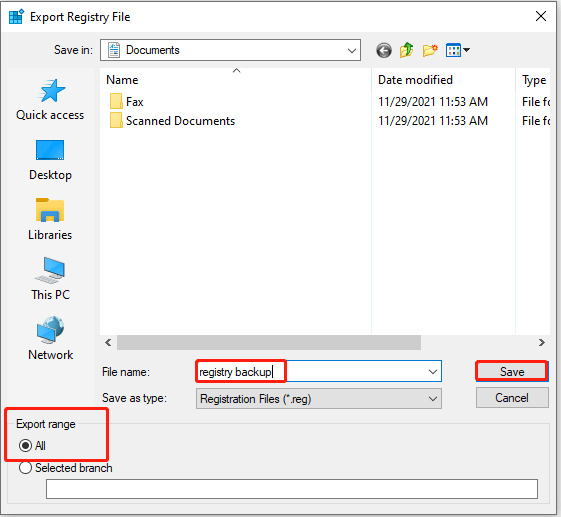
Step 2: Before repairing the disk image driver, you should create a registry backup. To do this, you need to choose the File tab and then click the Export option.

Step 3: Give the backup a name and save it on your computer. (Please make sure the Export range is set to All.)
Step 4: Once you have created the backup, please paste the following registry subkeys and press Enter.
- HKEY_LOCAL_MACHINESYSTEMCurrentControlSetControlClass{4D36E965-E325-11CE-BFC1-08002BE10318}
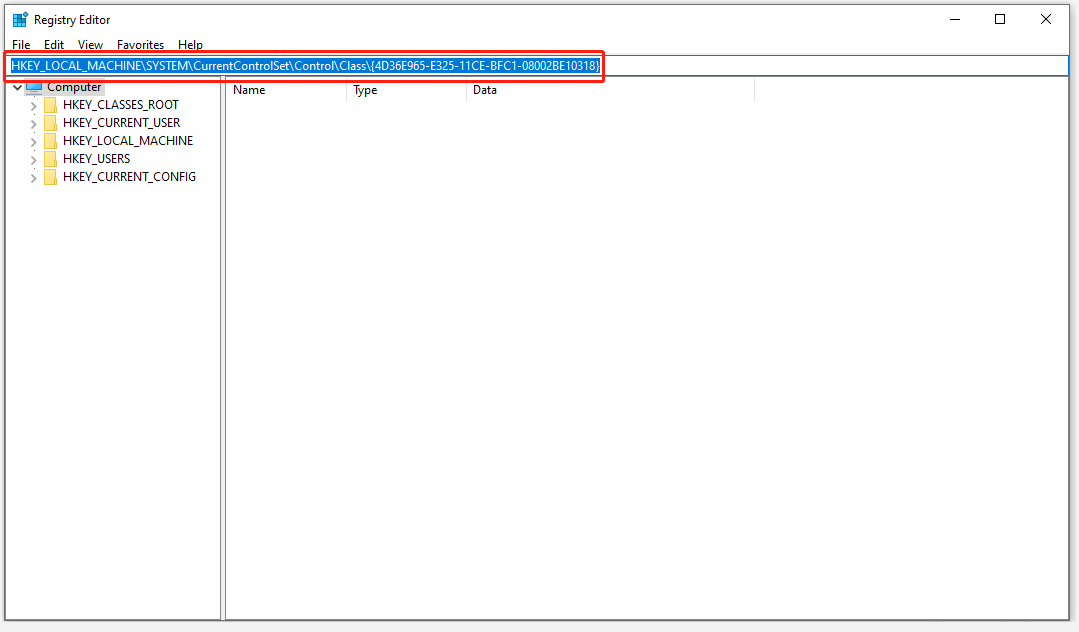
Step 5: Now, go to the right panel, right-click UpperFilters and choose Delete.
Step 6: Then, right-click LowerFilters and choose Delete.
After that, close Registry Editor and restart your computer. Then, try to mount the ISO file again to see if the problem is resolved.
How to Mount or Unmount SD Card | Fix SD Card Won’t Mount
Bottom Line
Now you have known the methods to solve the problem “sorry there was a problem mounting the file”. If you fail to mount the ISO file, you can try these methods in this post to fix the error mounting the ISO file.
If you have any questions about how to fix the error “sorry there was a problem mounting the file”, please leave them in the comment zone and we will try our best to answer them. If you need any help when using the MiniTool Partition Wizard software, you can contact us via [email protected].
User Comments :