What Causes The Application-Specific Permission Settings Error
According to user reports, the application-specific permission settings do not grant local activation permission for the COM Server Application with CLSID error can be found in system event logs. The detailed error message is often accompanied by this security permission can be modified using the component services administrative tool.
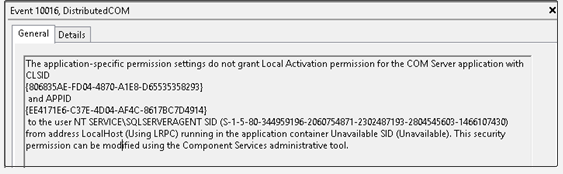
As indicated in the event log, the main reason for the “COM Server application with CLSID” error is invalid permissions. The error also occurs when a specific process doesn’t have enough permissions to the COM components.
Some users reported that their system can still function correctly when the error occurs. Under this situation, you can let it be. If the error prevents certain applications or services from functioning correctly, you can follow the troubleshooting method below to fix it.
How to Fix The Application-Specific Permission Settings Do Not Grant Local Activation Permission Error
To fix the application-specific permission settings do not grant local activation permission error, you can follow the steps below to grant access to these DCOM components.
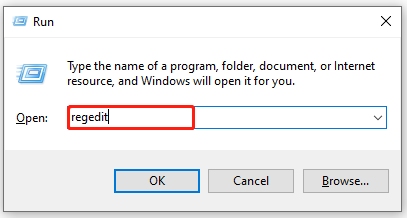
Step 1. Press Win + R keys to open the Run dialog box, and then type Regedit in the box and hit Enter.
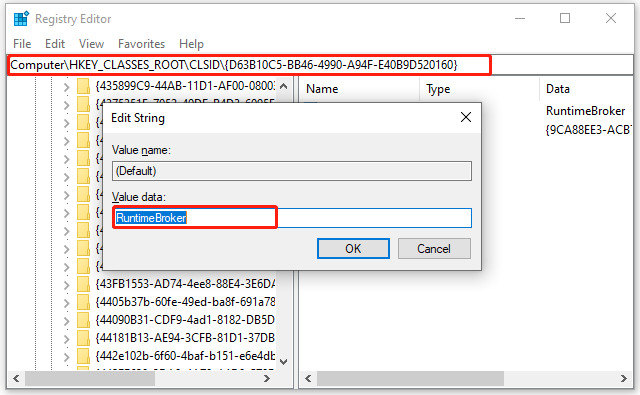
Step 2. Navigate to the following path from the left sidebar, and then double click the Default entry key from the right pane and note down its Value data.
HKEY_CLASSES_ROOTCLSID{D63B10C5-BB46-4990-A94F-E40B9D520160}
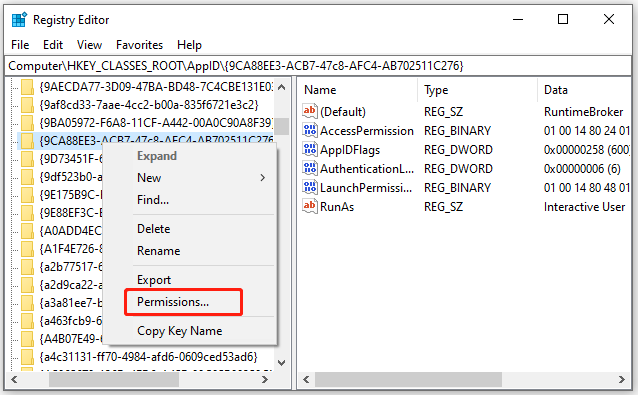
Step 3. Navigate to the following path, and then right-click the {9CA88EE3-ACB7-47c8-AFC4-AB702511C276} key from the left pane and select Permissions from the list.
HKEY_CLASSES_ROOTAppID{9CA88EE3-ACB7-47C8-AFC4-AB702511C276}
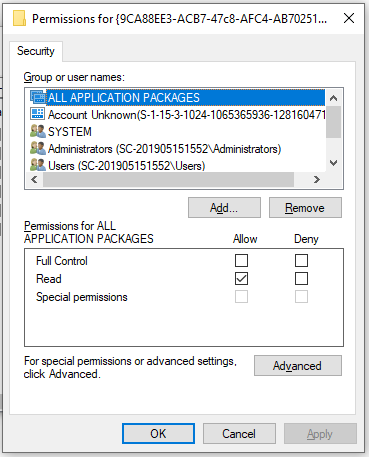
Step 4. In the Permissions window, click on Advanced.
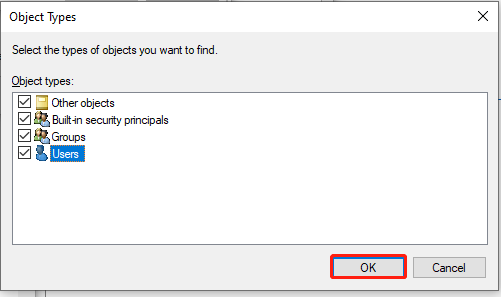
Step 5. Click on the Change link next to the TrustedInstaller option. In the pop-up window, click on Object Type and select Users, and click on OK.
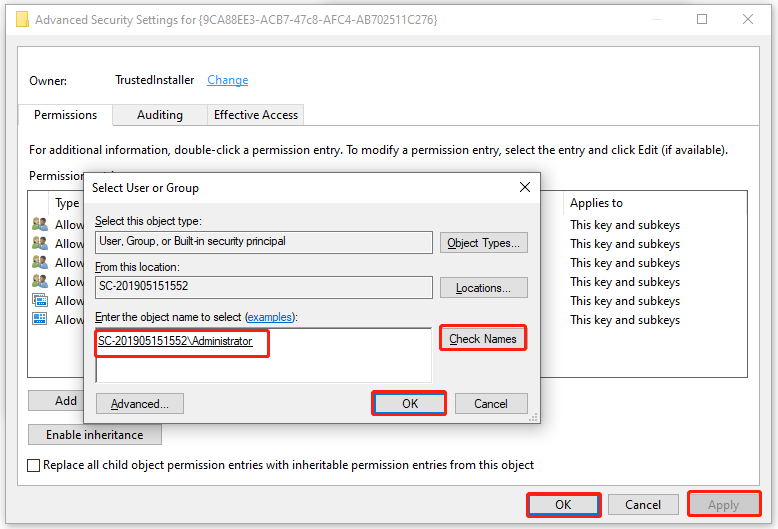
Step 6. Click on Locations and select your Desktop name, and click on OK.
Step 7. Enter your username in the field and click on Check Names. Here we take the Administrator for example. After that, click on OK and Apply in the Advanced Security Settings window.
Step 8. Come back to the Permissions window that we opened in Step 4.
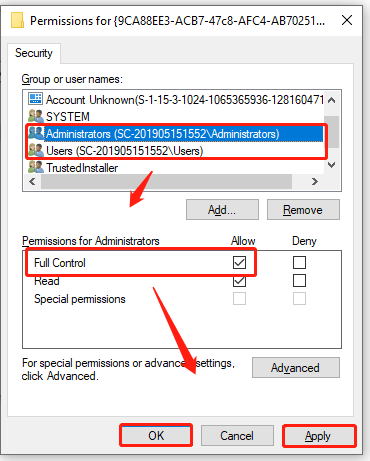
Step 9. Select Administrators from the Group or user names heading and tick the checkbox for Full Control. Then select Users and check the Full Control option again. Once done, click on OK and Apply to save changes.
Step 10. Open the Run box again, and then type dcomcnfg.exe in it and hit Enter.
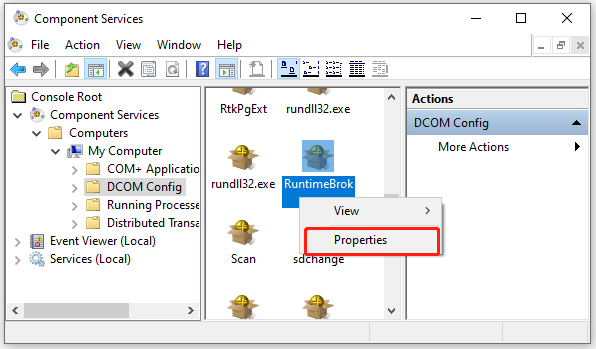
Step 11. In the Component Services window, navigate to the following path. Right-click RuntimeBroker from the listed services and select Properties.
Component Services>Computers>My Computer>DCOM Config
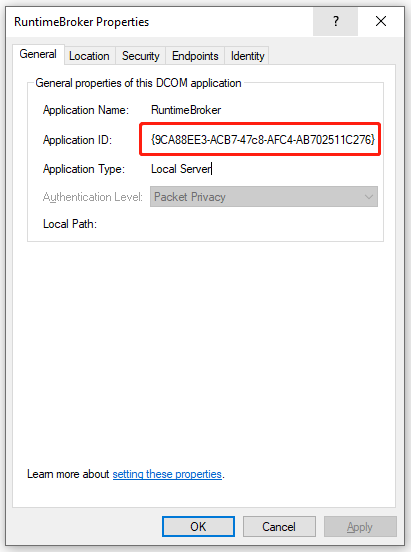
Step 12. If the Application ID is 9CA88EE3-ACB7-47C8–AFC4–AB702511C276, it indicates that you selected the right application. Then you can go to the Security tab, and then select Customize and click on Edit under the Launch and Activation Permissions section. When there is a Windows Security prompt, click on Remove.
Step 13. Click on Add, and then type NT AUTHORITYLOCAL SERVICE in the Enter The objects Name to select field and click on OK. If there is no NT AuthorityLocal Service, type Local Service instead.
Step 14. Grant Full Control to the Local Activation permission of the entry.
Now, you can check if the application-specific permission settings do not grant local activation permission for the COM error is gone.

User Comments :