Is the watermark in your Word no longer needed? If yes, this post might be what you need. This post shows you how to remove watermark in Word using different ways. By the way, if you want to quickly remove a partition on your Windows 10 computer, give MiniTool Partition Wizard a try.
How to remove a watermark in Word? Try the following ways.
How to Remove Watermark in Word?
- Use the Remove Watermark feature in Word.
- Remove watermark from the Document’s Header or Footer.
- Save the document in the XML format.
Way 1: Use the Remove Watermark Feature in Word
To remove a watermark in Word, what you first need to try is to use the Remove Watermark feature in Microsoft Word.
Step 1: Open the Microsoft Word app.
Step 2: Switch to the Page layout or Design tab.
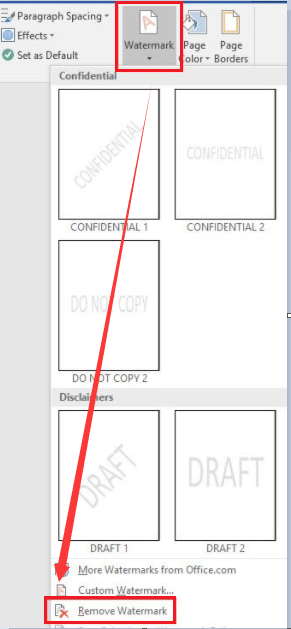
Step 3: Under the Page Layout or Design tab, click the Watermark feature.
Step 4: In the Watermark menu, choose the Remove Watermark option.
If this way can’t remove a watermark in Word, try the following ways.
Way 2: Remove Watermark from the Document’s Header or Footer
Alternatively, you can try removing a watermark from the document’s header or footer. How to do that? Follow the steps below.
Step 1: Open the document that contains the watermarks that you want to remove.
Step 2: Double-click the top or bottom of the document.
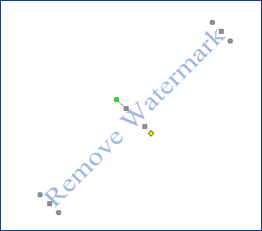
Step 3: When the document’s header or footer appears, click the watermark to select it.
Step 4: Hit the Delete key to remove the selected watermark.
Step 5: Repeat the above operations until all watermarks are removed.

Way 3: Save the Document in the XML Format
Compared to the above two ways, this way is a bit complicated.
Before showing you how to carry out the way, please let me talk about what the XML format is.
According to Wikipedia, XML is the abbreviation of Extensible Markup Language. It is a markup language that defines the rules for encoding documents in a format that is both human-readable and machine-readable.
Step 1: Open your document with Microsoft Word and then save it in the XML format.
Step 2: Open the saved document with Notepad.
Step 3: When the saved document opens, press the Ctrl + F keys to find the watermark phrase.
Step 4: On the Find window, type the watermark wording and then click the Find Next button.
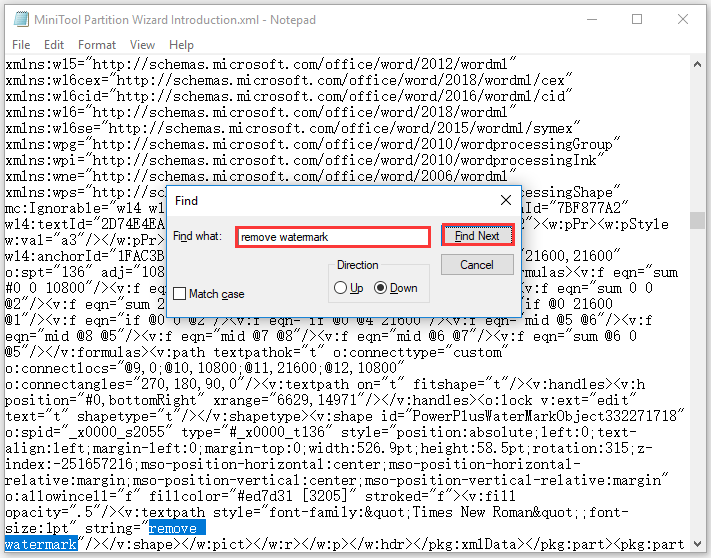
Step 5: Only delete the watermark wording.
Step 6: Find and delete again until all watermark wordings are removed.
Step 7: Save the changes and then reopen the document with Microsoft Word.
Now, your document should not contain any watermark.
This is all ways about how to remove watermark in Word. Have you tried one of them? If you have any other ways of removing watermark in Word, please share with me in the following comment zone.
Do you know how to remove watermark from a video and photo? If not, this post How to Remove Watermark from Video and Photo Efficiently you might be interested in.
User Comments :