You may encounter issues like slow PC performance, frequent crashes, low disk space, etc. What causes these issues? Well, reasons vary according to different errors. Even so, they have some common causes such as malware infection, high system resource usage, junk files, and so forth.
For instance, these errors can occur because of PC Doctor Module high CPU. Here comes the question – what is PC Doctor Module. The section below will explain it to you.
An Overview of PC Doctor Module
What is PC Doctor Module?
PC Doctor Module is one of components of Dell SupportAssist. Generally speaking, Dell computers shipped with the Dell SupportAssist diagnostics have a PC Doctor Module.
Is the PC Doctor Module a virus or malware?
You can check the fact by following these steps.
- Right-click on the Windows icon on the desktop and click Task Manager.
- Find the PC Doctor Module under the Processes tab.
- Right-click on this process and choose Go to details.
- Right-click on the executable file name of the application and choose Open file location.
If you are redirected to the path below, it indicates that the file is not a threat.
C:Program FilesDellSupportAssistAgentPCDrSupportAssist6.0.7193.611pcdrmemory2.p5x” run -e -lang en -cust dell -var dsc -bd “C:ProgramDataPCDr7193” -engineClientPid.
Also read: Avast Remediation Exe: Is It Malicious and How to Remove It
Solutions to PC Doctor Module High CPU
If you find the PC Doctor Module high CPU issue in the Task Manager, you can troubleshoot it with the following solutions.
Solution 1: Modify Optimization Settings
Option 1: Through the SupportAssist Window
Tweak optimization settings via SupportAssist by following these steps.
Step 1: Run SupportAssist from the Start menu.
- Type supportassist in the search box
- Click on SupportAssist under the Best match section.
Step 2: Move to SupportAssist Scheduled Scans.
Step 3: Tap the gear icon at the upper right corner of the SupportAssist window to open Settings. By default, hardware scans are set to run once a month.
Step 4: If you want to disable automatic scan, uncheck the Turn on automatic scans and optimizations at option. Disabling automatic scan doesn’t indicate that you are stuck. Instead, you can run a manual scan according to your demand from the Home tab.
Option 2: Through the Services Window
The built-in program of Windows – Services, can also help you change settings of SupportAssist.
Step 1: Press Windows and R keys to open the Run window.
Step 2: Type services.msc and hit Enter. This will open the Services window.
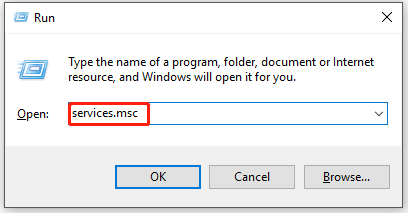
Step 3: Find the Dell SupportAssist service (or SupportAssistAgent) from the Services window, and then double-click it and set it to Automatic (delayed started) by default.
Step 4: Then click OK to save the changes.
Also read: 5 Methods for Services and Controller App High CPU Usage
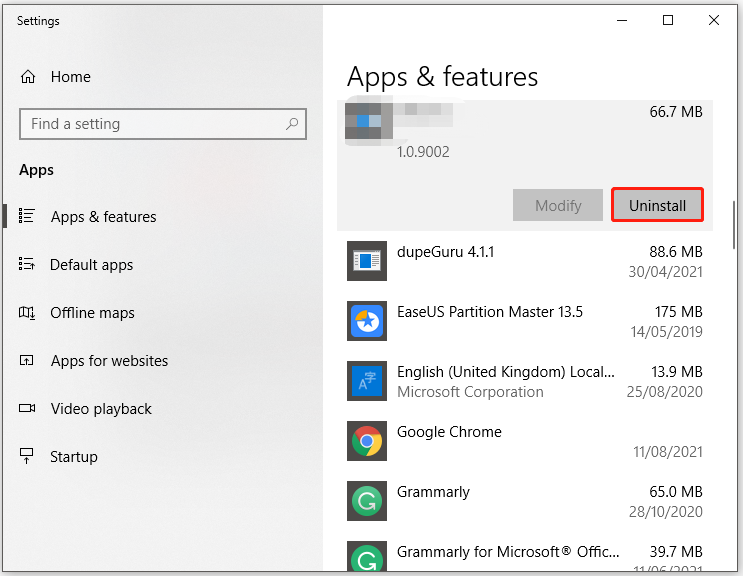
Solution 2: Uninstall SupportAssist
Step 1: Press Windows + X key and then tap Apps and Features.
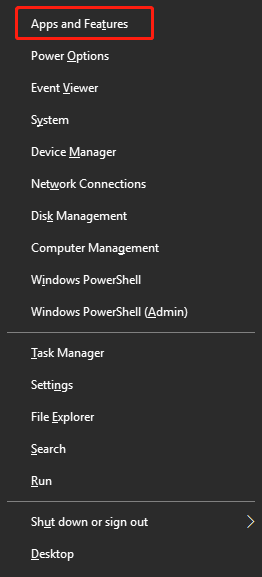
Step 2: Scroll down the content under the Apps & features section in the prompted window to find Dell SupportAssist.
Step 3: Click on Dell SupportAssist and click Uninstall. Then, follow the on-screen instruction to finish the uninstallation process.
User Comments :