Are you using OBS? Are you facing encoding overloaded OBS Studio? Are you eager to find methods to fix this issue? If your answers are yes, it is so lucky for you to read this post, where 9 methods to solve this problem are displayed by MiniTool.
OBS, short for Open Broadcaster Software, is one of the most popular streaming and game recording programs, with various presets and customization settings. It is a powerful and free video editing tool that has great support and is compatible with Twitch.
However, you might come across certain problems while using this program. In this post, we will talk about one of the most common errors that occurs on OBS – OBS encoding overloaded.
About OBS Encoding Overloaded Issue
When you are streaming screens or games on OBS, you might unfortunately encounter encoding overloaded issue, receiving an error message: Encoding overloaded! Consider turning down video settings or using a faster encoding preset.

This error indicates that your computer cannot encode your video fast enough to keep the settings you have made before. When you get this error, your video will freeze or periodically stutter.
The causes of OBS Studio encoding overloaded could be various, and the common ones are listed below:
- There are few CPU resources. This is the main reason for encoding overloaded OBS Studio, as it demands a considerable amount of CPU usage to encode video.
- The disk storage is too low.
- The screen resolution is too high.
- Certain installed third-party streaming applications conflict with OBS.
Without further explanation for the cases of or reasons for the issue, let’s follow the methods in this guide to fix OBS encoding overloaded.
How to Fix OBS Encoding Overloaded
Here are 10 methods to help you fix OBS encoding overloaded error.
- Reduce Output Resolution
- Lower Frame Rate
- Change Encoder Preset
- Use Hardware Encoding
- Change Process Priority
- Close Additional Programs in the Background
- Free Up Space in Drive
- Disable Game Mode
- Upgrade Hardware or Use Alternatives
Method 1: Reduce Output Resolution
The CPU usage in OBS is largely determined by the output resolution, because your OBS encode the screen of the game you are streaming in real-time. The higher resolution you choose to encode the game, the more CPU will be used.
Thus, you can scale the resolution down to put less pressure on your CPU and to solve this encoding problem. Here’s how to reduce resolution in OBS.
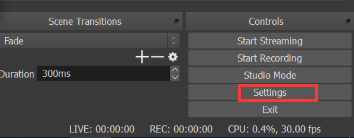
Step 1: Open your OBS Studio and click Settings at the bottom right side of the screen.
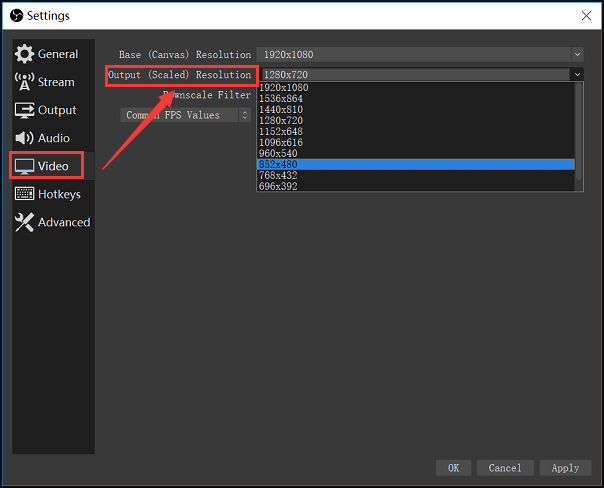
Step 2: Switch to Video tab of the left pane. In the right pane, click Output (Scaled) Resolution and choose a lower resolution parameter from the drop-down list. The layout of the encoded game won’t change by doing this.
Step 3: Click Apply and OK to save the change and exit OBS.
After that, you can restart your computer and try streaming game again to see if the encoding error is resolved.
Method 2: Lower Frame Rate
The frame rate determines the number of frames captured from the original game video. It is a factor that affects your GPU usage. If you are capturing frames with a high frame rate, your GPU might be unable to render the game and the video you’re streaming.
Reducing frame rate to 30 or even lower won’t affect the quality of the video significantly. On the contrary, this can give the encoder enough room to deal with the video.
Step 1: Launch your OBS and go to its Settings.
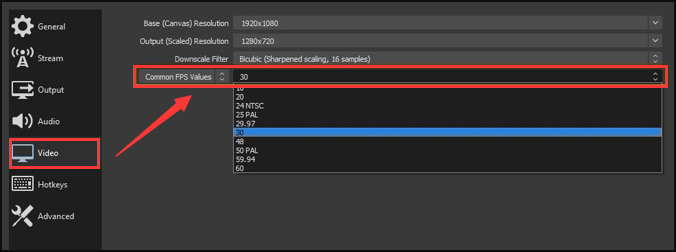
Step 2: Click Video tab and select Common FPS Values. Then, choose 30 or less from the listed values.
Step 3: Click Apply and OK to confirm the change.
Now, you can restart your computer and check if OBS encoding overloaded warning disappears.
Method 3: Change Encoder Preset
By default, the video encoder used by OBS is x264. There are different presets involved in its operation and you can set any of these presets to balance the CPU usage and the video quality. The default encoder preset is very fast which offers the best balance in most cases.
The presets indicate the running speed of the encoder. If you set a faster preset, less CPU sources will be uses and thus reduce the video quality.
So, you can set a faster preset to fix OBS encoding overloaded issue.
Step 1: Open OBS and go to its Settings.
Step 2: Choose Output settings in the left pane.
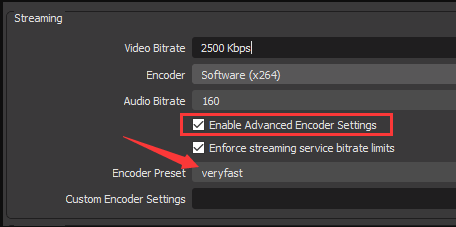
Step 3: In Streaming section of the right pane, make sure the Encoder is set as Software (x264) and check Enable Advanced Encoder Settings option.
Step 4: Click Encoder Preset to open its list and choose superfast or ultrafast to reduce CPU cycles.
You can try different presets as your needs. After that, you can check if choosing a faster preset solves the issue for you.
Method 4: Use Hardware Encoding
You can also try using hardware encoding to reduce your CPU usage and thus to resolve OBS Studio encoding overloaded problem.
OBS allows you to use alternative encoders apart from x264, like AMF, Quicksync and NVENC hardware encoder which are available on recent AMD, Intel and Nvidia GPUs respectively. These hardware encoders deliver lower quality of video than x264 and therefore put less pressure on your CPU.
To achieve this, just follow the steps below:
Step 1: In OBS Settings, go to Output tab.
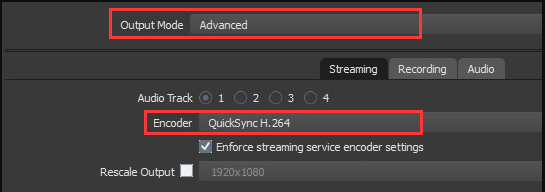
Step 2: In the right pane, select Advanced for the Output Mode.
Step 3: Then, open the menu of Encoder and choose the hardware encoder available for you, such as QuickSync H.264 shown in the following picture.
Note: If there’s no hardware encoder displayed, the chances are that your Integrated Graphics are not activated in your BIOS. You can enter your BIOS settings and make sure the Internal Graphics is Enabled.
Method 5: Change Process Priority
If the above changes for your OBS settings cannot help you get rid of encoding overloaded issue, you might need to do something to optimize your computer to fix the problem. At first, you might need to change the process priorities for your OBS from Task Manager.
The processor works on the principle of priorities, which means that the processes with high priorities will get more CPU resources and be processed first. If your OBS is given low priority, the CPU resources will be channeled first to other processes and leave OBS process few CPU, causing OBS encoding overloaded finally.
To set process priorities, do as the following tutorial shows.
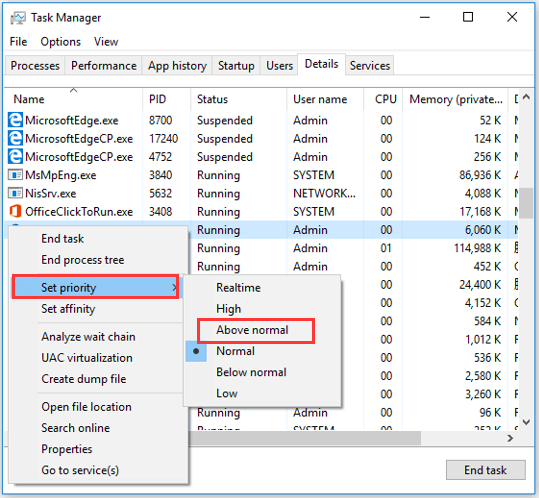
Step 1: Press Ctrl + Alt + Del and choose Task Manager to open this tool.
Step 2: In Processes tab, locate and right-click your OBS. Then, choose Go to details from the context menu to locate OBS in Details tab directly.
Step 3: Now, right-click OBS and choose Set priority > Above normal to set it with a little higher priority.
After that, you can go back to your game and you should be able to stream it without any issues.
Method 6: Close Additional Programs in the Background
As mentioned before, certain third-party streaming programs might conflict with you OBS, such as Discord and NVIDIA Overlay. Hence, you should check whether these similar recording programs are running in the background.
To close a running application, you can go to Task Manager, right-click the process and choose End task. If needed, you might want to uninstall these programs to fix encoding overloaded OBS Studio completely.
Method 7: Free Up Space in Drive
Aside from RAM, OBS also requires space on the hard drive for operations including writing temporary configurations and output files. So, another important reason for OBS encoding overloaded is that you don’t have enough storage space on your drive. Your OBS won’t stream any kind of video if there’s no extra space on the drive.
To free up the space on the drive, you might need to delete/transfer certain data, uninstall some unnecessary applications from the drive manually.
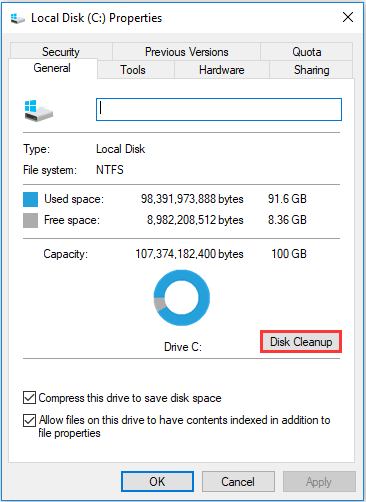
Alternatively, you can perform disk cleanup. Just open File Explorer, right-click the drive you want to clean and choose Properties. In the pop-up window, switch to General tab and click Disk Cleanup. Then, follow the onscreen instruction to clean your drive.
If you cannot free up the drive by disk cleanup or you don’t want to delete any data, you could choose to extend this drive. MiniTool Partition Wizard is recommended here for you.
This is a professional hard disk manager, and it provides a feature of Extend Partition to help you expand the space of a drive by taking free space from any other partitions on the same disk.
Note: You can also choose to resize the partition to take free space from contiguous partition.
Just feel free to download and install it on your computer to have a try.
MiniTool Partition Wizard FreeClick to Download100%Clean & Safe
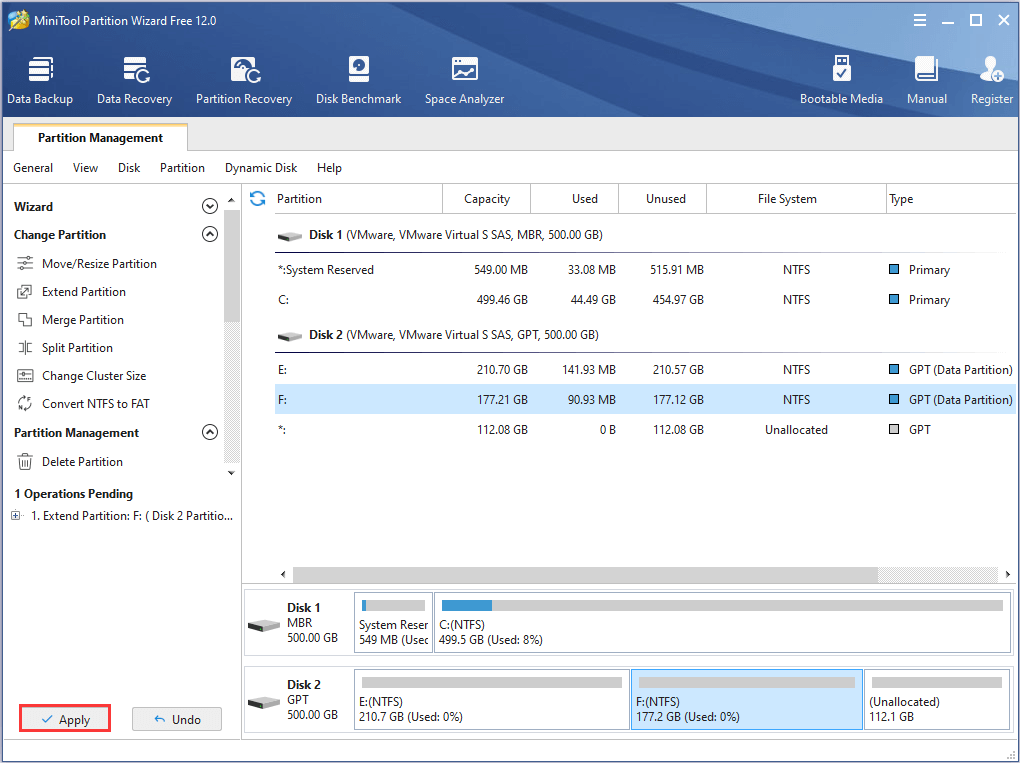
Step 1: Launch MiniTool Partition Wizard to get its main interface.
Step 2: Right-click the drive with few free spaces and choose Extend from the context menu. Also, you can choose Extend Partition under Change Partition in the left pane after highlighting the drive.
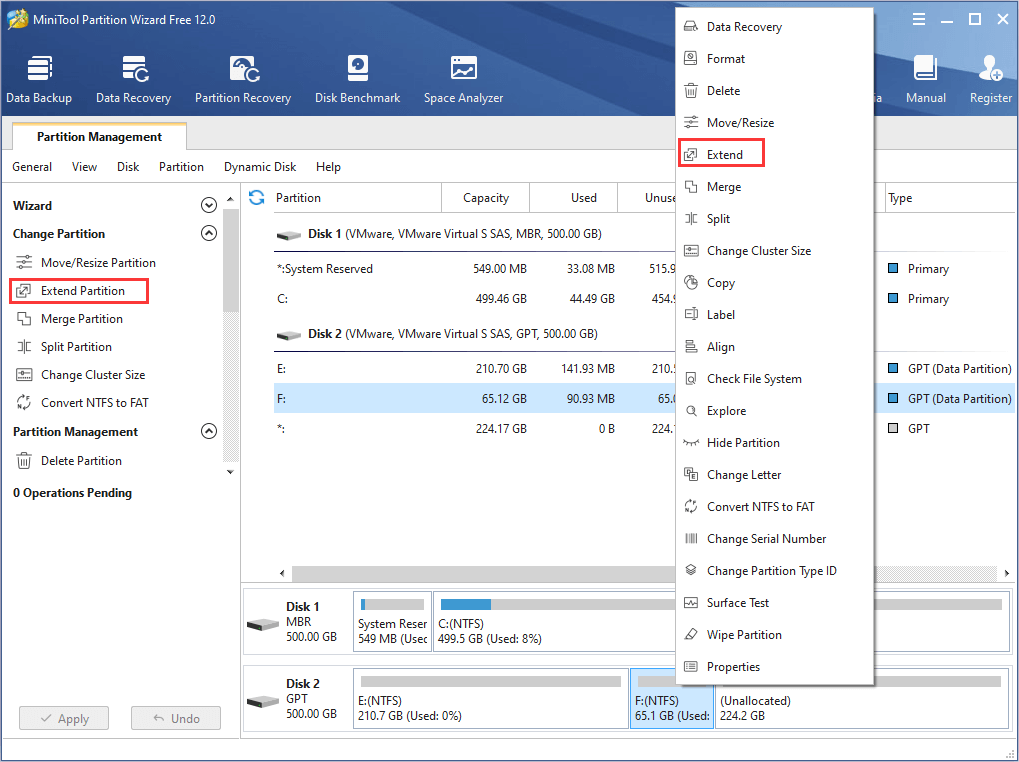
Step 3: In the Extend Partition window, you need to choose the partition you want to Take Free Space from, and move the slider to determine how much free space will be allocated for the partition you want to expand. Then, click OK button.

Step 4: When you back to the main interface, click Apply button to execute the pending operation.
Now, you can restart your computer to see if the error message disappears
MiniTool Partition Wizard is a great tool that helps me to enlarge my drive easily.Click to Tweet
Method 8: Disable Game Mode
If you are a game lover, you might have turned Game Mode on for the best gaming experience. However, the Game Mode might channel all the CPU resources to the game, leaving few CPU for OBS. Of course, this will lead to OBS encoding overloaded and the failure of streaming.
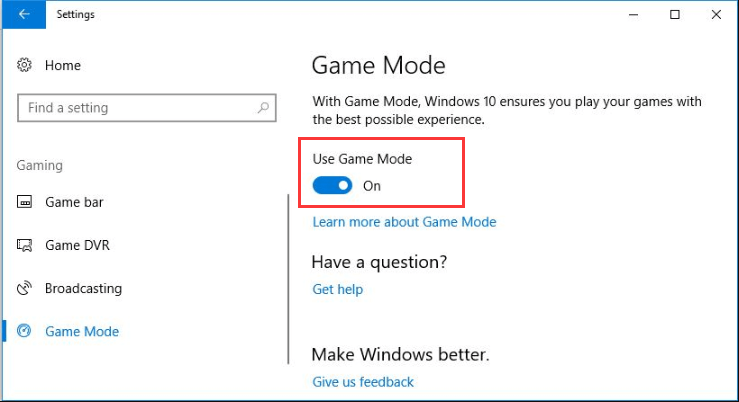
To fix this error, you should disable Game Mode in Settings.
Just press Windows + I to open Settings and go to Gaming > Game Mode. When you get the following screen, turn off the switch of Use Game Mode in the right pane.
Method 9: Upgrade Hardware or Use Alternatives
If all the methods introduced above fail to fix OBS studio encoding overloaded problem, you might need to consider the hardware issue. Perhaps the error occurs simply because your hardware cannot handle simultaneous streaming and gaming.
The demanding task of OBS for game recording and streaming needs a solid processor with 6 or 8 cores. Besides, you might need to upgrade your GPU if possible, as an outdated GPU will also bring some problems for streaming in your OBS. What’s worse, computer will run slow for this reason. To get solutions to fix computer running slow, you can check this post.
Finally, if fixing this OBS issue is too troublesome for you, you can choose to use another third-party program as an alternative, such as Bandicam, ShadowPlay, Discord, etc.
Bottom Line
OBS encoding overloaded is really an annoying problem, but you can fix the problem simply using the methods introduced in this post.
Have you resolved the problem successfully? Please tell us in the comment zone below, or contact us via [email protected] if you have problems with extending drive via MiniTool Partition Wizard.
OBS Encoding Overloaded FAQ
There are several methods to lower your CPU usage on OBS, just as it’s shown in this post.
- Reduce output resolution.
- Lower the frame rate.
- Change your encoder preset.
- Try hardware encoding.
- Upgrade your hardware.
You can choose to switch to hardware encoding to fix OBS encoding overloaded issue. To change encoding in OBS, just follow the steps below:
- Launch OBS and go to its Settings interface.
- Switch to Output tab and select Advanced for the Output Mode in the right pane.
- Open the menu of Encoder and choose the hardware encoder available for you, such as QuickSync H.264.
To fix or stop dropped frames issue in OBS, here are several tips provided for you:
- Reduce the streaming resolution.
- Enable dynamic bitrate or reduce the bitrate.
- Make sure your firewall settings are not interfering with the connection.
- Update network adapter driver.
- Stop streaming with wireless connection.
User Comments :