Do you know how to uninstall Internet Explorer from your Windows 10? A great many users are searching for this answer to the question on Google. If you are one of them, read the post of MiniTool, where detailed steps will be provided.
As an old web browser, the day of Internet Explorer 11 comes to the end. Plenty of excellent browsers like Google Chrome, Mozilla Firefox, Opera, and Microsoft Edge are replacing IE. If you don’t want to use it any longer, you can uninstall it.
Hence, a problem comes into being. How to delete Internet Explorer from Windows 10? You can refer to the following 3 methods.

Method 1. Uninstall Internet Explorer with Control Panel
The first method to remove Internet Explorer is to use Control Panel. You can follow the detailed steps below.
Step 1. Press Win + I keys to open the Settings window.
Step 2. Then click on the Apps option. In the pop-up window, click on App & Features on the left side.
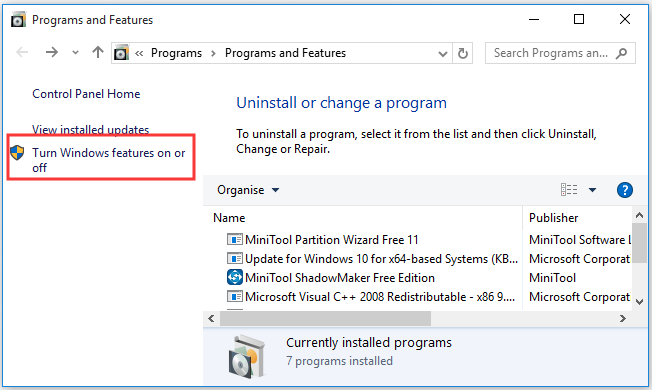
Step 3. On the right side, click on the Program and Features button under the Related settings.
Step 4. Click the Turn Windows feature on or off section on the left pane.
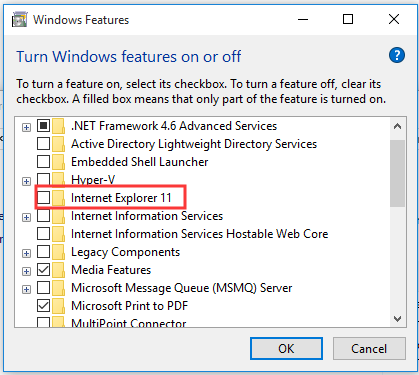
Step 5. In the Windows Features page, uncheck the folder of Internet Explorer 11 and click on the OK button.
Step 6. Then you will receive a confirmation message, just click on the Yes button.
Step 7. Click on Restart now button to restart your computer.
After you complete the above steps, Internet Explorer should be removed from your computer. When you search the Internet Explorer in Cortana, Microsoft Edge will become the top result and the Open with Internet Explorer option will be shown on the Start button.
How to uninstall Internet Explorer Windows 10? Let’s keep reading.
Method 2. Uninstall Internet Explorer with Windows PowerShell
Alternatively, you can use Windows PowerShell to delete Internet Explorer Windows 10. PowerShell is a Windows built-in utility that can be used to manage multiple computers by running the command lines. Here you can run a command line to uninstall IE 11.
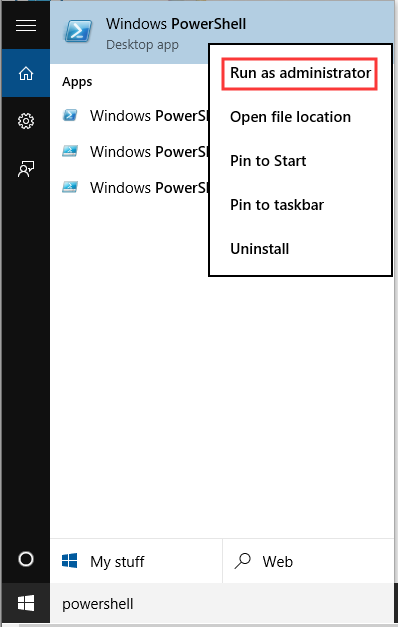
Step 1. Type PowerShell in the search box, and then right-click the top result and select the Run as administrator option.
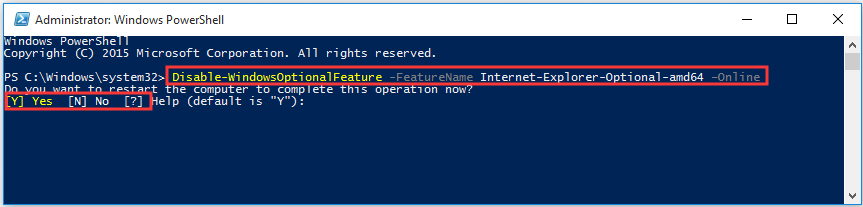
Step 2. In the pop-up window, type the following command to uninstall Internet Explorer Windows 10 and press the Enter key.
Disable-WindowsOptionalFeature -FeatureName Internet-Explorer-Optional-amd64 –Online
Step 3. Then you will be asked, “Do you want to restart the computer to complete this operation now?” Type Y on your keyboard and hit Enter to confirm.
After you complete all the steps, your computer will restart to execute this process and the Internet Explorer will disappear from your installation.
Well, if you need to use the browser later out of some reasons, you can find it back with the above instructions. But you need to replace the command in Step 2 with Enable-WindowsOptionalFeature -FeatureName Internet-Explorer-Optional-amd64 –Online.
Here comes the end of the post. Now, I believe that you already have known how to remove Internet Explorer from Windows 10. Have a try now!
User Comments :