You may want to format an SSD on Windows for a new SSD setup, reinstall the OS, or troubleshoot issues. You can use File Explorer, Disk Management, DiskPart, or MiniTool Partition Wizard to do that. Among these methods, MiniTool Partition Wizard is worth trying.
Solid-state drives (SSDs) are the first choice for most users due to their speed, durability, and efficiency compared to traditional hard drives (HDDs).
However, like any storage device, there may be times when you need to format your SSD, whether it’s to reinstall your system, optimize performance, or prepare the drive for a new user.
This guide will walk you through everything you need to know about formatting an SSD on Windows, covering various methods and some common issues (slow performance or cannot format).
About SSD Formatting
SSD formatting involves preparing the drive for use by creating a file system and potentially erasing all existing data. There are two main types of formatting – Quick Format and Full Format.
Quick Format
This process deletes the file system table (pointing to file locations) but leaves the underlying data intact. The drive simply marks the space as overwritable.
It doesn’t harm the lifespan of the SSD because it doesn’t perform the heavy writes that wear out the flash memory.
Full Format
This process writes zeros to every storage block of the SSD, effectively overwriting all existing data, making it difficult or impossible to recover. It also scans the partition for logically bad sectors.
A quick format on an SSD is faster because it only deletes the file system metadata and does not erase the actual data. A full format is slower because it also writes zeros to every storage block and checks for bad sectors.
A quick format is the recommended standard practice for SSDs. The key reason is that SSDs work fundamentally differently from HDDs.
If your goal is to securely and permanently erase the data on your SSD before selling or recycling it, neither a quick nor a full format is the best approach.
Instead, you should use the manufacturer’s Secure Erase utility. This sends special commands directly to the SSD controller, completely and permanently erasing all data from the drive’s storage cells, ensuring that the data cannot be recovered without damaging the drive.
When Do You Need to Format SSD?
You typically format an SSD in the following situations: when setting up a new SSD, reinstalling the Windows OS on the SSD, clearing all data on an SSD for reuse, or troubleshooting.
Formatting prepares the drive for use by the operating system, ensuring it can be recognized and used properly. Here are more detailed instructions:
#1. New SSD Setup
When you purchase a new SSD, it may come unformatted. Depending on the operating system, it typically needs to be formatted to match the operating system’s file system (such as NTFS for Windows or APFS for macOS) before it can be used to store data.
#2. Change the File System
You may have noticed that you can choose the file system when formatting a drive. This means you can change the file system by formatting the drive. To change the file system from NTFS to EXT2/3/4, simply format the drive.

#3. Reinstall the OS on the SSD
Formatting the hard drive is generally recommended when reinstalling an operating system, as it ensures a clean hard drive and can resolve most issues from the previous installation.
However, the operating system installer typically formats the hard drive during the installation process.
#4. Troubleshoot Issues
In some cases, formatting can help resolve file system errors. However, formatting should be performed with caution, as it erases all data on the drive.
#5. Repurpose
Formatting an SSD deletes all existing data, allowing you to use it for a different purpose.
Preparation Before Formatting the SSD
Formatting will delete data on the SSD, so taking the following precautions is vital.
#1. Backup Important Data
Before formatting, it’s better to back up important data to another storage device, cloud services, or an external hard drive. In regard to backup, MiniTool ShadowMaker is the right choice for you.
This PC backup software supports backing up your files, folders, disks, systems, and partitions to an internal/external hard drive, USB flash drive, and more.
MiniTool ShadowMaker TrialClick to Download100%Clean & Safe
#2. Determine the File System
It’s crucial to choose the appropriate file system for compatibility and performance while formatting the SSD. NTFS, exFAT, and FAT32 are three widely used file systems on Windows.
- NTFS: The default file system for Windows. It supports large files (over 4GB), file permissions, encryption, and compression. And it is ideal if the SSD will only be used with Windows.
- exFAT: It is compatible with both Windows and macOS. And it is suitable for external SSDs that need to transfer files between operating systems, though it lacks some security features of NTFS.
- FAT32: An older file system with limitations on file size (up to 4GB) and partition size (up to 32GB on Windows). It’s generally not recommended for SSDs.
In general, NTFS is the best choice for an internal SSD used as a system drive. For external SSDs shared between devices, exFAT offers better cross-platform compatibility.
How to Format SSD?
There are four methods for formatting an SSD on Windows.
- File Explorer
- Disk Management
- Command Prompt
- MiniTool Partition Wizard
Among these methods, MiniTool Partition Wizard has a simple user interface and boasts a lot of features to manage disks/partitions. It is worth trying.
Way 1. Use File Explorer
File Explorer is a file manager app that is included in Microsoft Windows. It also provides an easy way to format an SSD. This method works for both internal secondary drives and external SSDs.
Step 1. Open File Explorer.
Press the Win + E key or click the folder icon in the taskbar.
Step 2. Navigate to “This PC”.
In the File Explorer window, locate This PC on the left-hand side.
Step 3. Select and format the SSD.
You should see all your connected drives listed under Devices and drives. Right-click the SSD you want to format and choose Format. This will open the “Format” dialog box.
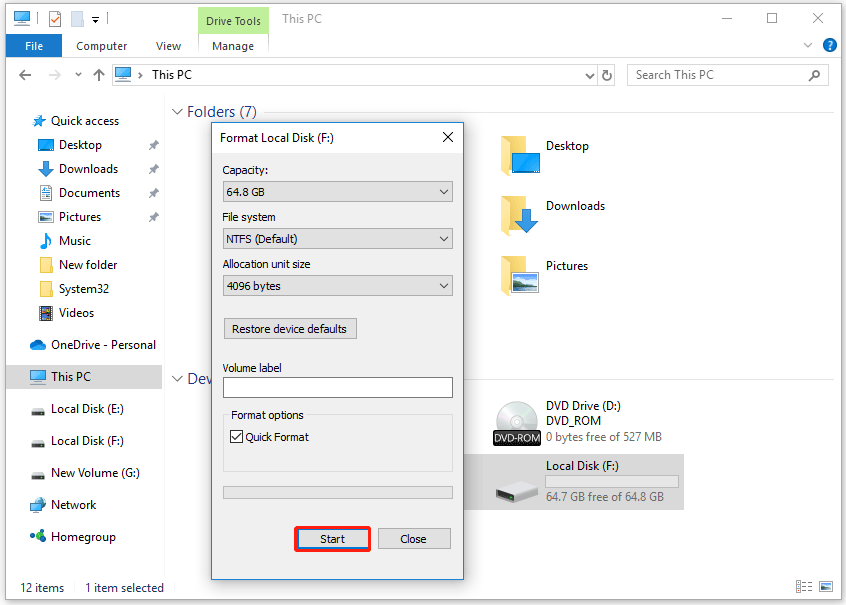
Step 4. Configure the formatting options.
- File system: Select NTFS for Windows only, exFAT for cross-platform compatibility, or FAT32 for excellent compatibility.
- Allocation unit size: Use the default value (typically 4096 bytes for NTFS) to ensure 4K alignment. It is critical for SSD performance. Modern Windows automatically aligns NTFS sectors by default when formatting. In general, manual adjustment is unnecessary.
- Volume label: Enter a name for the drive (optional).
- Quick format: Make sure this box is checked to minimize write operations.
Step 5. Start formatting.
Click Start and confirm the warning message. A progress bar will appear, and the process is expected to complete within a few minutes, depending on the size of the drive.
Once complete, the SSD will appear in File Explorer under the label you selected, ready for use.
Way 2. Use Disk Management
You can format your SSD using Disk Management, Windows’ built-in hard drive formatting tool. Disk Management is a Microsoft Windows utility first introduced in Windows XP to replace the aging FDISK command.
Disk Management can perform simple disk and partition operations, such as creating/deleting/formatting partitions, changing drive letters, and extending or shrinking partitions.
Therefore, you can use Disk Management to format an SSD on Windows, which is quite simple. The procedure is as follows.
Step 1. Open Disk Management.
- Right-click Start and select Disk Management.
- Press the Windows key + R, type “diskmgmt.msc“, and press Enter.
Step 2. Locate the SSD.
In the Disk Management window, find the SSD you want to format.
If it’s a new SSD, it might show as “Not Initialized” and “Unallocated”. Skip to step 3.
If it’s an existing drive, it will be listed with its current partitions.
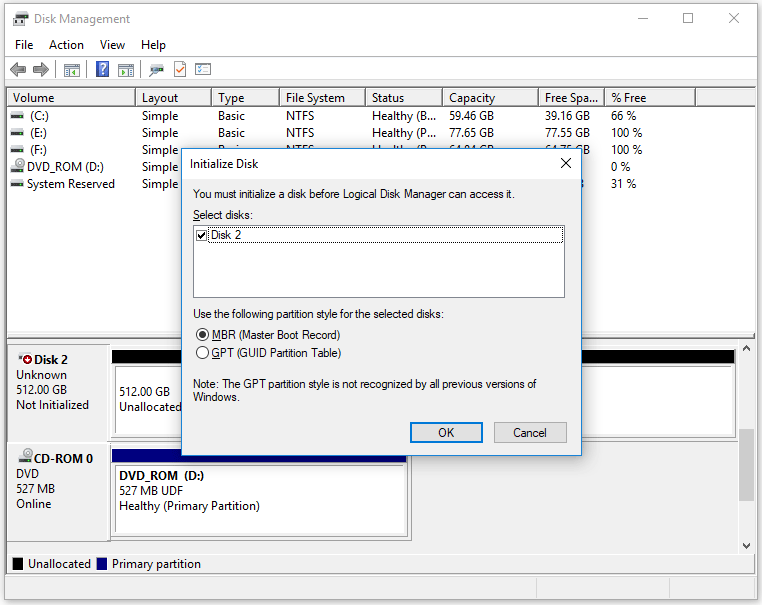
Step 3. Initialize the SSD (for new drives).
- Right-click the SSD and select Initialize Disk.
- Choose GPT or MBR partition style and click OK.
Step 4. Format the SSD.
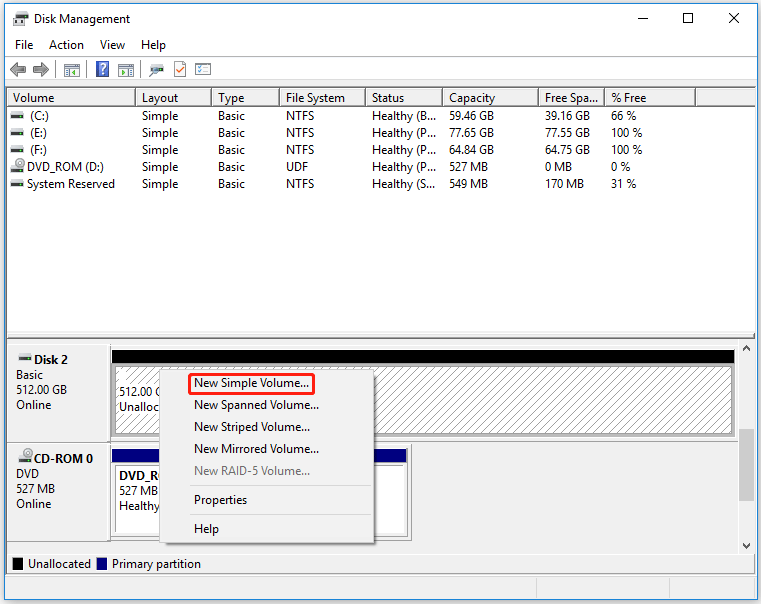
If it’s unallocated, you need to create a new volume to begin the formatting process.
- Right-click on the unallocated space and select New Simple Volume.
- Follow the wizard to specify the volume size.
- Assign a drive letter and proceed to the formatting step.
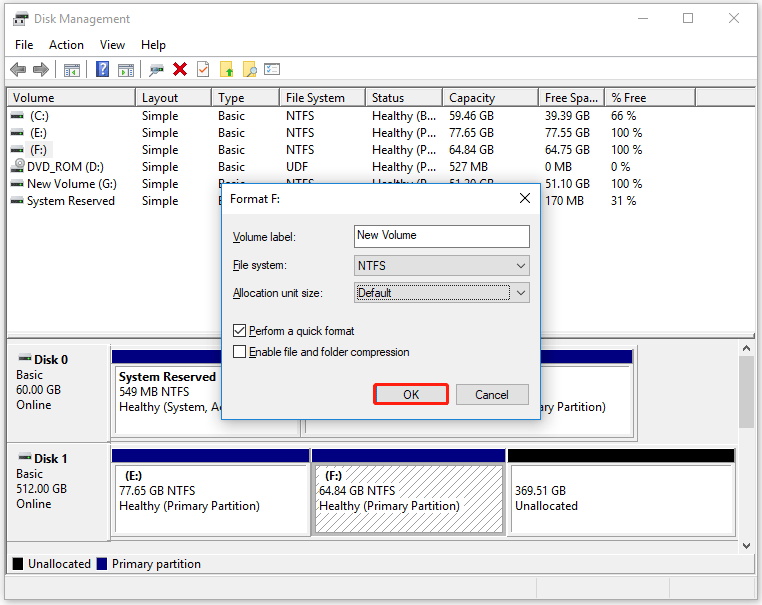
If it has existing partitions, you need to format the partition on the SSD.
- Right-click on the partition and select Format.
- Specify the volume label, file system, and allocation unit size.
- Check Perform a quick format.
- Then click OK to confirm the formatting process.
Once complete, the drive will be ready for use.
Way 3. Use DiskPart
DiskPart is a disk partitioning utility that uses command lines to perform operations. It can be used to manage partitions of hard disks, USB flash drives, etc., including creating/deleting/merging partitions.
Advanced users may prefer this tool to format the SSD. Here’s a step-by-step breakdown:
Step 1: Press the Win + R keys to open the Run dialog box, and then type diskpart in it and press Enter. Click on Yes to open the tool in Command Prompt.
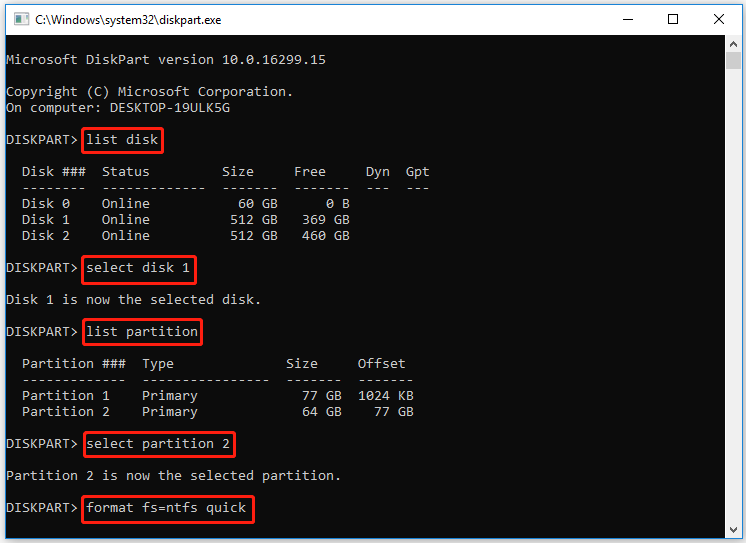
Step 2: Type the following commands in order and press Enter after typing each one.
- list disk (This command will list all disks detected by the PC)
- select disk * (* represents the drive number)
- list partition (This command will list all partitions on the selected disk)
- select partition * (* represents the partition number of the drive)
- format fs=ntfs quick (This command will quickly format the drive to NTFS)
Step 3. After the formatting process completes, you can type exit and press Enter to close the Command Prompt window.
Way 4. Use MiniTool Partition Wizard
Compared to these Windows’ built-in tools, MiniTool Partition Wizard offers significant advantages in functionality and ease of use.
As for a reliable free partition manager, it can format hard drives, SSDs, SD cards, and USB flash drives on Windows.
It also offers rich partition management features, such as resizing, moving, merging, and splitting partitions, as well as support for GPT/MBR conversion. These features are either limited or complex in Windows’ built-in tools.
Furthermore, MiniTool Partition Wizard’s interface and operation are more intuitive, making it easier for average users to use.
MiniTool Partition Wizard FreeClick to Download100%Clean & Safe
Here is how to format the SSD using MiniTool Partition Wizard.
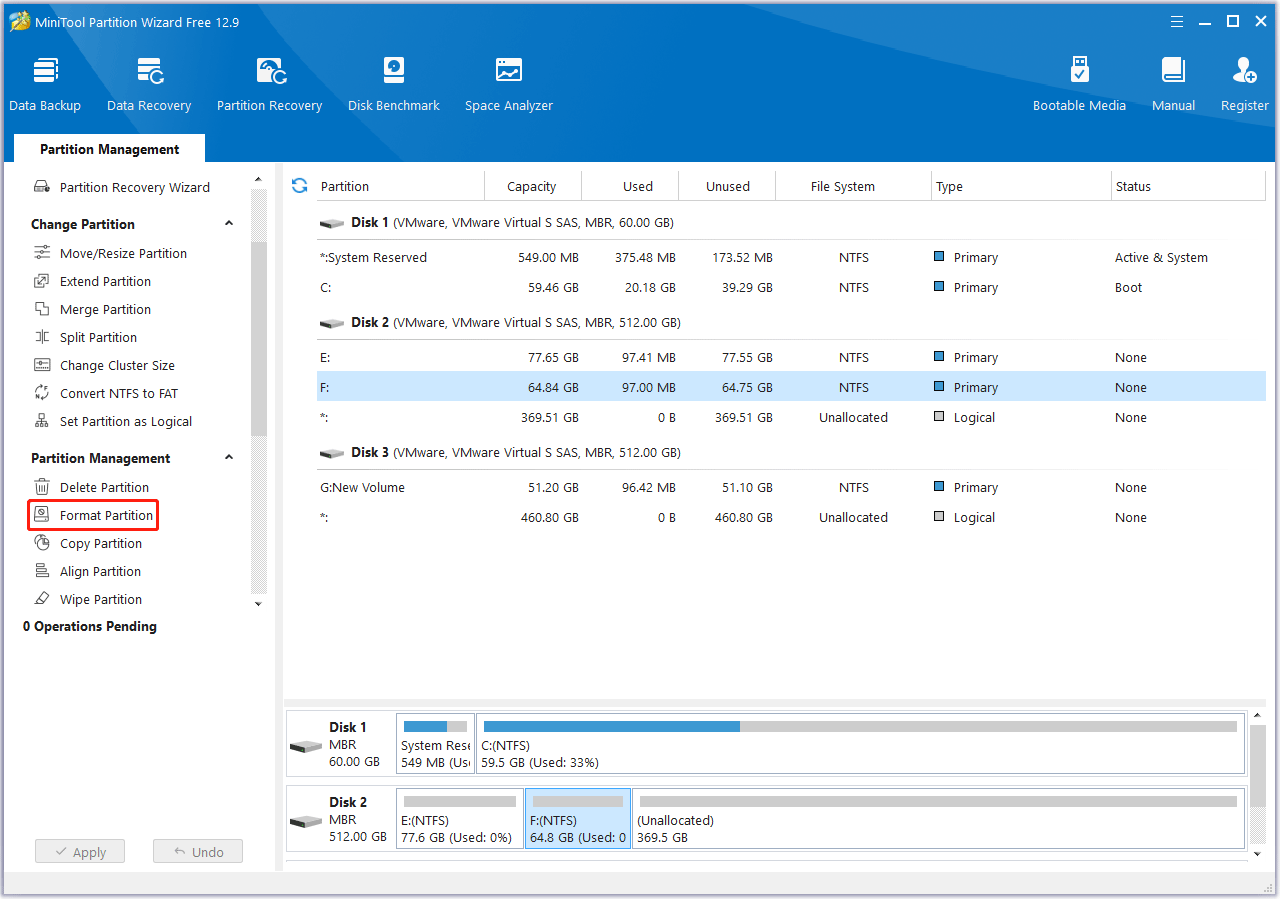
Step 1. Choose the partition on the SSD.
- Open MiniTool Partition Wizard after installation.
- Choose the partition on the SSD that you want to format.
- Select the Format Partition feature from the left action panel.
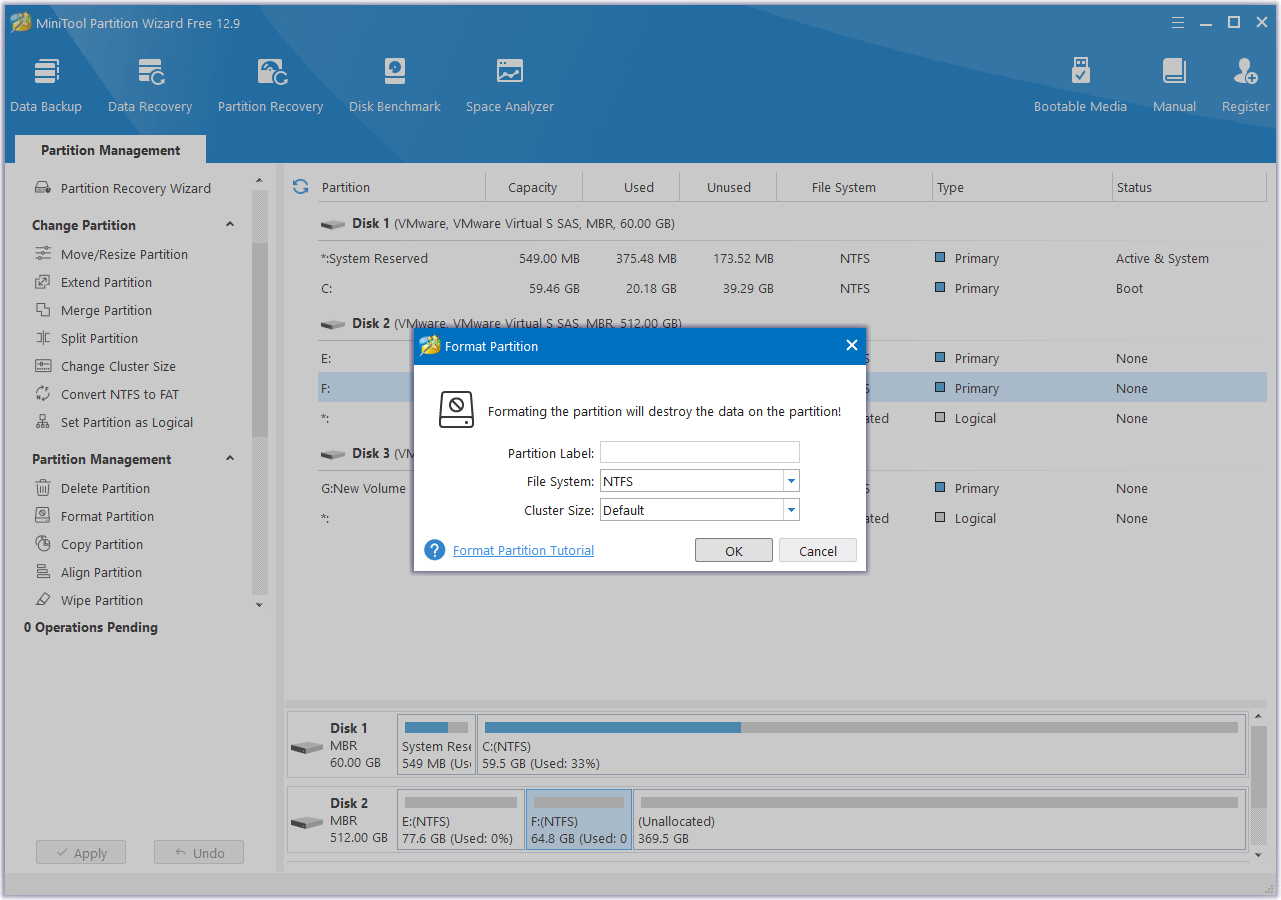
Step 2. Configure the formatting settings.
In the Format Partition window, you will need to do:
- Select a file system: Choose between options like NTFS, FAT32, or exFAT.
- Assign a volume label (optional): Give your formatted drive a name.
- Set cluster size: This determines the size of data blocks on the drive. The default is usually fine.
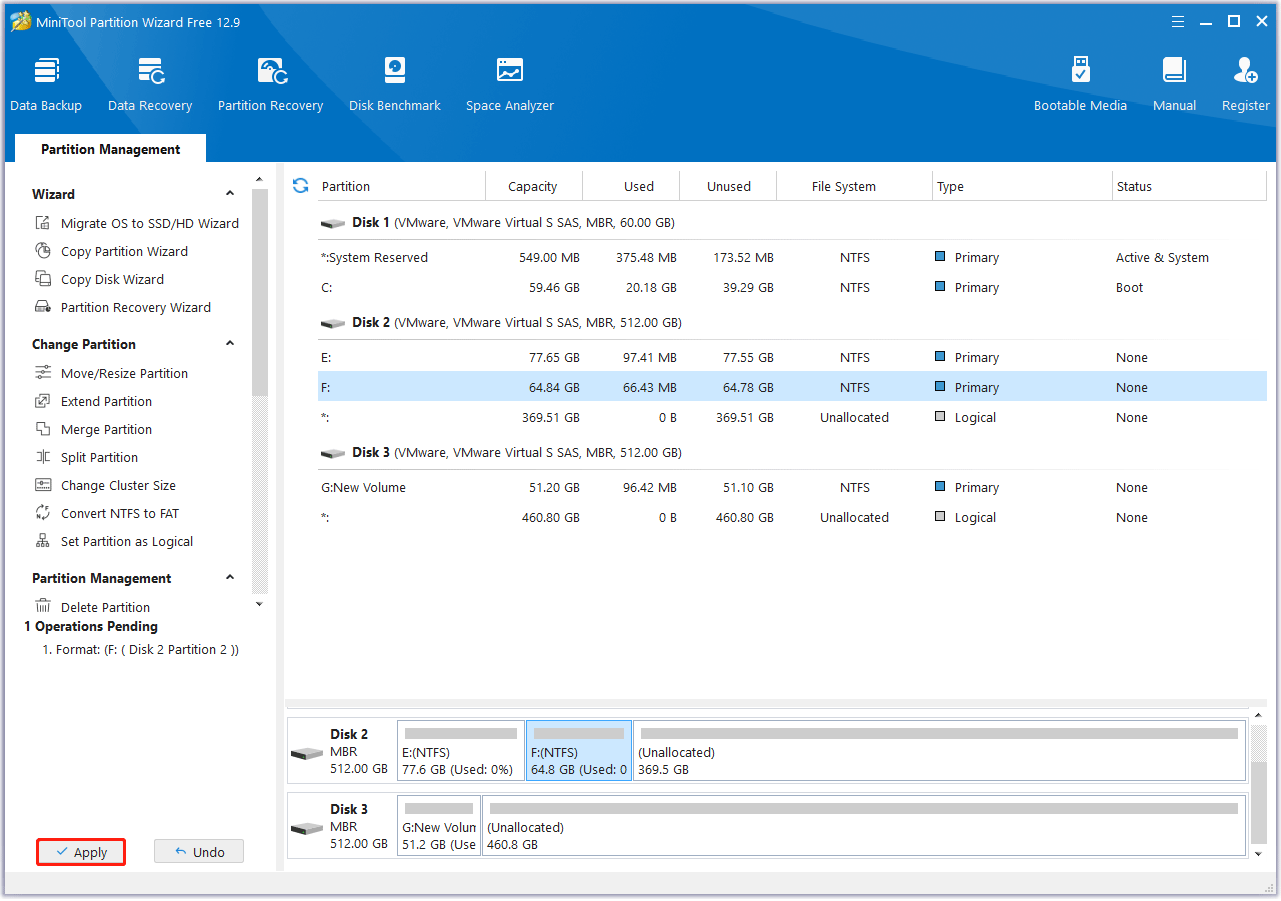
Step 3. Apply the changes and confirm.
- Click OK on the Format window.
- Then click Apply to start the formatting process.
- Click Yes to proceed when this tool prompts.
What to Do If You Encounter Issues After Formatting?
Are you encountering some issues after formatting the SSD? Here, we list some common issues.
Issue 1. Windows Can’t Format the Drive
This error may occur due to write protection on the drive or drive errors. To fix it, you can try:
Remove write protection
Step 1. Type CMD in the Search box, right-click Command Prompt, and then choose Run as administrator.
Step 2. In the Command Prompt window, type diskpart and press Enter.
Step 3. Type the following commands and press Enter after each one.
- list disk
- select disk # (# refers to the number of the drive)
- attributes disk clear read-only

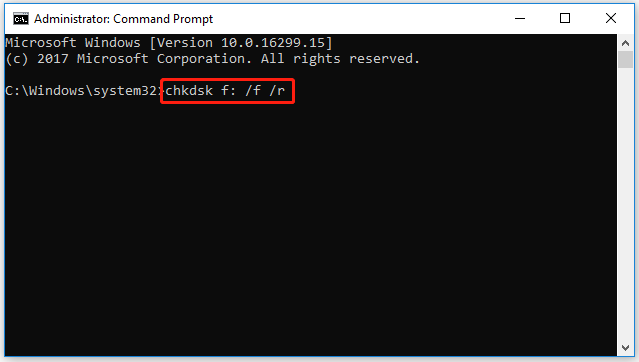
Check and fix drive errors
Step 1. Open Command Prompt as an administrator again.
Step 2. Type chkdsk *: /f /r (* represents the drive letter) and press Enter.
Issue 2. Slow Performance After Formatting
If your SSD performs poorly after formatting, you can try to ensure TRIM is enabled and do 4K alignment. Here is the guide:
Enable TRIM
TRIM plays an important role in making an SSD work faster. It can help the OS precisely detect the data location that you want to move or delete.
It can mark the data blocks as no longer needed, which allows the SSD’s built-in garbage collection mechanism to delete them at a more appropriate time.
So, make sure the SSD TRIM feature is enabled on your PC. For that:
Step 1. Open the Command Prompt as an administrator.
Step 2. Type the fsutil behavior query disabledeletenotify command and hit Enter.
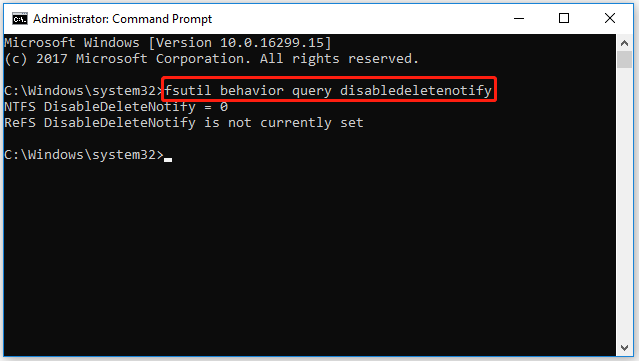
Step 3. If the Command Prompt displays DisableDeleteNotify = 0, it means the TRIM has been turned on for your SSD. If the number is 1, you need to run the fsutil behavior set disabledeletenotify = 0 command to enable TRIM.
Align the SSD Partitions
4K alignment can align the physical storage space of the SSD, thereby improving SSD performance, including disk read and write speeds, Windows running speed, and startup speed.
As for a free SSD alignment tool, MiniTool Partition Wizard is a great choice. It can help you align partitions on the SSD easily. Here are the steps:
MiniTool Partition Wizard FreeClick to Download100%Clean & Safe
Here are the steps to align all partitions on the SSD using MiniTool Partition Wizard.
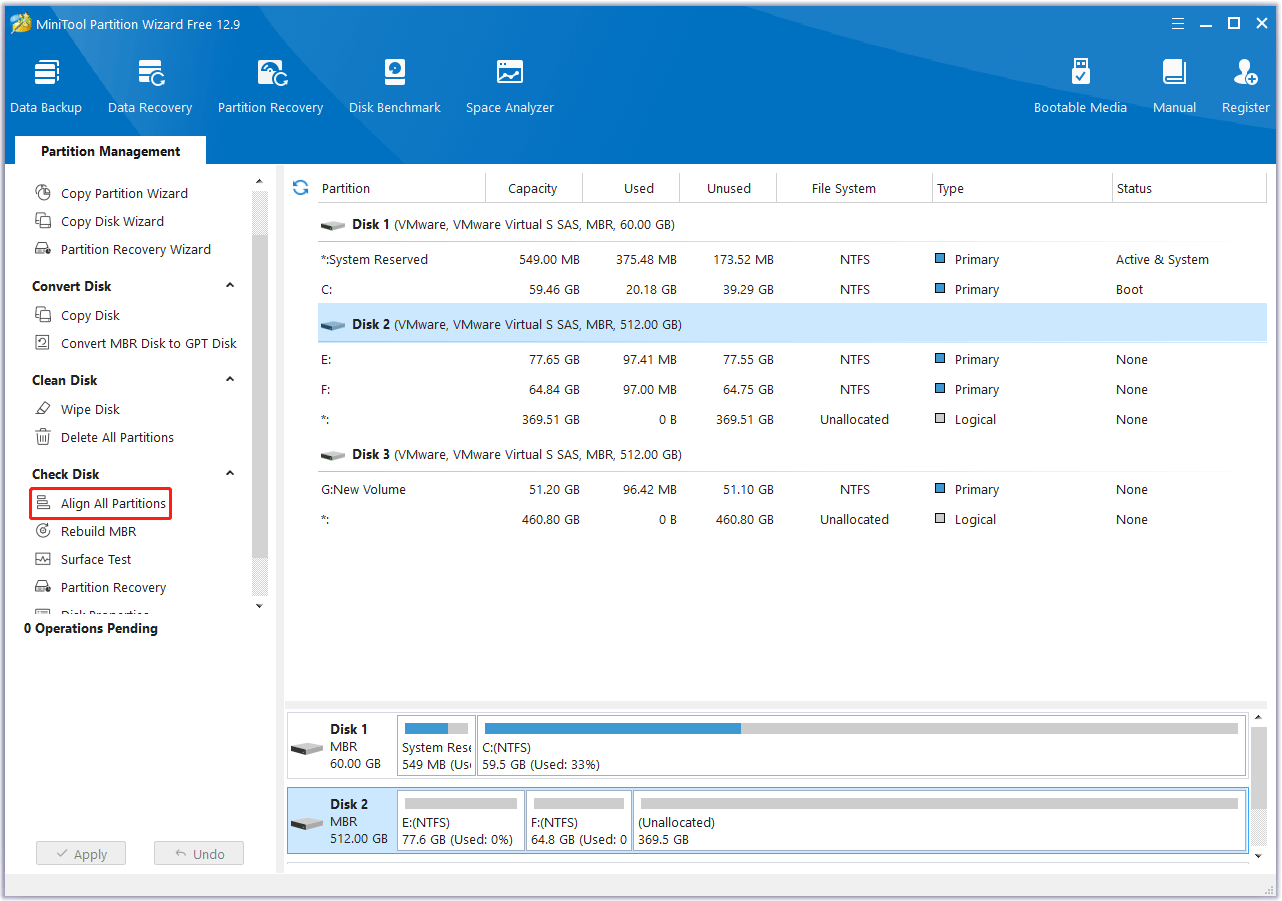
Step 1. Launch this free disk partition software to enter its main interface.
Step 2. Choose the target SSD and click on Align All Partitions from the left action panel.
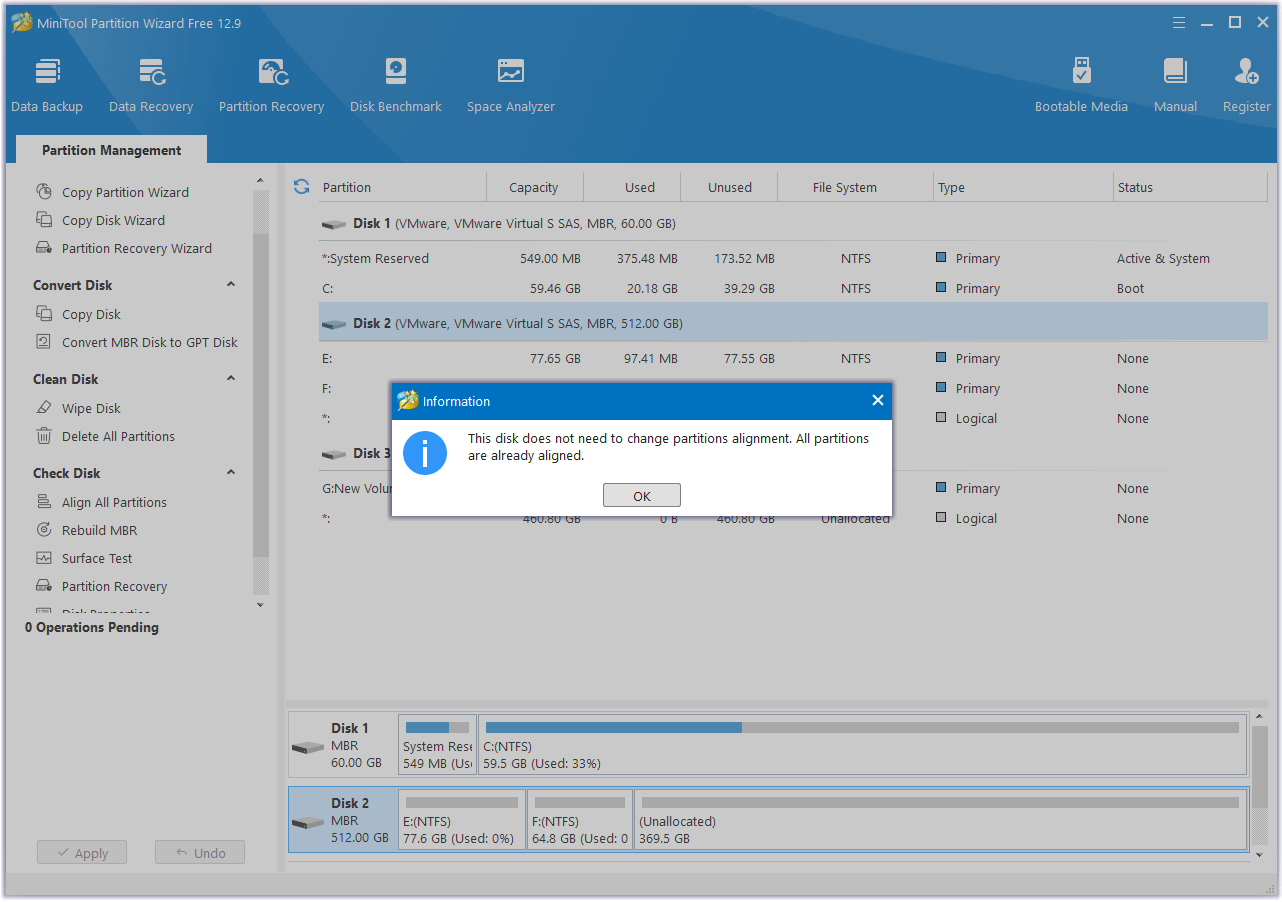
Step 3. If this software detects misaligned partitions, it will tell you how many partitions need to be aligned. If all partitions on the disk are already aligned, it will show you information telling “All partitions are already aligned.” Then click on OK to continue.
Recover Data from the Formatted SSD
If you accidentally formatted the wrong partition on the SSD, don’t worry. You can recover data from the formatted hard drive with MiniTool Partition Wizard.
Its Data Recovery feature can recover files from logically damaged, formatted, and RAW partitions, as well as recover files mistakenly deleted from internal or external hard drives.
Note that the Data Recovery feature is only available in MiniTool Partition Wizard Pro Platinum and above editions.
Here is how to recover lost data with MiniTool Partition Wizard:
Step 1. Launch the MiniTool software to enter its main interface and click Data Recovery in the top toolbar.
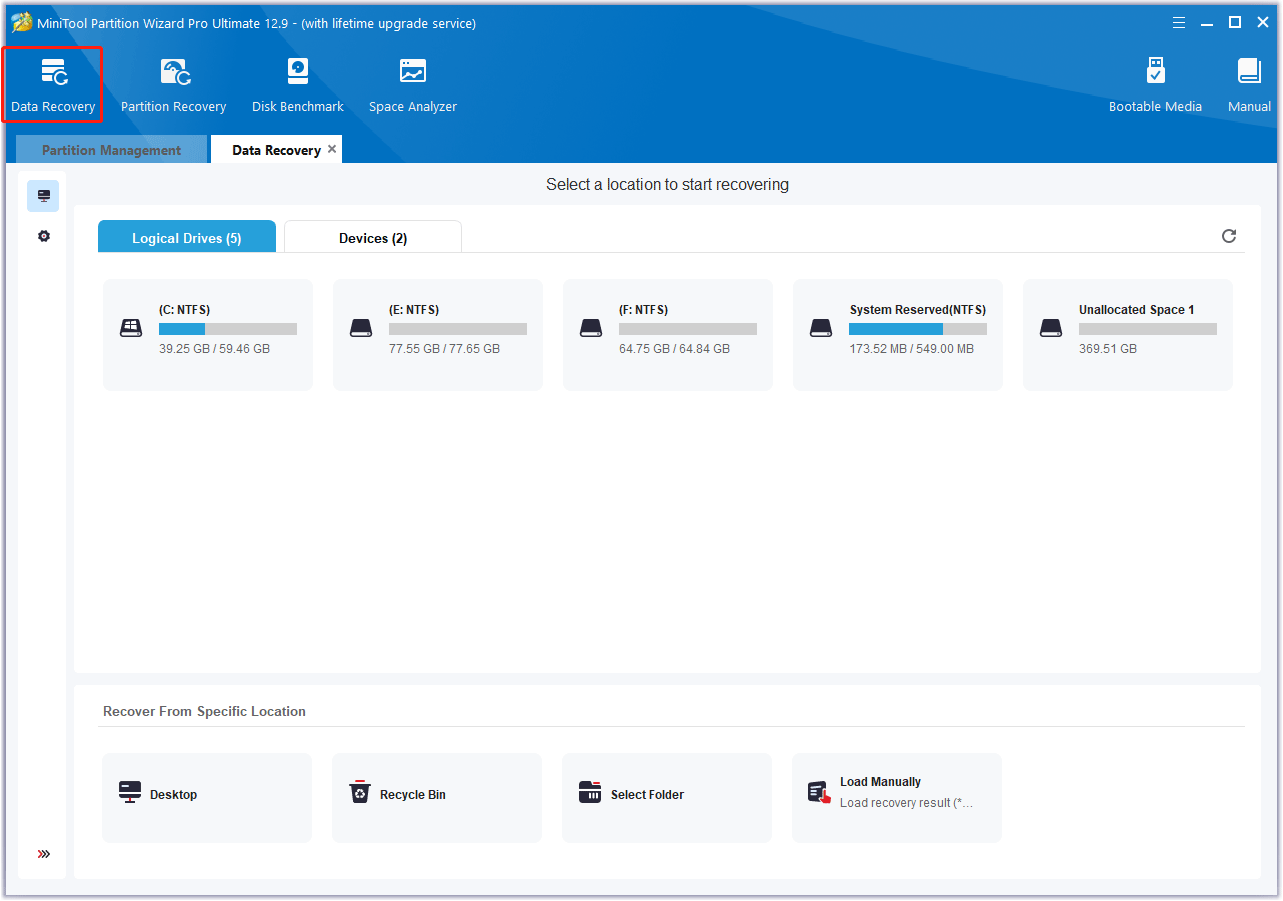
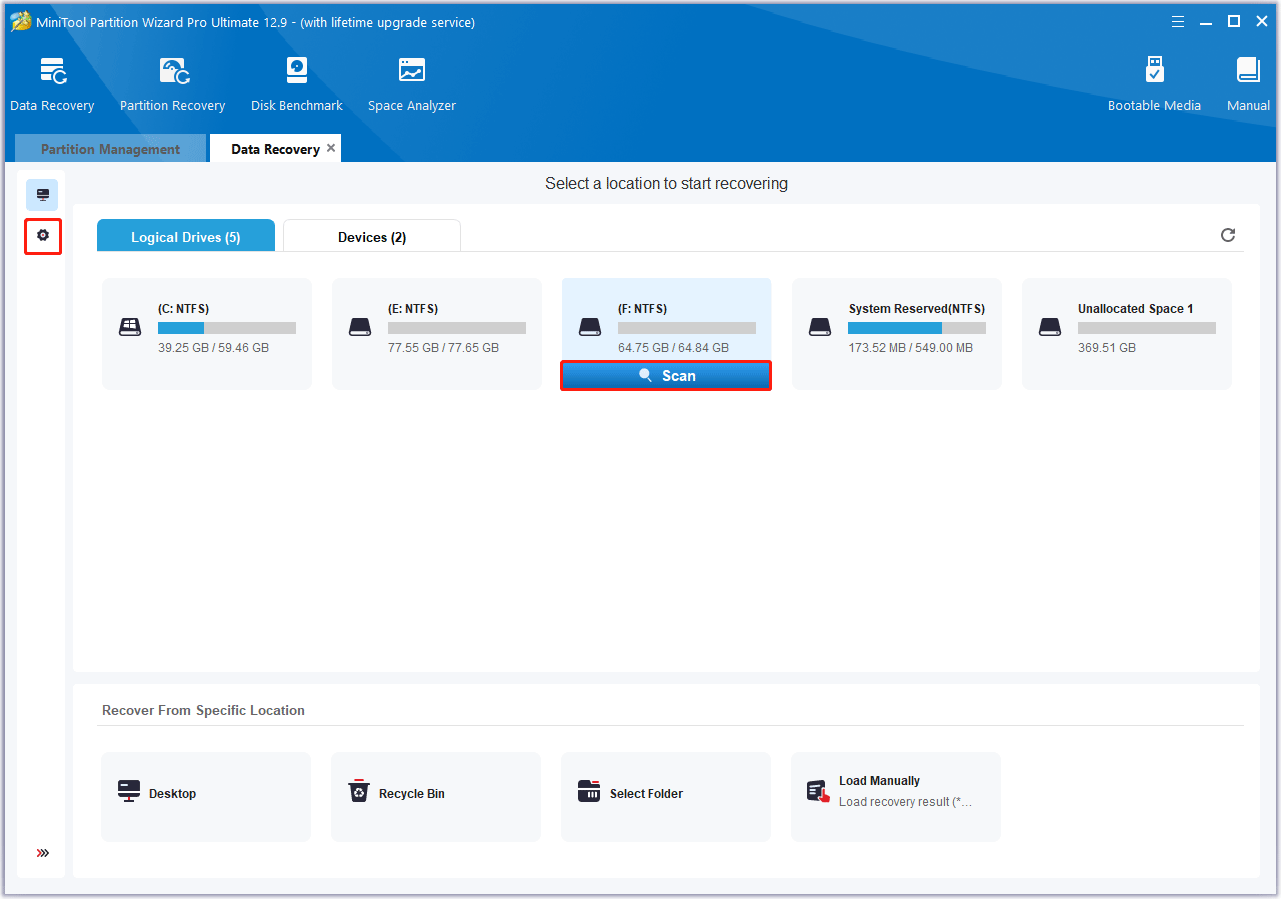
Step 2. In the pop-up window, under the Logical Devices tab, select the hard drive where you are losing data and click Scan. In addition, you can also customize the scan settings.
Step 3. Then, wait for the scan to complete. If the desired data is found, you can click the Pause or Stop icon to get instant data recovery.
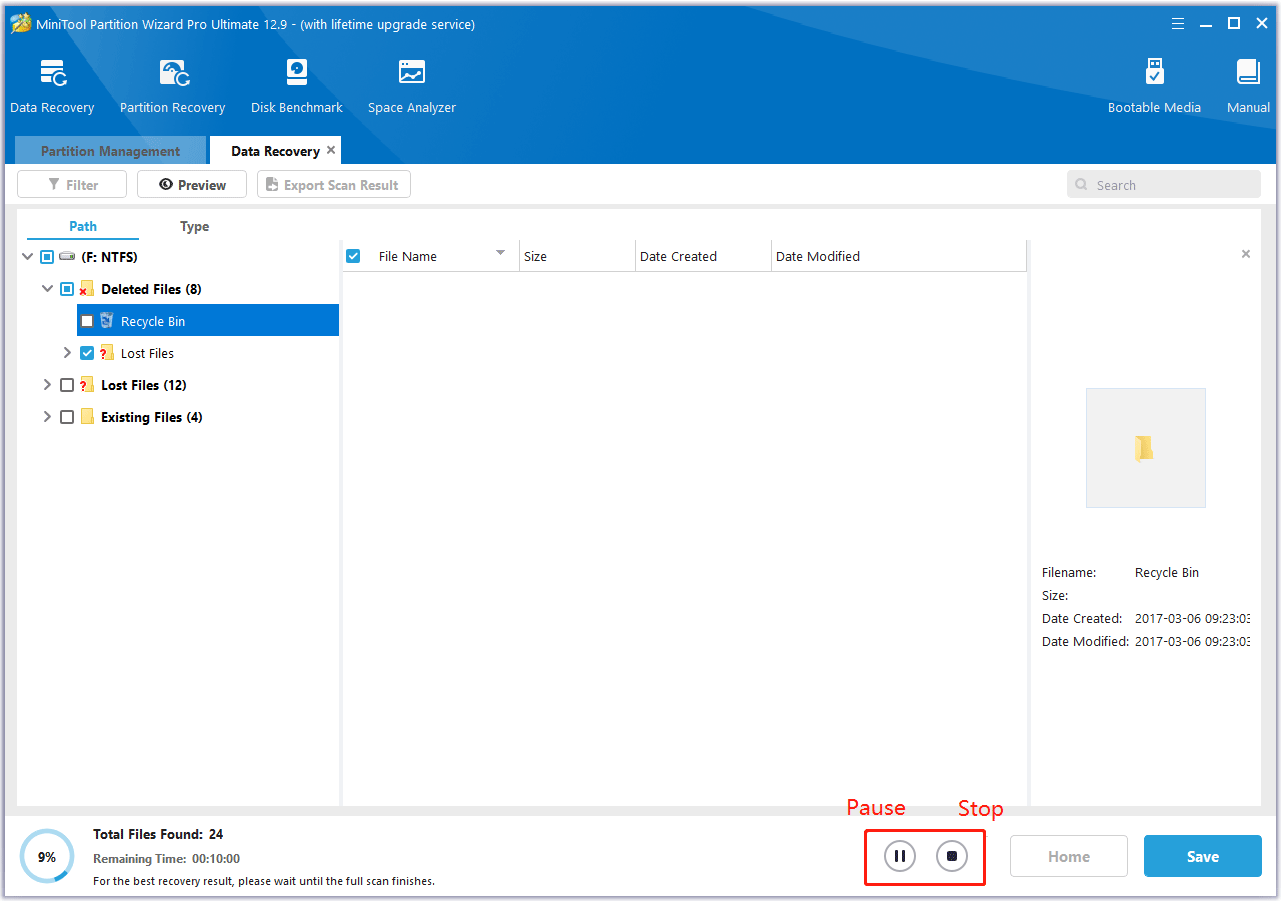
Step 4. After completing the scan, you can go to the Search box in the upper right corner and type the specific file name to quickly find the needed file.
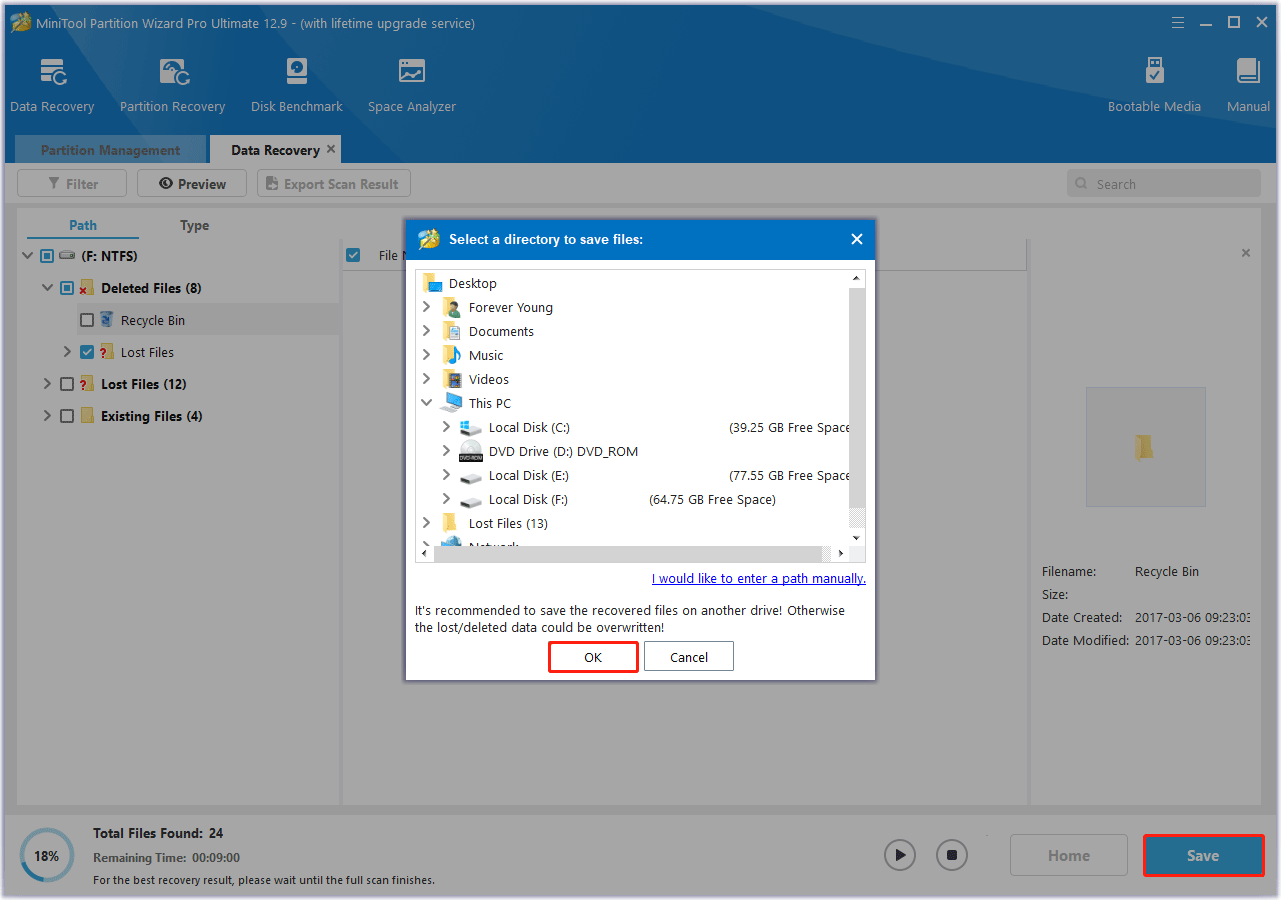
Then, make sure to tick the checkboxes of the folders/files you want to recover and click Save. Here, you can also click the Preview button to preview the files/folders.
Step 5. In the pop-up window, select the location to save the selected files/folders and click OK to confirm this action.
Bottom Line
Formatting an SSD on Windows is simple if you follow the correct steps, but it requires careful planning to protect your data and maintain the health of the drive. Be sure to clone important files to a safe location and choose the right file system for your needs.
If you have any questions or suggestions on how to use MiniTool Partition Wizard, please do not hesitate to contact us via [email protected].
How to Format SSD FAQ
About The Author

Position: Columnist
Vega enjoys helping people with computer problems, including disk management, data recovery, data backup, and more. She is constantly expanding her knowledge in related fields. And she will continue to bring more easy-to-understand professional articles to help people solve various problems on the PC.
User Comments :