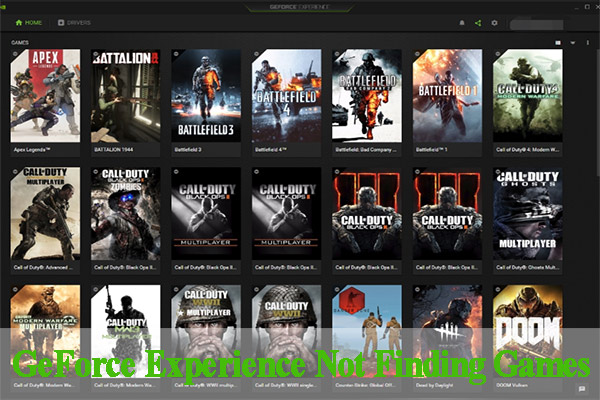
When GeForce Experience is trying to scan for the installed games, an error message pops up “scanning failed”. Are you also bothered by the GeForce Experience scanning failed error? Now, you can obtain several solutions from MiniTool.
GeForce Experience scanning failed error often appears when scanning many game installation folders. In fact, not all games are supported by GeForce Experience. The first thing you should do is to check if your games are actually supported by viewing this page.
In addition, other causes are responsible for the GeForce Experience scan failed error. The most common reason is that your faulty graphics card drivers. Insufficient permissions or lacking ownership can trigger scanning failed GeForce Experience.
Fix 1. Uninstall Your Graphics Card Driver
Corrupted graphics card driver often causes many game errors like KOTOR crashing, Minecraft not using GPU, Dying Light crashing, and GeForce Experience scanning failed. To get rid of this error, you can try uninstalling the graphics card driver.
Step 1. Press Win + R keys to open the Run dialog box, and then type devmgmt.msc in the box and hit Enter to open this program.
Step 2. In the Device Manager window, expand the Display adapters categories, then right-click the graphics card driver and select Uninstall device. Then follow the on-screen instruction to finish the uninstallation.
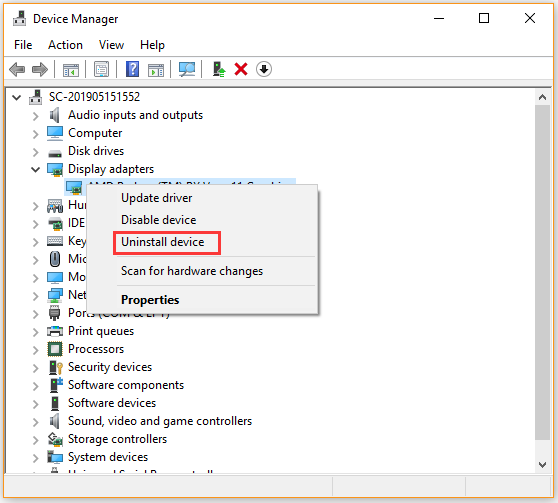
Step 3. Restart your computer and Windows will automatically install a default graphics card driver for you.
Now, check if the GeForce scanning failed error still persists. If it doesn’t work, move on to the following solutions.
Fix 2. Clean Install the NVidia Driver
If uninstalling the graphics card driver fails to work, you can try performing a clean installation of the NVidia driver. This method actually helped lots of users. Have a try now.
Step 1. Click here to open the NVidia Driver Downloads page, and then enter the required information including the NVidia driver and operating system in the boxes and click on Search.
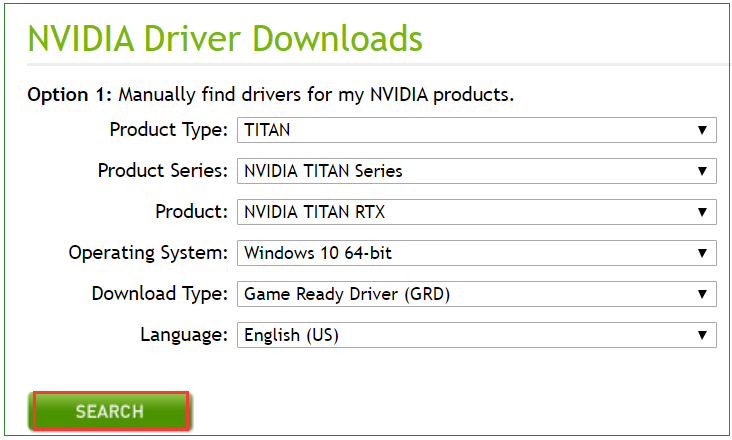
Step 2. Now, you will see a list of NVidia drivers. Scroll down the list until you find the required driver, and then select its name and click on the Download button.
Step 3. Open the downloaded driver on your computer and follow the on-screen instructions to install.
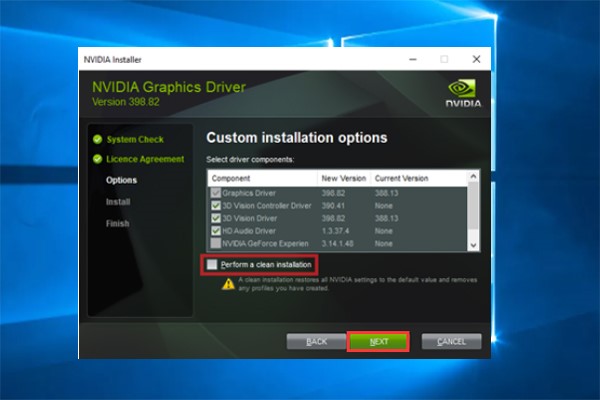
Step 4. Once you reach the Installation options screen, select the Custom (Advanced) option, and click on Next. Then you will see a list of installed components.
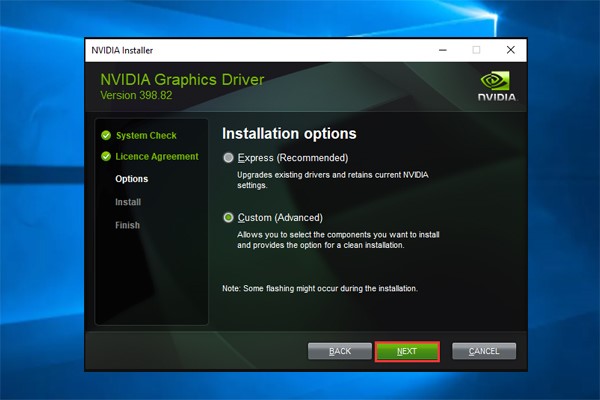
Step 5. Tick the checkbox next to Perform a clean installation and click Next button to install the driver.
Now, check to see if the NVidia GeForce Experience scanning failed error still appears.
Fix 3. Run NVidia GeForce Experience as an Administrator
As mentioned above, GeForce Experience scanning failed error often appears when the installation folders can’t be fully accessed due to insufficient permissions. So, we recommend you run this program as an administrator.
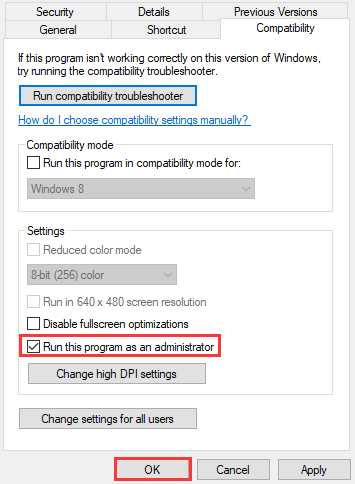
Step 1. Right-click the GeForce Experience shortcut on your desktop and select Properties from the context menu.
Step 2. Navigate to the Compatibility tab, and then select the checkbox for Run this program as an administrator and click on OK to save the change.
Now, reopen and check if the GeForce Experience scan failed error is fixed or not.
Fix 4. Grant the Ownership of the Installed Game Folders
If the issue still persists, then it may be caused by lacking ownership of the game installation folders. In this case, you need to grant enough permissions to GeForce Experience. Here’s how to do that:
Step 1. Open your File Explorer, and then navigate to the parent folder that states the error scanning failed GeForce Experience.
Step 2. Right-click the folder and select the Properties.
Step 3. In the Properties window, navigate to the Security tab and click on the Advanced button.
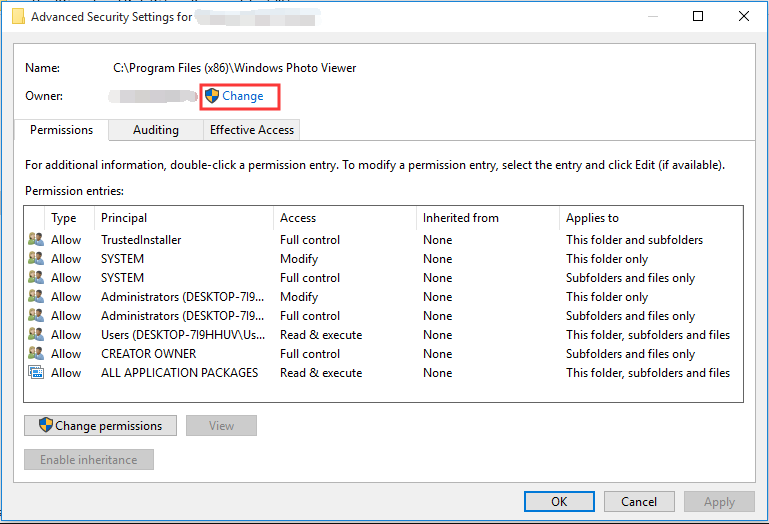
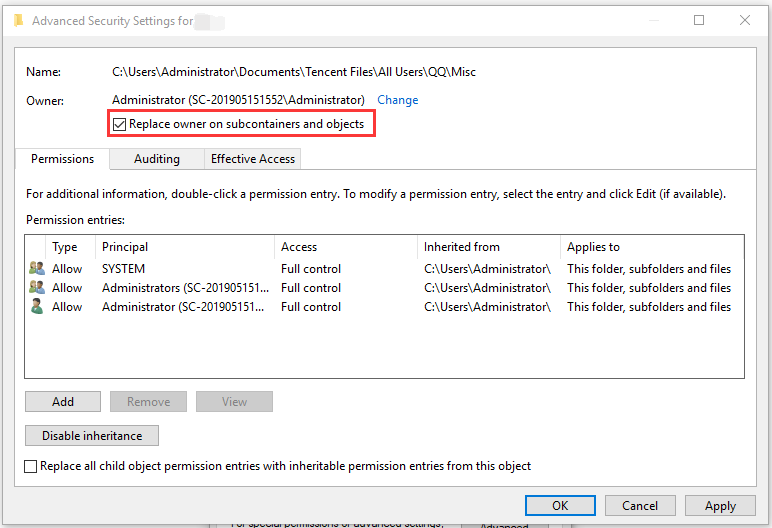
Step 4. Now the Advanced Security Settings window pops up, click the Change link next to the Owner label.
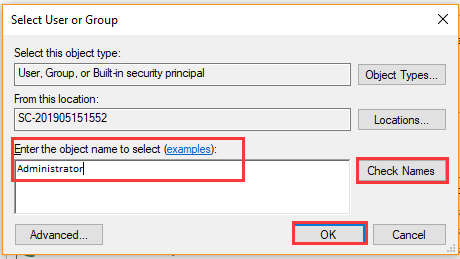
Step 5. Enter the object name that you are using on your computer and click on the Check Names button. Then Windows will check and complete the full object name automatically. Once the full name completes, click on OK.
Step 6. Tick the checkbox next to Replace owner on sub containers and objects and click on OK in the Advanced Security Settings window.
Now, you should take ownership of the folder and check if GeForce scanning failed error is fixed.
![How to Change Default Graphics Card Windows 10 [Full Guide]](https://images.minitool.com/partitionwizard.com/images/uploads/2020/09/how-to-change-default-graphics-card-win10-thumbnail.jpg)
User Comments :