In order to improve system performance or use for a specific app, a great many people are using multiple GPUs. Now, Windows 10 users can use multiple GPUs (also called graphics card) and set default graphics card an app inside the control panel.
However, lots of users are confused about how to set default graphics card. Some users want to set a dedicated GPU for apps. For this, how to change default graphics card Windows 10 for apps? Please keep reading the following content.

How to Check Graphics Card Windows 10
If you are using an NVidia or AMD graphics card, then you can set and change the default graphics card insides its control panel. So, it is necessary to know what graphics card your computer is using. Let’s see how to check graphics card Windows 10.
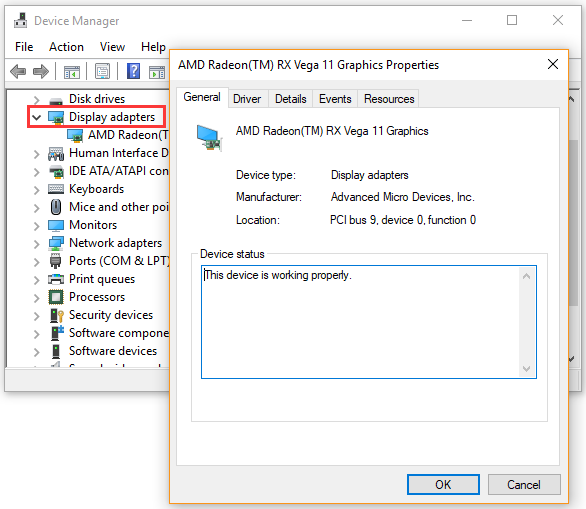
Step 1. Press the Win + R keys to open the Run dialog box, and then type devmgmt.msc in the box and hit Enter.
Step 2. In the Device Manager window, expand the Display adapters category, right-click the graphics card driver, and select Properties. Then you will see all the detailed graphics card information in a pop-up window.
How to Set Default Graphics Card
How to set default graphics card on Windows 10? Here we will show you the detailed steps to set default graphics card inside the NVidia control panel.
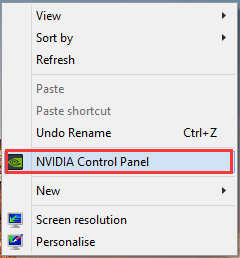
Step 1. Right-click on your desktop and select the NVidia Control Panel from the context menu. Or you can find the control panel from the Taskbar.
Step 2. Expand the 3D Settings category at the left pane and click on Manage 3D Settings.
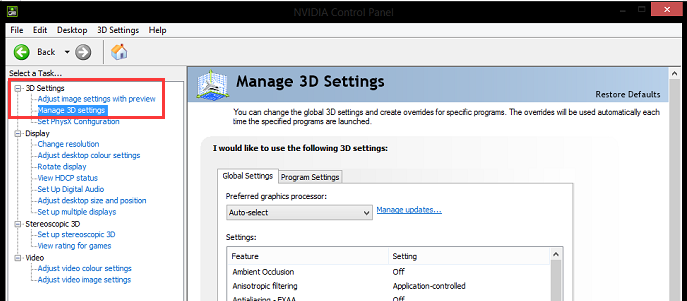
Step 3. Navigate to the Programs Settings tab and select the program that you want to set default graphics card for from the drop-down list.
Step 4. Now, you can choose the preferred graphics processor from the drop-down menu. If you want to use a dedicated graphics card, select the High-performance NVidia processor.
How to Change Default Graphics Card Windows 10 for Apps
Sometimes, you may need to force an app to use a dedicated graphics card. How to change default GPU for an app on Windows 10? To do so, follow the steps below:
Step 1. Press the Win + I keys to open the Settings window and click on System.
Step 2. Navigate to the Display tab and click on Graphics settings under the Multiple displays section.

Step 3. Select an app type from the drop-down menu to set preference.
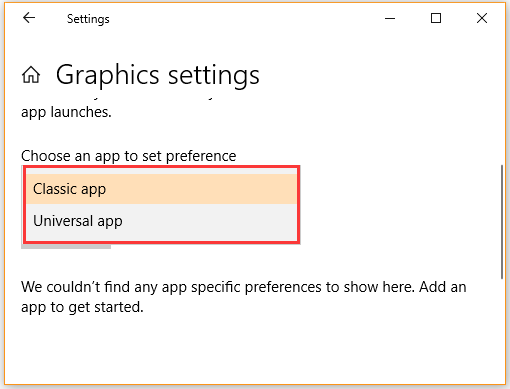
Step 4. If you select the Classic app, you need to click on the Browse button to add the .exe file of the app.
Step 5. If you select the Universal app, click on the Options button, and then select the graphics preference that you want to use for the app.
Step 6. Click on the Save button in the pop-up window.
How to change the default graphics card Windows 10? All the steps are told to you. Now, it’s your turn to have a try.
User Comments :