When your computer has been used for a long time, you may encounter the low disk space warning issue. This post shows you the effects of low disk space and corresponding solutions. Therefore, if the problem occurs to you, don’t worry. Now, please follow the post to see the specific steps.
What Is Low Disk Space Warning
Low disk space warning is a prompt appearing in Windows OS to inform users a specific location of the hard drive is running out of space. When this message appears, users need to take some actions to solve this error message or it will keep popping out frequently. Besides, low disk space warning indicates bad health of the hard drive which needs to be improved in urgent to users.
When Will Low Disk Space Warning Appear
We believe many users have the experience of seeing a red partition bar in Windows Explorer(see the following example). How does this happen? When the free space of a specific partition is lower than 10% of the total storage space, that partition will present itself with a red bar.

And, according to Microsoft’s explanation, users will receive Low Disk Space Warning at the following situations:
- When free disk space reaches 200 MB, users receive the following message for 10 seconds, once per session: “You are running out of disk space on [drive].”
- When free disk space reaches 80 MB, users receive the following message for 30 seconds, every four hours, twice per session: “You are running very low on disk space on [drive].”
- When free disk reaches 50 MB, users receive the following message for 30 seconds, every five minutes, until the free space is above 50 MB: “You are running very low on disk space on [drive].”
How to Disable the Low Disk Space Check
Let’s see a topic posted at Tomshardware:
“I game a lot on my computer, often in windowed mode, and have been getting the ‘Low Disk Space’ warnings popping up during sessions because one of my drives is completely filled with games. My OS is on a separate SSD, so there isn’t any worry there. They are just annoying and detract from game sessions, especially when I am really into a game. Any idea?” Thanks, Andy
Many users are annoyed with this warning message especially when they are focusing on something. They search on the internet wondering how to prevent this low disk space check, because there is no option in the warning message to disable it, and they have scanned over computer settings but find nothing to resolve it. In fact, there is a registry value you can set to disable this feature.
- Click Start, click Run, type “regedit”, and then click OK;
- Click the following key in the registry: HKEY_CURRENT_USERSOFTWAREMicrosoftWindowsCurrentVersionPoliciesExplorer;
- On the Edit menu, point to New, and then click DWORD Value;
- Type “NoLowDiskSpaceChecks”, and then press ENTER;
- On the Edit menu, click Modify;
- Type 1, and then click OK;
- Quit Registry Editor.
How to disable low disk space check–Click to tweet
4 Ways to Thoroughly Solve Low Disk Space Warning in Windows
Users must know disabling low disk space check only disappears the warning message. However, the low disk space issue is not solved. Thorough and effective method should be something that release disk space or increase the free space.
In this post, we list 4 ways to help solve this issue totally.
Way 1: Run Disk Cleanup
Windows includes a built-in tool that enables users to delete temporary files and other unimportant data to free out disk space. Follow the steps below:
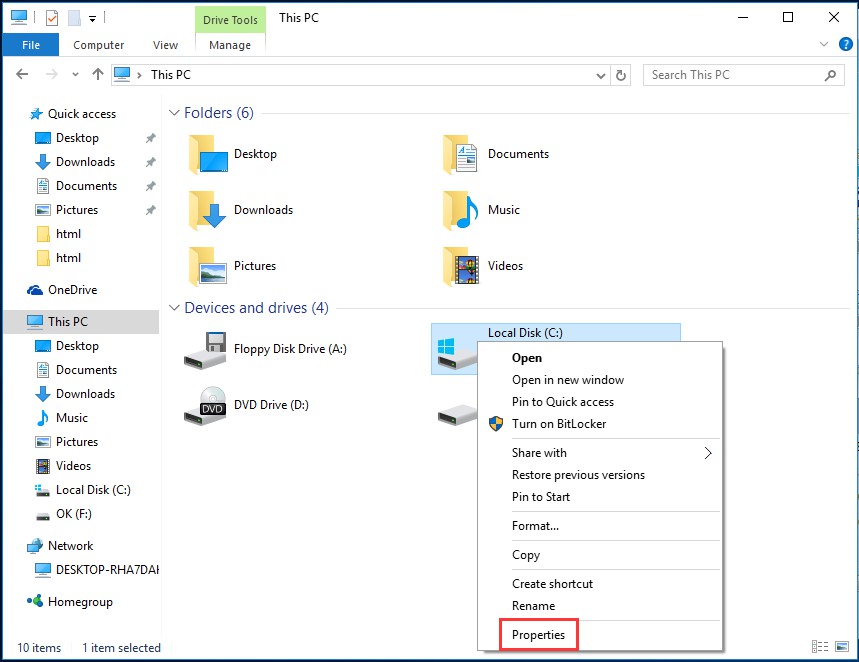
Step 1. Right-click on the low disk space drive in Window Explorer and select “Properties”.
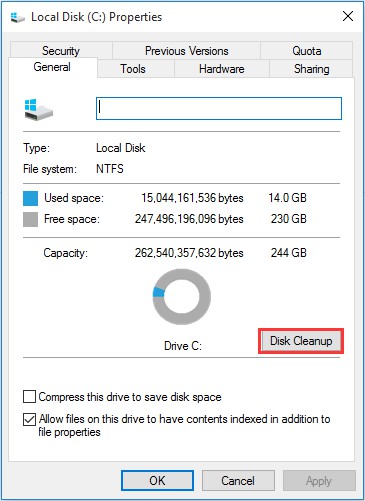
Step 2. Click the “Disk Cleanup” button in the disk properties window.
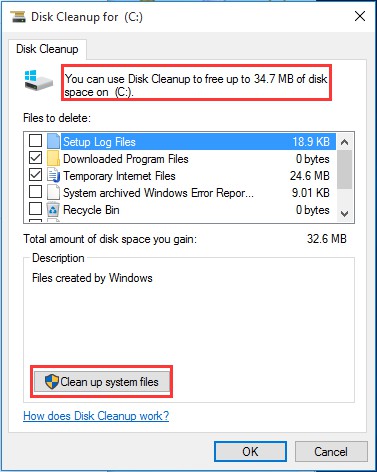
Step 3. A new window comes out. Select the types of files to be deleted and click OK. These files include temporary files, log files, files in your recycle bin, and other unimportant files. Disk Cleanup will show users how much space they can obtain by deleting the selected files.
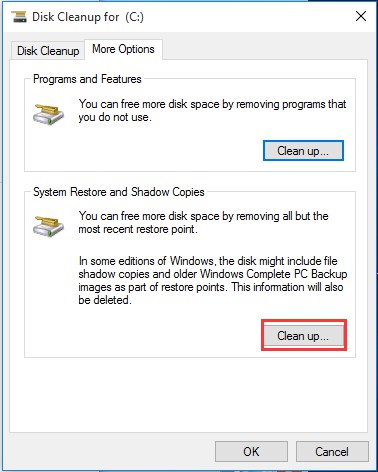
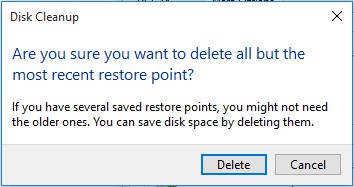
Step 4. By pressing “Clean up system files”, users can click the “More Options” button and use the “Clean up” button under “System Restore and Shadow Copies” to delete system restore data. This button deletes all but the most recent restore point, so please ensure your computer is working properly before using it -after that create another system restore point.
Obviously disk cleanup only free limited space – to some extent it is of small significance. A more effective way should be extend partition.
Way 2: Delete Unnecessary Files
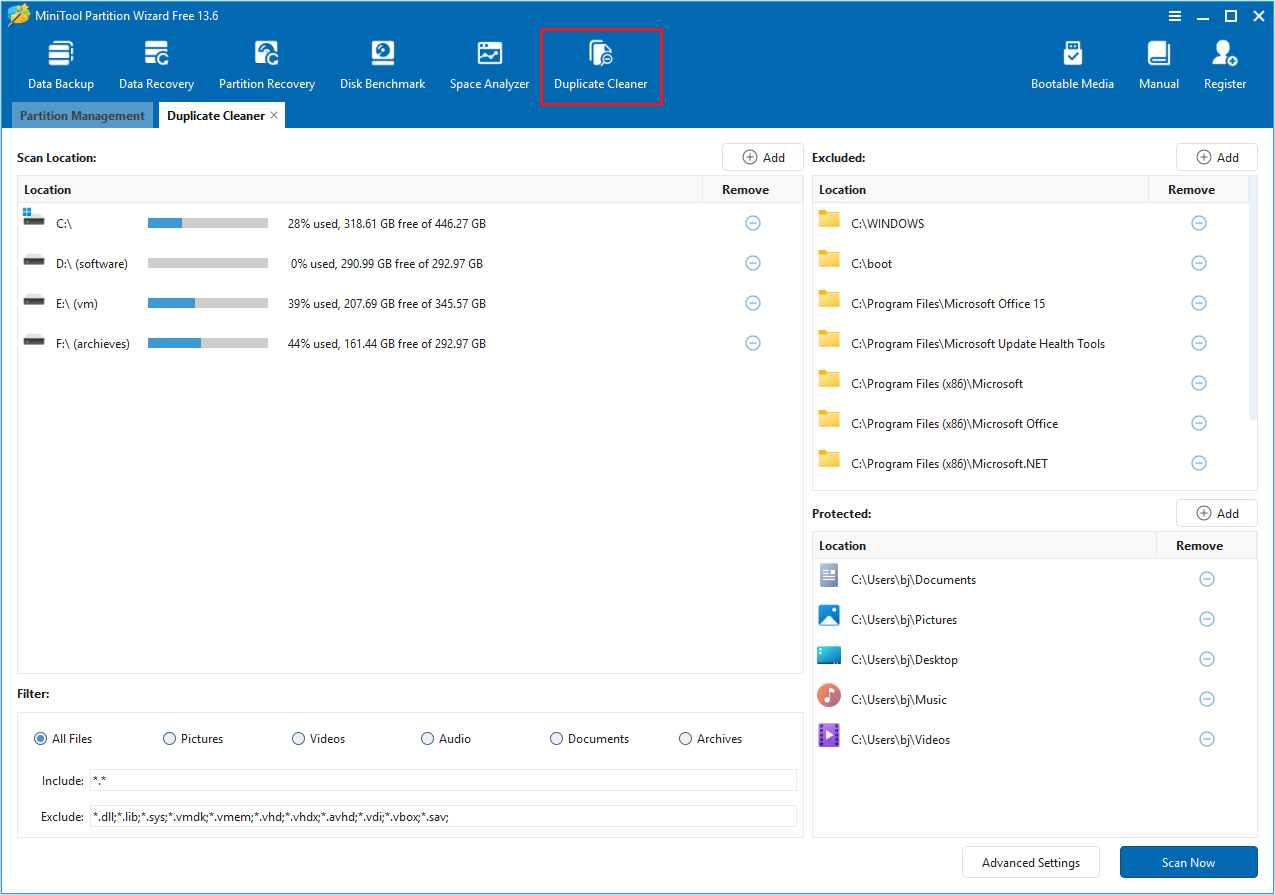
Daily computer use can lead to the accumulation of useless files, which need to be cleaned up regularly to free up space. MiniTool Partition Wizard can help you do that easily with its Duplicate Cleaner and Space Analyzer features.
MiniTool Partition Wizard FreeClick to Download100%Clean & Safe
Step 1. Launch this app to enter its main interface. Click Duplicate Cleaner. Keep the default options and then click Scan Now.
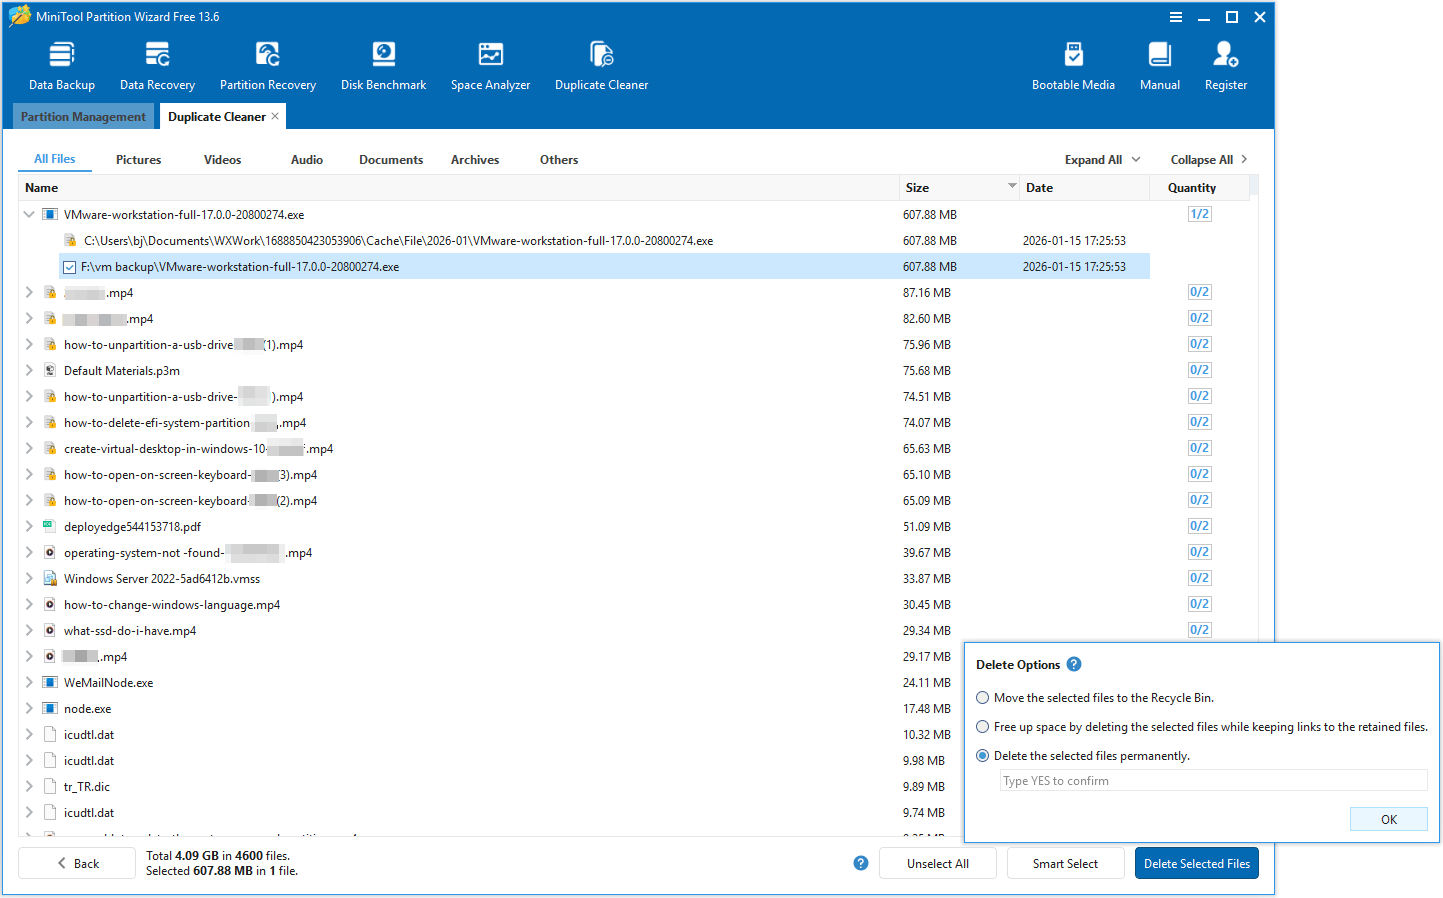
Step 2. All duplicate files in the computer will be listed. Expand each directory and select the duplicate files. Then, click Delete Selected Files and choose the Delete the selected files permanently option. After that, click OK to delete them.
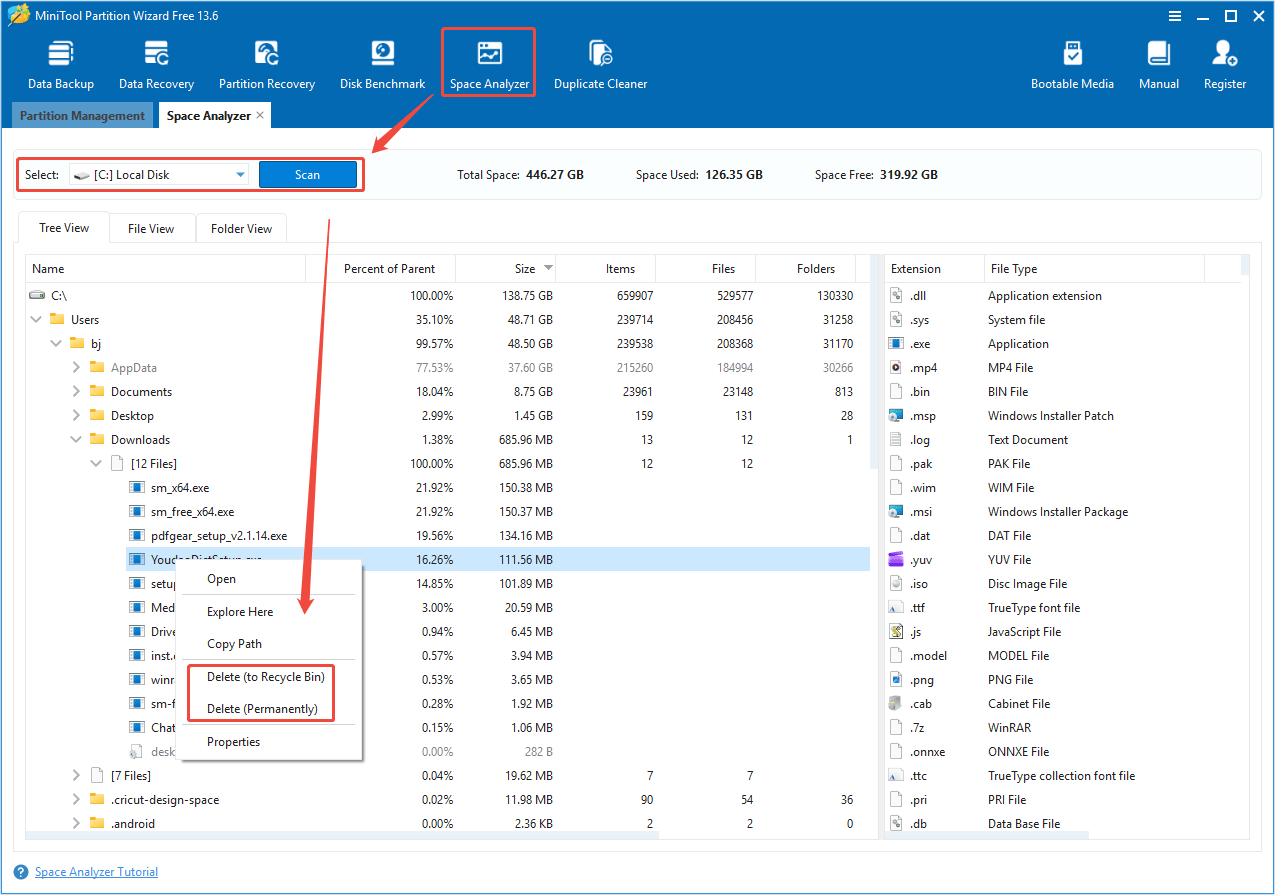
Step 3. Click Space Analyzer in the tool bar. Select the drive that you want to scan from the drop-down menu and then click Scan. Once the scanning process is complete, right-click the unwanted file and select Delete.
Way 3: Extend Partition on the Same Disk
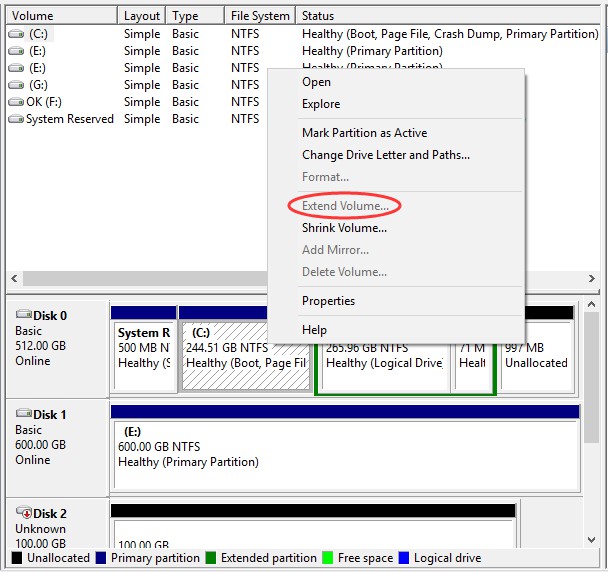
If there are enough free space on the rest partitions of the same disk, extending partition should be straight forward. When it comes to extending partition, Windows Disk Management utility is stereotyped in the way it extends partition, because it always presents users with grey/unavailable options which disable users to use this feature.
Why extend volume greyed out in Windows Disk Management? In other words, extend volume only works when:
- The partition to be extended should be NTFS partition or RAW partition;
- If the partition to be extended is primary partition, there must be unallocated space adjacent and after it;
- If the partition to be extended is logical partition, there must be free space adjacent and after it.
To break these limits, we recommend a more flexible and powerful disk management tool called MiniTool Partition Wizard. What can MiniTool Partition Wizard do? It is professional in disk and partition management which helps users to extend partition, move/resize partition, convert file system, rebuild MBR, recover partition, etc. And free edition is competitive in increasing a low disk space partition.
How to extend partition with MiniTool Partition Wizard:
MiniTool Partition Wizard FreeClick to Download100%Clean & Safe
1. Use Move/Resize Partition if there is unallocated space adjacent (both at left and right side) to the target partition.
Step 1: Launch MiniTool Partition Wizard free edition and users will see their disk layout in the middle pane.
Step 2: Click on the partition users want to extend, and choose “Move/Resize Partition” feature in the left pane.
Step 3: In the pop-up window, drag the slide bar to occupy the free space or input the specific volume users want to take from the unallocated space. Then click “OK” to go back to the main interface.

Step 4: Press Apply to execute the changes users have made.
2. Use Extend Partition if there is no unallocated space adjacent (both at left and right side) to the target partition.
Step 1: LaunchMiniTool Partition Wizard free edition, and enter into its main interface.
Step 2: Click on the target partition and choose Extend Partition.
Step 3: In the pop-up window, drop down the partition list and choose which partition or unallocated space to take free space from. Also, it is available to drag the slide bar leftwards or rightwards to decide how much free space users need from that partition. Click OK to continue.
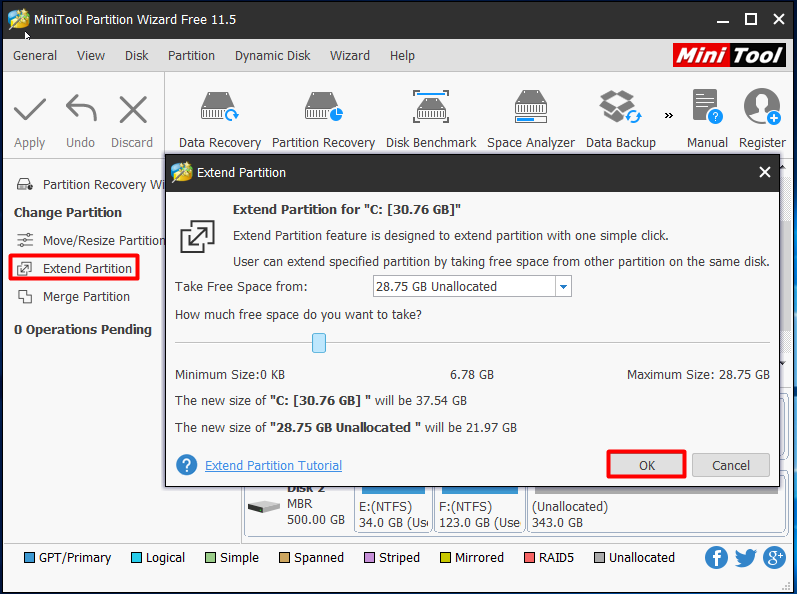
Step 4: Back to the main interface and press Apply on the top left corner.
MiniTool Partition Wizard helps to extend partition freely–Click to tweet
Way 4: Extend Partition with another Hard Drive
As mentioned in the former part, Disk Management also enables users to extend volume (works for non-system disk) with another hard drive by converting it into dynamic disk. However, dynamic disk brings many restrictions on system installation. Thus, upgrading hard drive should be a more flexible way to solve low disk space warning.
See what does Microsoft say about Basic Disk and Dynamic Disk.
If users have one more hard drive at hand, then there are two more ways to extend partition with MiniTool Partition Wizard free edition.
The first one is to Copy Disk to a larger one. This solution is most suitable for users who encounter low disk space on a small hard drive and are going to upgrade the small one to a larger one. In this case, Copy Disk feature of MiniTool Partition Wizard will clone the whole hard drive including the operating system sector-by-sector.
Step 1: Connect the larger drive internally to computer and then launch MiniTool Partition Wizard free edition to the main interface.
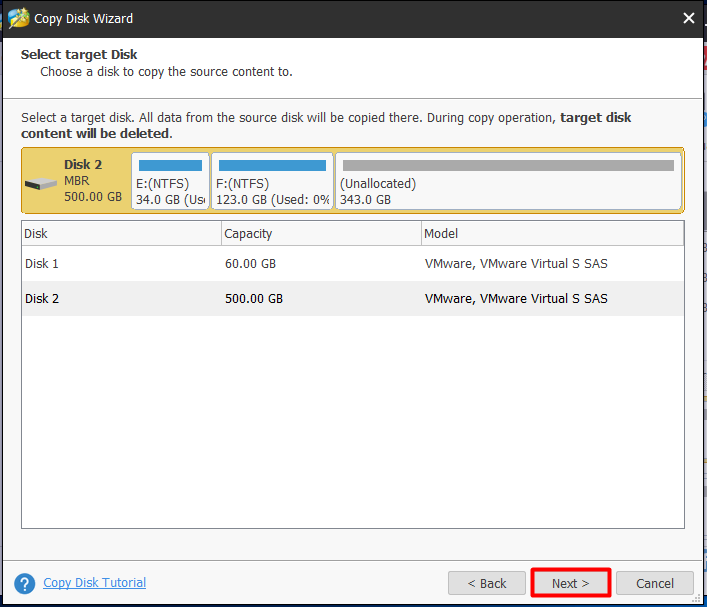
Step 2: Select the source disk that is going to be copied and choose Copy Disk.

Step 3: Then users will be lead to another window to select a target disk. Please note that the target disk must be able to hold all the data on the source disk and data on the target disk will be erased, so a backup is necessary. Here we click disk 2 to continue.
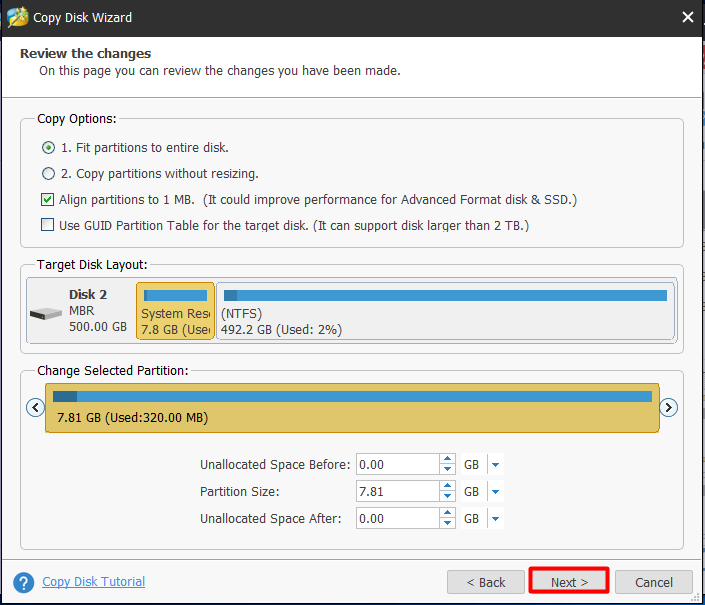
Step 4: On this page there are three options for users. Choose one and click Next to move on.
- “Fit partition to entire disk” allows users to keep the capacity proportion of the partitions on original disk.
- “Copy partition without resize” means to clone an exact same disk with the original one.
- “Align partitions to 1MB” is strongly recommended if the target disk is SSD or has got advanced format.
- “Use GUID Partition Table for the target disk” is very useful if the target disk is larger than 2TB. If users want to make full use of its huge capacity, check this option.
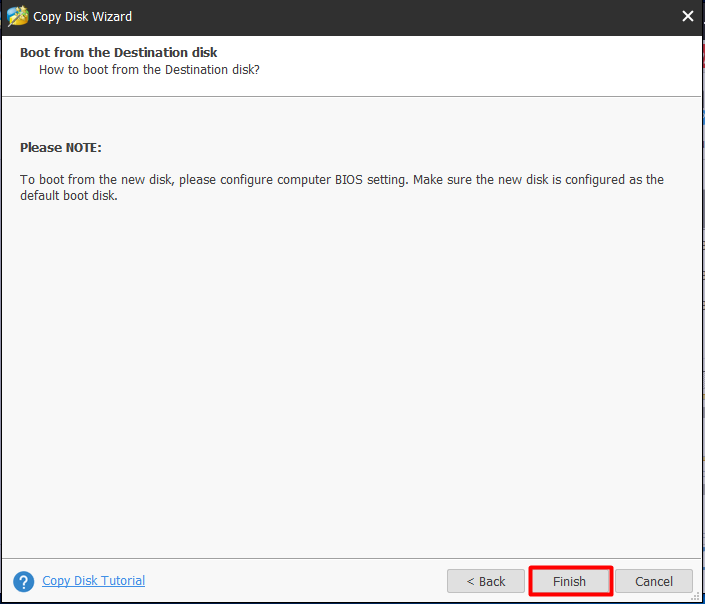
Step 5: In the next page MiniTool Partition Wizard shows users how to boot from the new drive. Please pay attention to this message. Ok now click Finish to go back to the main interface and click Apply to make these changes effective.
The second solution is to Migrate OS to another drive which is useful for system low disk space warning. This solution is suitable for users who only want to enlarge the system partition but there is not enough free space on the rest partitions of the same disk.
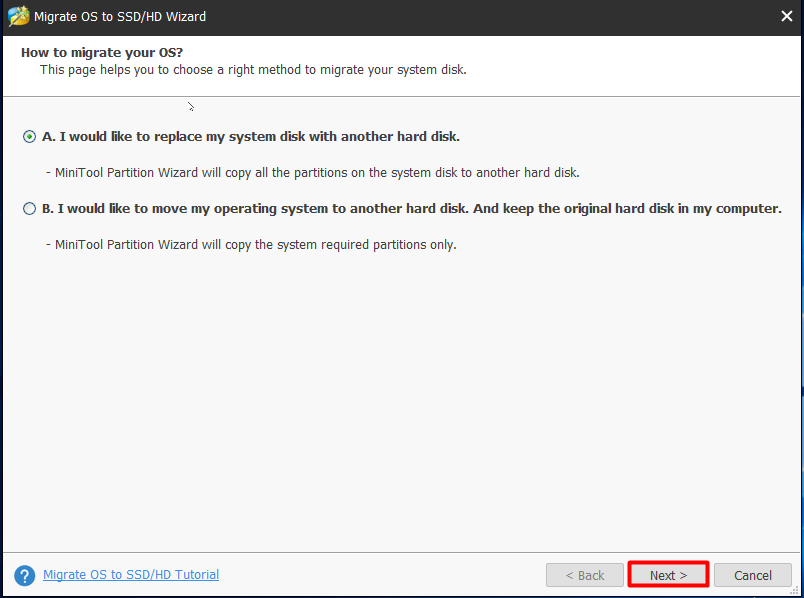
Step 1: Connect the second hard drive to computer internally and launch MiniTool Partition Wizard Free Edition. In the main interface choose “Migrate OS to SSD/HD Wizard” from the menu bar.
Step 2: Then choose how to migrate the OS. Is that the system required partitions only, or the whole partitions on the drive? Here select the second option and click Next to continue.
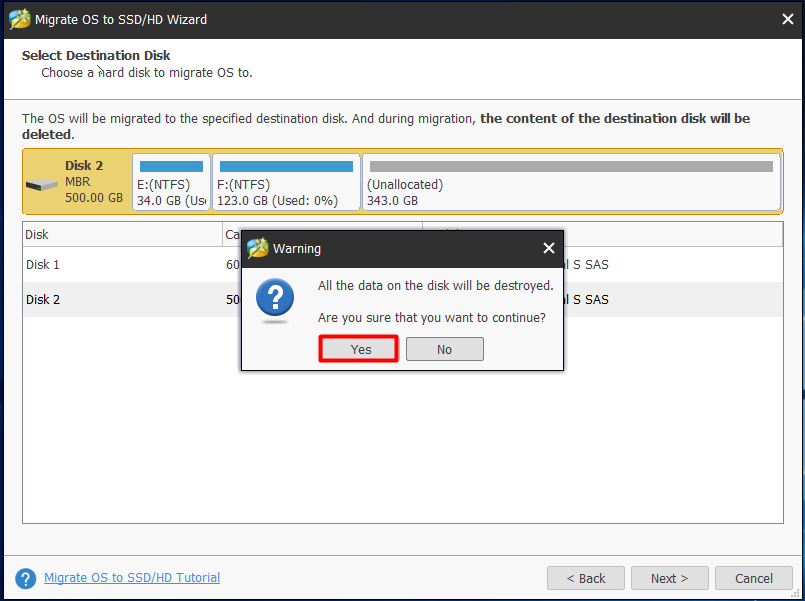
Step 3: In the pop up window select a destination disk and go on. Please pay attention to the warning message that all data on the destination drive will be destroyed so maybe a backup is necessary.
Step 4: Similar with Copy Disk, four options are available for users here. Choose the option you prefer and go ahead.

Step 5: Then Partition Wizard will tell you how to boot from the destination disk. Please make sure the disk is configured as the default boot disk after the migration. Finally press Apply to execute the operations.
MiniTool Partition Wizard is a useful partition tool for Windows low disk space warning right? Press the button to download freeware or buy one for Windows Server.
MiniTool Partition Wizard FreeClick to Download100%Clean & Safe
Bottom Line
In this post we mainly talk about why Windows low disk space warning appears, how to disable low disk space check and how to solve low disk space warning completely. Users can choose any of the three solutions that is most available for them – to do disk cleanup, to extend partition on the same disk, or to upgrade the disk. And, for any questions and suggestions, please leave us comments below. We read every thread.
About The Author

Position: Columnist
Linda has been an editor at MiniTool for seven years. She continuously learns about computers and puts her knowledge into practice. Moreover, she is particularly knowledgeable in disk management, data recovery, system installation, and PDF editing. Her articles typically reference multiple examples or are based on her own experience, providing users with the most suitable solutions.
User Comments :