This article from Partition Wizard provides you with 6 ways to fix the “could not reconnect all network drives in windows 10/11” issue and disable the warning message. These methods have helped thousands of users.
Could not reconnect all network drives
Click here to check the status of your network drives.
Windows Explorer
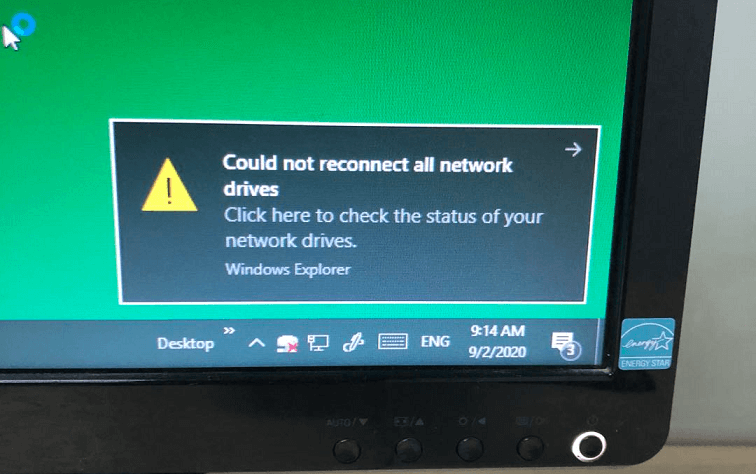
Have you ever been notified with this warning message when you boot up your computer? if so, do you know what it means and how to fix this issue? Or, how to disable this kind of reminding?
About Network Drive Reconnection Failure
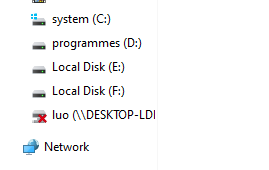
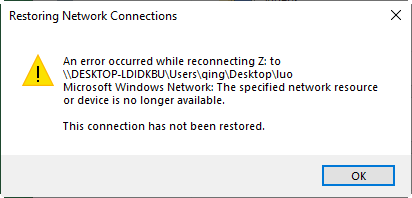
“Could not reconnect all network drives” just indicates that the network drives that you mapped before can’t be connected to your machine. If you go to Windows Explorer, you will see a red X icon on the mapped network hard drive icon. And, when you run the net use command in a command prompt, the mapped network disks will be displayed as Unavailable.
How to Fix “Could Not Reconnect All Network Drives Windows 10/11”?
- Disconnect Network Drive
- Force Windows “Always wait for the network at computer startup and logon”
- Disable the Notification at Windows Startup
- Command Script Fixes from Microsoft Support
- Reconnect Related Hard Drive
- Remap Network Drive
Then, how to fix the “could not reconnect all network drives” problem? It is recommended to try the following methods.
![[Solved] Is SSD Good for Long Term Storage: Past VS Now](https://images.minitool.com/partitionwizard.com/images/uploads/2020/07/is-ssd-good-for-long-term-storage-thumbnail.jpg)
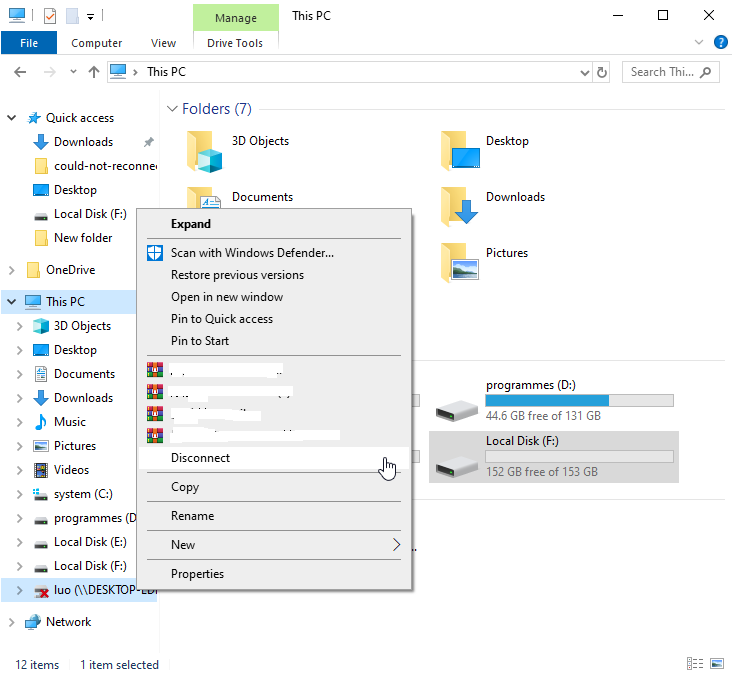
Solution 1. Disconnect Network Drive
To fix the issue, you can disconnect all the network drives. Just right-click on a target network drive in Windows Explorer and select Disconnect.
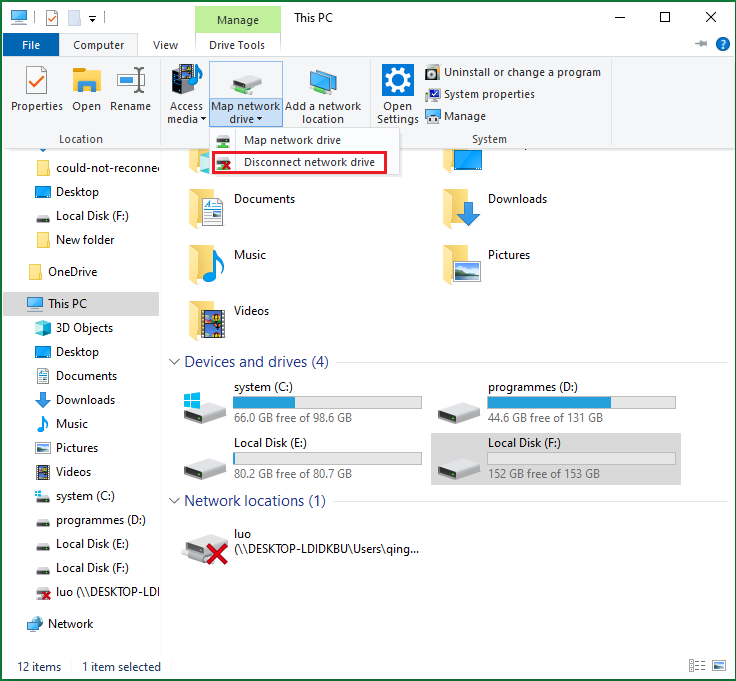
Or, double-click This PC on desktop and click Computer on the top menu of the pop-up window. In the drop-down toolbar, click Map network drive and choose Disconnect network drive.
Solution 2. Force Windows “Always wait for the network at computer startup and logon”
When you start up your PC, the policy that maps your hard disks should be initiated and completed before you log into the operating system. If there isn’t active connectivity by that moment, the network drives can’t be loaded before you completely log into the system. So, the above error message appears.
To solve the problem, you can set up a local group policy to make Windows wait for the connection before enabling the mapping process.
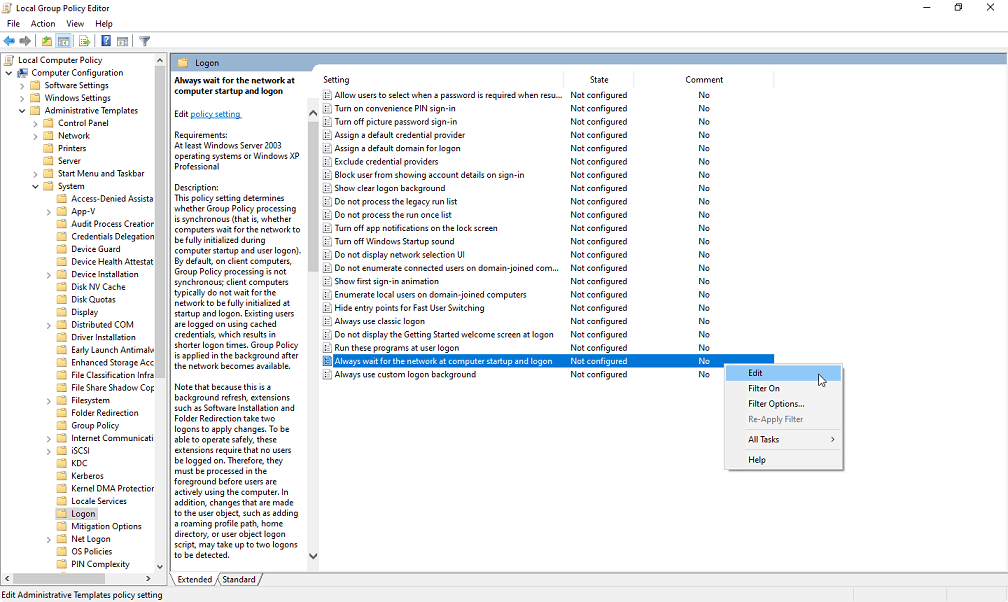
Step 1. Search “edit group policy” in Windows; find and open Local Group Policy Editor.
Step 2. In the Editor window, navigate to Computer Configuration > Administrative Templates > System > Logon.
Step 3. Find and right-click on “Always wait for the network at computer startup and logon”, then choose Edit.
Step 4. In the pop-up window, select Enabled and save the changes by clicking Apply. Click OK to exit.
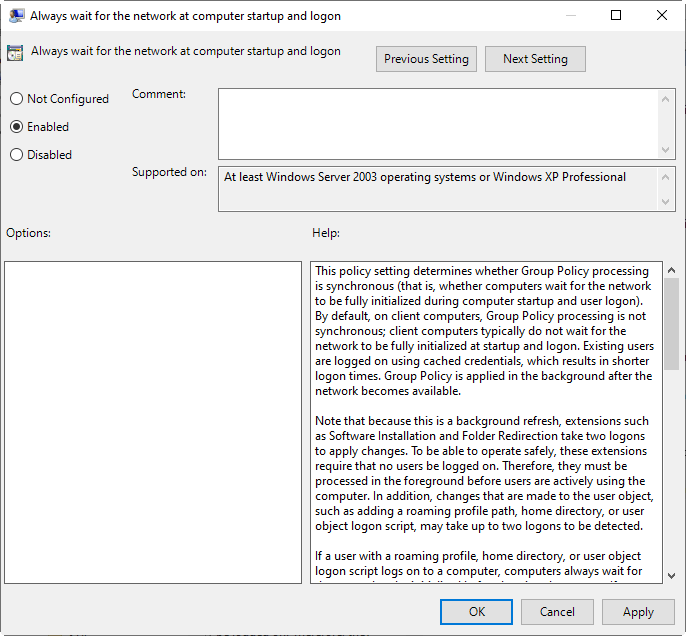
Step 5. Finally, reboot your computer.
Solution 3. Disable the Notification at Windows Startup
For could not reconnect all network drives disable message Windows 10/11, you can set it in Windows Registry Editor.
Step 1. Key in regedit in Windows Run box and click OK to trigger the Registry Editor.
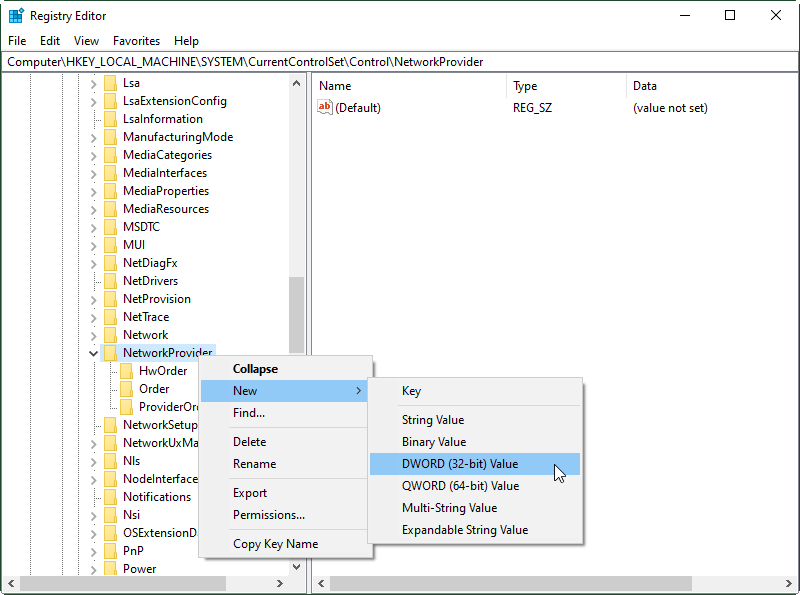
Step 2. Then, move to HKEY_LOCAL_MACHINESYSTEMCurrentControlSetControlNetworkProvider.
Step 3. Find and double-click RestoreConnection on the right section of the window. Set the RestoreConnection value data to “0” to turn off the mapped network drive message. Click OK to save changes.
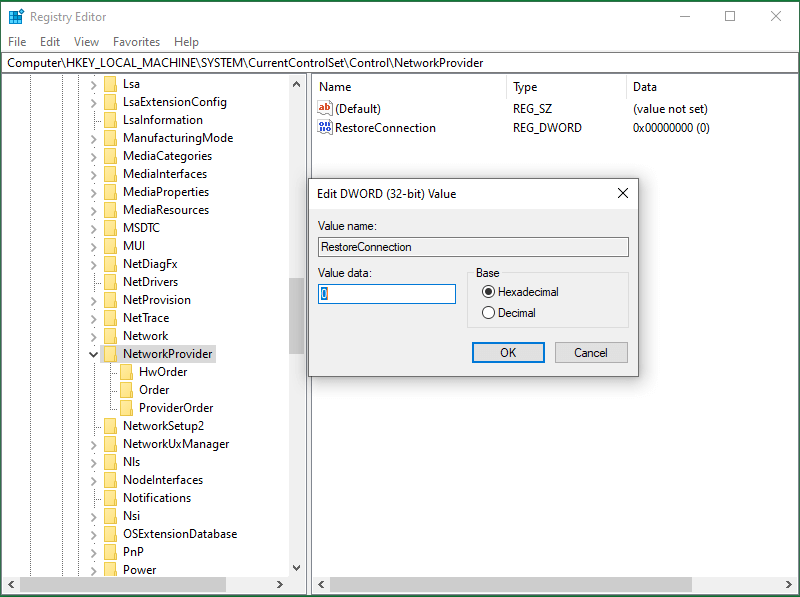
Step 4. Finally, Restart your machine.
Solution 4. Command Script Fixes from Microsoft Support
Way 1. Create a Startup Log File
Step 1. Write the below script in a notepad and save it as say NetworkDriveMap.cmd.
PowerShell -Command “Set-ExecutionPolicy -Scope CurrentUser Unrestricted” >> “%TEMP%StartupLog.txt” 2>&1
PowerShell -File “%SystemDrive%ScriptsMapDrives.ps1” >> “%TEMP%StartupLog.txt” 2>&1
Step 2. Put the notepad file NetworkDriveMap.cmd into this location: C:ProgramDataMicrosoftWindowsStart MenuProgramsStartUp.
Step 3. Copy and paste the following command into another notepad, save and name it as NetworkDriveMap.ps1.
$i=3
while($True){
$error.clear()
$MappedDrives = Get-SmbMapping |where -property Status -Value Unavailable -EQ | select LocalPath,RemotePath
foreach( $MappedDrive in $MappedDrives)
{
try {
New-SmbMapping -LocalPath $MappedDrive.LocalPath -RemotePath $MappedDrive.RemotePath -Persistent $True
} catch {
Write-Host “There was an error mapping $MappedDrive.RemotePath to $MappedDrive.LocalPath”
}
}
$i = $i – 1
if($error.Count -eq 0 -Or $i -eq 0) {break}
Start-Sleep -Seconds 30
}
Step 4. Copy NetworkDriveMap.ps1 file to %SystemDrive%Scripts.
Step 5. Then, a log file will be created in C:UsersqingAppDataLocalTemp.
Step 6. Restart your computer.
Way 2. Create a Scheduled Task
Step 1. Copy NetworkDriveMap.ps1 file to %SystemDrive%Scripts.
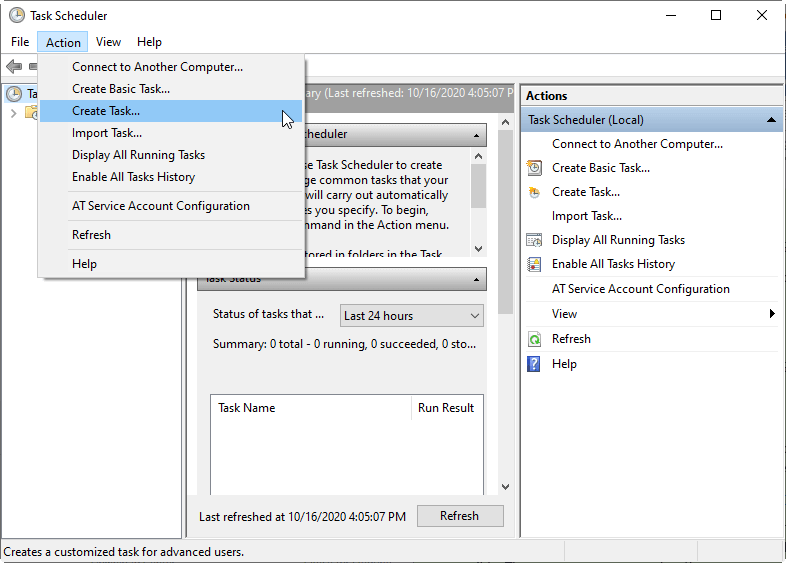
Step 2. Click Action and select Create Task in Task Scheduler.
Step 3. In the Create Task window, in the General tab, specify a name and description for this task, and click OK.
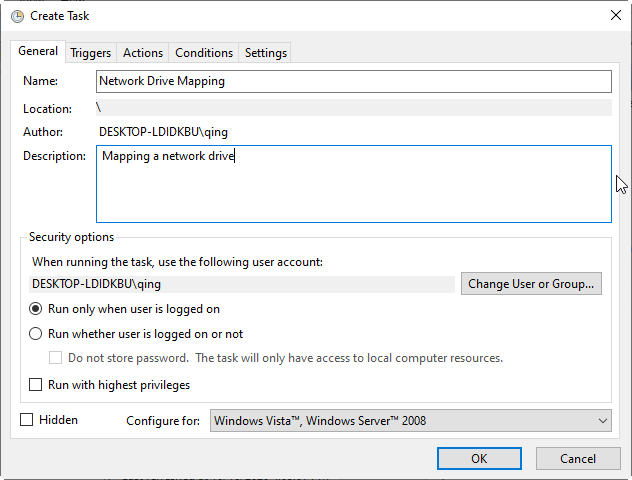
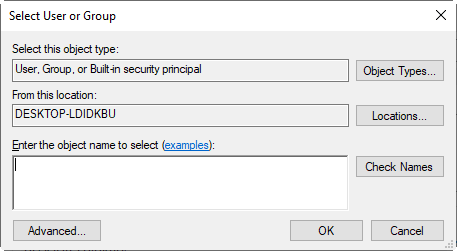
Step 4. Click Change User or Group in the above picture and the below window will pop up. Within the popup, click on the Object Types button and select Groups or Users in the new pop-up window. Then, click OK to save the selection and OK again to exit the below window.
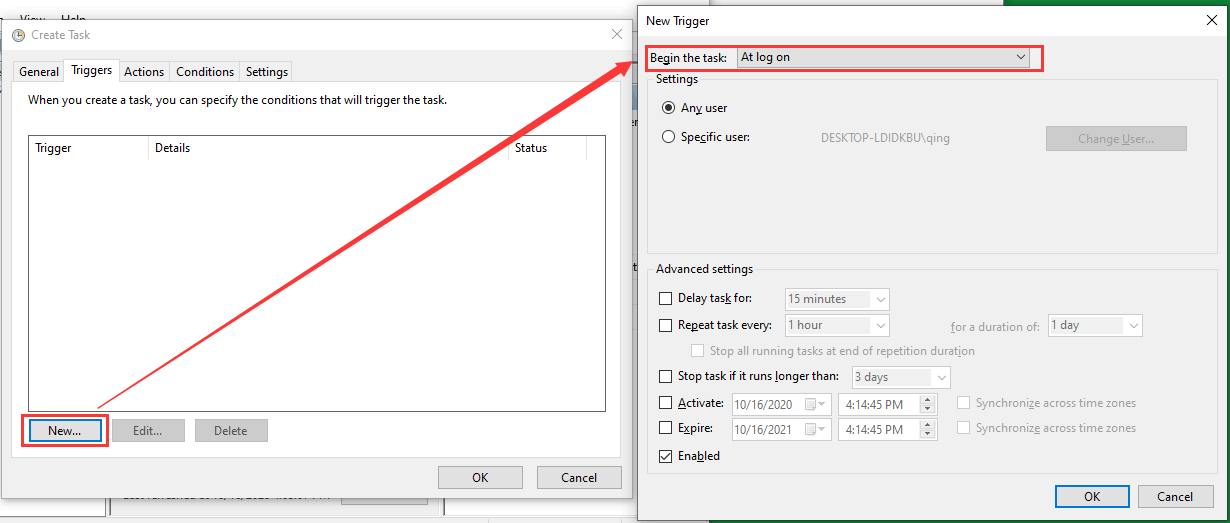
Step 5. Move to the Triggers tab, click New. In the next window, choose At log on in Begin the task column.
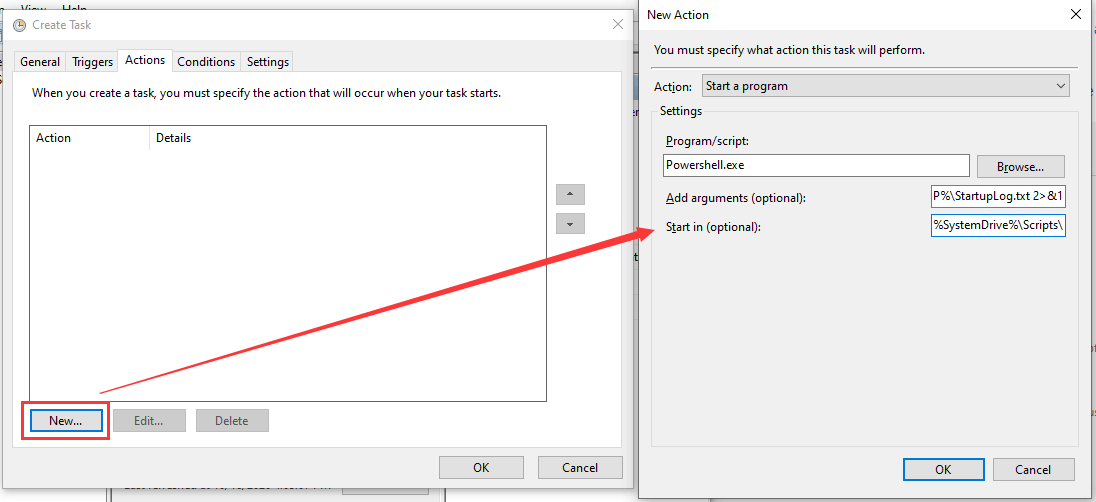
Step 6. Go to the Actions tab and choose New. Next, pick Start a program in the Action field; type Powershell.exe under Program/script; input below script behind Add arguments; and write the location (%SystemDrive%Scripts) of the script file behind Start in.
-windowsstyle hidden -command .MapDrives.ps1 >> %TEMP%StartupLog.txt 2>&1
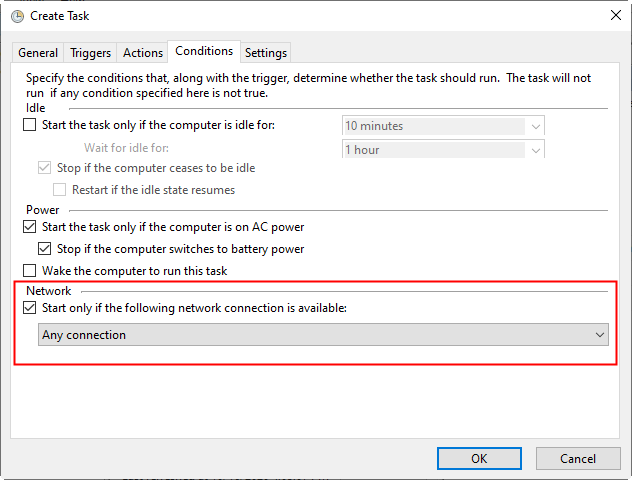
Step 7. On the Conditions tab, check Start only if the following network connection is available, and choose Any connection.
Step 8. Finally, reboot your computer to run the scheduled task.
View more details on Microsoft Support.
Solution 5. Reconnect Related Hard Drive
If the network drive is mapped from an external disk, you can try to reconnect the external drive to make it recognized by its hold computer. therefore, the network connecting problem may be solved.
If the network drive is mapped from a hard disk in another computer and the machine is disconnected from the network, you can reconnect the PC with the network and make the physical disk in it accessible. Thus, on your own computer, the error message won’t appear.

Solution 6. Remap Network Drive
Sometimes, you can’t reach the mapped network drive for it is no longer available. The possible causes are either the physical hard disk is removed from its original place, or its owner has stopped sharing it with others. Anyhow, if it is possible, you can reconnect it physical disk to the original location and with the same network address, or ask its owner to reshare it with you.
Most people can solve their issues by one of the above methods. If you have other fixes that can handle the “Windows 10/11 could not reconnect all network drives” message, please feel free and be kind to share them with our readers in the below comment zone.
About The Author

Position: Columnist
Helen is a tech writer with over 10 years of experience. She specializes in creating easy-to-follow guides for video editing, media file conversion, and computer performance. Helen doesn't just write—she tests every software herself and listens to feedback from users and experts. Her goal is to make complex programs simple so that everyone can solve their tech problems with confidence.
User Comments :