The Windows built-in Task Scheduler enables Windows users to create various automated tasks to be run by Windows. But there are still many people who don't know how to use Task Scheduler to create a basic task to run. Luckily, this post from MiniTool will show you the detailed steps.
What Is Task Scheduler?
Task Scheduler is a useful tool of Microsoft Windows that enables users to schedule automated tasks such as running a specific program at the specified time you set.
However, not many Windows users know about the Task Scheduler Windows 10 utility. And they don’t know how to schedule an automatic task. If you are one of them who don’t know how to use Task Scheduler to create tasks, you can follow the steps below to create a basic task on Windows 10.
How to Create a Basic Task with Task Scheduler?
To create a basic task with the Task Scheduler in Windows 10, you can follow the steps blow.
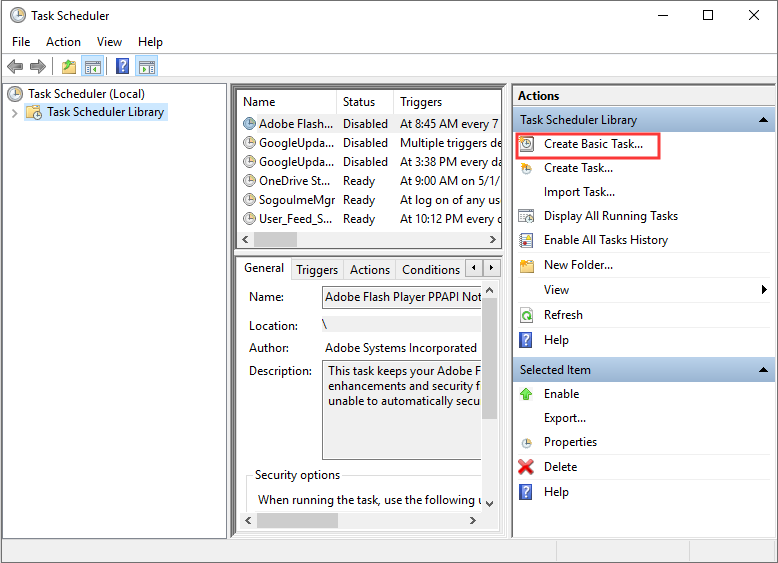
Step 1. Type task scheduler in Windows 10 Cortana search box and click the best match to open it.
Step 2. Under the Actions column on the right, click the Create Basic Task to open the wizard.
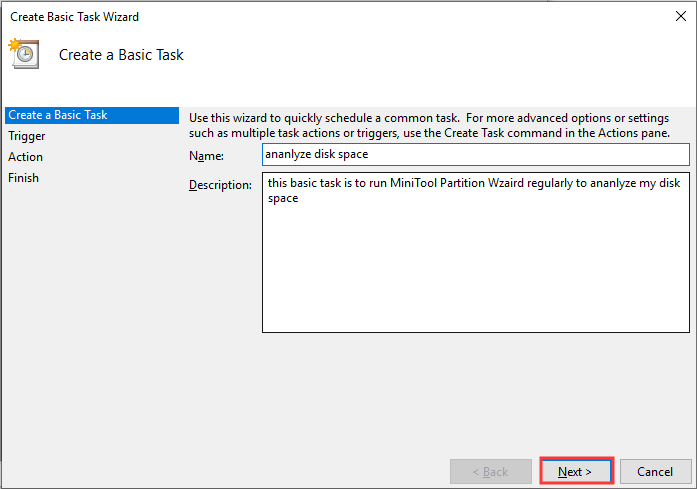
Step 3. Give the new task a name and a description. Then click the Next button to continue.
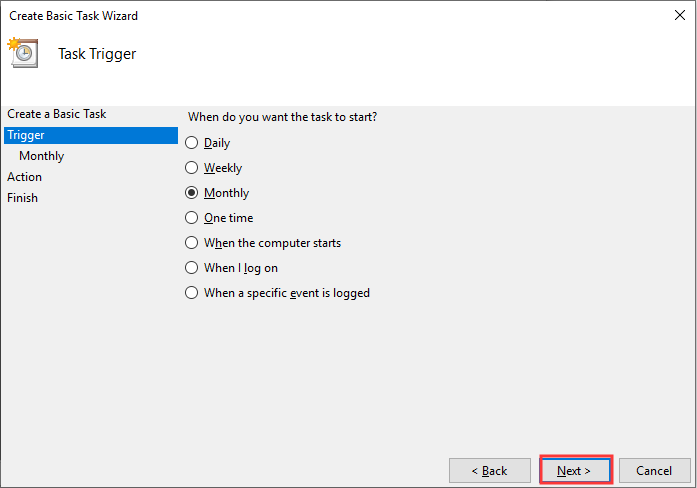
Step 4. Then you can choose the time when the task starts. The created task can be run daily, weekly, monthly, one time, when the computer starts, when you log on or when a specific event is logged. After you decide the task execution time, click Next.
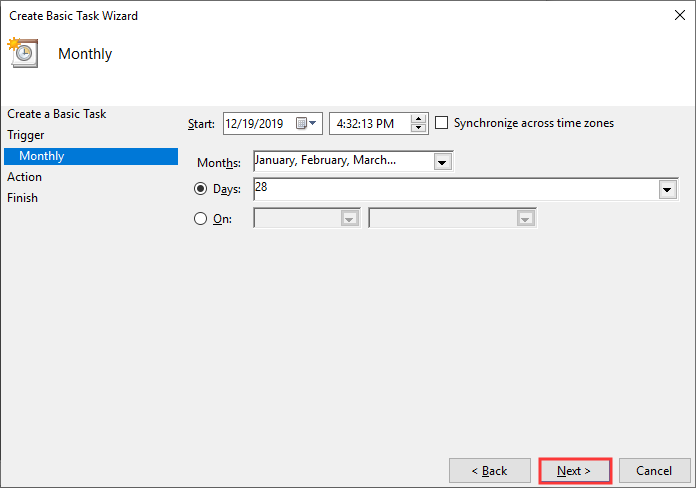
Step 5. Set the exact time for the task to run. Then click Next.
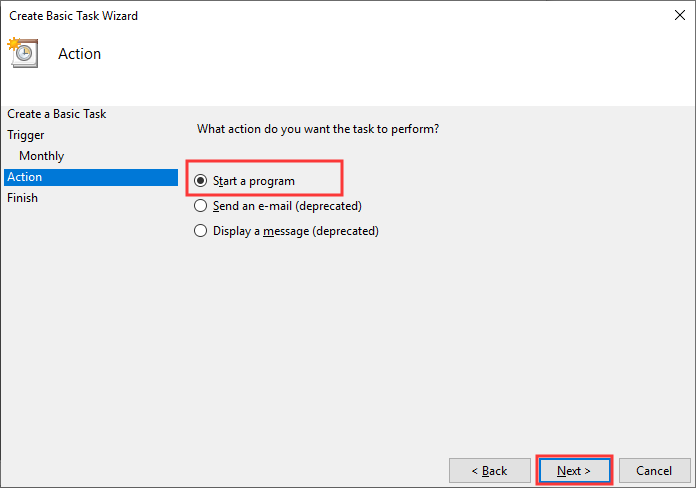
Step 6. On “What action do you want the task to perform?” page, select Start a program and click Next to continue.
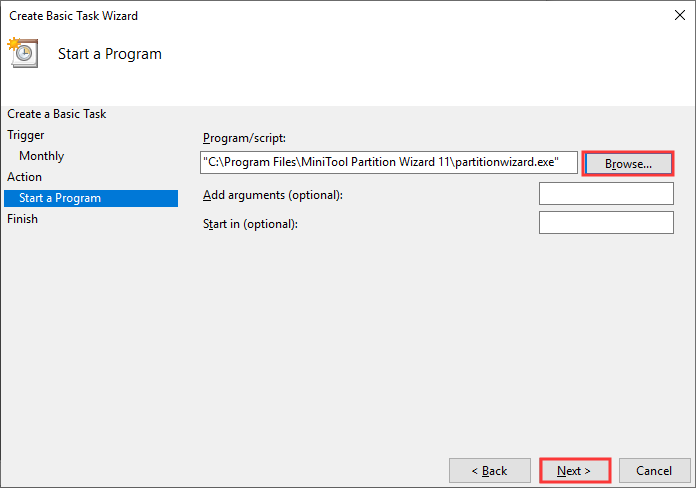
Step 7. Click the Browse button to choose the program or the script that you want to run. Then click Next.
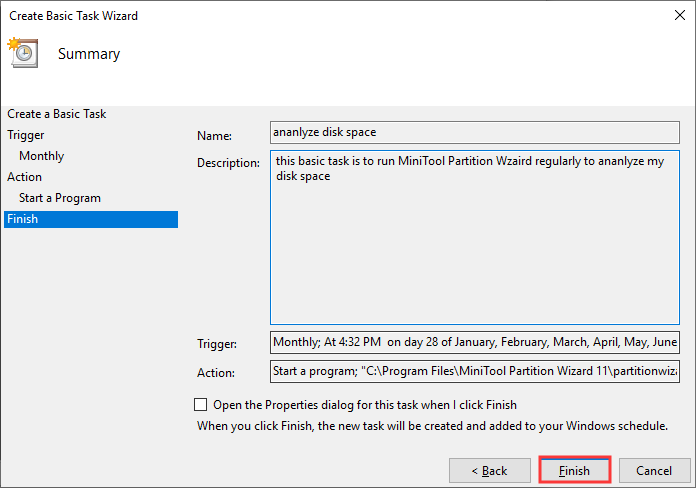
Step 8. Then you can view the settings that you have made about the task. If you want to change anything, click Back button. If you find everything is correct, click Finish to save the task.
You see, it is not difficult to create a basic task with Task Scheduler Windows 10. If you are using Windows 7, you can also schedule tasks to send e-mails or display messages because the two actions are only enabled on Windows 7. Try using Windows Task Scheduler to create automated tasks now!
Conclusion
After reading this post, you should know how to create basic tasks with Task Scheduler. If you have different opinions about Task Scheduler, you can leave a message in the following comment zone.
User Comments :