Viber is a popular instant chat messaging application available on multiple platforms, but lots of users encounter Viber not installing on Windows 10/11 PC. Here’s a true example from the answers.microsoft.com forum:
Can’t install Viber on computer. Since I upgraded the last Viber version on my laptop, I cannot open Viber anymore. I uninstalled Viber, then installed it again, but I cannot run the installation program. I click on the vibersetup.exe button and nothing happens on my screen.https://answers.microsoft.com/en-us/windows/forum/all/cant-install-viber-on-my-laptop/a83c9529-fef0-48f1-9fb5-34f3b48732d2?page=3
Why Can’t You Install Viber on PC
What causes the Viber not installing on Windows 11/10 PC? According to a survey, the problem often occurs when your PC doesn’t meet the Viber minimum system requirements. Besides, insufficient disk space, antivirus interference, outdated OS, poor network connection, unofficial version, and regional restriction is also responsible for Viber not installing on PC.
How to Fix Viber Not Installing on Windows 10/11 PC
How to fix it if you cannot install Viber on Windows 11/10 PC? Here we summarize 6 proven ways to fix the problem after investigating extensive user reports from different forums. Let’s try them in order until you get the issue resolved.
Note: Before trying other methods, you can perform simple restarts of your PC and network connection to clear temporary glitches. If
# 1. Make Sure You Have Enough Disk Space
First of all, you need to make sure your hard drive has enough space to download and install Viber. If not, you can’t install Viber on PC. How to free up disk space on Windows 10/11? You can delete all unnecessary files, uninstall some programs, or run disk cleanup. However, this process will delete some data on your hard disk.
So, we highly recommend you extend the partition that you will install Viber on. MiniTool Partition Wizard can help you extend partitions to even non-contiguous free space easily. Moreover, this powerful partition software can also migrate OS to SSD, convert MBR to GPT without data loss, recover lost data, rebuild MBR, etc.
MiniTool Partition Wizard FreeClick to Download100%Clean & Safe
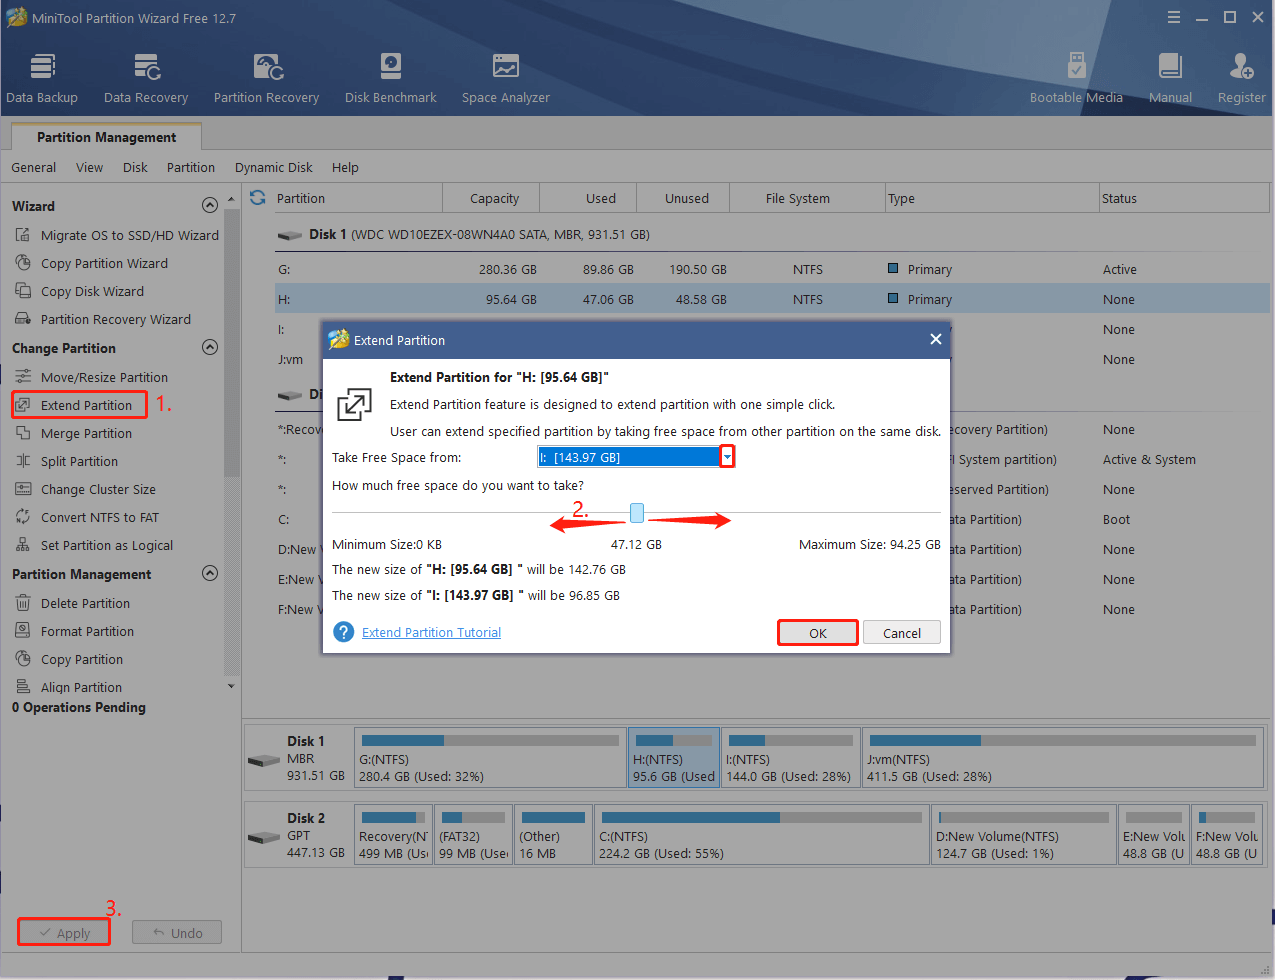
Step 1. Run MiniTool Partition Wizard to enter its main interface, select the partition you want to install Viber on, and click on Extend Partition from the left pane.
Step 2. Select unallocated space or a partition from the drop-down menu, drag the sliding bar to occupy the space, and click on OK.
Step 3. Click on Apply to execute the process.
Once done, you can restart your PC and check if the Viber not installing on Windows 10/11 issue disappears.
# 2. Check for Windows Updates
Sometimes you can’t install Viber on computer if the Viber version is not compatible with your current Windows version. In this case, you can check for Windows updates and install the latest version.
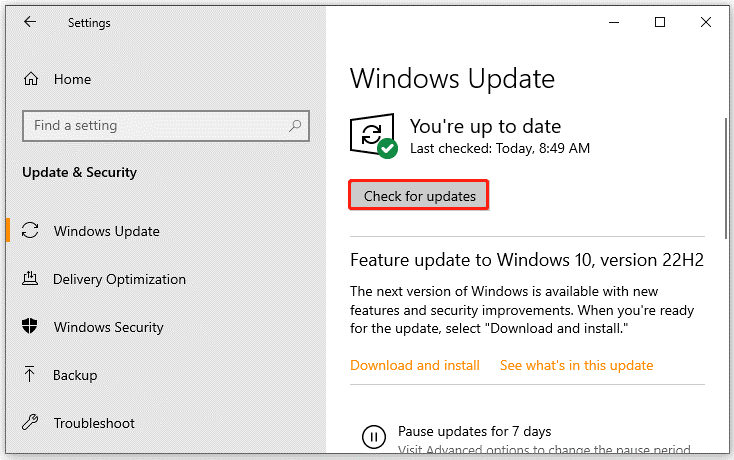
Step 1. Press the Win + I keys to open the Settings app and navigate to the Update & Security section.
Step 2. Click on the Check for updates button to scan for the latest updates. If there are any available Windows updates, install them. After that, you can restart your system and see if the Viber not installing on Windows 11/10 problem gets fixed.
# 3. Allow the Software Through Your Firewall or Antivirus Security
Sometimes your antivirus software and even Windows firewall can block Viber from installing on PC. If you still cannot install Viber on Windows 11/10, try allowing the installation through your firewall and antivirus software.
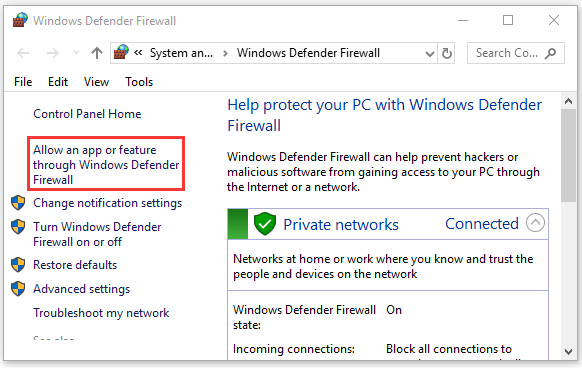
Step 1. Type firewall in the search box and then select the Windows Defender Firewall from the context menu.
Step 2. Click on Allow an app or feature through Windows Defender Firewall from the left pane.
Step 3. Click on Change settings and then on Allow another app.
Step 4. Select the checkbox for Viber from the list of programs, tick the checkbox for both Private and Public networks, and click OK to save the change.
If you still can’t install Viber on PC, try disabling Windows Defender Firewall temporarily or antivirus software.
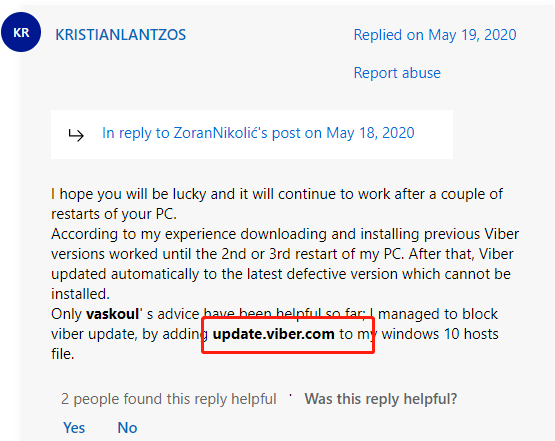
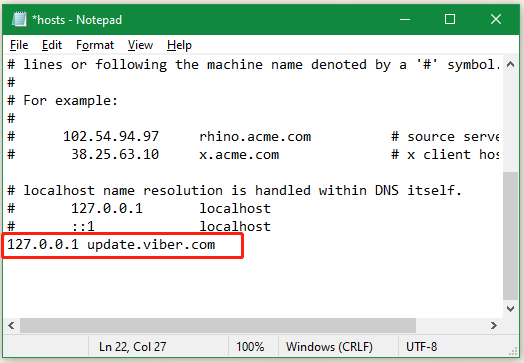
# 4. Add update.viber.com to the Hosts File
Some users from the answers.microsoft.com forum reported that Viber not installing on Windows 11/10 can be solved by adding the update.viber.com line to the Windows hosts file. It may seem strange but worth trying.
Step 1. Press Win + R keys to open the Run box, and then type the following content in it and press Enter.
C:\Windows\System32\drivers\etc
Step 2. In the pop-up window, right-click the hosts file and open it with Notepad.
Step 3. Go to the bottom section of Notepad, add the following line, and press Ctrl + S keys to save the changes.
127.0.0.1 update.viber.com
# 5. Install an Older Version of Viber
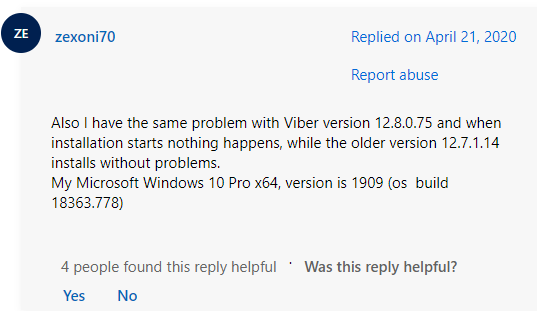
Some other people reported that the “cannot install Viber on Windows 11/10” issue often appears on the newer version. In this case, you can try installing the older version like Viber 12.7.1.14, and see if it works.
# 6. Use a VPN
As mentioned above, some applications are only available for certain regions and countries. If you cannot install Viber on Windows 10/11 PC, try using a VPN that breaks the region’s limitations. To know more details, you can refer to this post “How to Set Up a VPN on Your Windows 10 PC”.
User Comments :