Advantages of Using a VPN Server
VPN (Virtual Private Network) is a service that can enable your computer to connect a private network. Private protection is the biggest advantage of a VPN. In addition, there are many other advantages.
- It can protect your data better. Using a VPN connection can avoid some intrusive ads, avoid your bank account being locked, and etc.
- You can browse web pages at super speed, especially when watching videos or movies.
- VPN breaks the bypass censorship and country restrictions, which enables you to access the content with more freedom.
How to create a VPN server? How to set up a VPN on Windows 10? Please keep reading to get all the answers.
You may be also interested in how to fix the IPV6 connectivity not working access error.
How to Create a VPN Server on Windows 10 PC
In order to create a VPN server on your Windows PC, you need to open the Network Connections window first. Here’s how to do that.
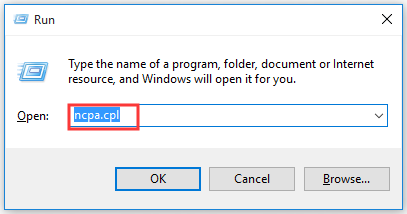
Step 1. Press Win + R keys to call out the Run dialog box, and then type ncpa.cpl in the box and hit Enter.
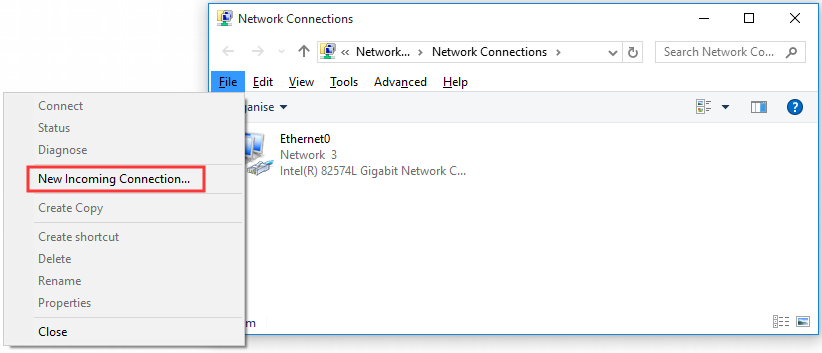
Step 2. In the Network Connections window, press the Alt key to display the full menus. Then click the File menu and select the New Incoming Connection option from the sub-menu.
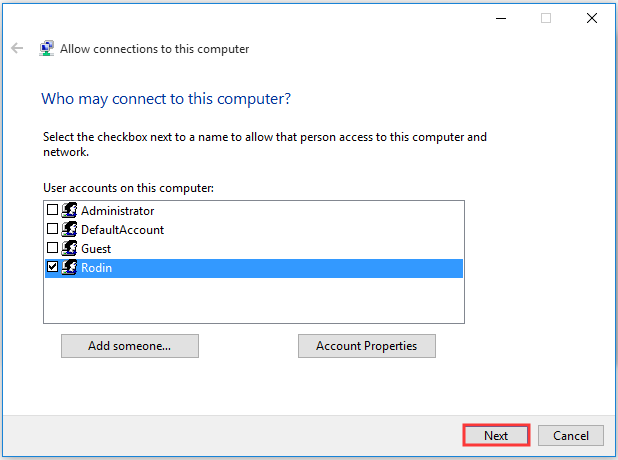
Step 3. In all listed user accounts, select the account that can connect remotely and click the Next button.
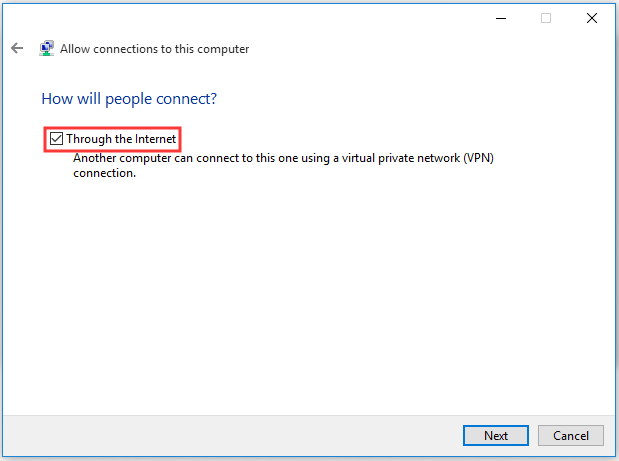
Step 4. Select the checkbox of Through the Internet to allow VPN connection over the Internet and click Next to go on.
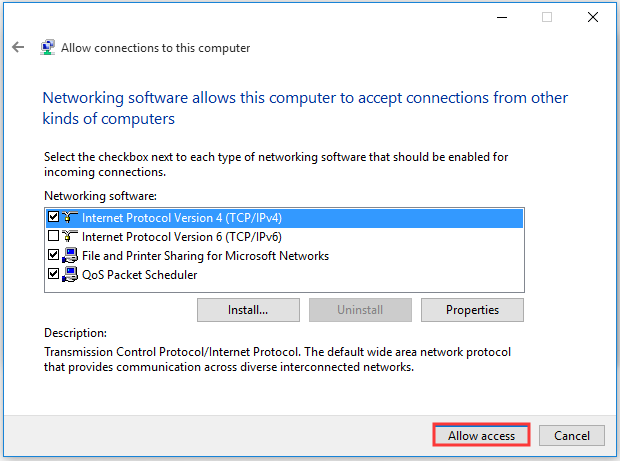
Step 5. Now, you can select a Network software that can access the incoming connections and click the Allow access button.
Step 6. Now Windows will access the user account that you chose automatically. After that, your VPN server should run as normal.
Next, let’s see how to setup a VPN on Windows 10 PC.

How to Setup a VPN on Your Windows 10 PC
Before you setup VPN, please make sure what protocol you want to use. If you can download files from other places rather than the Store without using Windows 10 S Mode, you can download an OpenVPN config. If not, you can try using the most secure protocol available.
Now, follow the steps below to set up a VPN on Windows 10 PC.
Step 1. Press Win + I keys to open the Settings window.
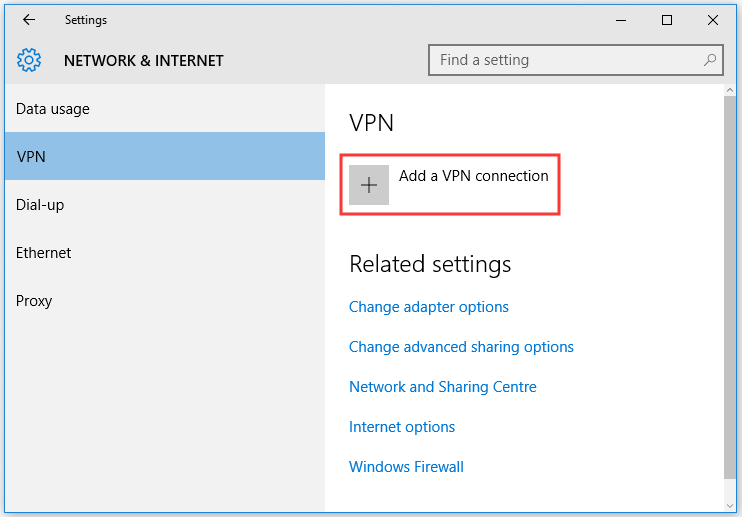
Step 2. Navigate to Network & Internet section, and then click VPN on the left pane and click the Add a VPN connection on the right pane.
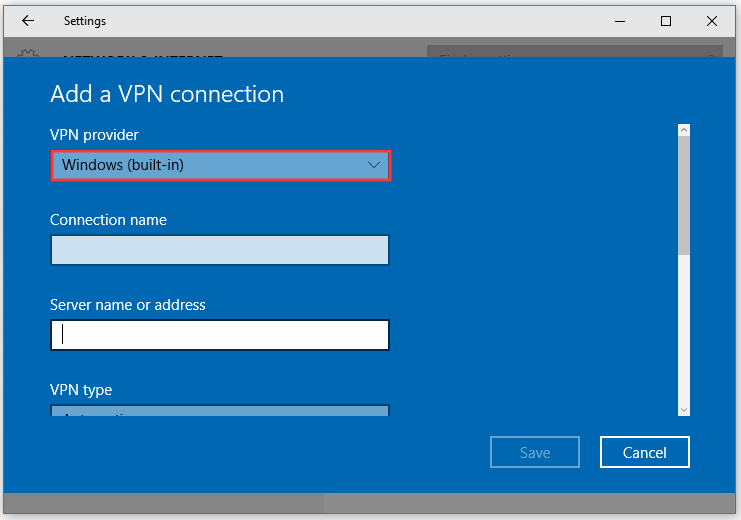
Step 3. In the pop-up window, click the drop-down menu below VPN provider and select the Windows (built-in).
Step 4. Click the Connection name area, and enter the name of the VPN connection. Similarly, type the Server address that you can find in your VPN account.
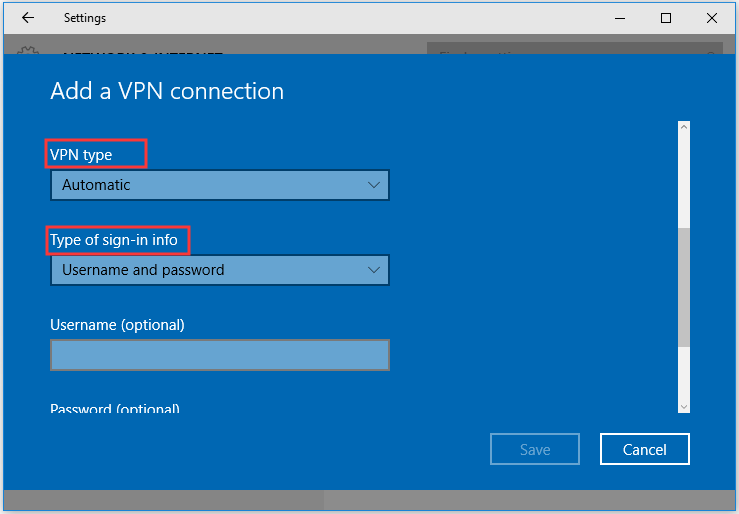
Step 5. Then click the drop-down menu below VPN type and choose a connection protocol based on your needs.
Step 6. Click the drop-down menu below the Type of sign-in info and click the sign-in method that depends on your VPN provider.
Step 7. After finishing the above steps, click on the Save button.
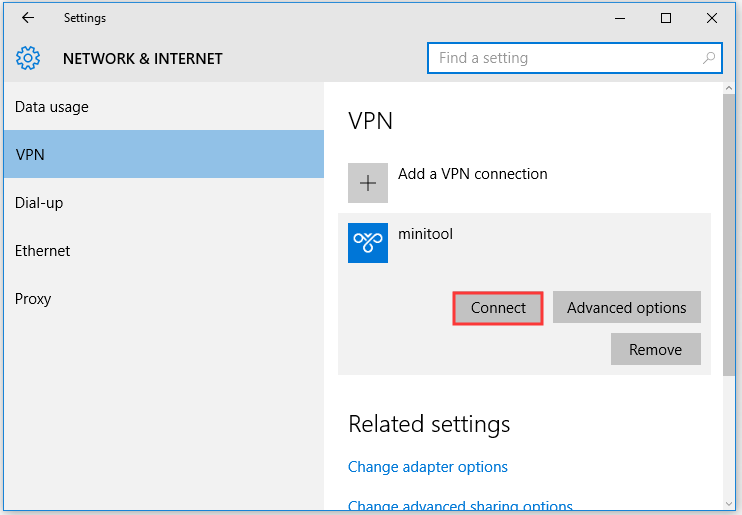
Step 8. In the VPN section, double click the VPN that you just set up and click Connect.
How to setup a VPN on Windows PC? The full guide has been told to you, and now it’s your turn to have a try.
User Comments :