A lot of users report that Windows Defender scans the PUA:Win32/Vigua.A virus on Windows 10/11. What is PUA:Win32/Vigua.A? How to remove PUA:Win32/Vigua.A virus completely? In this post, MiniTool Partition Wizard will discuss these questions in detail.
Microsoft often released some updates for Windows 10/11 to improve the security level, but Windows Defender still detects different viruses or malware, such as PUA:Win32/Presenoker, PUA.Superfluss PUADlManager:Win32/OfferCore, and PUA:Win32/Vigua.A.
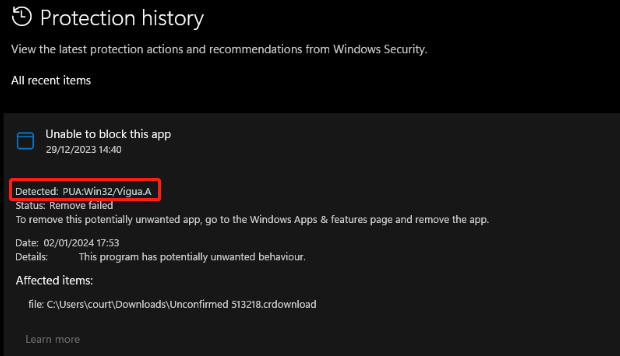
According to user reports, the PUA:Win32/Vigua.A virus is often scanned by Windows Defender and is located in a specific directory. Sometimes the virus keeps coming back even if it is removed. Here is a user report from the answers.microsoft.com forum:
My computer has detected PUA:Win32/Vigua.A and I can’t sort it out. I did a scan of my computer today and and my protection history has flagged this PUA:Win32/Vigua.A. Every time I choose to delete the item, the deletion is successful, but it will be detected again the next day. Is there anyone who can help assist me with this?https://answers.microsoft.com/en-us/windows/forum/all/my-computer-has-detected-puawin32viguaa-and-i-cant/34c1b575-e278-4d57-b47f-04bdf62bf517
What Is PUA:Win32/Vigua.A
What is PUA:Win32/Vigua.A? Here PUA stands for Potentially Unwanted Applications which usually come bundled with legitimated free software and are categorized as grayware as a package. If you installed the apps with the PUA:Win32/Vigua.A virus, the boot configuration, file associations, and various processes might be modified. What’s worse, it causes your computer to run slowly, display unexpected ads, or have an untoward impact on user security and privacy.
How to Remove PUA:Win32/Vigua.A on Windows 10/11 Completely
How to get rid of the PUA Win32 Vigua A virus on Windows 10/11. If the virus keeps coming back after deletion, you can try the following 5 methods.
Before You Do: Boot Your Computer into Safe Mode
Before the PUA:Win32/Vigua.A removal, we highly recommend you boot your system into Safe Mode. This can start OS with only core components and prevent third-party programs from loading. Here’s how:
Step 1. Press Win + R keys to open the Run box, and then type msconfig in it and press Enter.
Step 2. Navigate to the Boot tab, tick the box of Safe Mode under the Boot options, and click on OK > Restart.
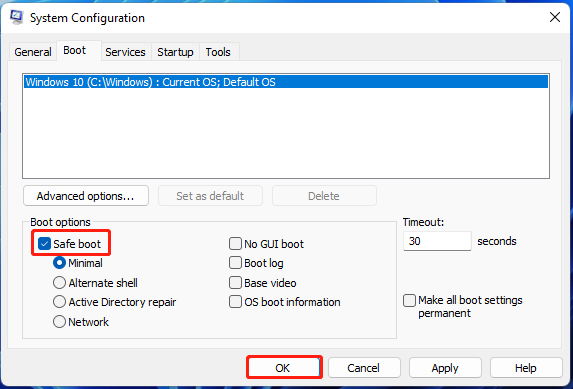
Once started, your computer will start in Safe Mode each time you start Windows 11/10. You can exit Safe Mode with the same procedure after you remove PUA:Win32/Vigua.A virus.
# 1. Check the Location of the File Infected by PUA:Win32/Vigua.A and Delete It
First of all, you need to check the location of the file infected by the PUA Win32 Vigua A virus. Here you can find it under the Affected items section. To delete the file, press Win + E keys to open the File Explorer, navigate the target path, select all files in the affected folder, and delete them. If you can find them, select View > Hidden items.

After that, you can run Windows Defender again and see if the PUA:Win32/Vigua.A virus is removed. f it shows No current threats status, then it means that the virus has been removed successfully.
# 2. Clean the Contents of the Temp Folder
Another useful PUA:Win32/Vigua.A removal guide has been proven by many people is to clean up the contents of the Temp folder. Let’s have a try.
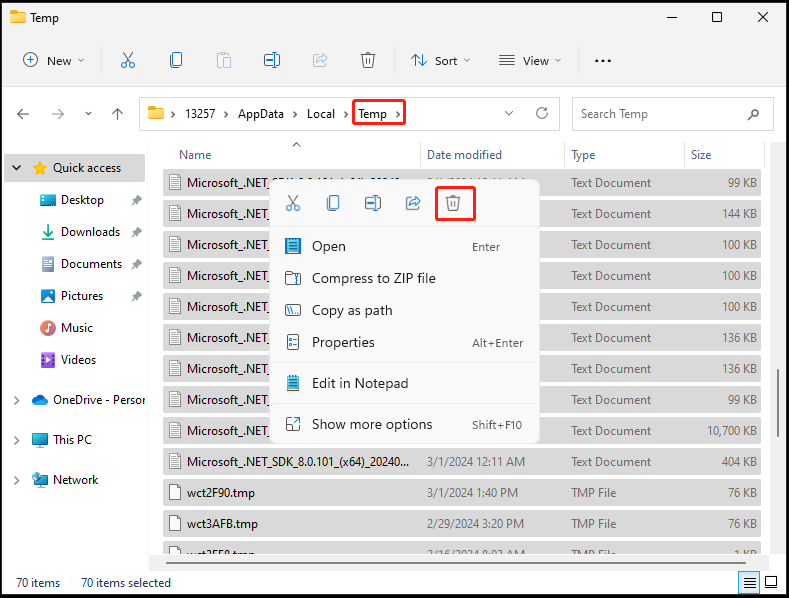
Step 1. Open the Run box, type %temp% in the box, and press Enter to open the Temp folder.
Step 2. Open the Temp folder, and then press Ctrl + A keys to select all files inside the folder and press Delete.
# 3. Delete the Windows Defender History
Sometimes the PUA Win32 Vigua A item may be left behind in the Windows Defender History folder. To remove the virus, you can delete it in the DetectionHistory folder.
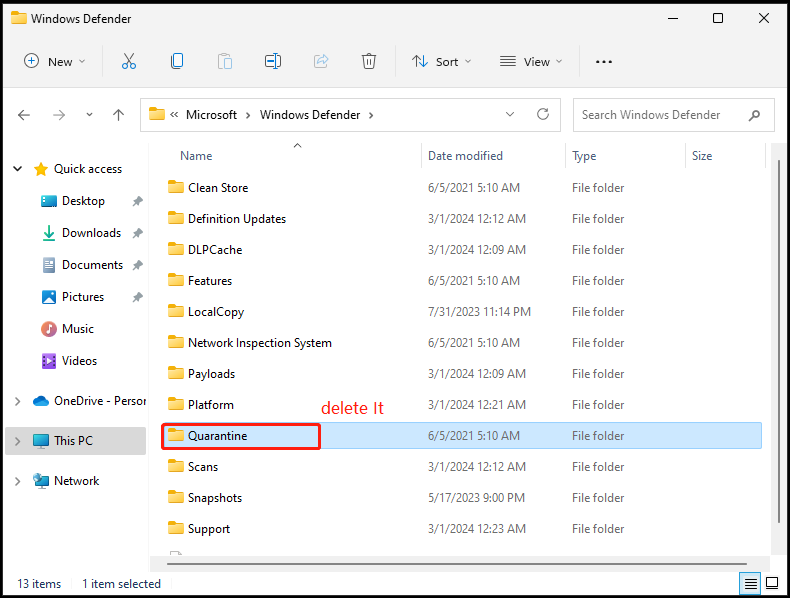
Step 1. Open the File Explorer window and navigate to the following path. Select the Quarantine folder and delete it.
C:\ProgramData\Microsoft\Windows Defender\Quarantine
Step 2. Continue to locate the following paths and delete their contents:
C:\ProgramData\Microsoft\Windows Defender\Scans\History\Results
C:\ProgramData\Microsoft\Windows Defender\Scans\History\Service
# 4. Uninstall All Suspicious Programs
The PUA Win32 Vigua A virus can appear after you downloaded some adware or malicious software accidentally. In this case, we recommend your perform a full system scan and uninstall all suspicious programs. To do so, right click the Start icon at the bottom screen of your PC, select Apps and Features, locate the unneeded program, click on Uninstall, and confirm the option.
# 5. Try Third-party Antivirus Software
In addition to Windows Defender, you can use some professional third-party antivirus software to scan the virus. There are various malware scan tools, such as Malwarebytes, Avast, McAfee, Norton, etc. Choose one that works best for you.
Bonus Tip: How to Recover Lost Files Caused by PUA:Win32/Vigua.A
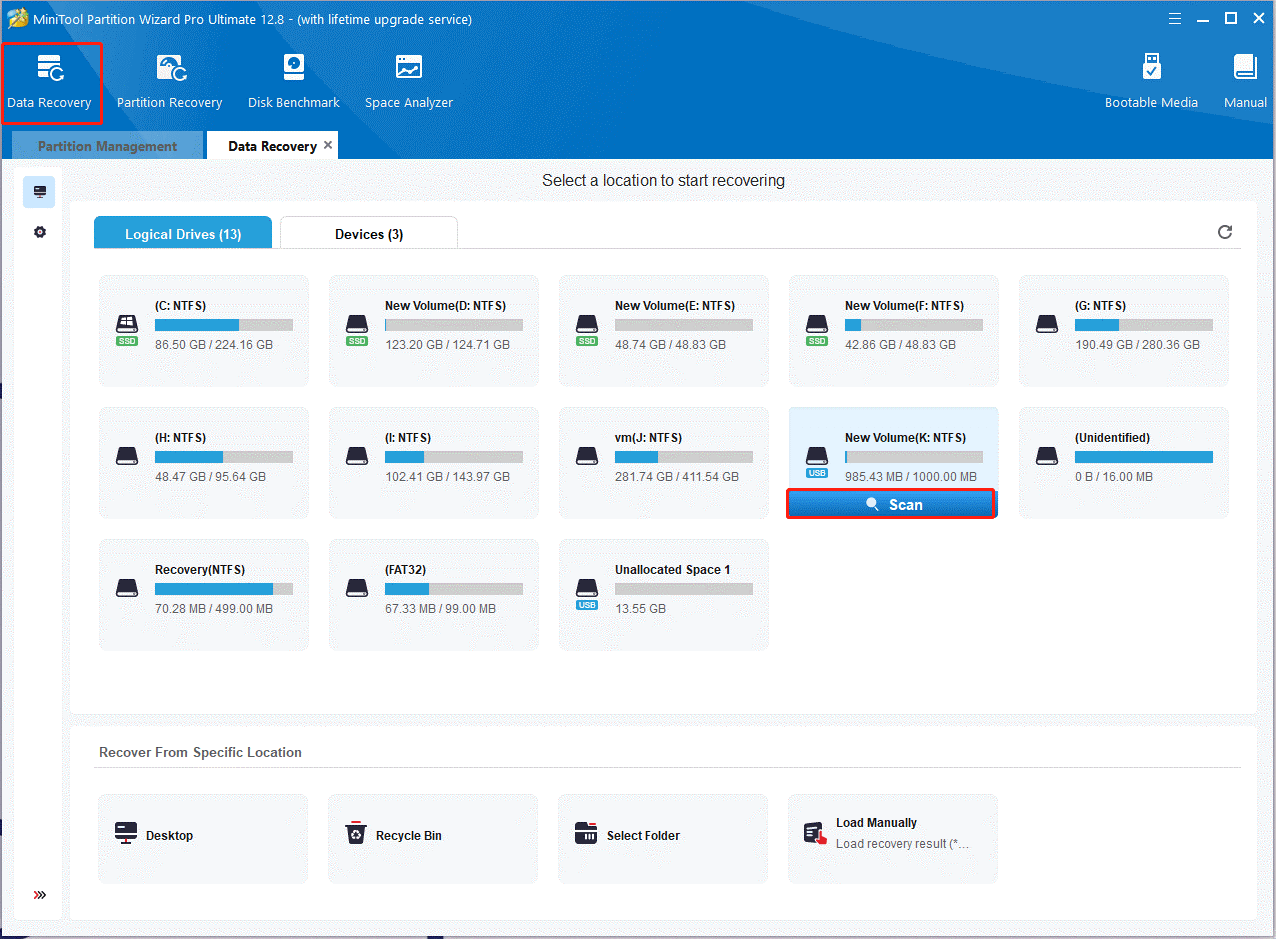
Some users reported that they experienced data loss due to the virus infection. So, we highly recommend that you back up all important files regularly using a file backup tool like MiniTool ShadowMaker. Well, if you have lost some data due to the virus, use MiniTool Partition Wizard. This powerful data recovery tool can help you quickly recover lost files/partitions from hard drives, SSDs, USBs, SD cards, and so on.
MiniTool Partition Wizard DemoClick to Download100%Clean & Safe
Besides, MiniTool Partition Wizard is a feature-rich partition/disk manager that can partition hard drive, convert FAT32 to NTFS without data loss, change cluster size, clone hard drive, migrate Windows OS to SSD, rebuild MBR, analyze disk space, check disk performance, repair hard drive errors, etc.
User Comments :