The error message “You can’t install Windows 10 because your processor doesn’t support NX” usually comes with the “This PC can’t run Windows 10” error. How to get rid of the error message? Well, MiniTool Partition Wizard offers you methods in this post.
The error message “This PC’s processor doesn’t support a critical feature (NX)” often occurs when you upgrade the system. This will stop you from upgrading the system successfully. Therefore, you need to take measures to troubleshoot the “process doesn’t support NX”.
MiniTool Partition Wizard DemoClick to Download100%Clean & Safe
Solution 1: Update BIOS
When the error message “This PC’s processor doesn’t support a critical feature (NX)” appears, the first solution you should try is to update BIOS. How to do that? Here’s the tutorial for you.
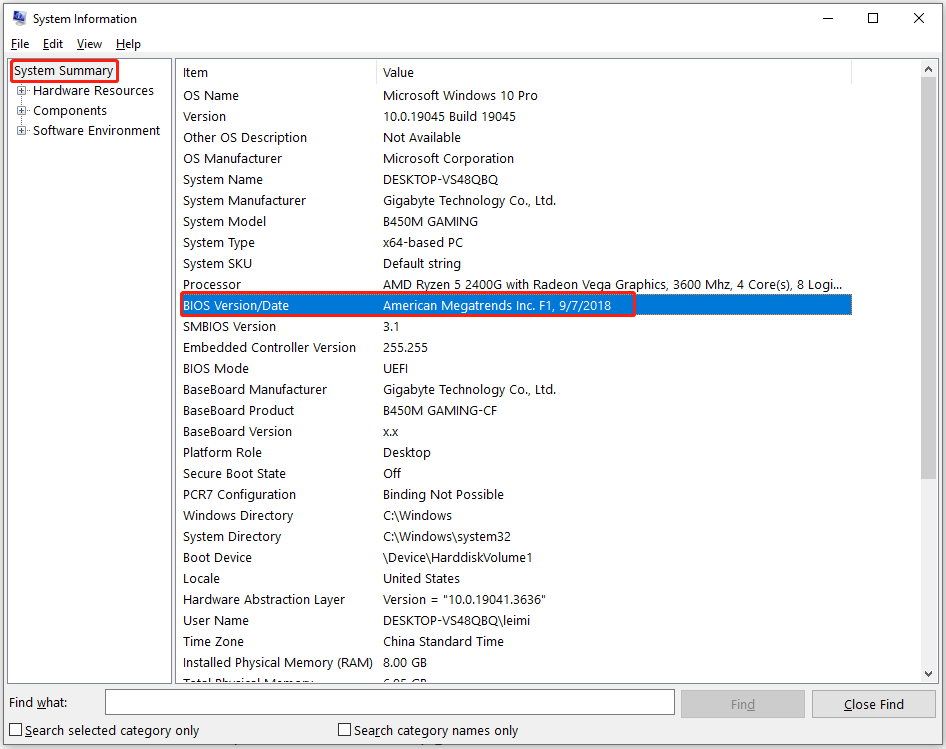
Step 1: Check your BIOS version manually.
- Open the Run window by holding the Windows and R keys.
- Type msinfo32 and click OK.
- In the System Information window, click System Summary and find BIOS Version/Date.
Step 2: Go to the official website of your PC and look for BIOS updates.
Step 3: Download the latest BIOS version and unzip the file if it’s in a zip archive.
Step 4: Copy the BIOS file to an empty USB drive (with FAT32 file system).
Step 5: Restart your computer and enter the BIOS by keep pressing the BIOS key while the PC loads up.
Step 6: Switch from easy to advanced menu mode if your system is in easy or basic mode.
Step 7: Move to the update menu and choose the BIOS file from your BIOS.
Step 8: Click Yes or OK to confirm the operation.
Step 9: Follow the on-screen instructions to complete the operation.
Alternatively, you can also update the BIOS using a BIOS update utility according to your PC brand. For instance:
- For Dell computers, use Dell Update Utility.
- For ASUS computers, use MyASUS BIOS update utility.
- For Lenovo computers, utilize Lenovo System Update Tool.
- For HP computers, utilize HP Support Assistant.
Solution 2: Update Drivers or Upgrade Hardware
If your driver and hardware don’t support Windows 10, you will receive the message “You can’t install Windows 10 because your processor doesn’t support NX” while installing the system. If so, update your driver and hardware.
- Upgrade processor/CPU
- Upgrade motherboard and CPU without reinstalling Windows
- Upgrade GPU
- Update AMD drivers
Solution 3: Make a Windows Bootable Drive and Perform a Clean Install
The last resort to the “process doesn’t support NX” error is to perform a clean install Windows by using an installation media. In this section, we show you how to make a Windows 10 bootable drive and conduct a clean install.
Step 1: Navigate to the official website of Microsoft and find & download the Windows Media Creation Tool.
Step 2: Double-click the setup file to run the tool.
Step 3: Read the license terms in the pop-up window and click Accept to continue.
Step 4: In the next window, choose Create installation media (USB flash drive, DVD, or ISO file) for another PC and click Next.
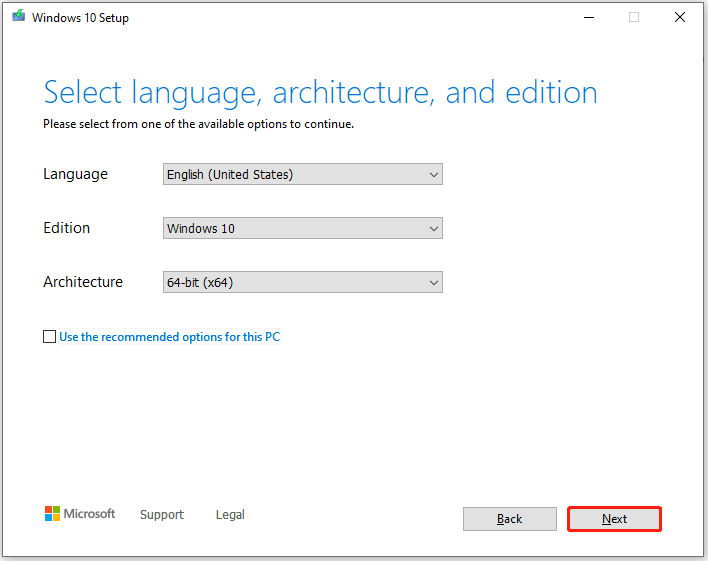
Step 5: Configure language, architecture, and edition based on your demands. Then click the Next button.
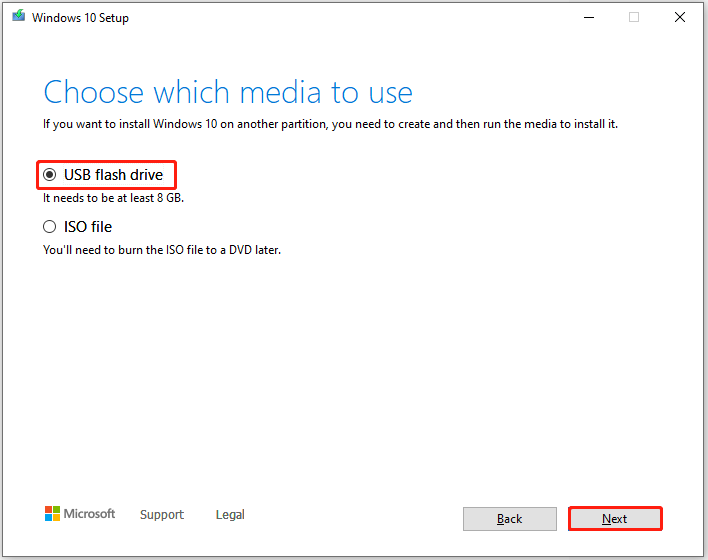
Step 6: Choose USB flash drive and click Next.
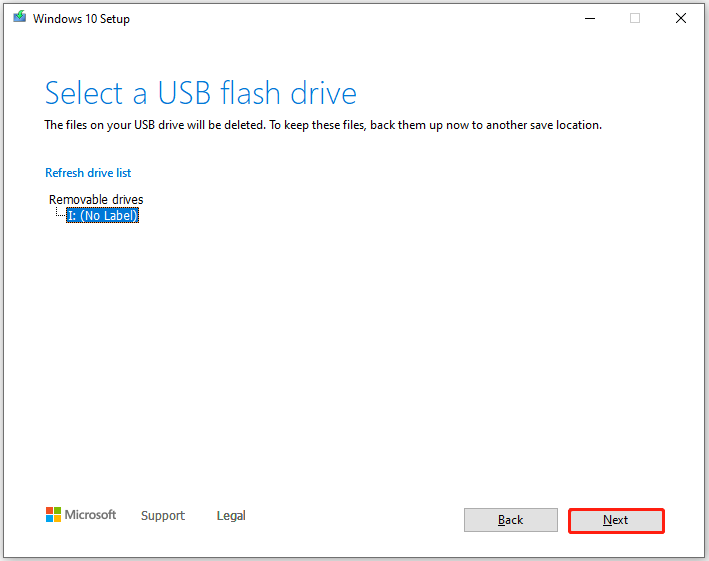
Step 7: Select a USB flash drive from the list and click Next.
Step 8: Wait for the finish of the creation.
Step 9: Connect the created bootable USB drive to the target computer and boot the PC to BIOS.
Step 10: Head to the Boot tab and configure the bootable USB drive as the first boot option.
Step 11: Press F10 > Enter to save changes. Your PC will boot from the USB drive automatically.
Step 12: Specify the language, time and currency format, and keyboard method. Then click Install now.
Step 13: Select I don’t have a product key > Custom to install Windows.
Step 14: Follow the prompted instructions to finish the process.
Also read: Solved: Windows Media Creation Tool Error 0x80042405 – 0xA001B
User Comments :