Lenovo IdeaPad 330 is a consumer laptop computer designed, developed, and marketed by Lenovo. The redesigned IdeaPad 330 is powerful and easy to use. This laptop has excellent processing power and plenty of storage space for everything you want to do.
Usually, many users will choose to replace the hard drive of a Lenovo IdeaPad 330 laptop with SSD to obtain more sufficient storage space and improve computer performance. SSD upgrades may also occur when the hard drive fails preventing the computer from booting properly, etc.
In this guide, step-by-step instructions will show you how to upgrade Lenovo IdeaPad 330 SSD. let’s start.
How to Run Lenovo IdeaPad 330 SSD Upgrade
Before You Do
- Choose an SSD compatible with the Lenovo IdeaPad 330.
- If your laptop only has one drive bay, prepare a SATA to USB cable to connect the SSD to your PC.
- Prepare a suitable screwdriver, open the computer case, take out the original hard drive, and replace it.
After making these preparations, start the Lenovo IdeaPad 330 SSD upgrade. Just find the details in the sections below.
How to Upgrade Lenovo IdeaPad 330 SSD
To upgrade your hard drive to a new one without reinstalling Windows, you can use MiniTool Partition Wizard, a powerful and reliable hard drive cloning software and partition manager. Its Migrate OS to SSD/HD feature can help you. If you want to transfer everything from HDD to SSD, use the Copy Disk feature.
MiniTool Partition Wizard FreeClick to Download100%Clean & Safe
Step 1: Download and install MiniTool Partition Wizard on your PC. Then launch it to its main interface.
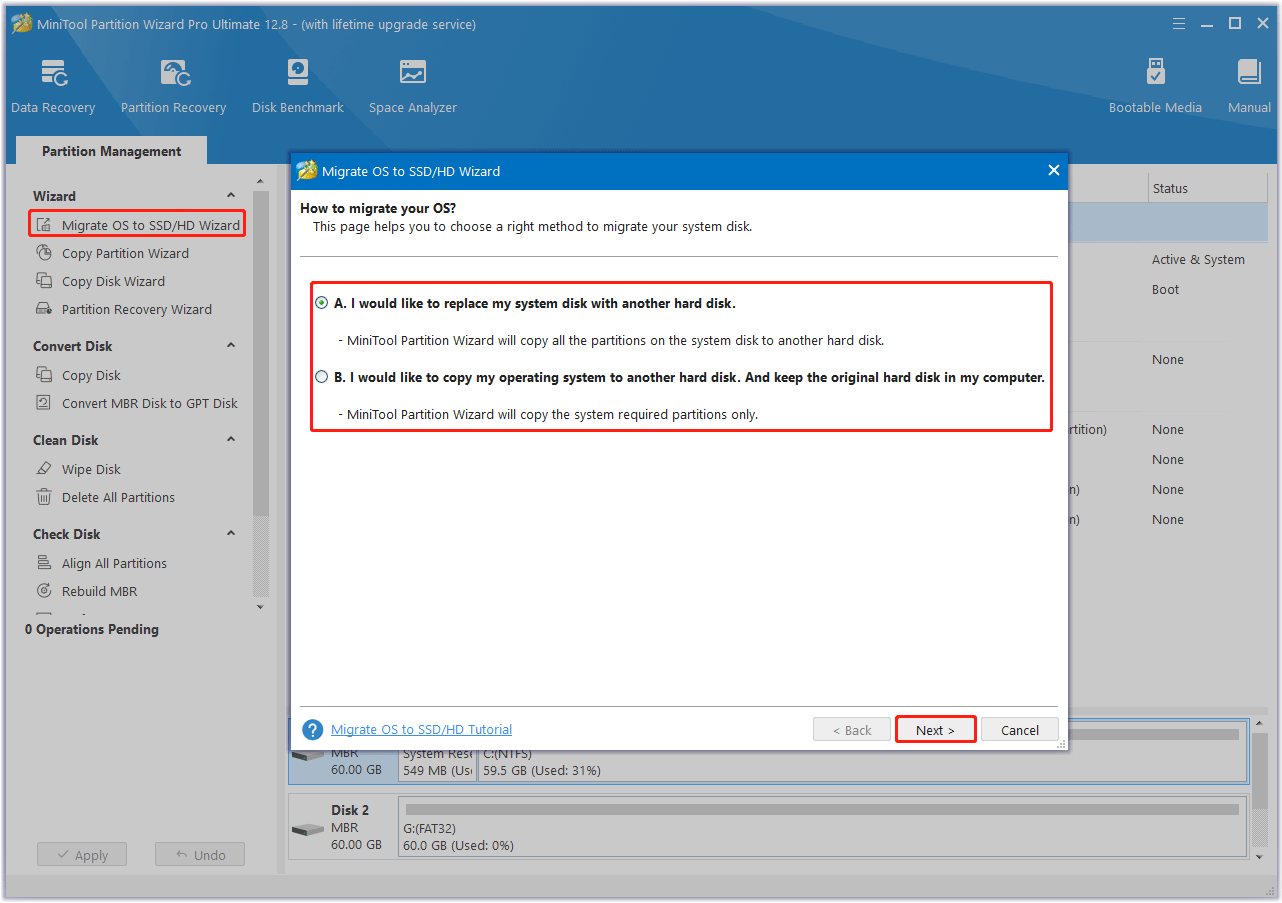
Step 2: Choose Migrate OS to SSD/HD Wizard from the left action panel.
Step 3: Choose the right method to migrate the system disk and click on Next. Option A allows you to clone the whole system disk, while Option B only allows you to migrate the OS-related partitions.
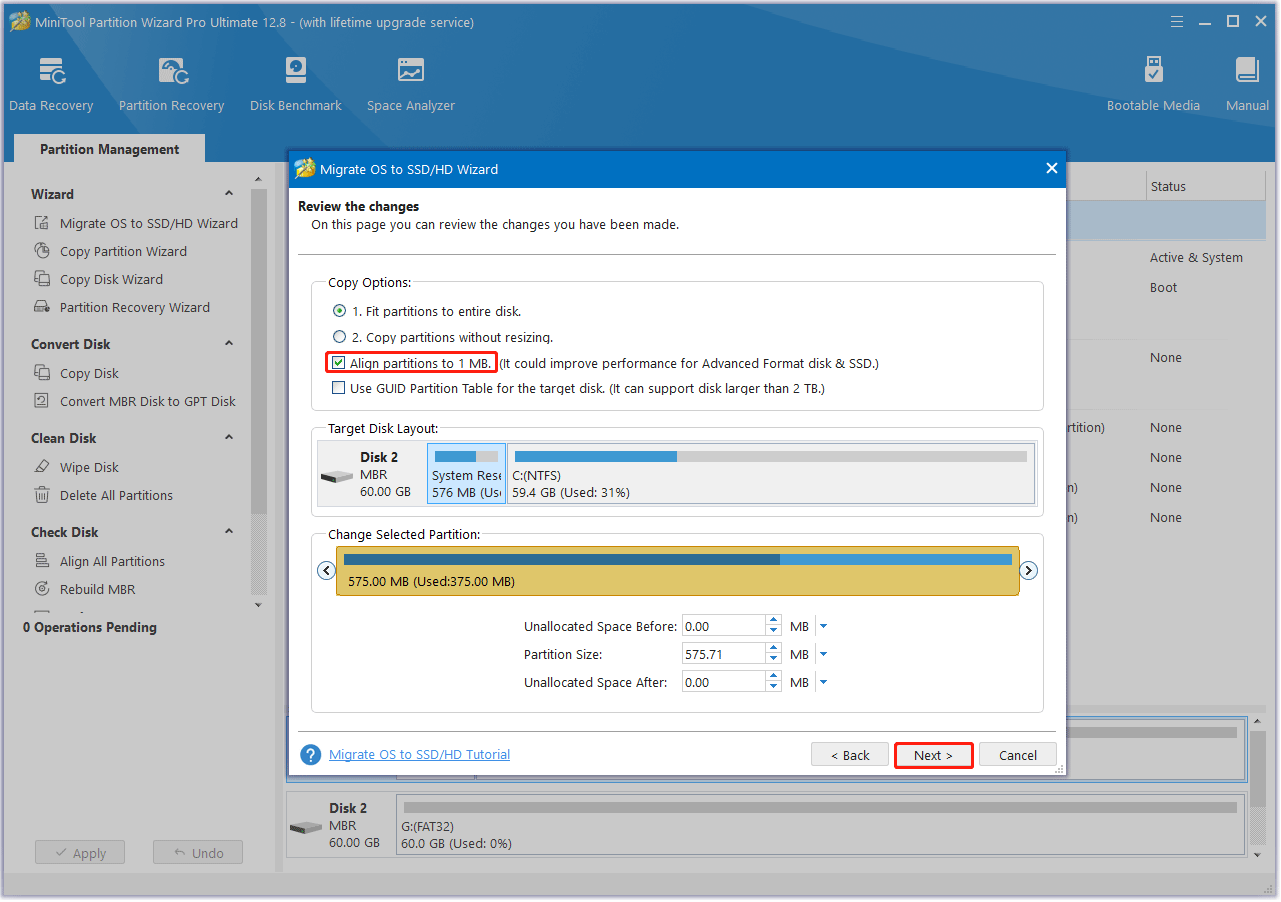
Step 4: Select the larger SSD as the destination disk and click on Next. Choose the copy options and configure the disk layout to change the default settings according to your needs. You are strongly recommended to check the Align partitions to 1MB option to improve your SSD performance. Then click on Next.
Step 5: Read the note about how to boot from the new SSD and click on the Finish button. When you go back to the main interface, click on the Apply button to start the cloning process.
After completing the clone, you can shut down your Lenovo IdeaPad 330 PC, use the screwdriver to open the cover of your computer to remove the original hard drive, and then install the SSD in the original place.
If you don’t know how to install SSD to your PC, refer to this post – How to Install SSD in PC? A Detailed Guide Is Here for You!
![Gateway Laptop Hard Drive Upgrade [A Step-by-Step Guide]](https://images.minitool.com/partitionwizard.com/images/uploads/2023/12/gateway-laptop-hard-drive-upgrade-thumbnail.png)
Bottom Line
That’s the guide on the Lenovo IdeaPad 330 SSD upgrade. If you need to perform Lenovo IdeaPad 330 SSD replacement, follow the instructions above. If you have any other ideas on this topic, leave a comment below.
About The Author

Position: Columnist
Vega enjoys helping people with computer problems, including disk management, data recovery, data backup, and more. She is constantly expanding her knowledge in related fields. And she will continue to bring more easy-to-understand professional articles to help people solve various problems on the PC.
User Comments :